【次回】Azureサイト間VPNの構築(2.AzureのVirtualMachines構築)
Azureサイト間VPN接続とは
VPN(Virtual Private Network)とは、インターネットをはじめとする共用のネットワーク上に仮想的な専用線を構築し、セキュアな通信を実現するための技術です。Azureサイト間VPN(Azure Site-to-Site VPN)は、「ローカル環境(オンプレミス環境等)」と「AzureのVirtual Network」との間でVPNを構築し、相互のLAN同士の通信を可能にします。
Azureサイト間VPNの接続料金
Azureのサイト間VPNに利用するVPNゲートウェイの利用料金は以下の通りとなっています。(2021年12月現在)
最安の種類で1時間あたり4円程度のため、1日100円ほどで検証環境を構築することが可能です。検証が終わった後は、Azure上のVPN接続を削除することを忘れないようにしましょう。

ネットワーク構成
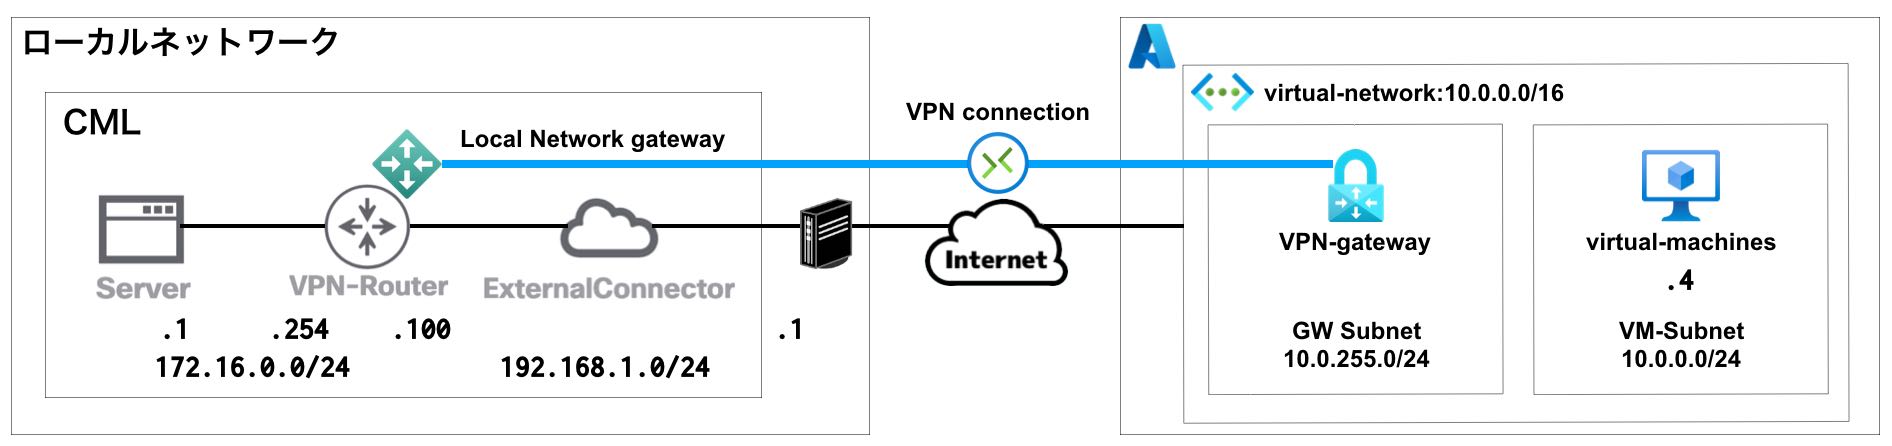
下記のネットワーク構成で、CML上のLAN(172.16.0.0/24)とAzure上のサブネット(10.0.0.0/24)が直接通信できるようにします。
※Server(172.16.0.1)からVM(10.0.0.4)にPingによる疎通確認ができるようにしていきます。
Azureの基本設定
ここでは、検証用にAzure上で、リソースグループ・仮想ネットワーク・サブネット・ゲートウェイサブネットを作成/設定していきます。
リソースグループの作成
「リソースグループの作成」をクリックします。

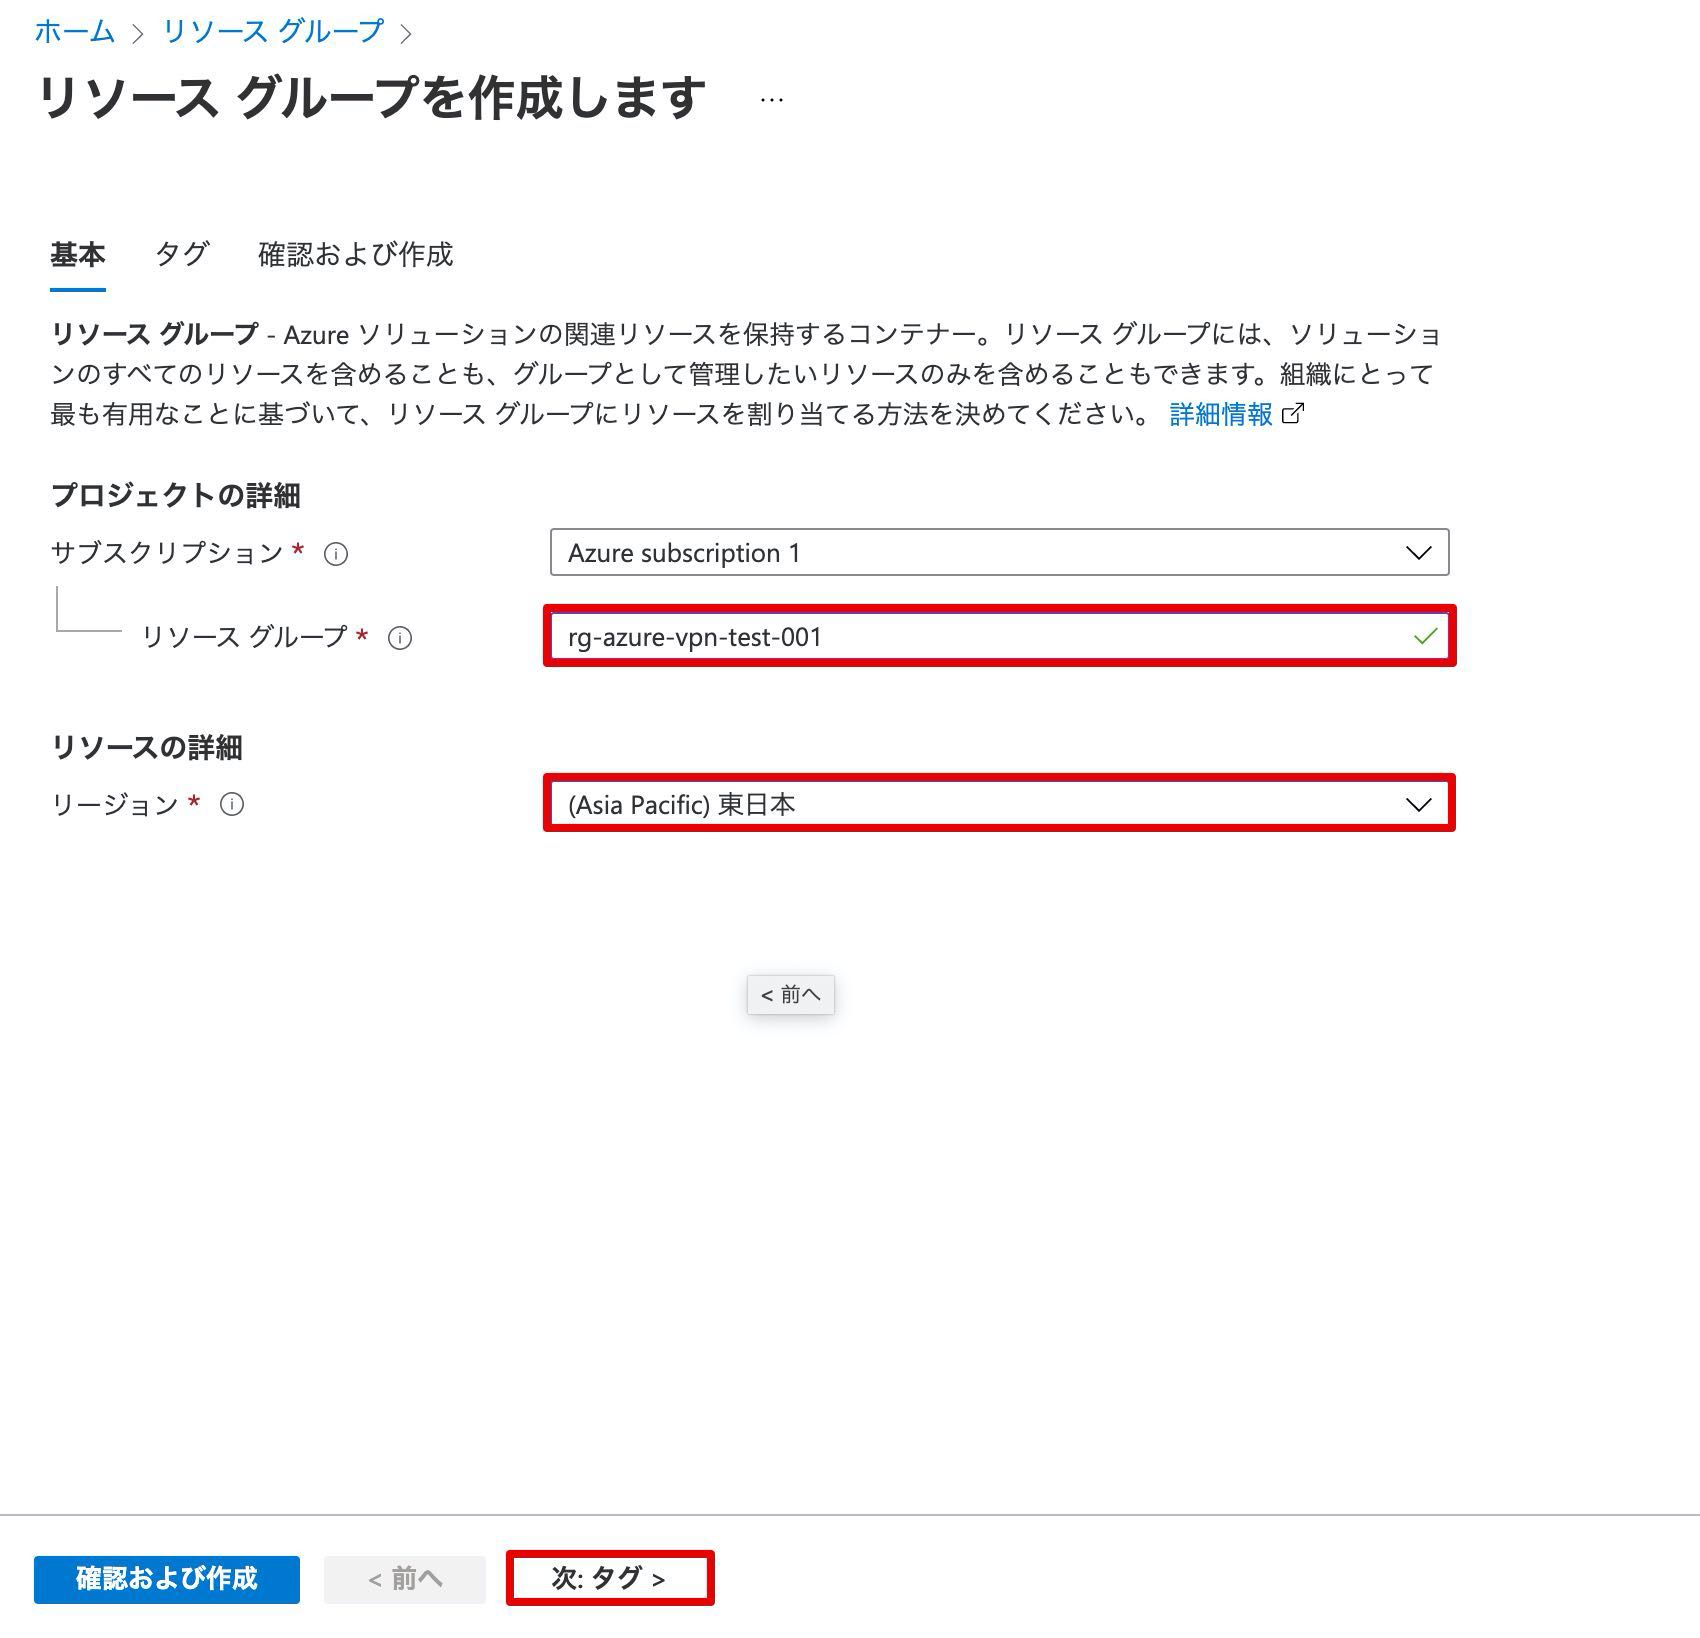
以下の通り入力・選択し、「次:タグ>」をクリックします。
リソースグループ:rg-azure-vpn-test-001 ※任意の名前
リージョン:(Asia Pacific) 東日本 を選択 ※任意のリージョンを選択
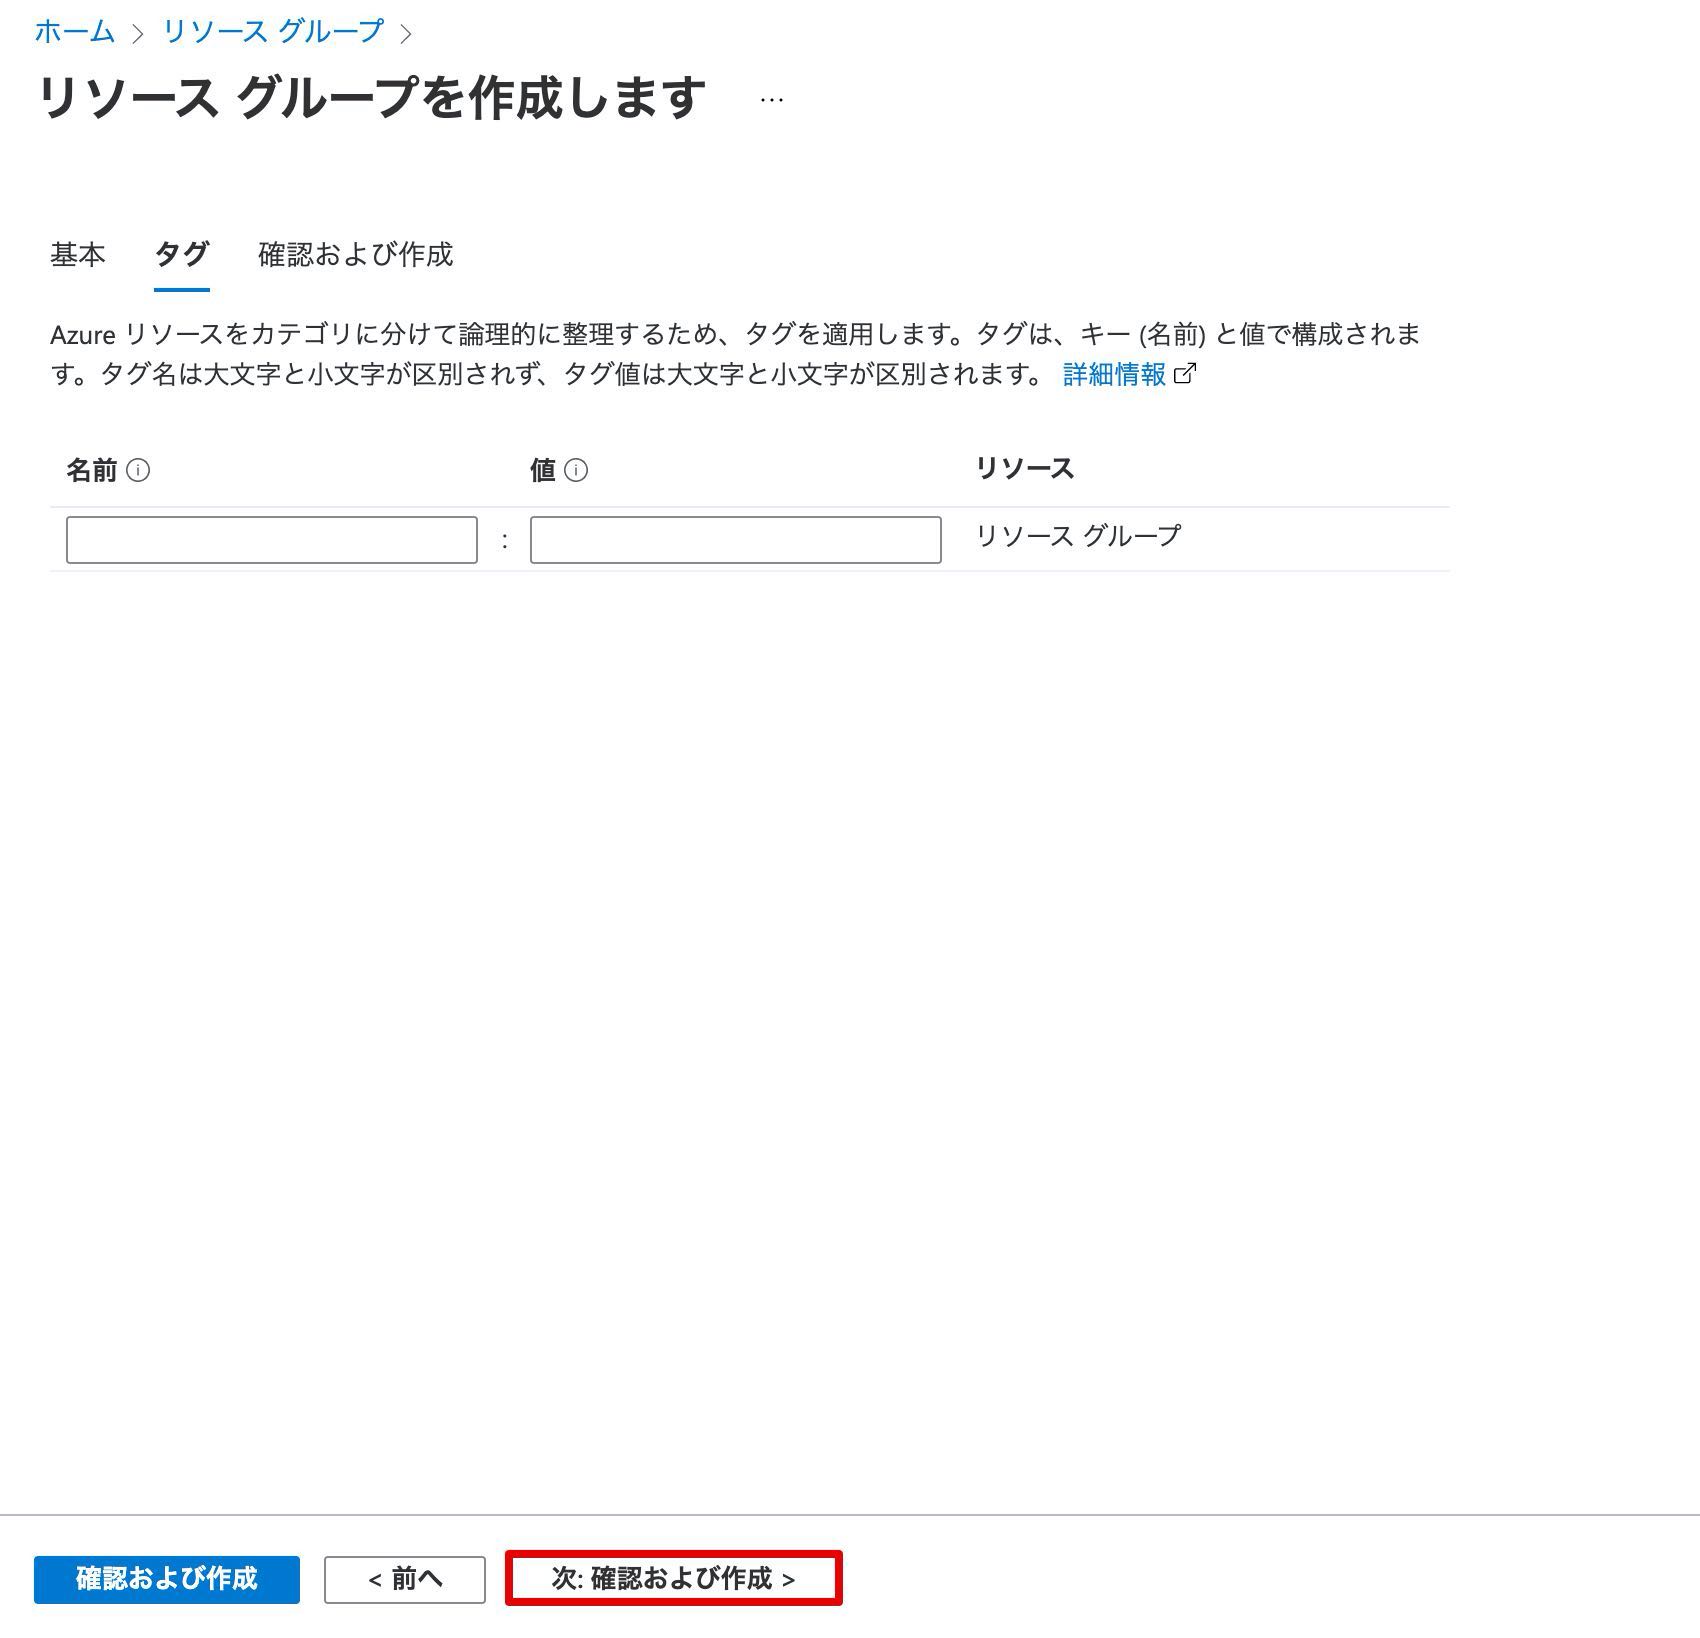
必要に応じてタグを入力し、「次:確認及び作成>」をクリックします。
作成内容と「検証に成功しました。」の表示を確認し、「作成」をクリックします。

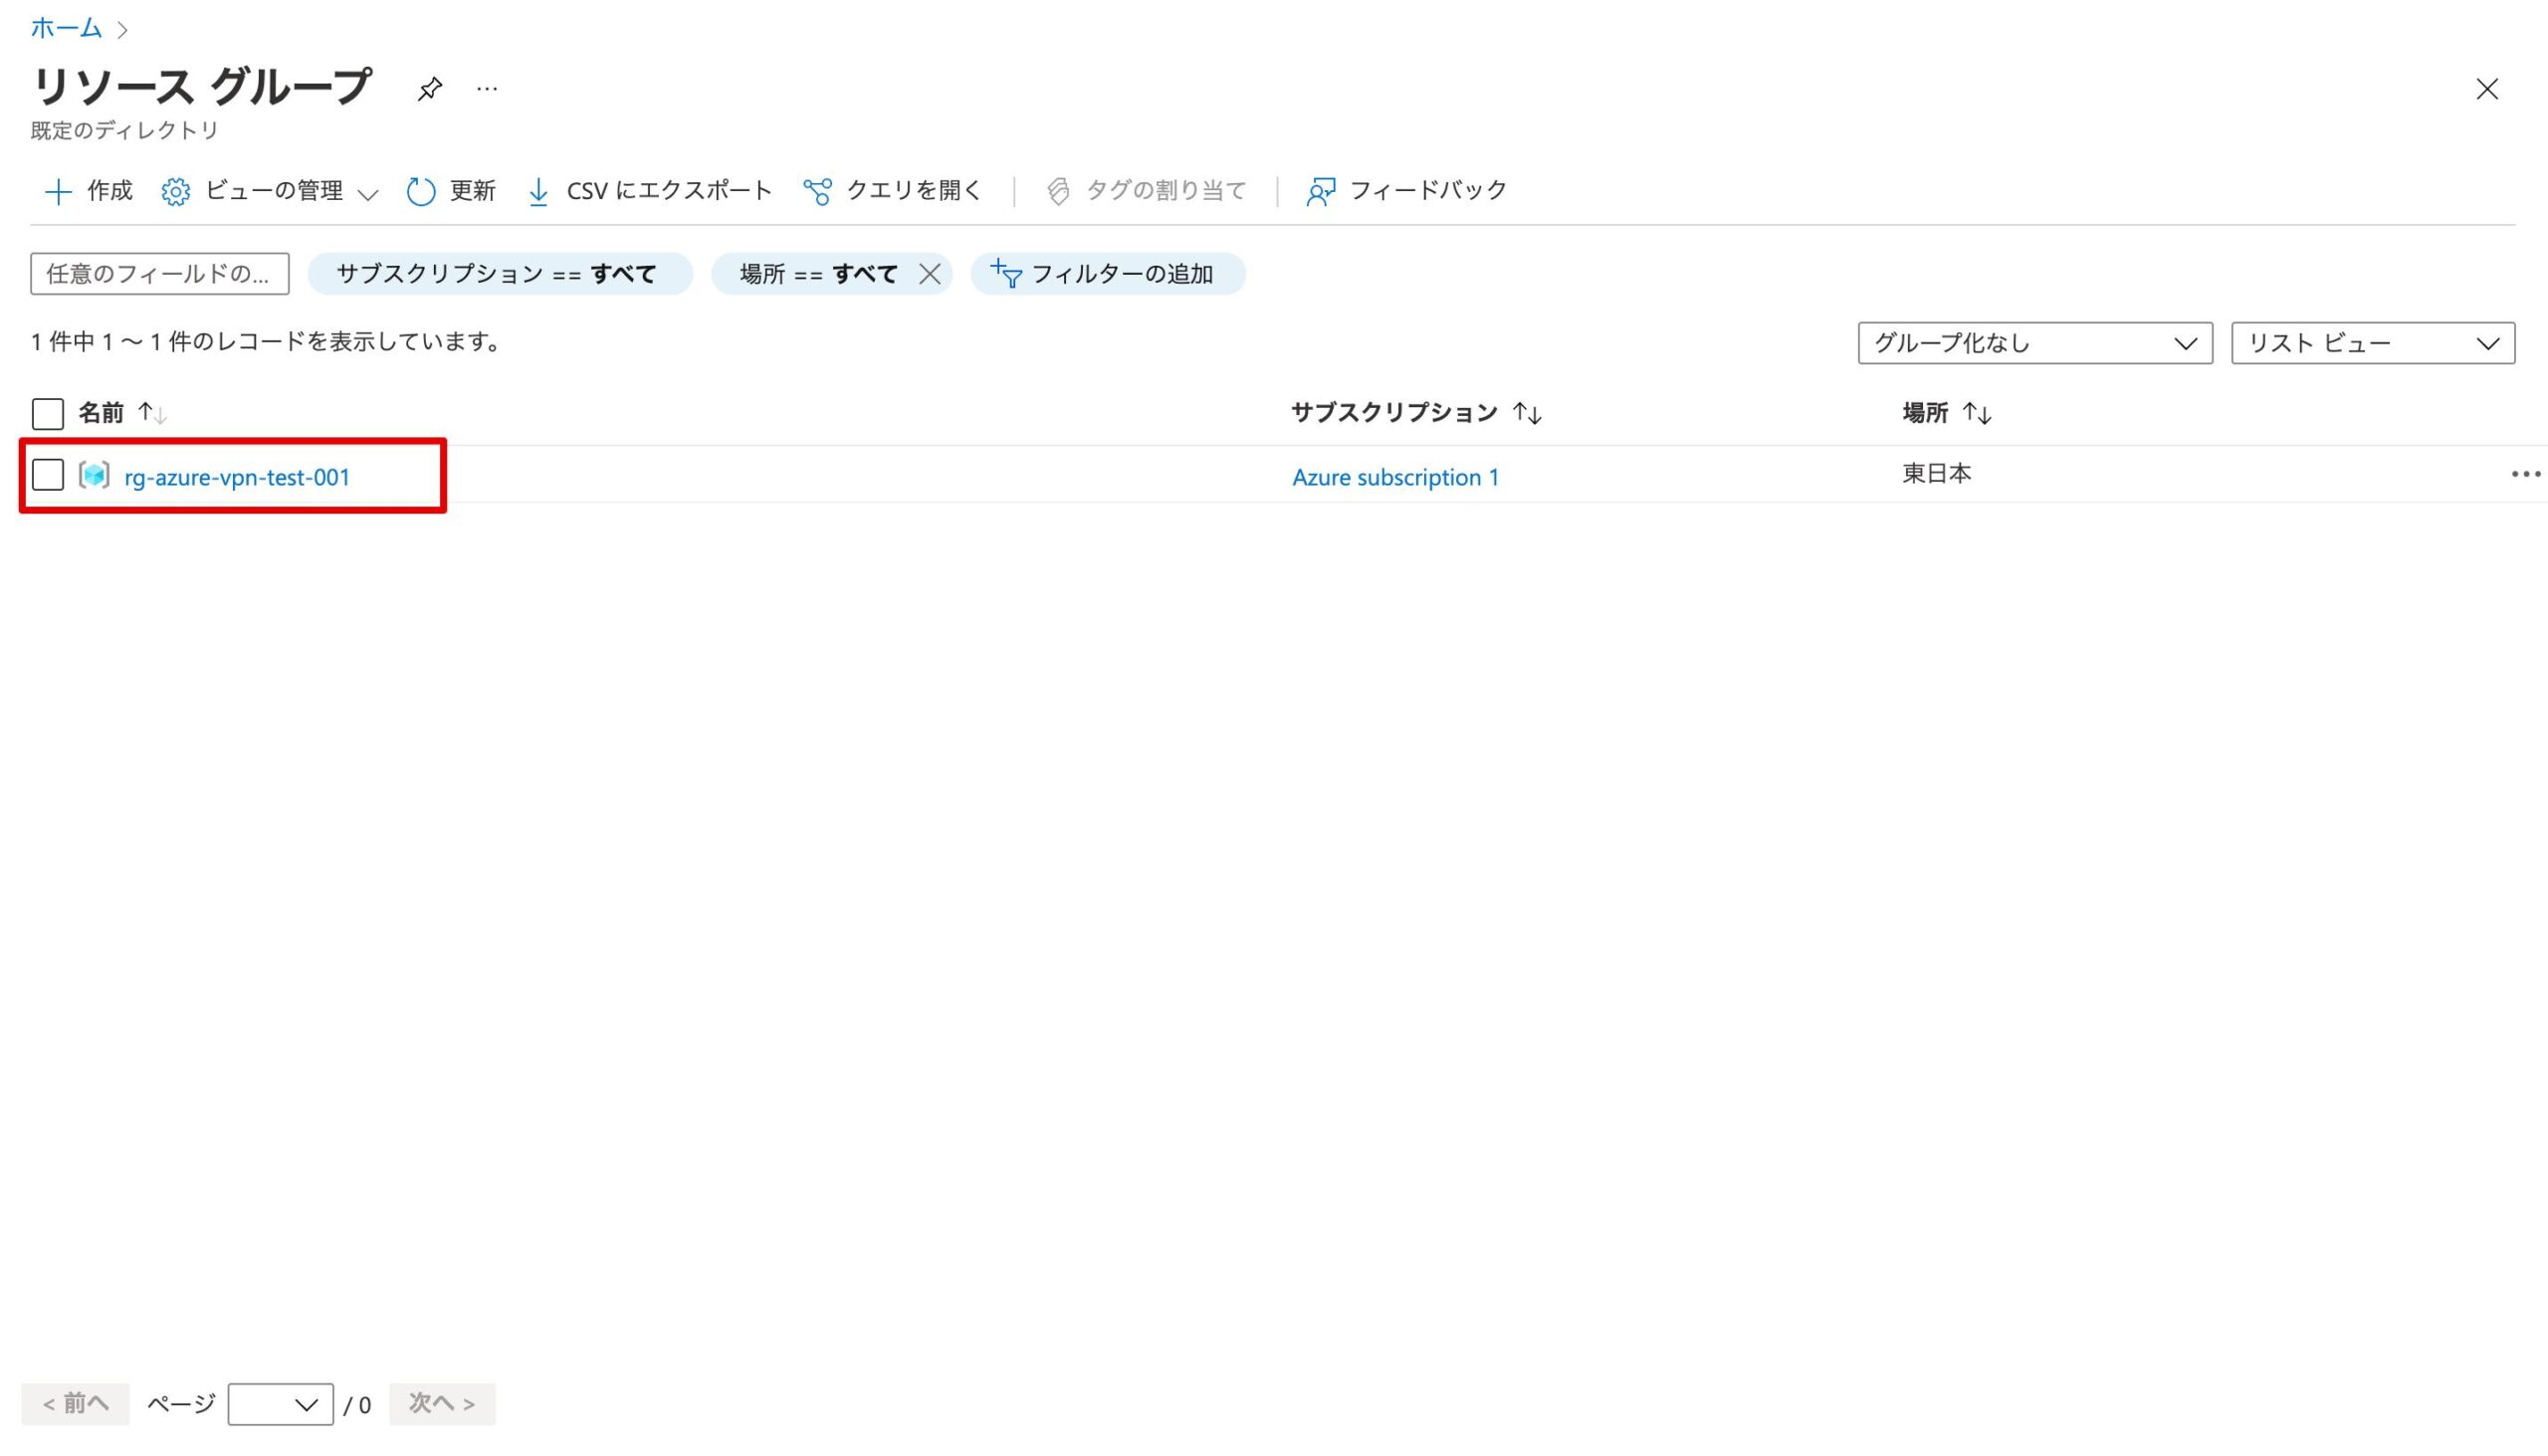
リソースグループが作成されたことを確認します。
仮想ネットワーク・サブネットの作成
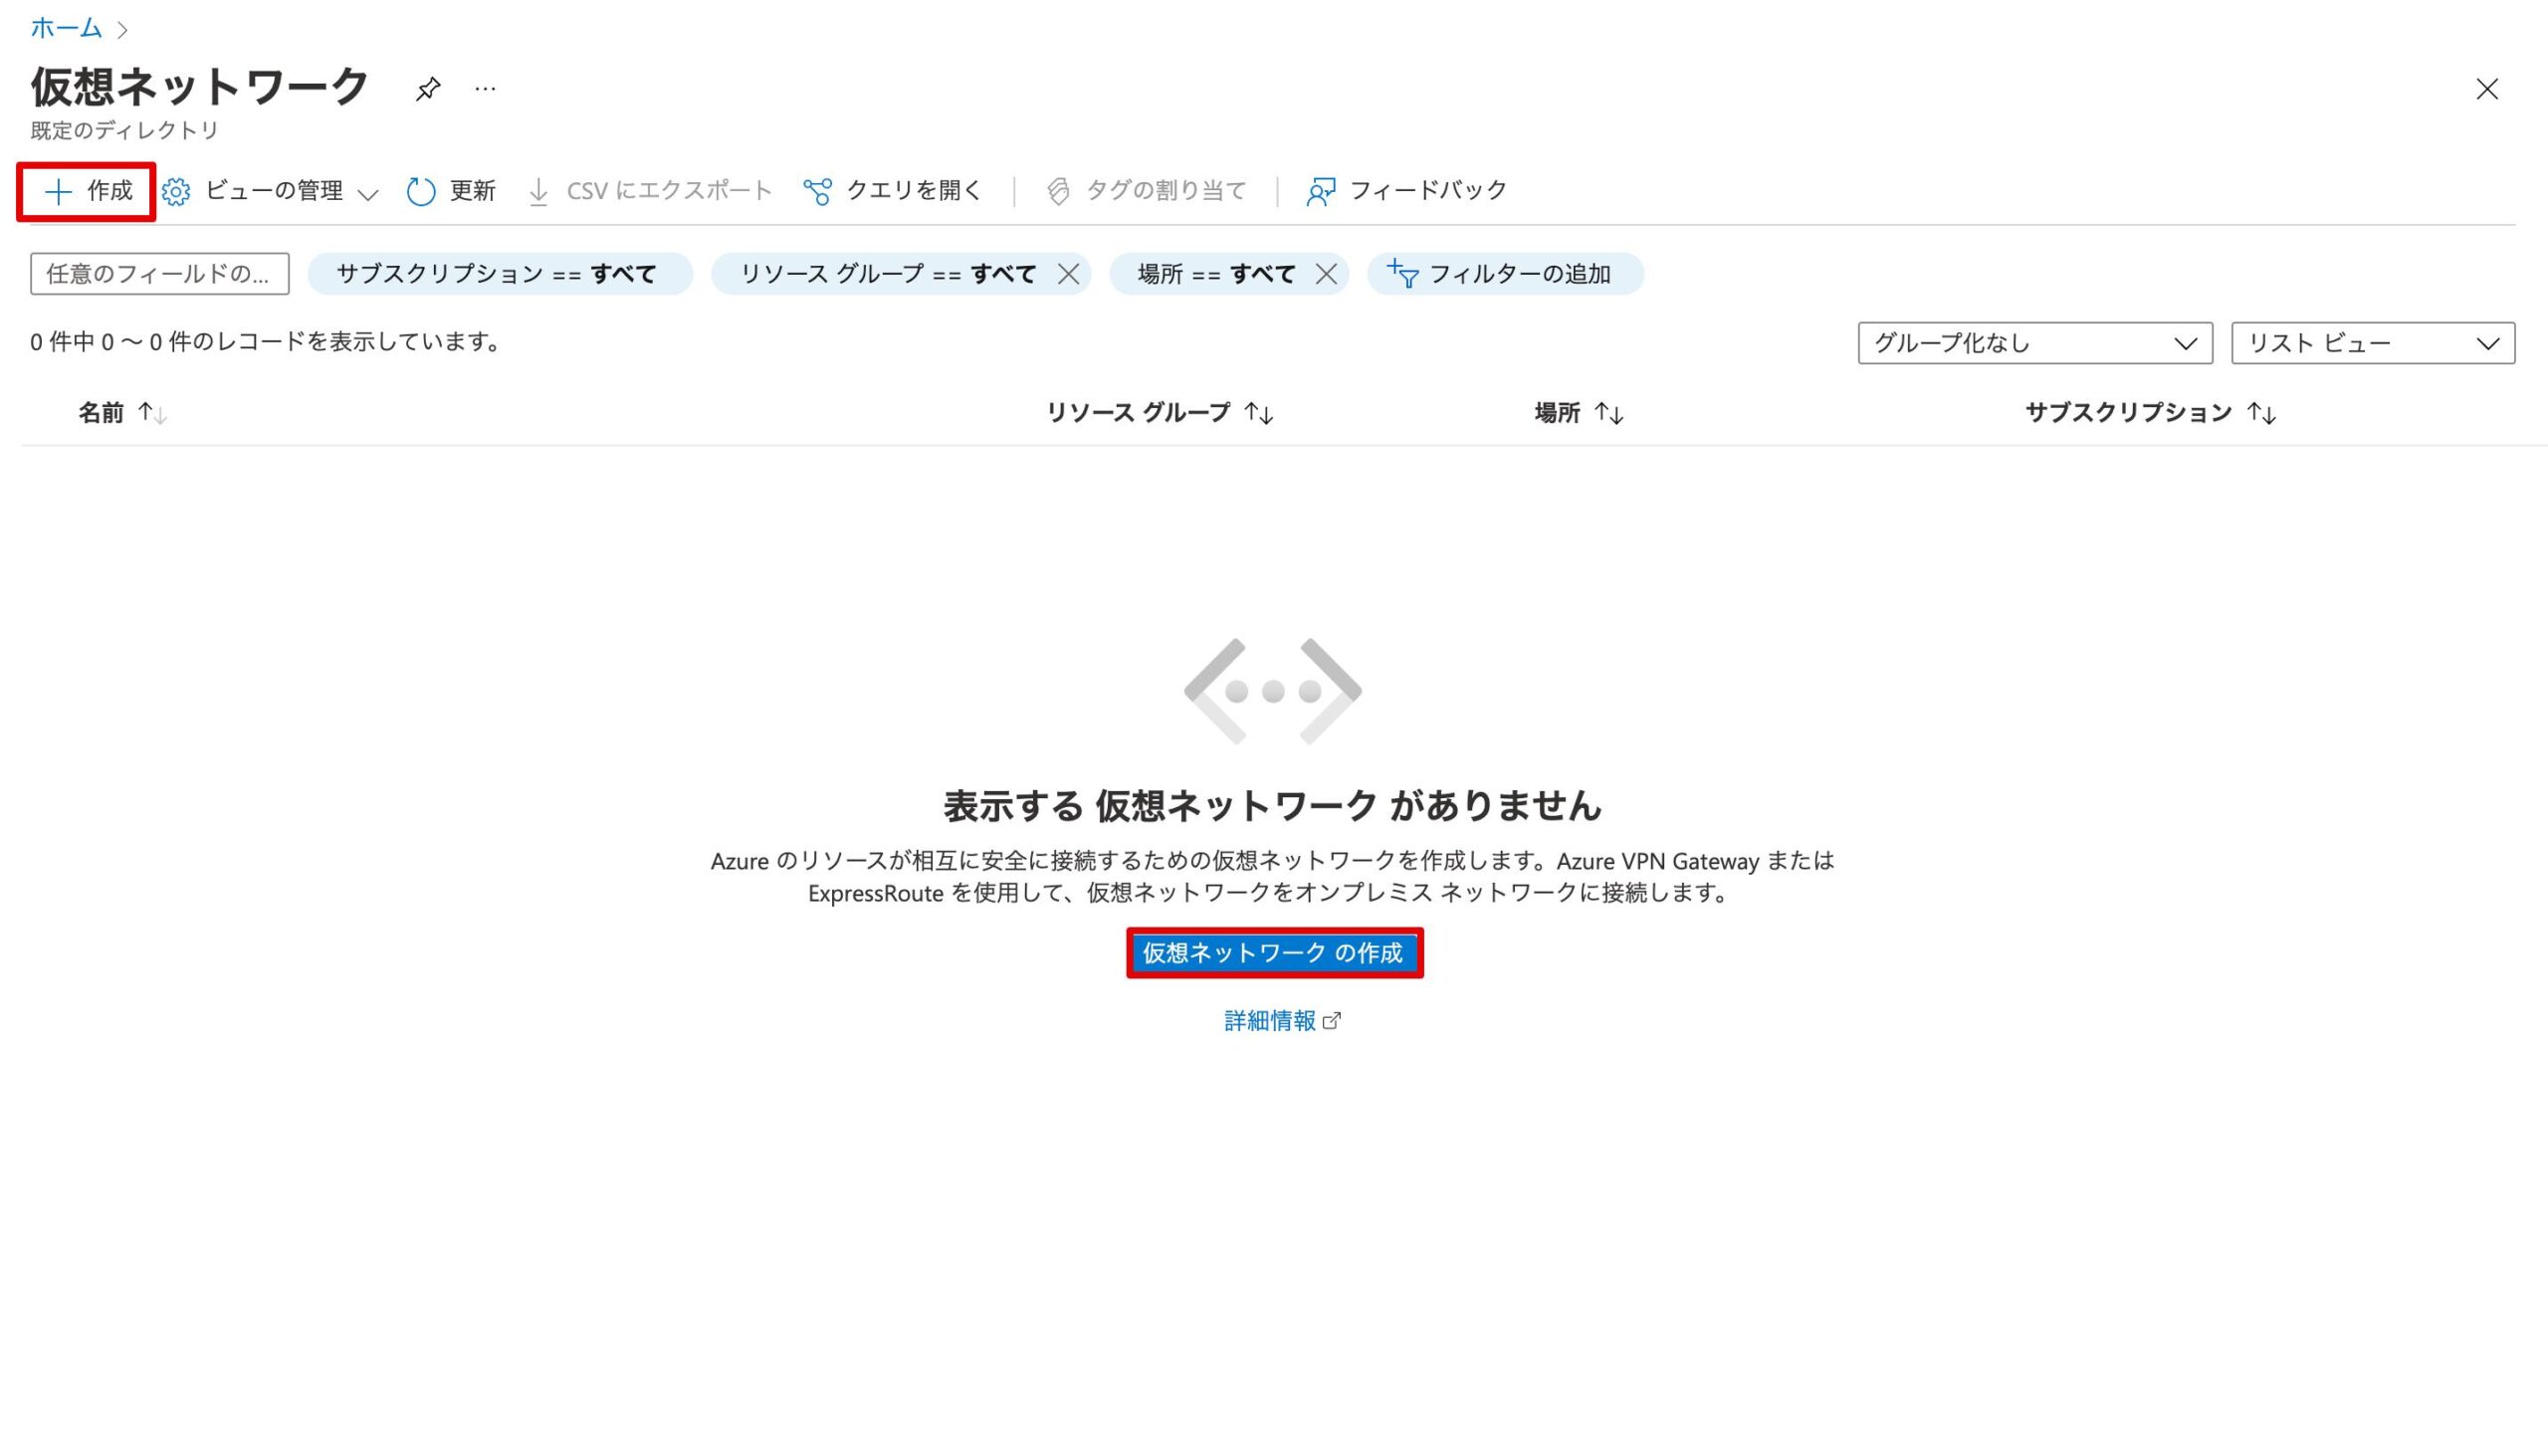
「仮想ネットワークの作成」をクリックします。
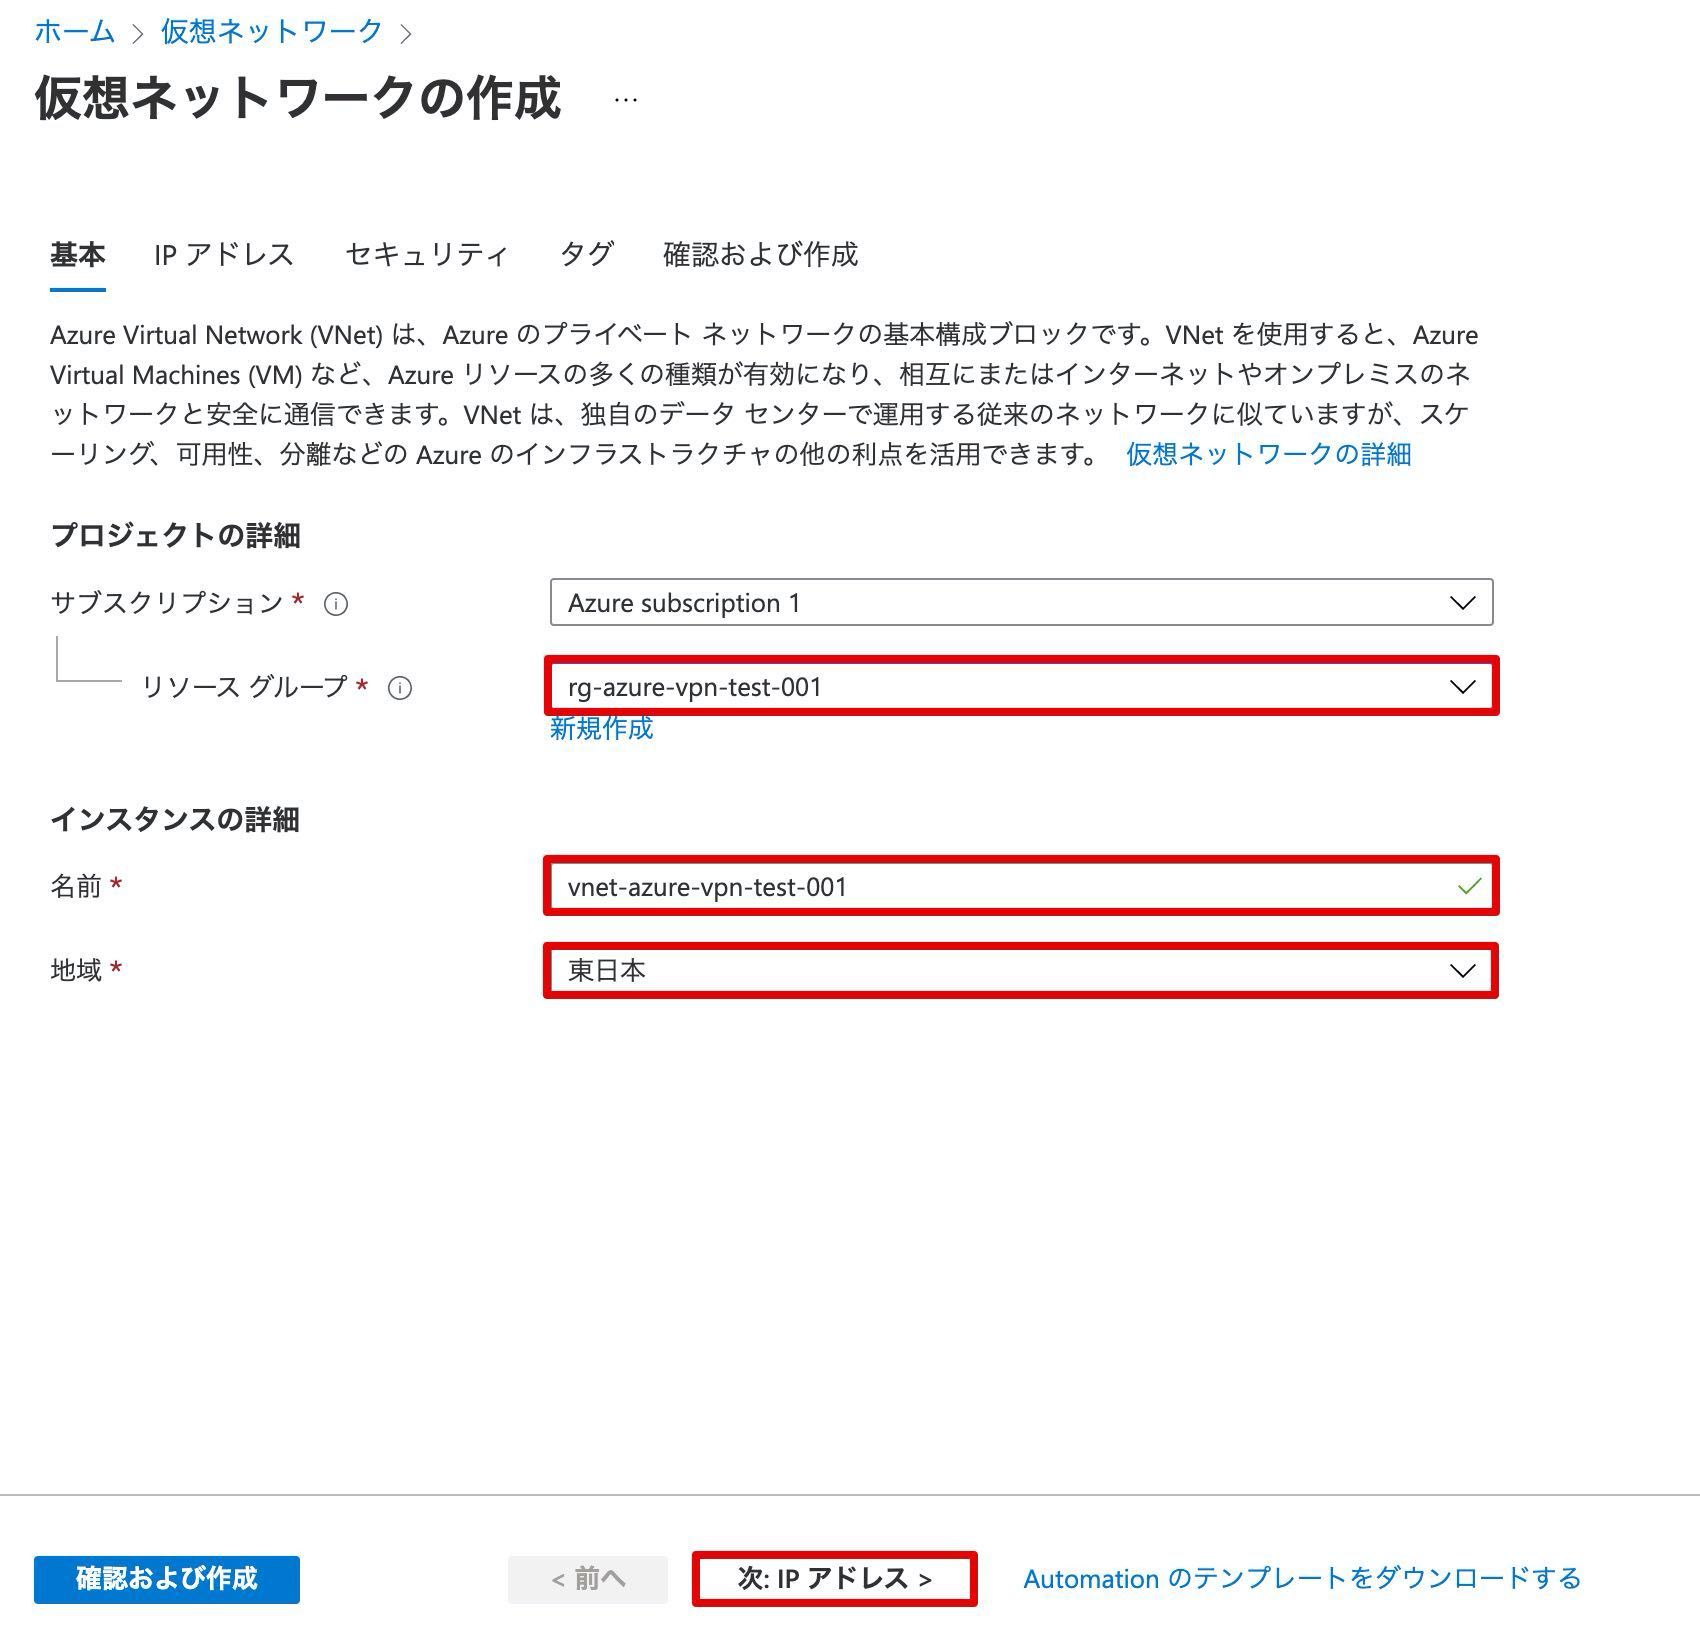
以下の通り入力・選択し、「次:IPアドレス>」をクリックします。
リソースグループ:作成したリソースグループを選択
名前:vnet-azure-vpn-test-001 ※任意の名前
地域:東日本を選択
デフォルトのサブネット名を変更し、「次:セキュリティ>」をクリックします。
サブネット名:snet-azure-vpn-test-001 ※任意の名前

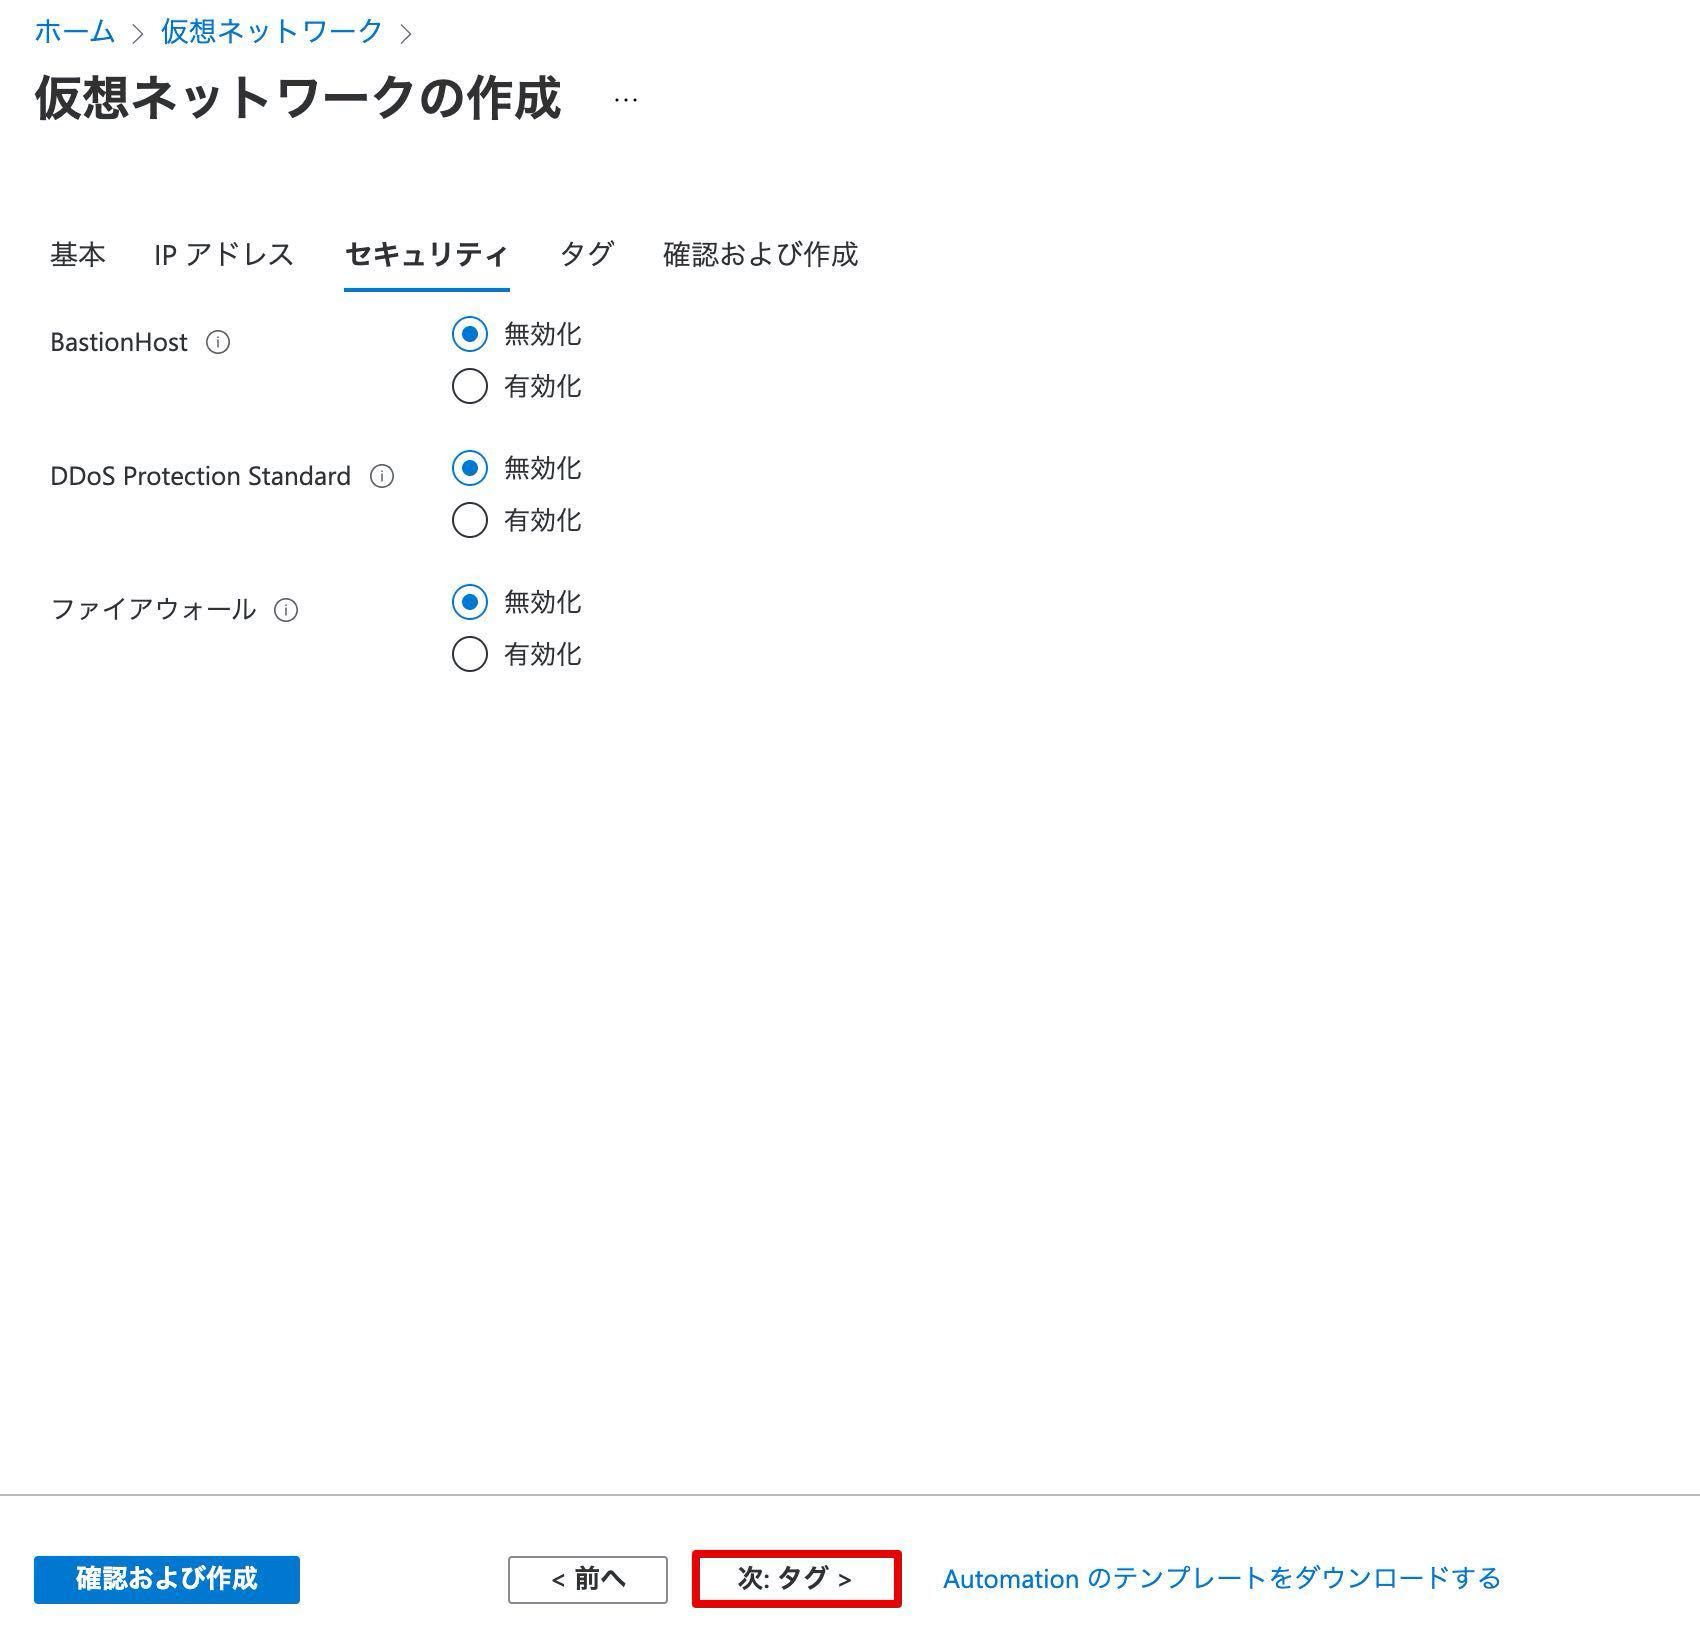
デフォルトの設定のまま、「次:タグ>」をクリックします。
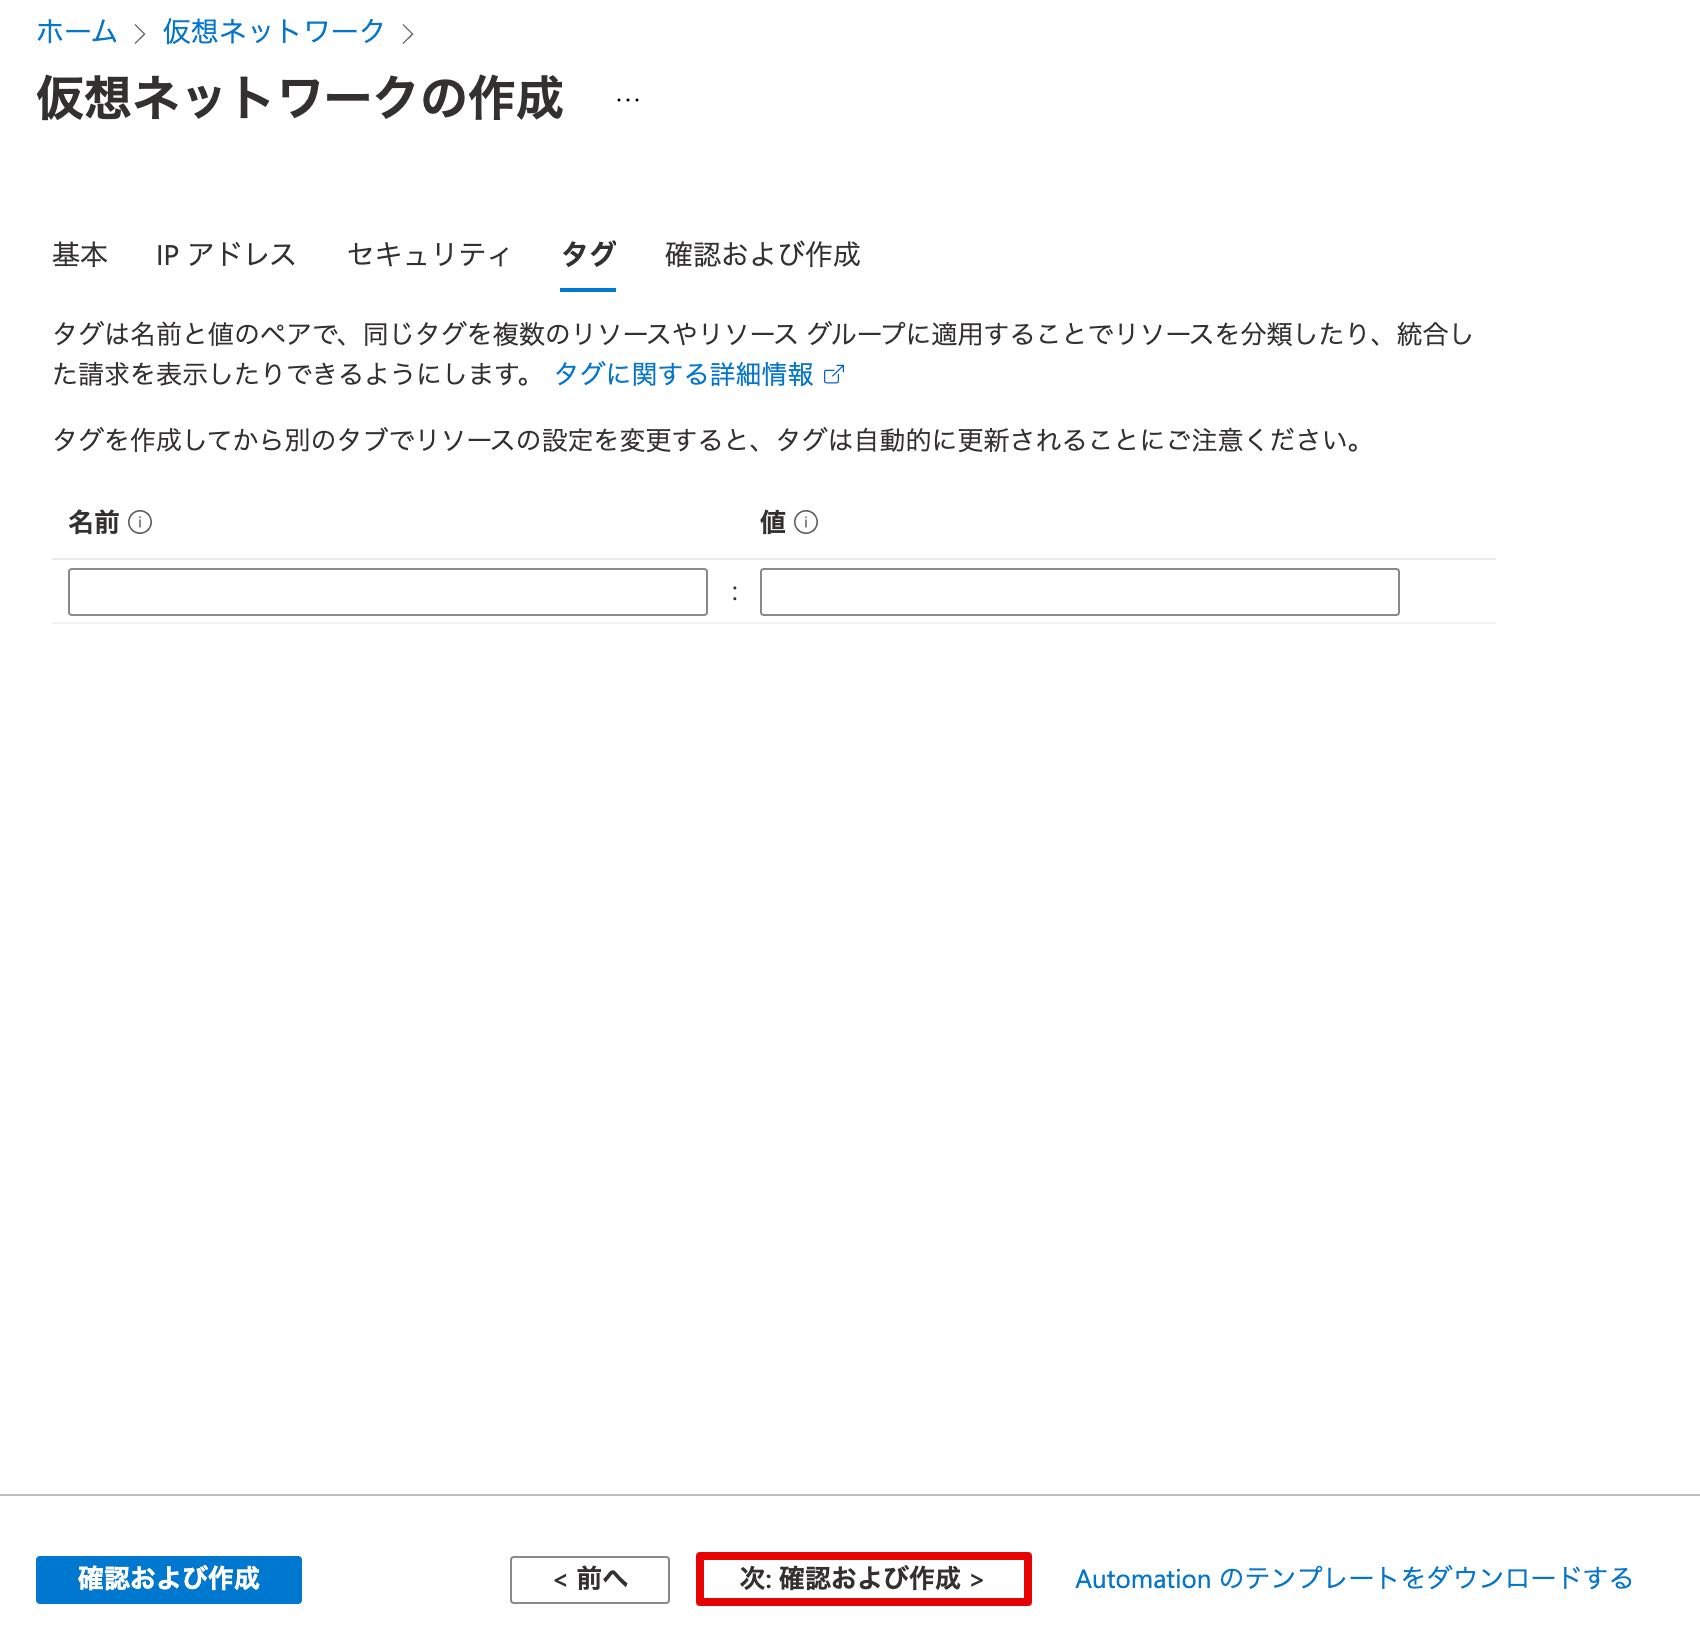
必要に応じてタグを入力し、「次:確認及び作成>」をクリックします。
作成内容と「検証に成功しました」の表示を確認し、「作成」をクリックします。
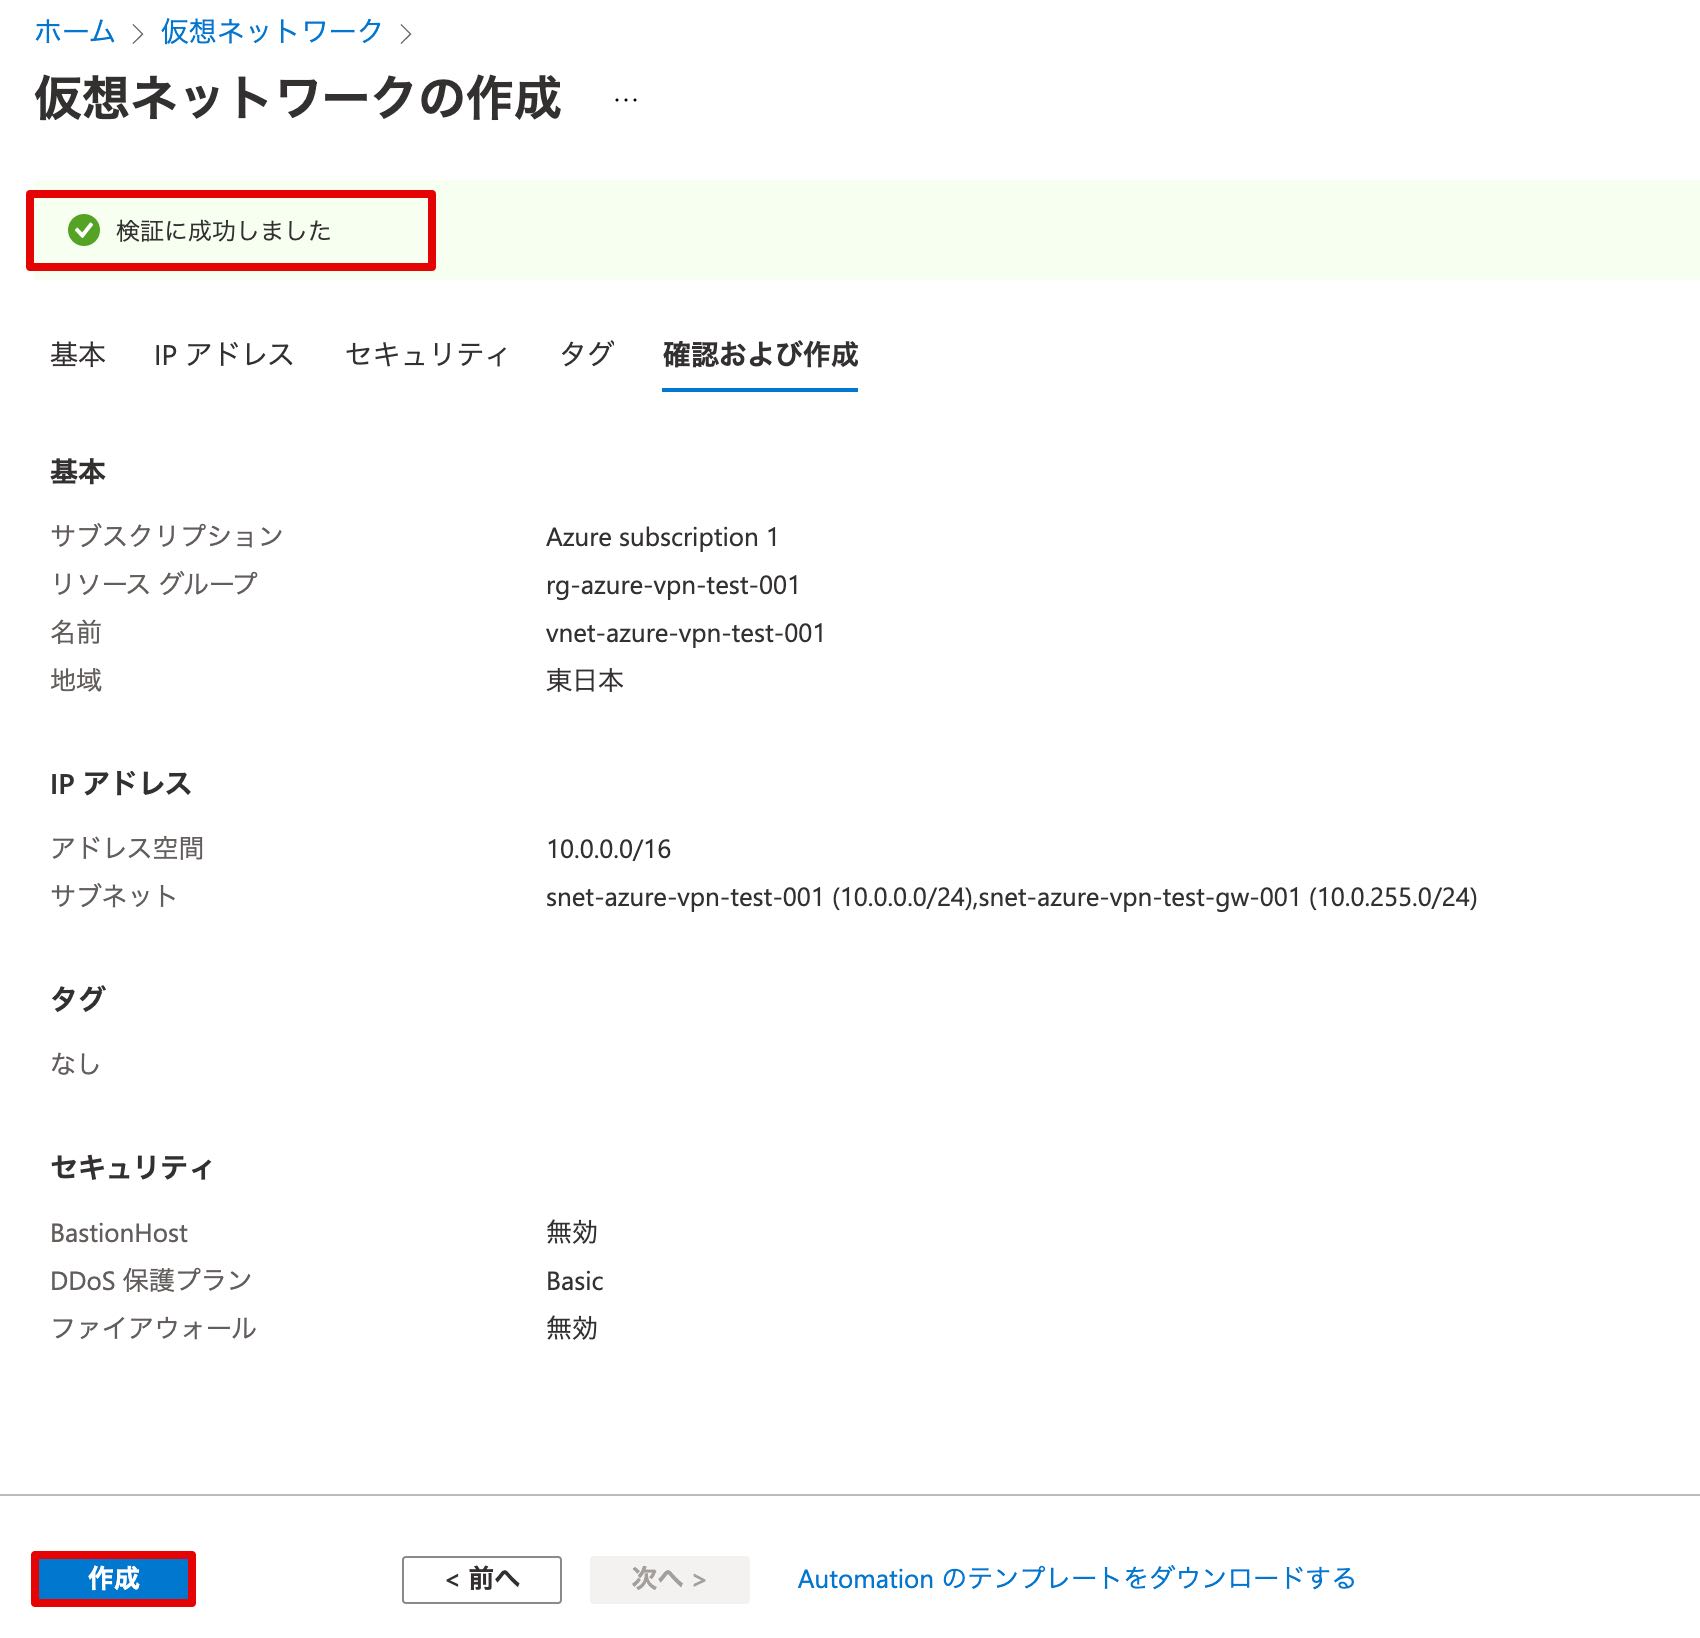
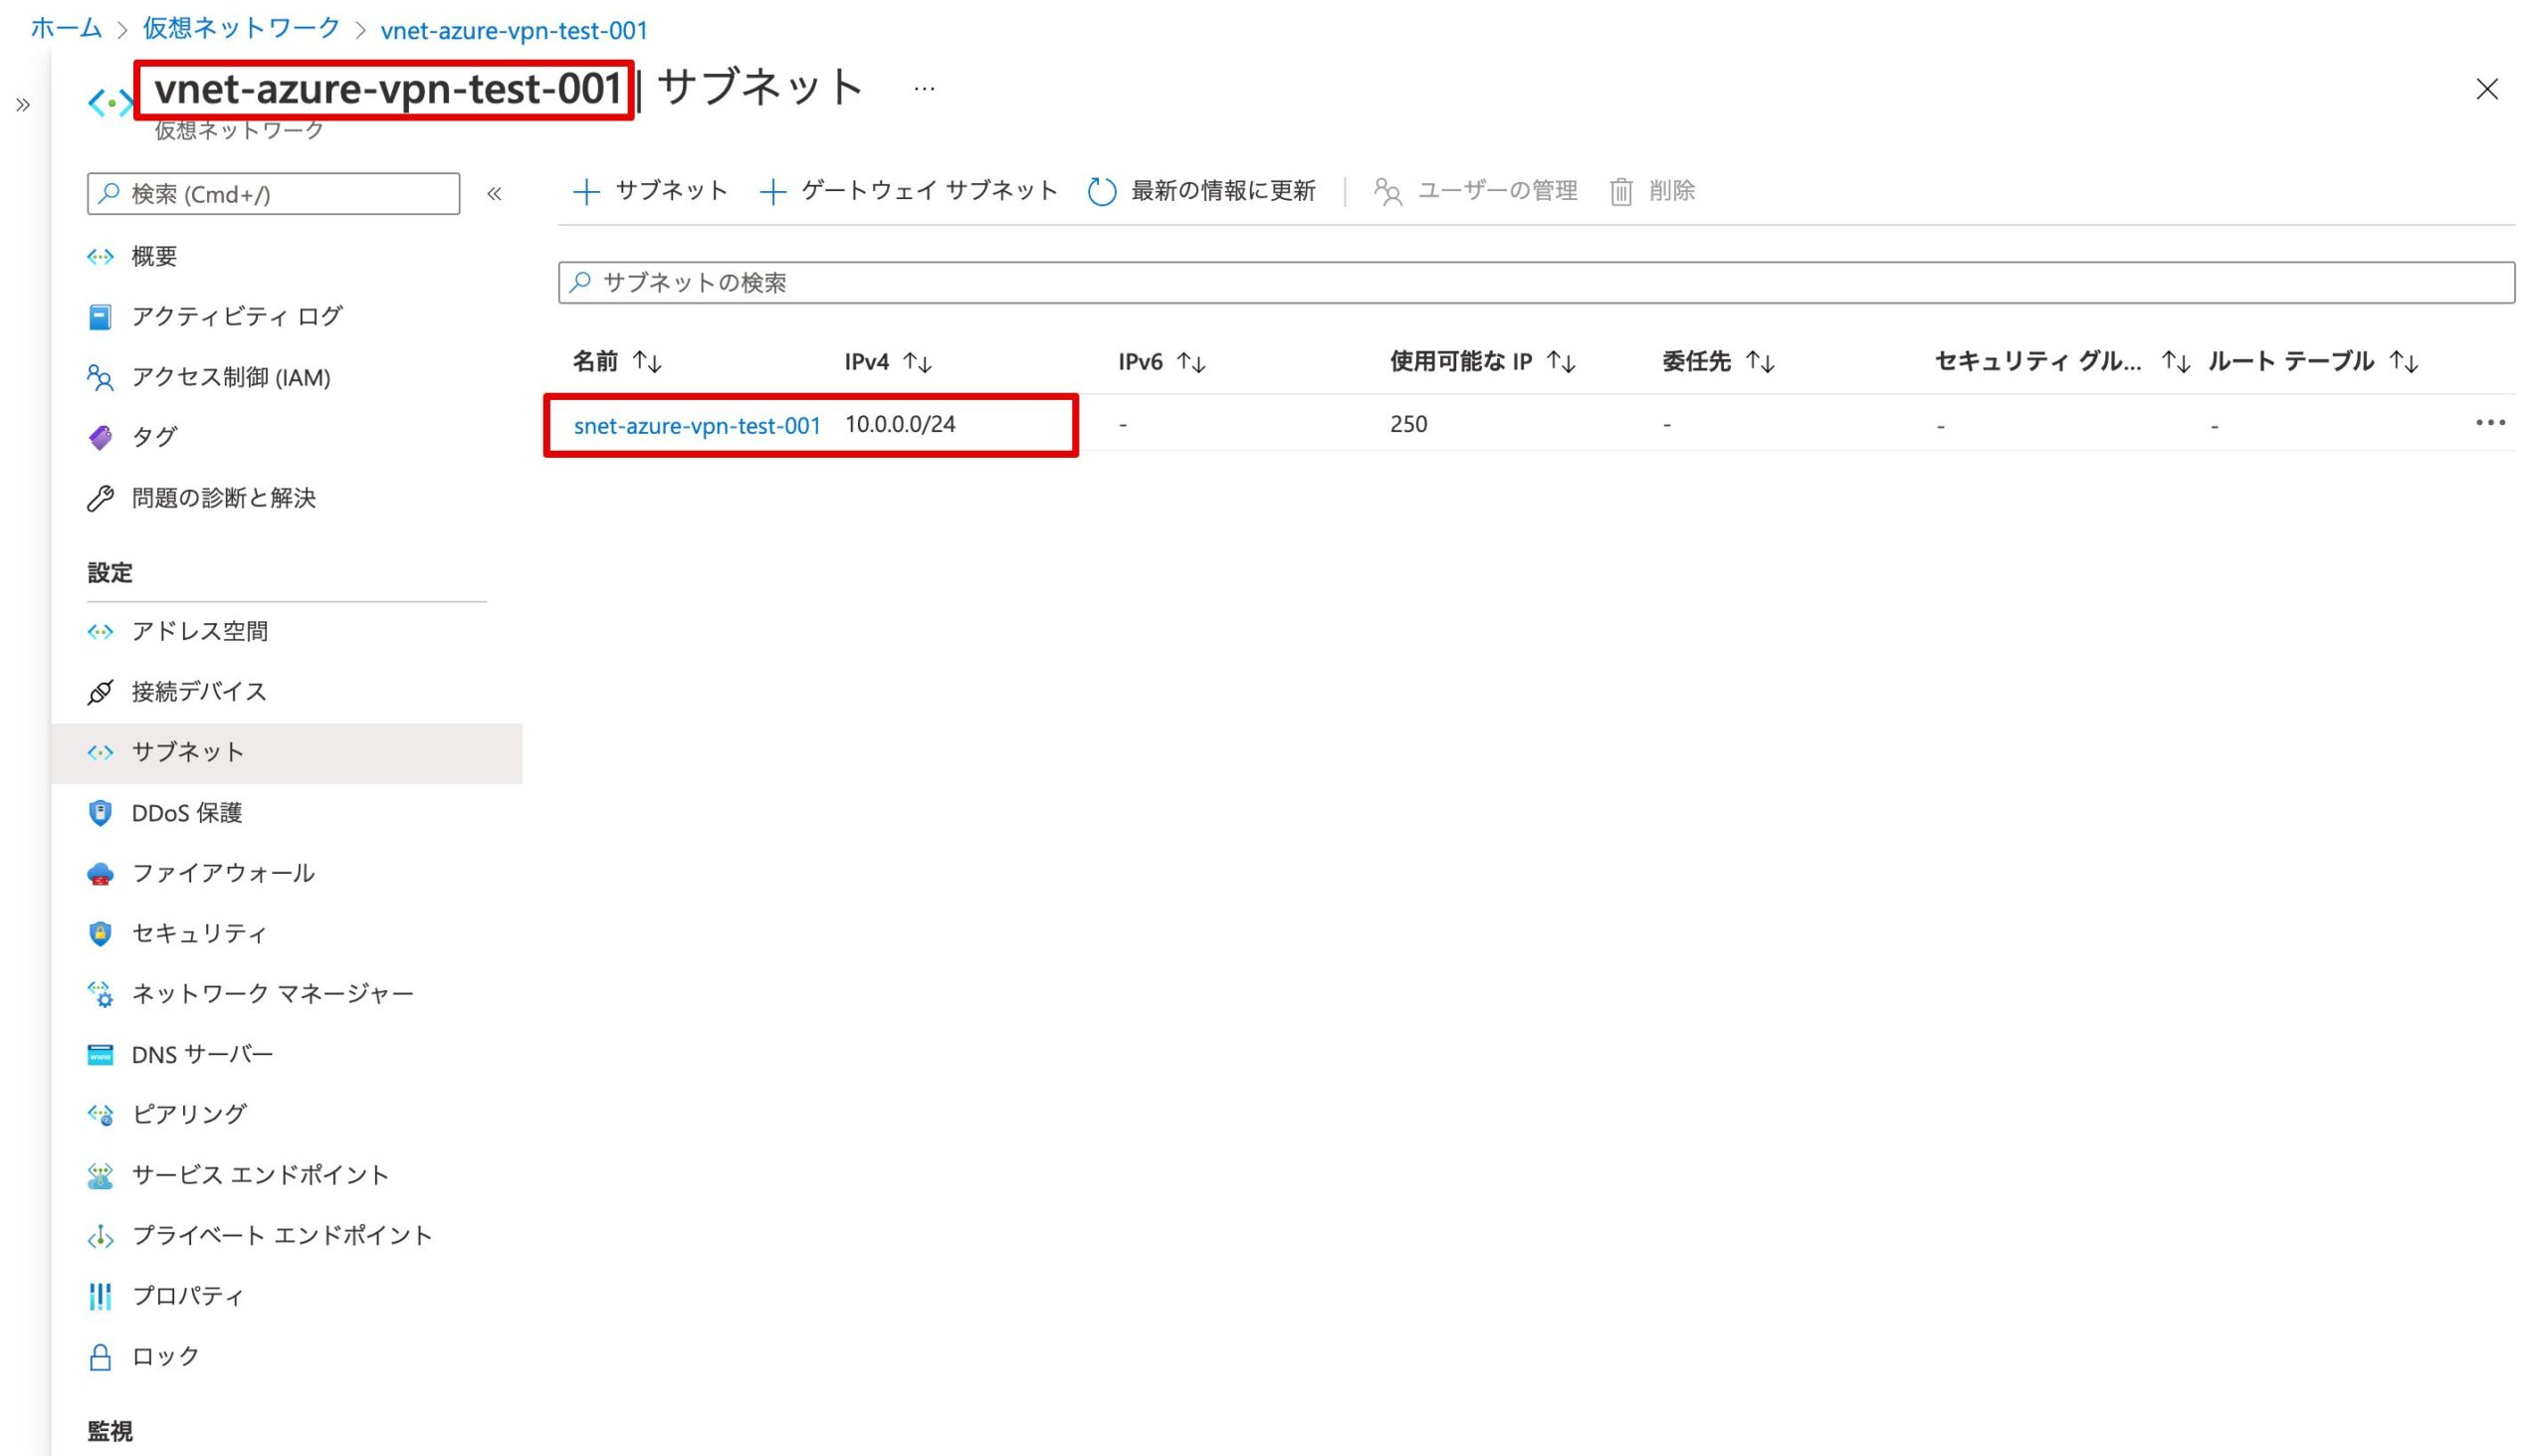
仮想ネットワークとサブネットが作成されていることを確認します。
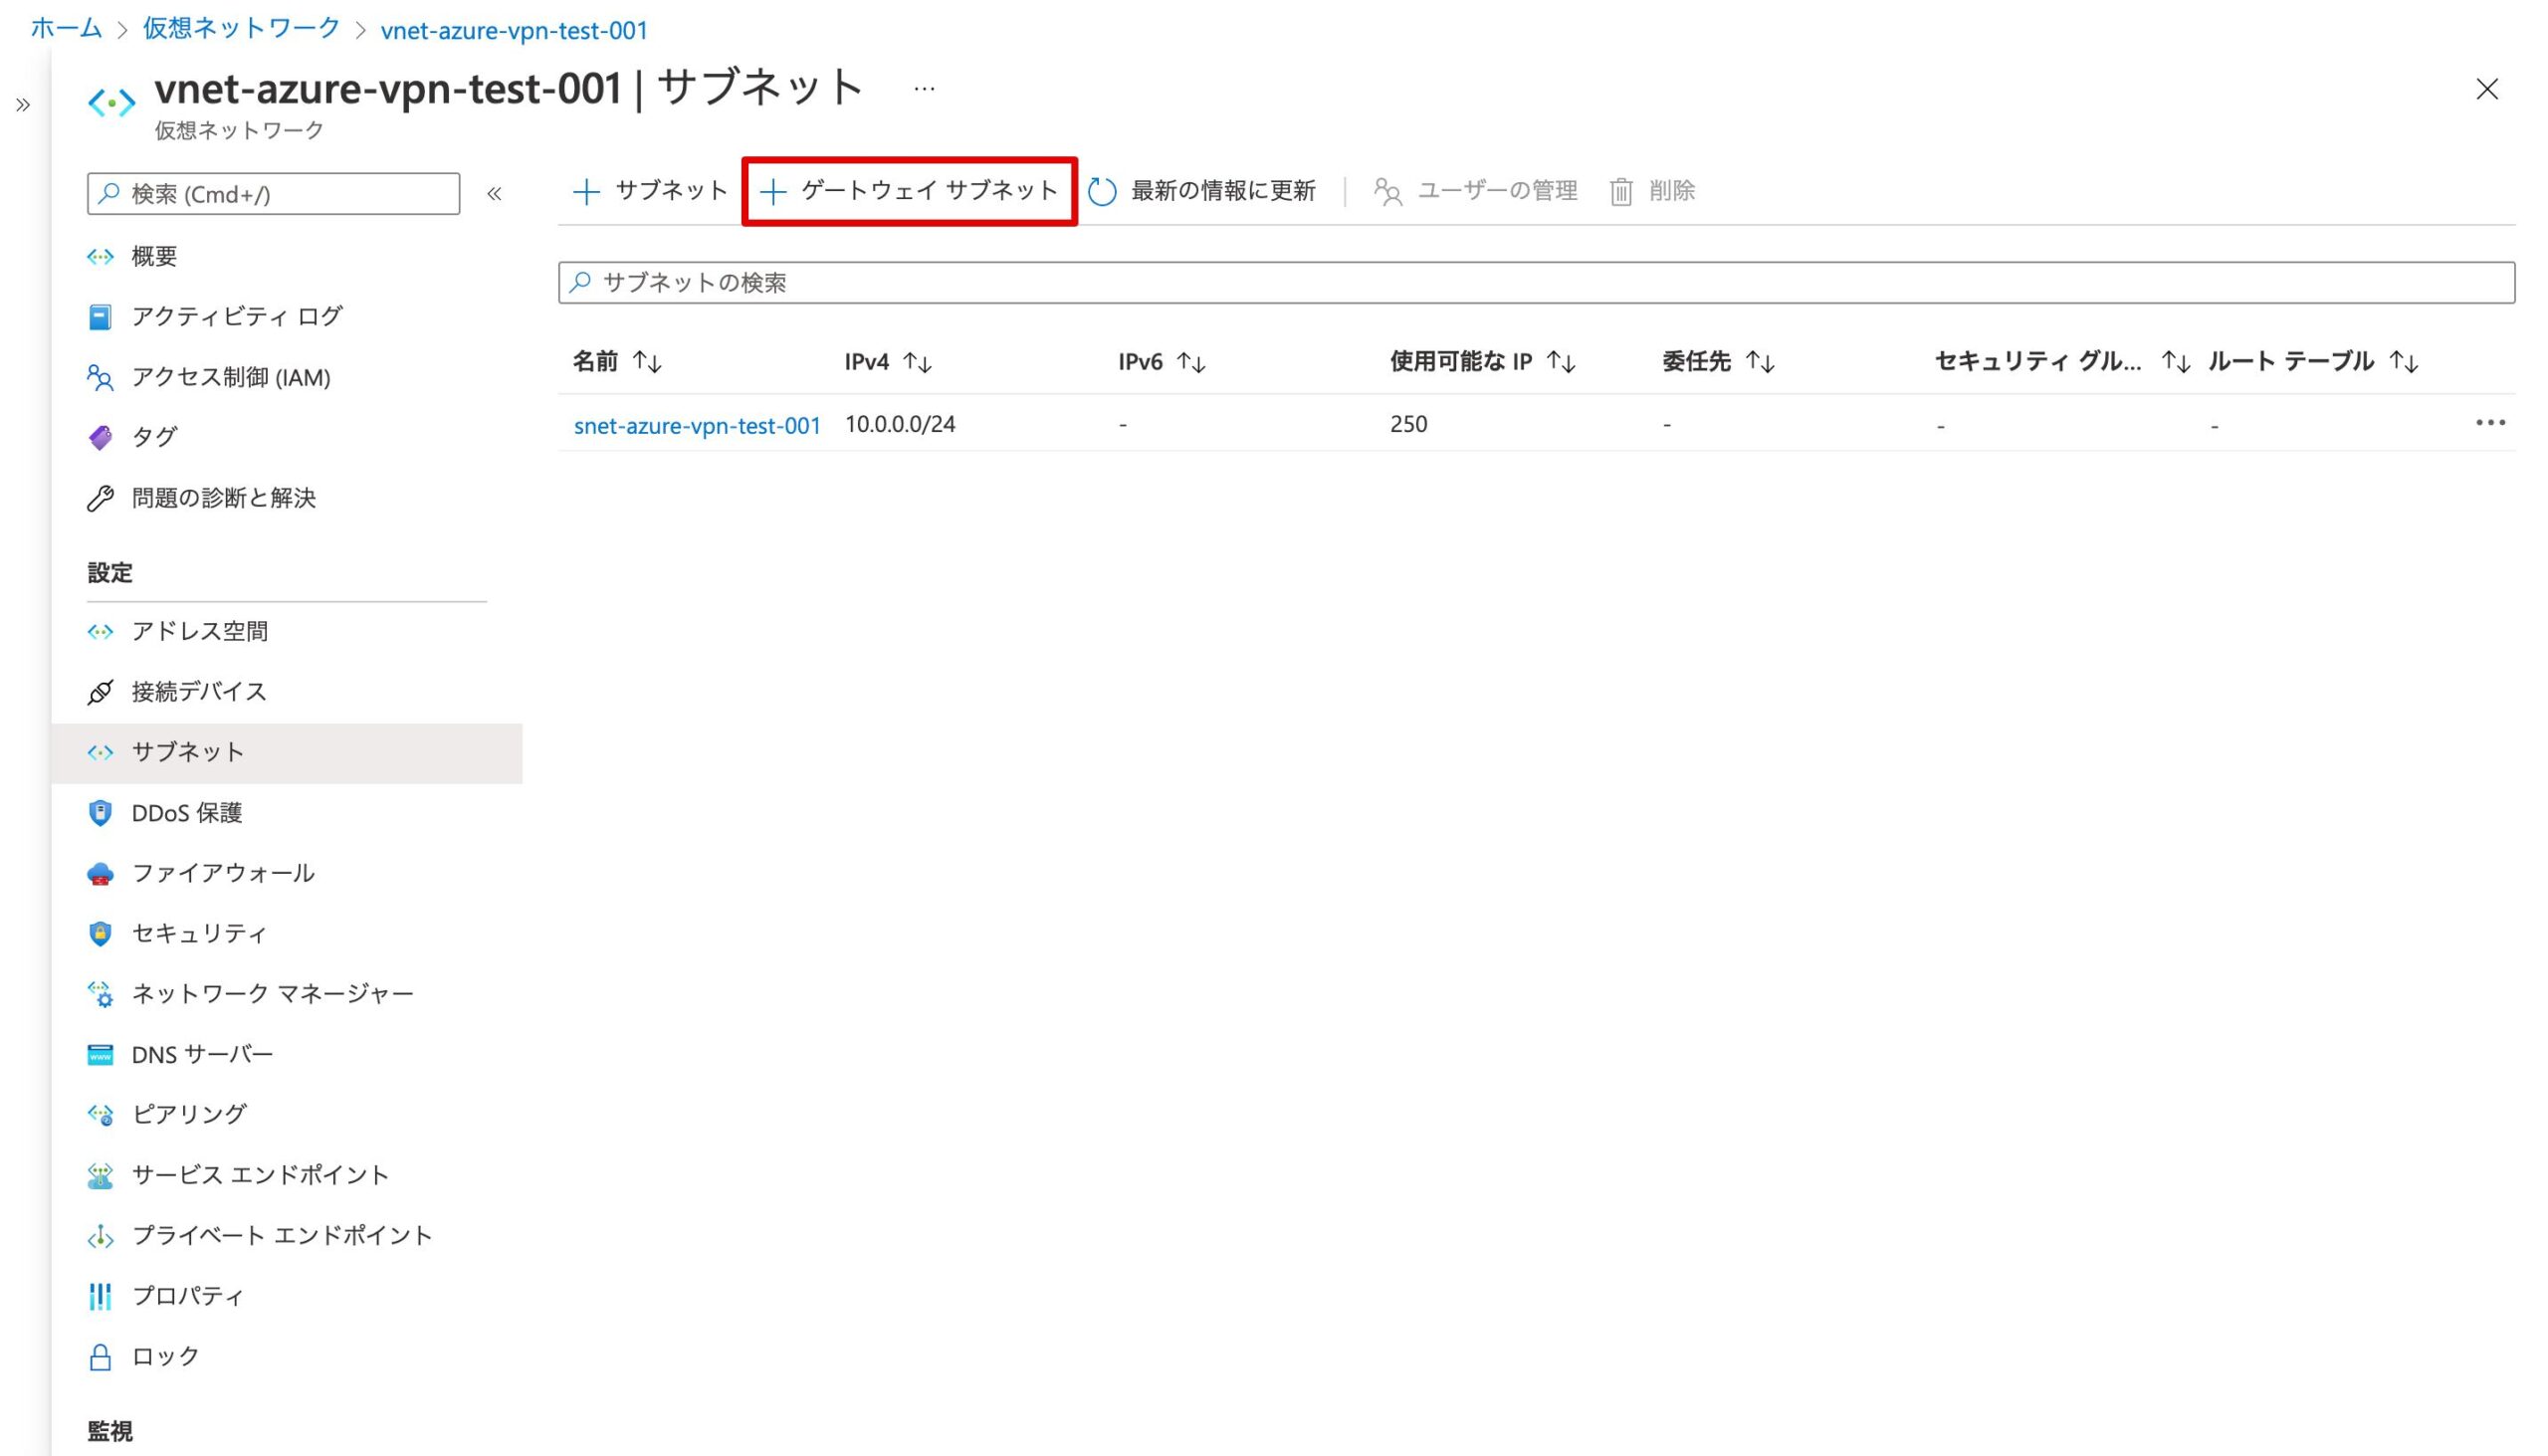
ゲートウェイサブネットの作成
作成した仮想ネットワーク上で、「+ ゲートウェイサブネット」をクリックします。
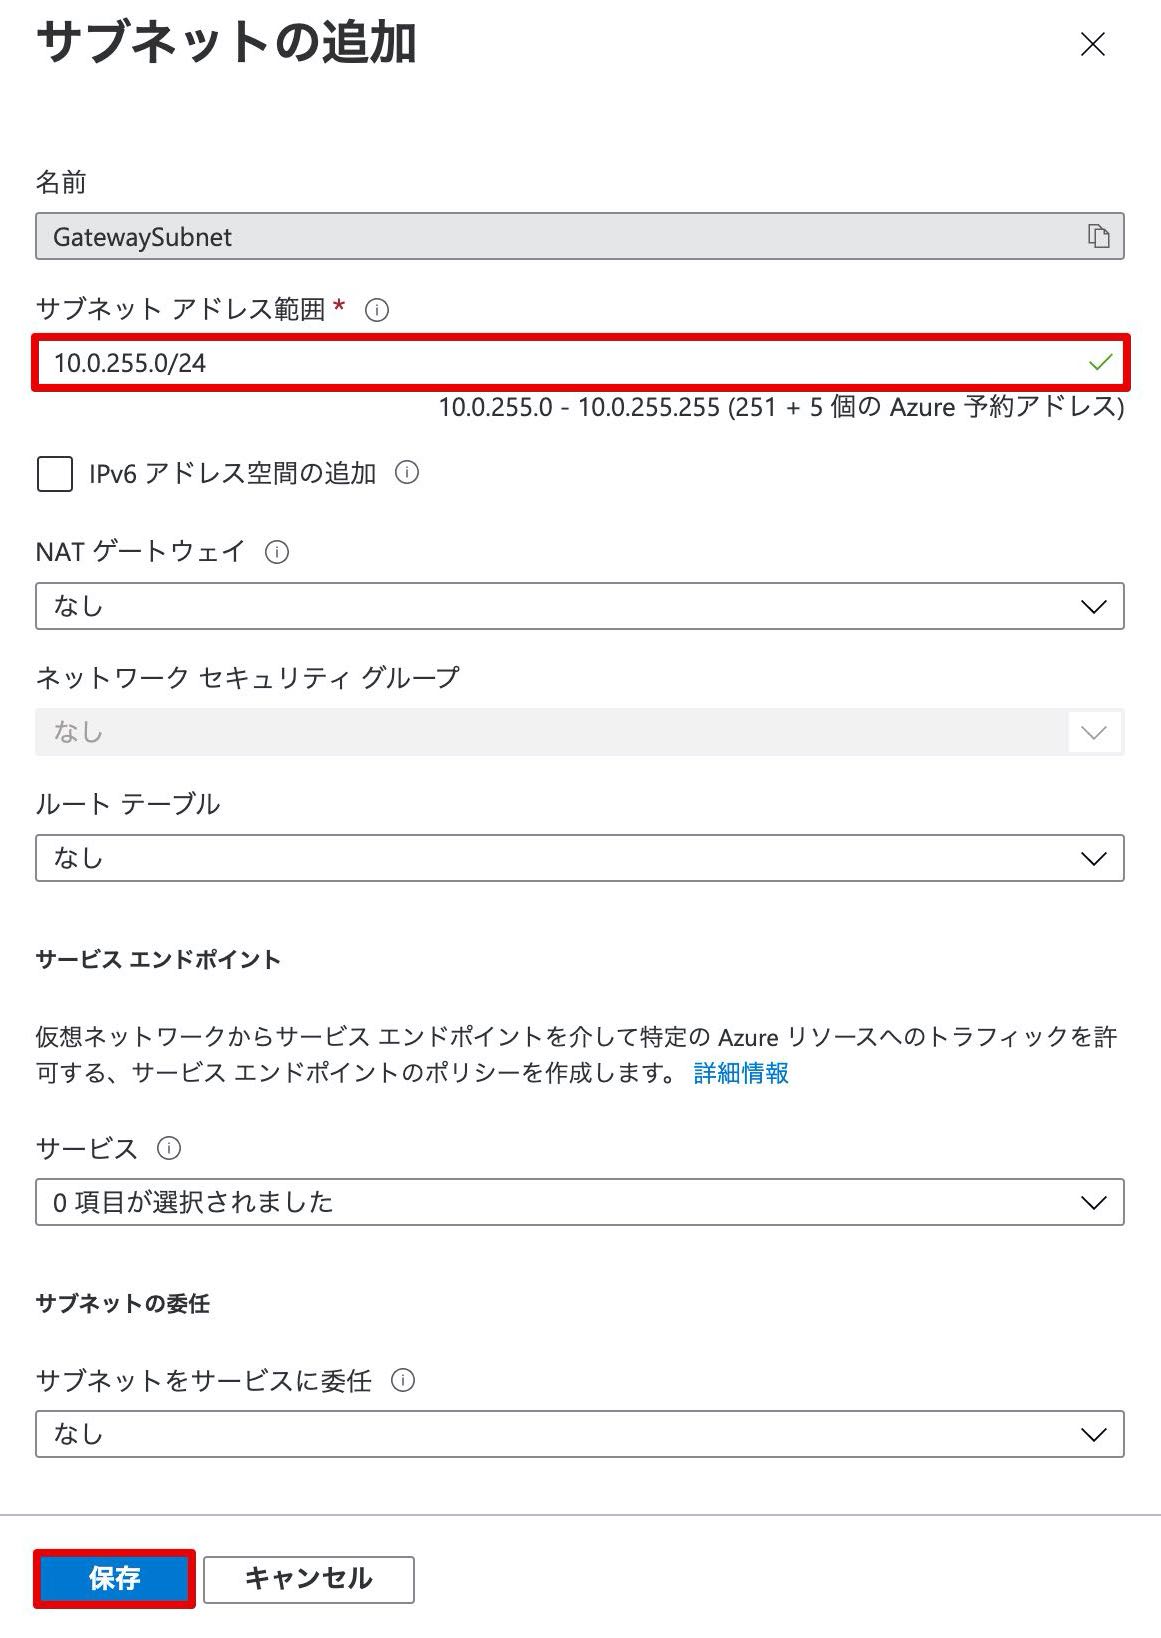
以下の通り入力し、「保存」をクリックします。
サブネット アドレス範囲:10.0.255.0/24
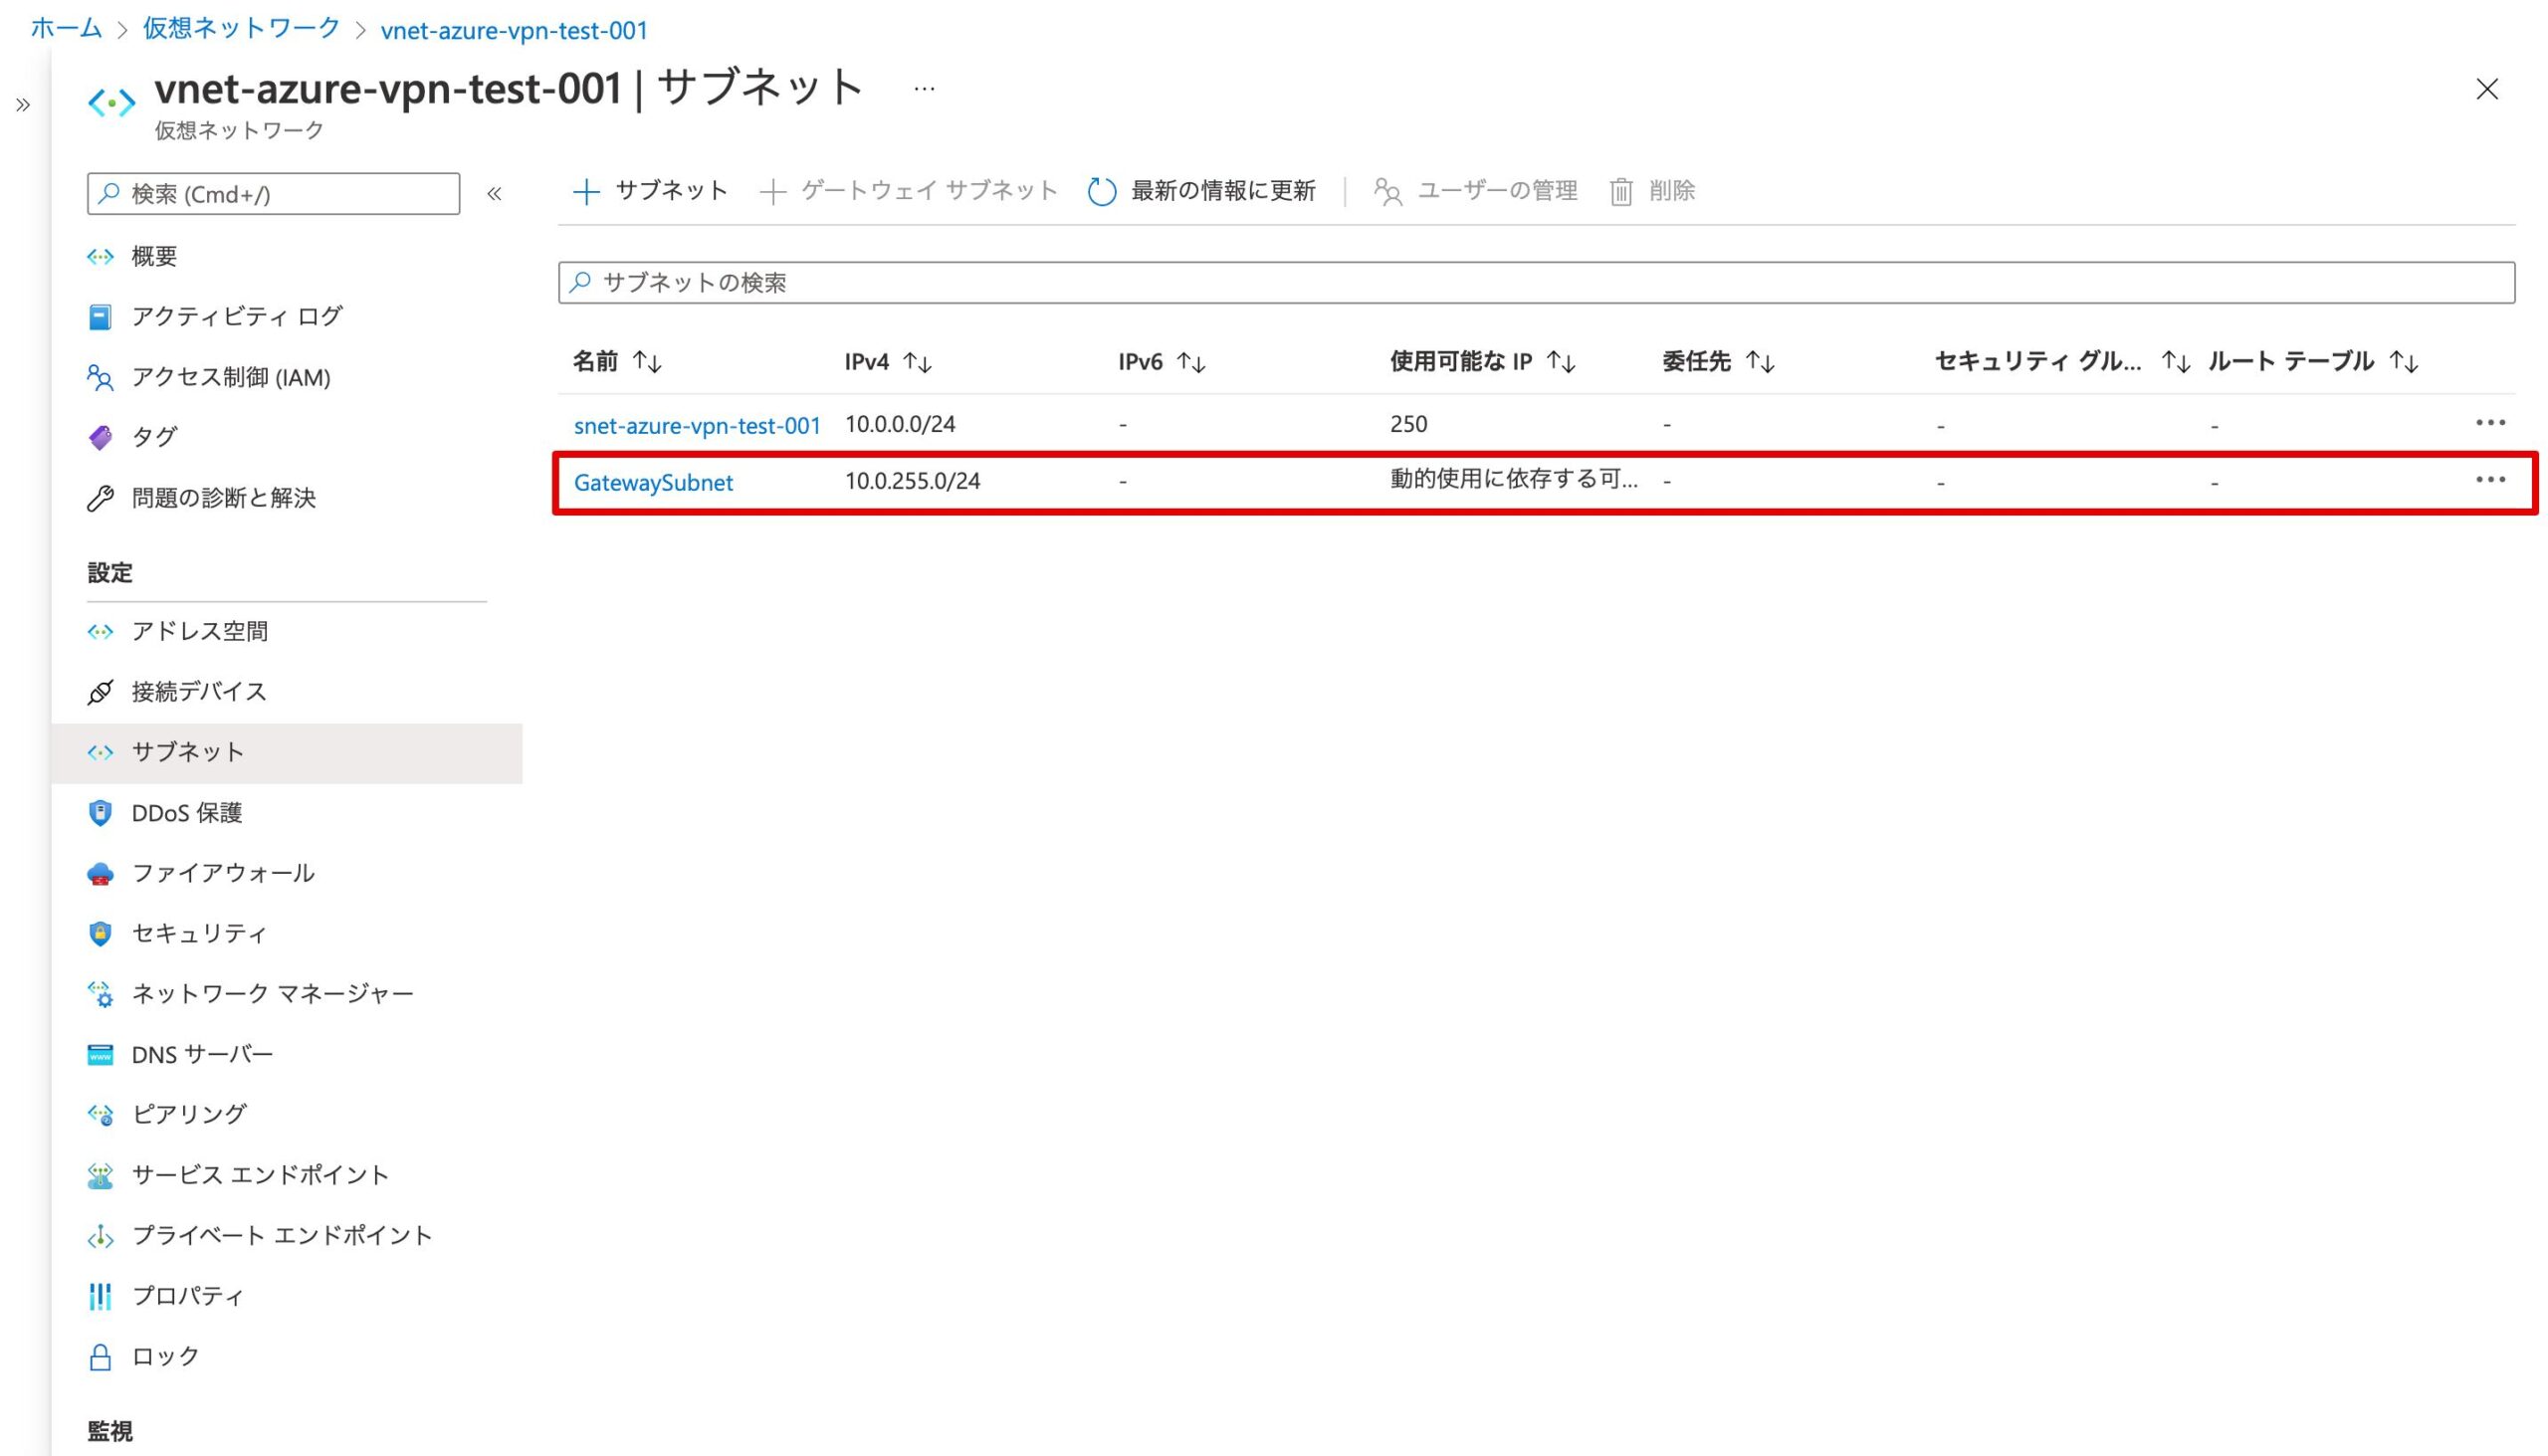
ゲートウェイサブネットが作成されたことを確認します。
以上で、Azureサイト間VPNの構築(1.Azureの基本設定)の説明は完了です!