ネットワーク構成
CMLでは、Ciscoが提供している「TRex」というオープンソースのトラフィックジェネレーターが準備されています。
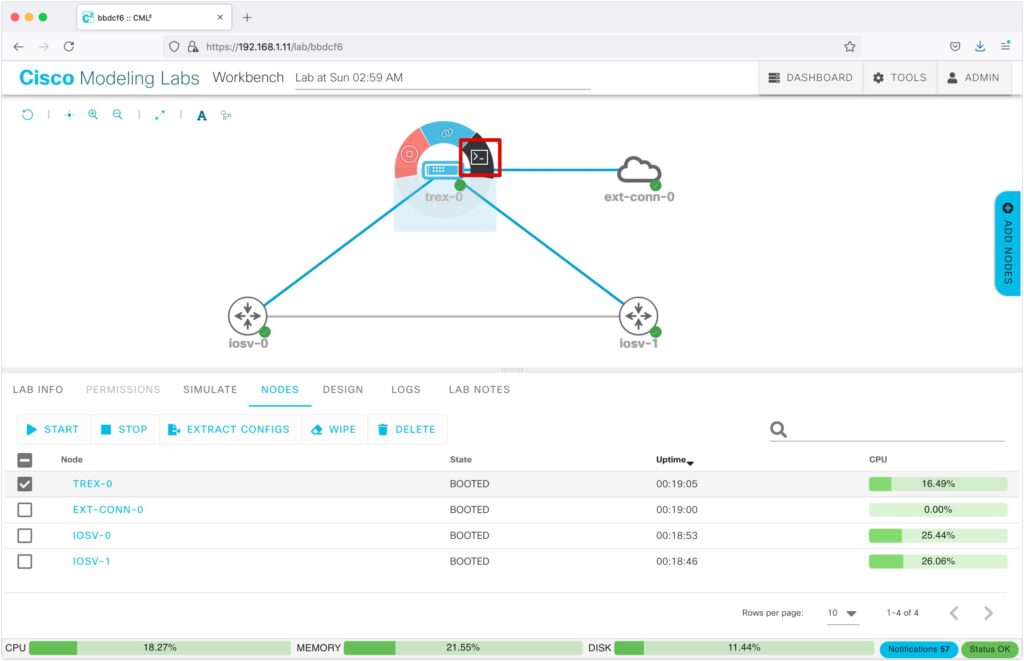
下記のネットワーク構成で、トラフィックジェネレーターの使い方を説明します。
※”trex-0″というノードがトラフィックジェネレーターです。
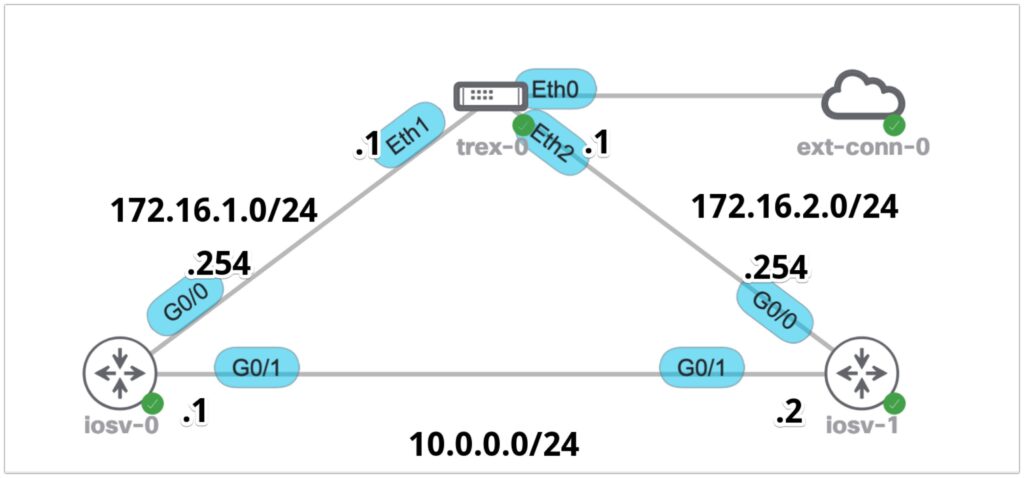
iosv-0とiosv-1にはそれぞれ以下を設定しています。
iosv-0
---------------------------
interface Gi0/0
ip address 172.16.1.254 255.255.255.0
no shut

interface Gi0/1
ip address 10.0.0.1 255.255.255.0
no shut

ip route 0.0.0.0 0.0.0.0 10.0.0.2
---------------------------

iosv-1
---------------------------
interface Gi0/0
ip address 172.16.2.254 255.255.255.0
no shut

interface Gi0/1
ip address 10.0.0.2 255.255.255.0
no shut

ip route 0.0.0.0 0.0.0.0 10.0.0.1
---------------------------
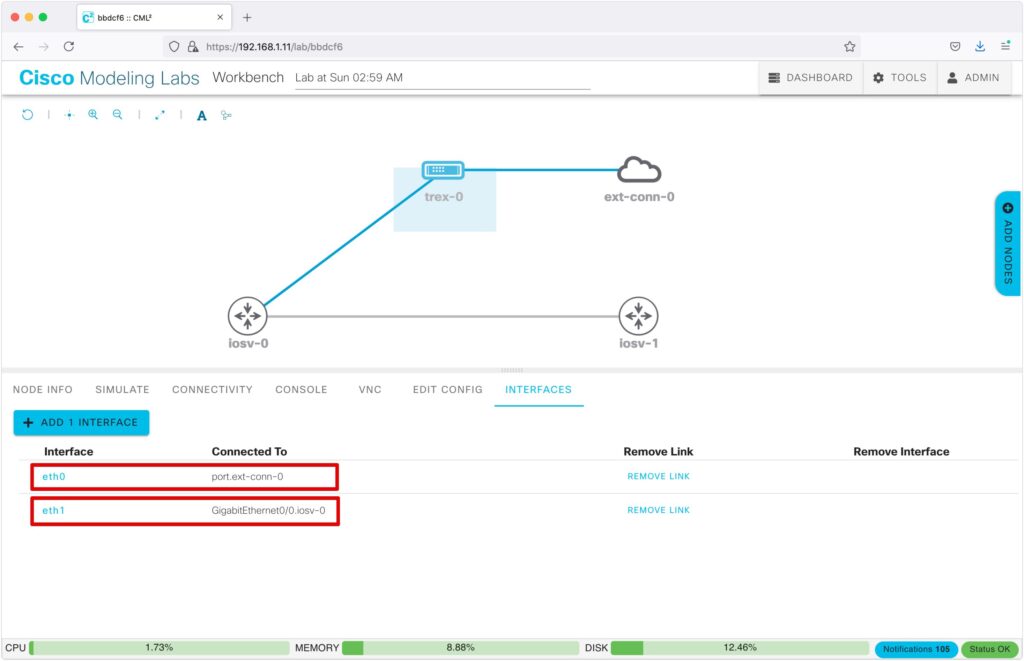
TRexは、デフォルトで”eth0″と”eth1″の2つのポートを持っています。
“eth0″はマネジメント用のポートのため、”External Connector”と接続し、外部からアクセスできるようにします。
“eth1″は片方のIOSノードと接続します。
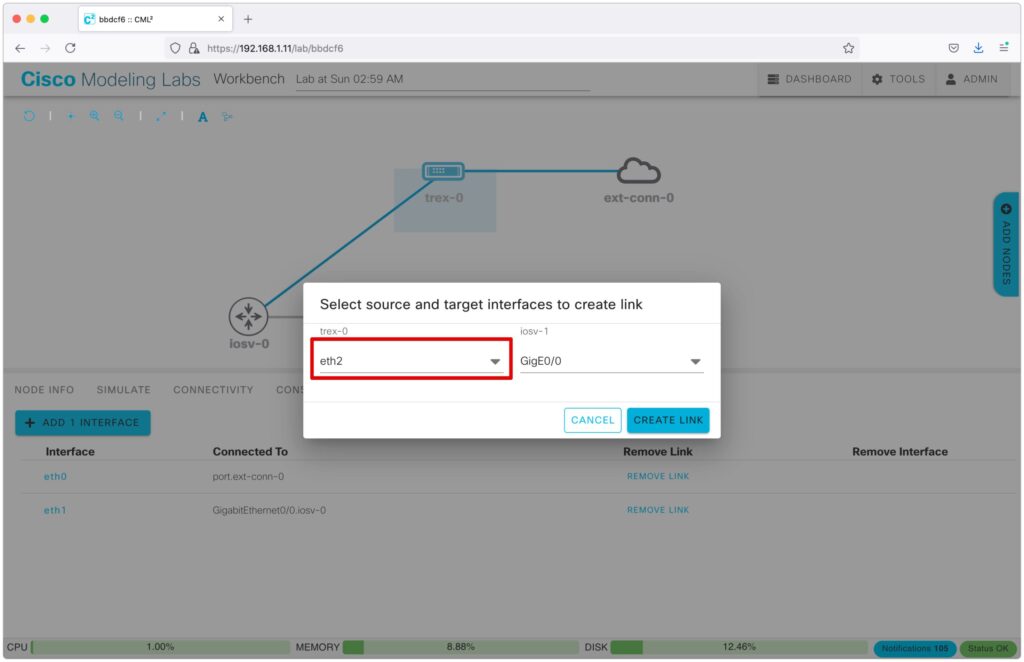
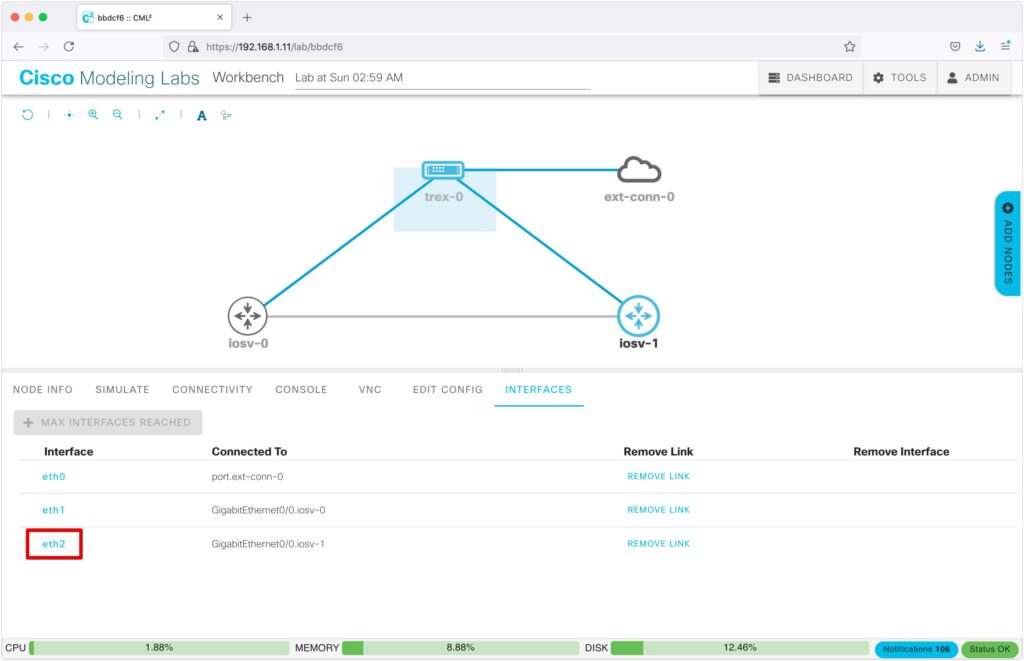
TRexと3ノード目を接続すると、自動的に”eth2″が追加されます。
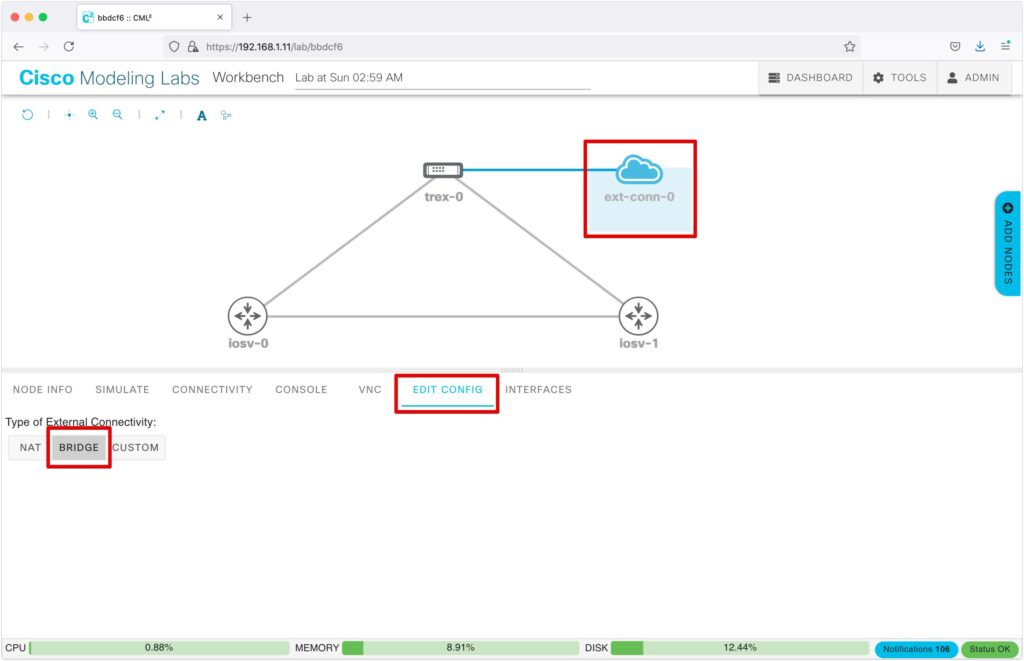
TRexは、DHCPクライアントとして設定されています。DHCPでIPアドレスを取得するため、”External Connector”はBRIDGE方式で接続します。
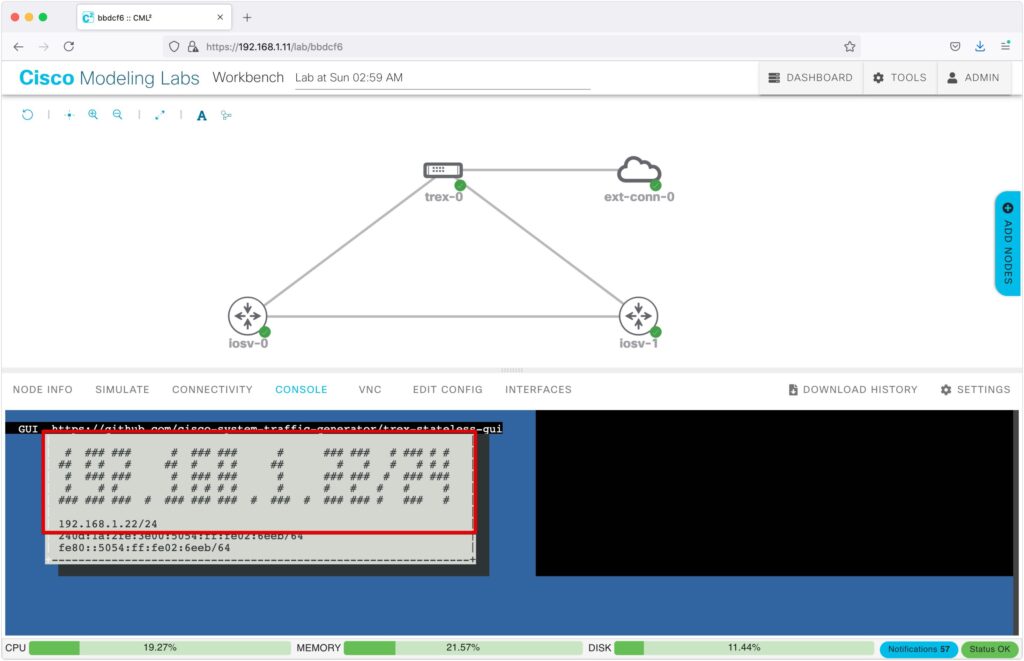
ノードの起動が完了したら、TRexのコンソールを選択します。
DHCPで取得されたIPアドレスが表示されます。
GUIツールのインストール
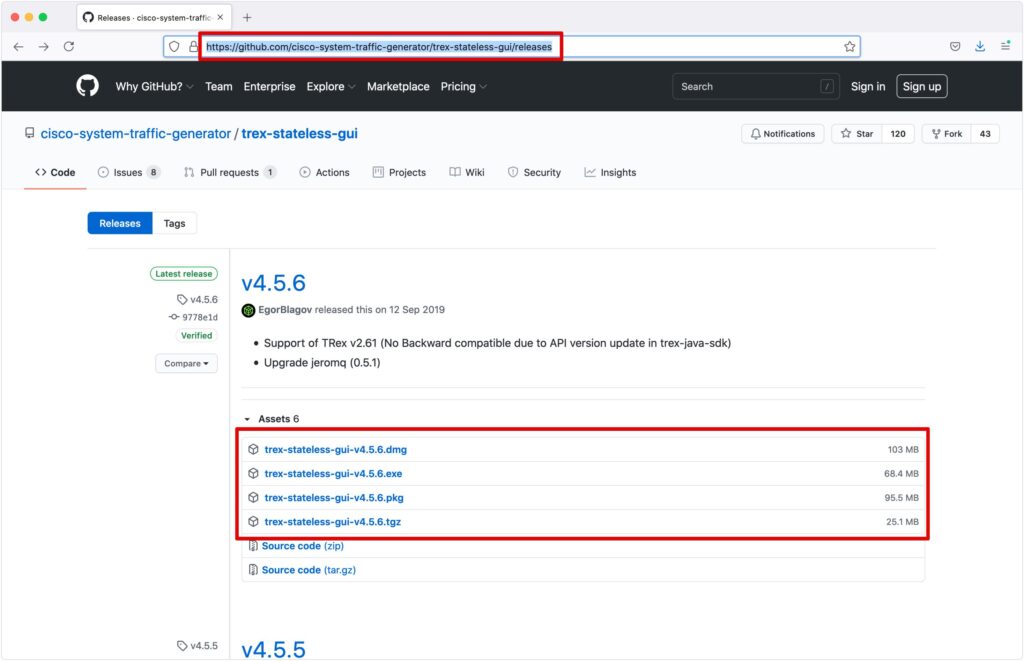
TRexへのアクセスには、ブラウザではなく専用のGUIツールを利用します。
以下URLから、環境にあったツールをダウンロードし、インストールしてください。
https://github.com/cisco-system-traffic-generator/trex-stateless-gui/releases
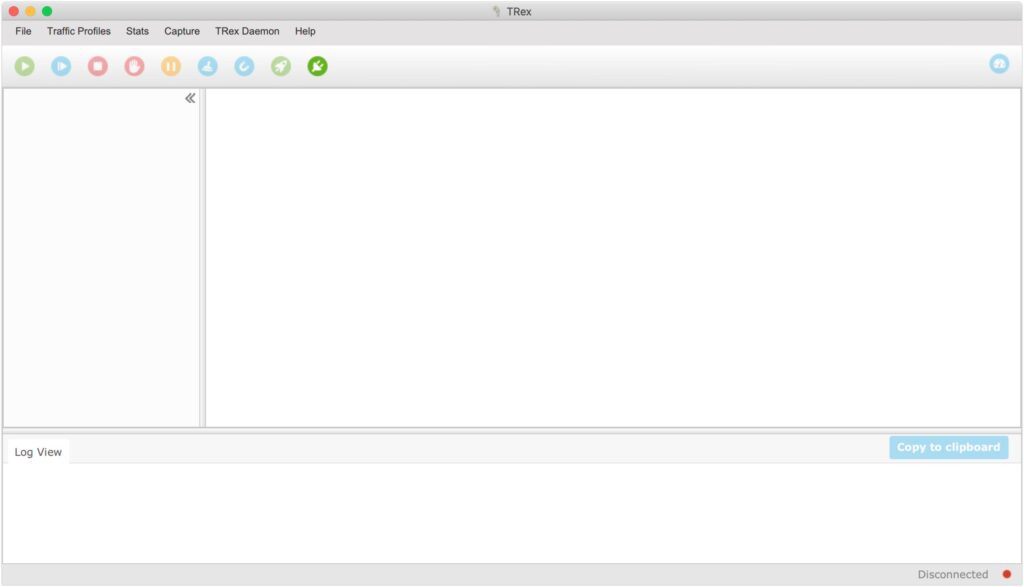
ツールを起動すると下記の画面が表示されます。
TRexへの接続
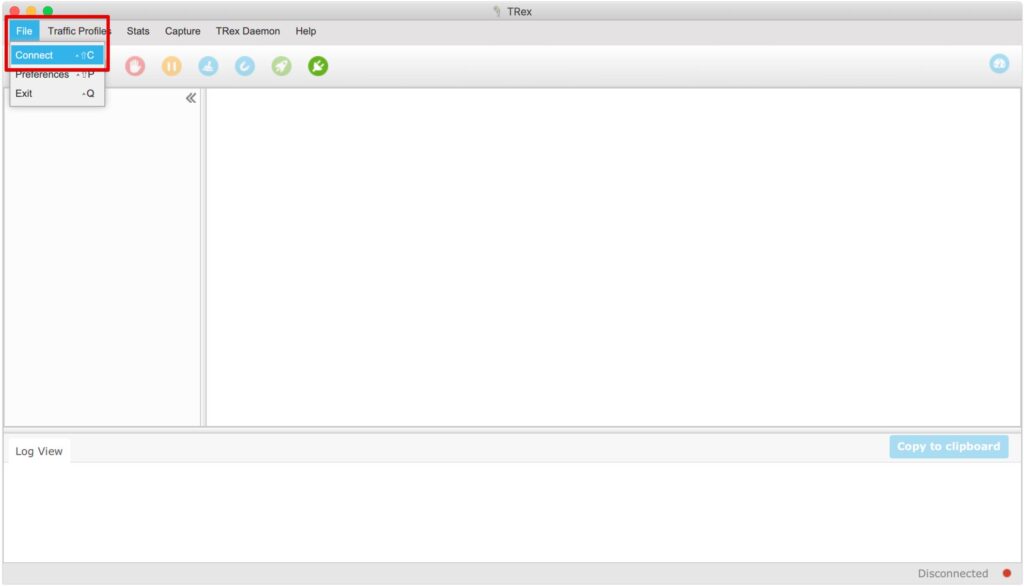
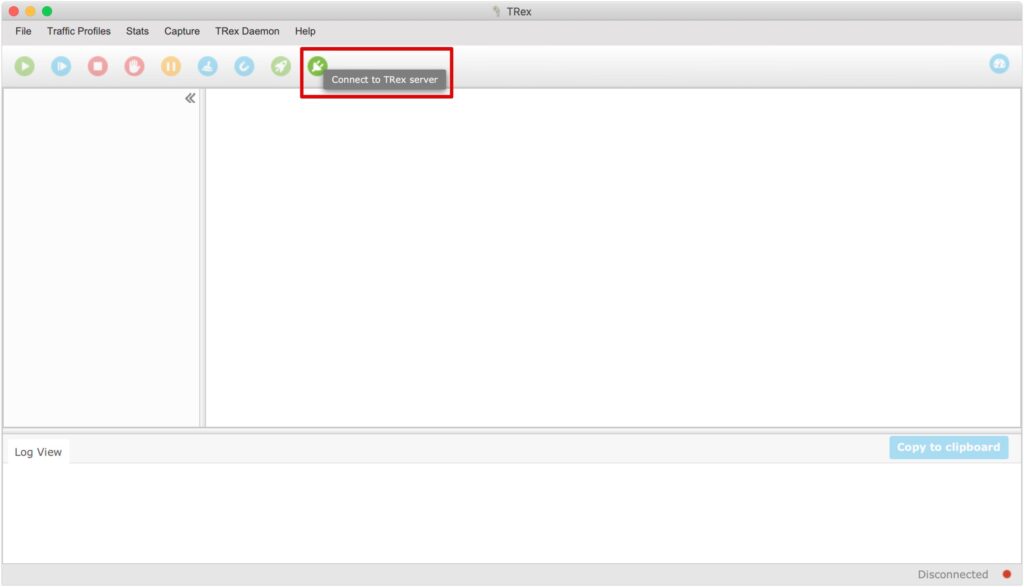
メニューの「File」→「Connect」を選択するか、コンセントブラグのようなアイコンをクリックします。
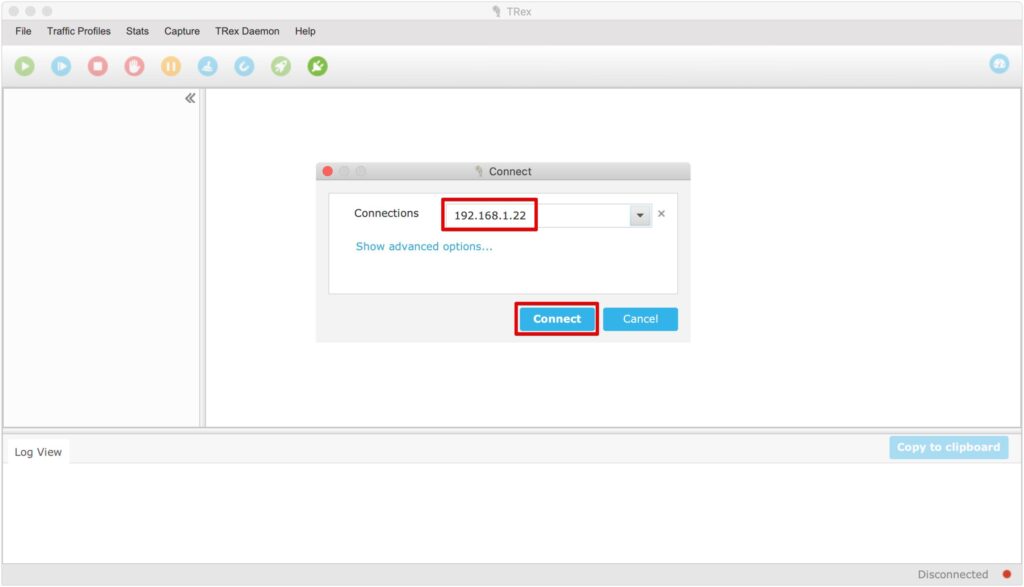
接続先のIPアドレスを入力し、「Connect」をクリックします。
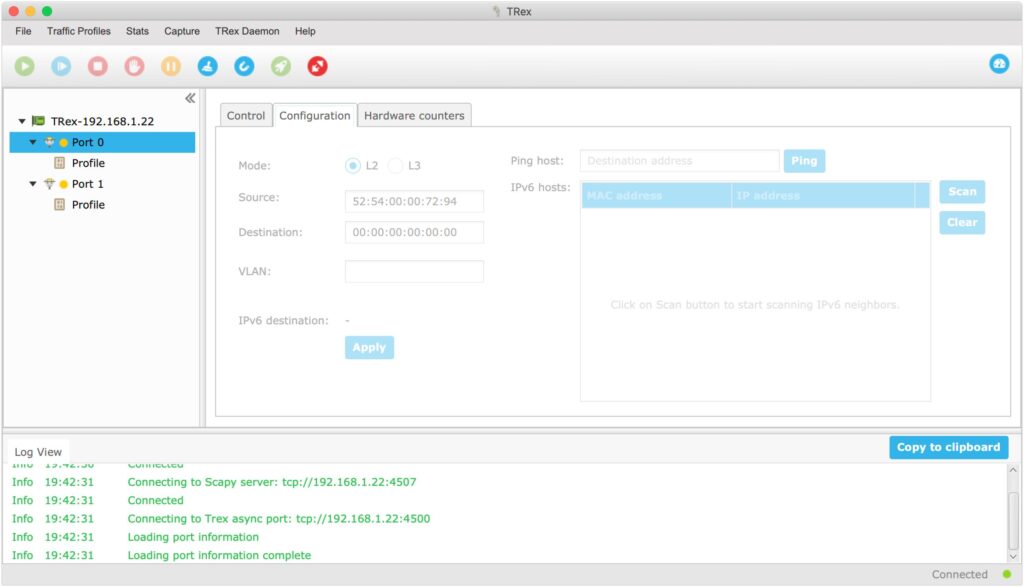
接続されると下記の画面が表示されます。
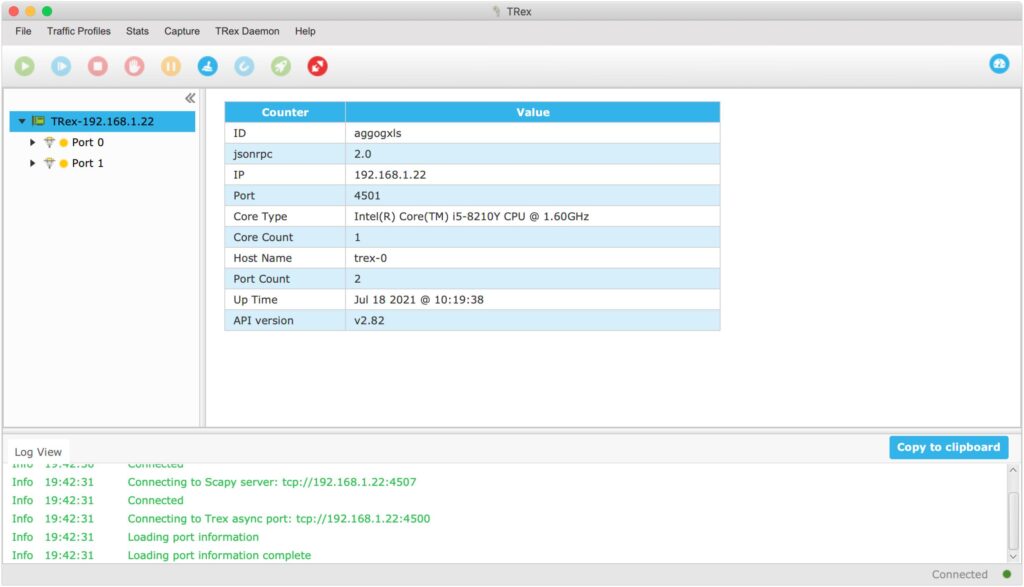
もし、下記のエラーが表示され接続できない場合は、TRexのバージョンを確認してください。
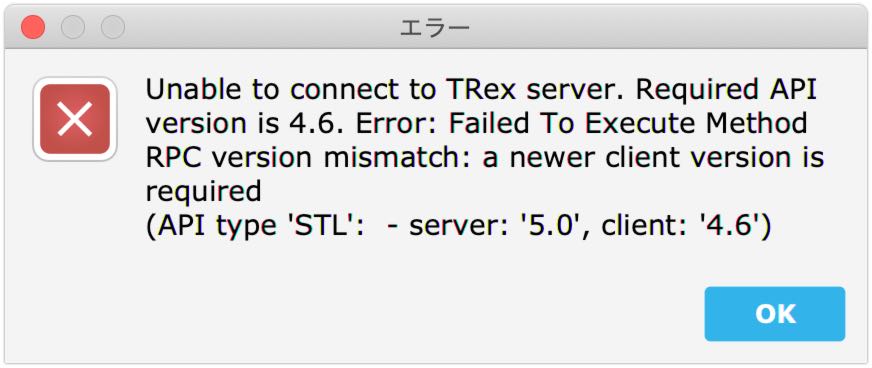
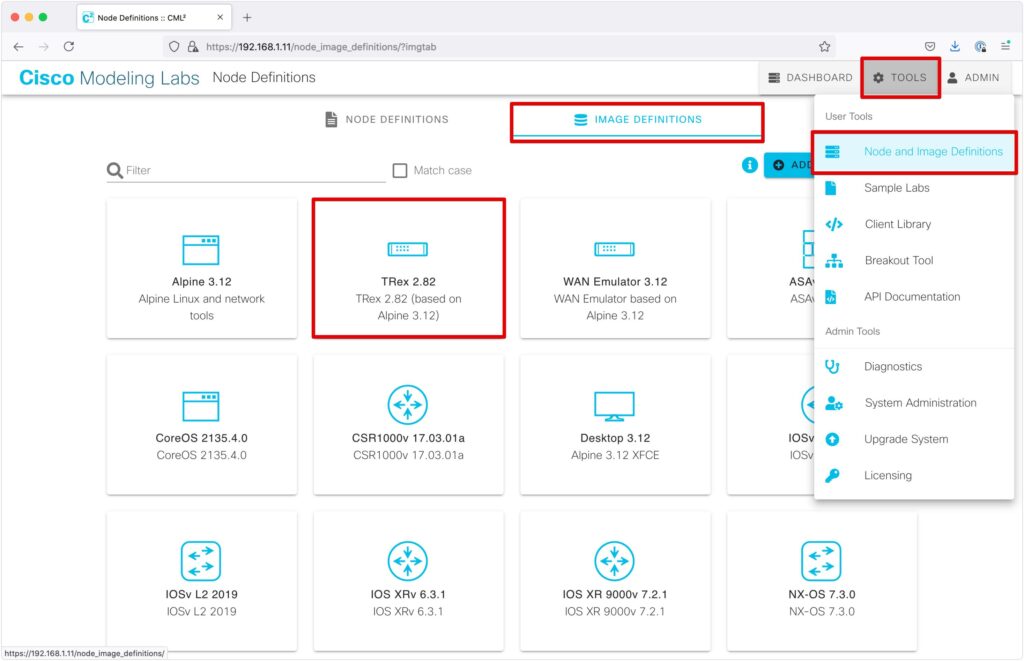
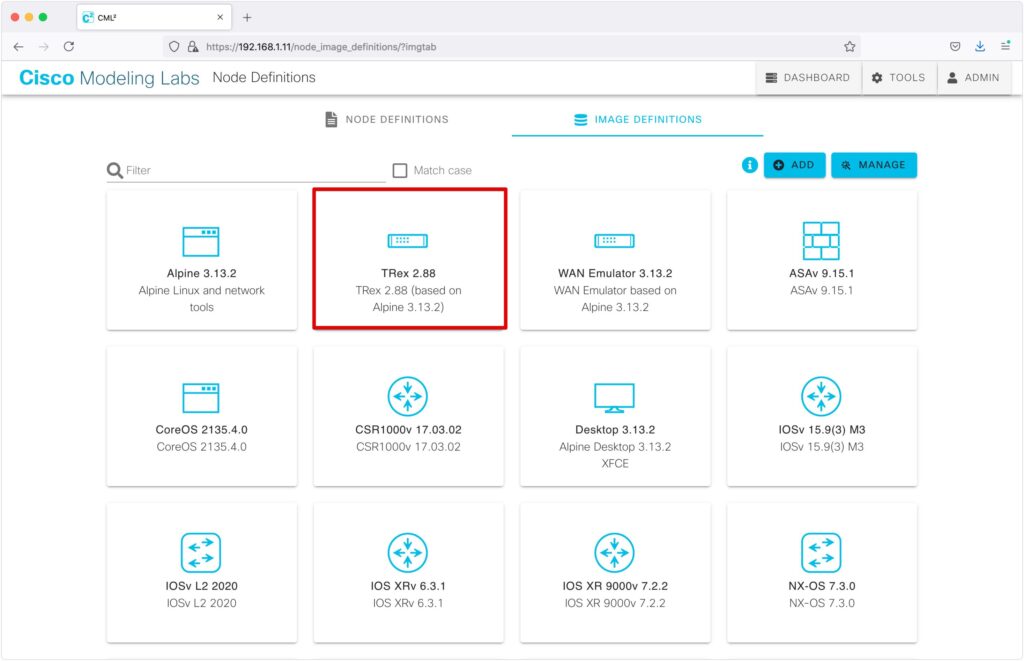
CMLの画面から、「TOOLS」→「Node and Image Definitions」→「IMAGE DEFINITIONS」を選択するとインストールされているバージョンが分かります。
2021年7月時点ですが、2.82であれば問題なく利用できます。
2.88の場合は、まだTRexのGUIツールが対応していないようです。
その場合、VMware起動時に読み込む”refplat_p-YYYYMMDD-fcs.iso”を古いバージョンに変更しましょう。
※”refplat_p-20201110-fcs.iso”を読み込めば、バージョン2.82のTRexがインストールされました。
TRexのネットワーク設定
少し分かりづらいのですが、”Port 0″が”eth1″ 、”Port1″が”eth2″と対応しています。
“Port 0″を右クリックし、「Acquire」をクリックします。
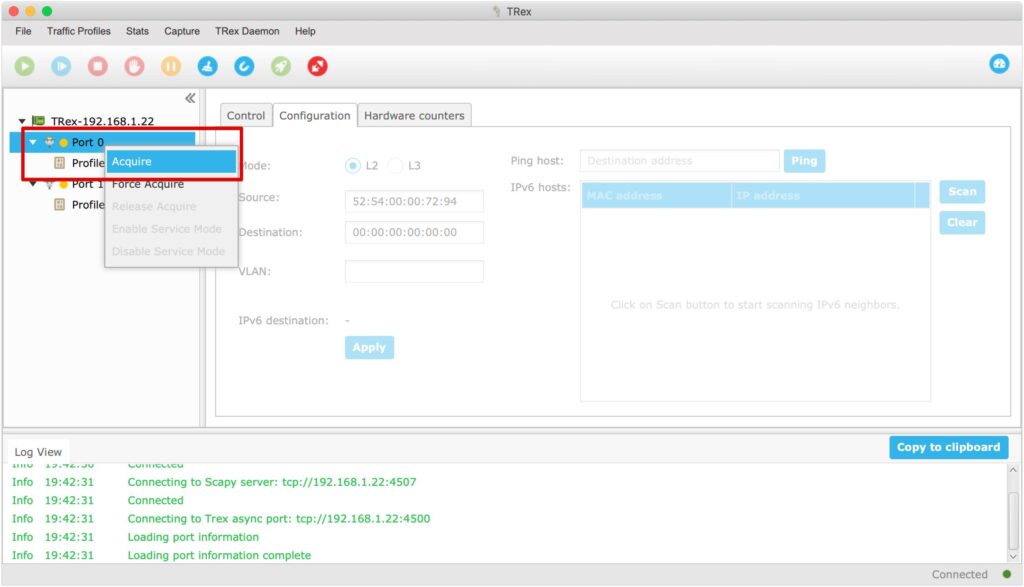
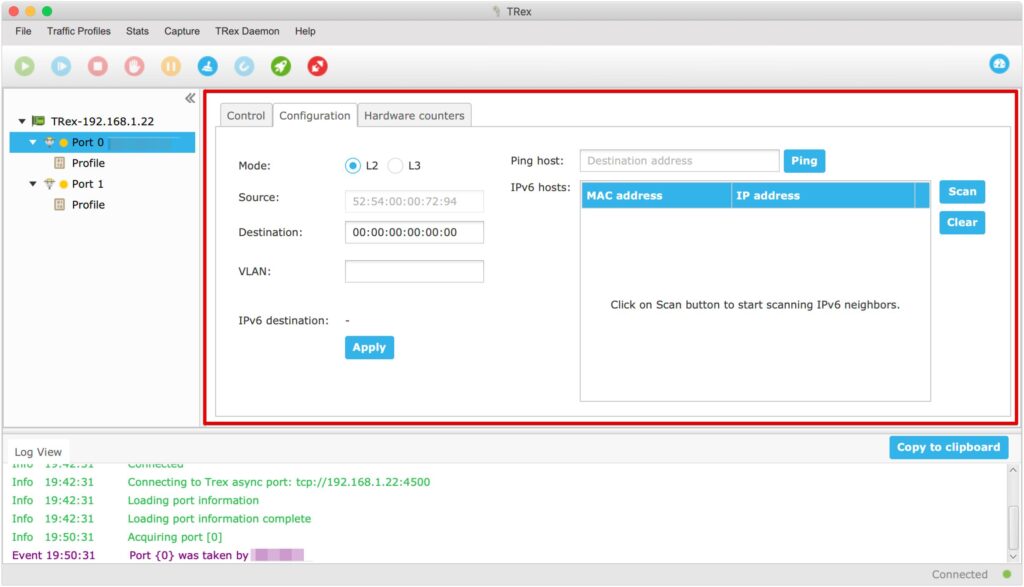
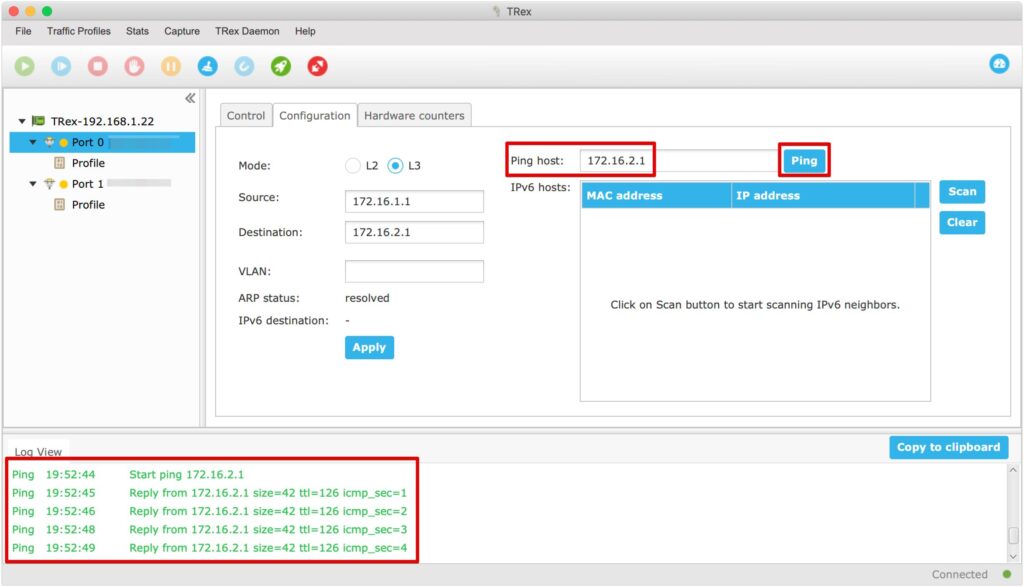
右側の「Configuration」が編集可能になります。
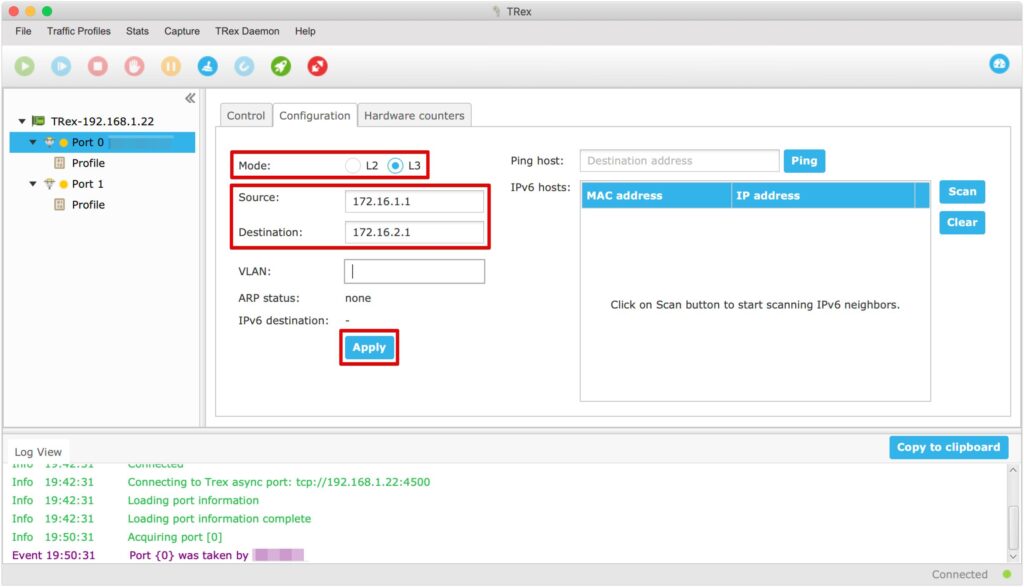
Modeは、”L3″を選択します。
Sourceは、eth1に設定するIPアドレス(172.16.1.1)を入力します。
Destinationは、eth2に設定するIPアドレス(172.16.2.1)を入力します。
入力が完了したら、「Apply」をクリックして、設定を適用します。
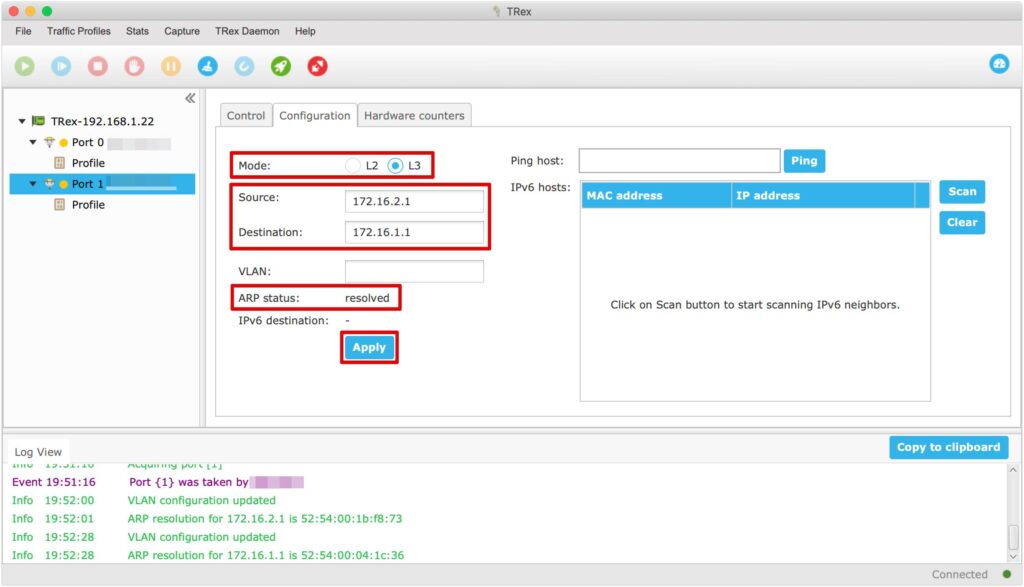
「ARP status」が、”resolved”になればOKです。

同様に”Port 1″も設定します。
Sourceは、eth2に設定するIPアドレス(172.16.2.1)を入力します。
Destinationは、eth1に設定するIPアドレス(172.16.1.1)を入力します。
“Port 0″から対向のIPアドレスにPingを実施します。
“Ping host”にIPアドレスを入力し、「Ping」をクリックします。
画面下部でPing応答があることが確認できます。
プロファイルとストリームの作成
実際にトラフィックを発生させるためにプロファイルとストリームを作成していきます。
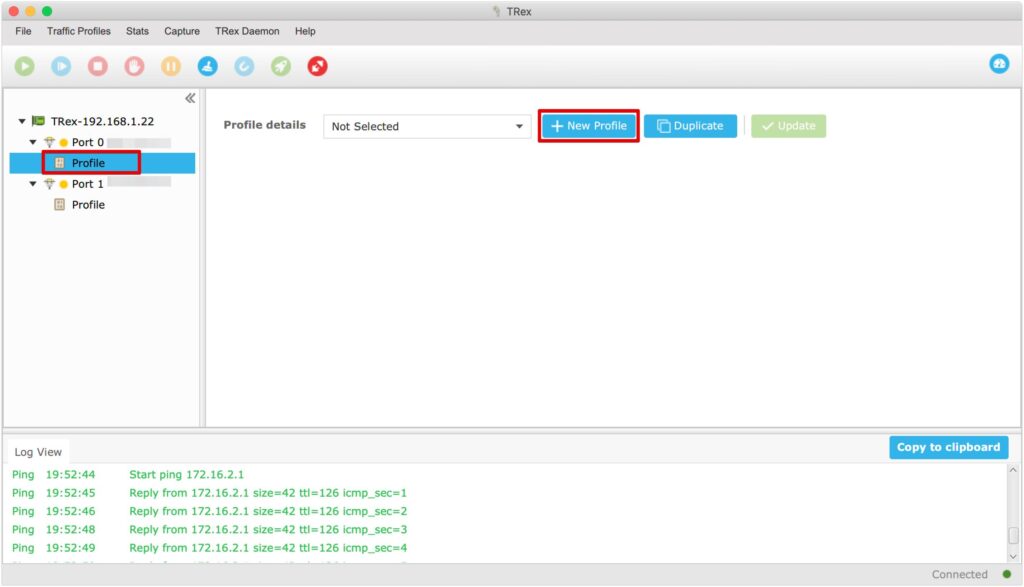
“Port 0″の「Profile」を選択し、「+New Profile」をクリックします。
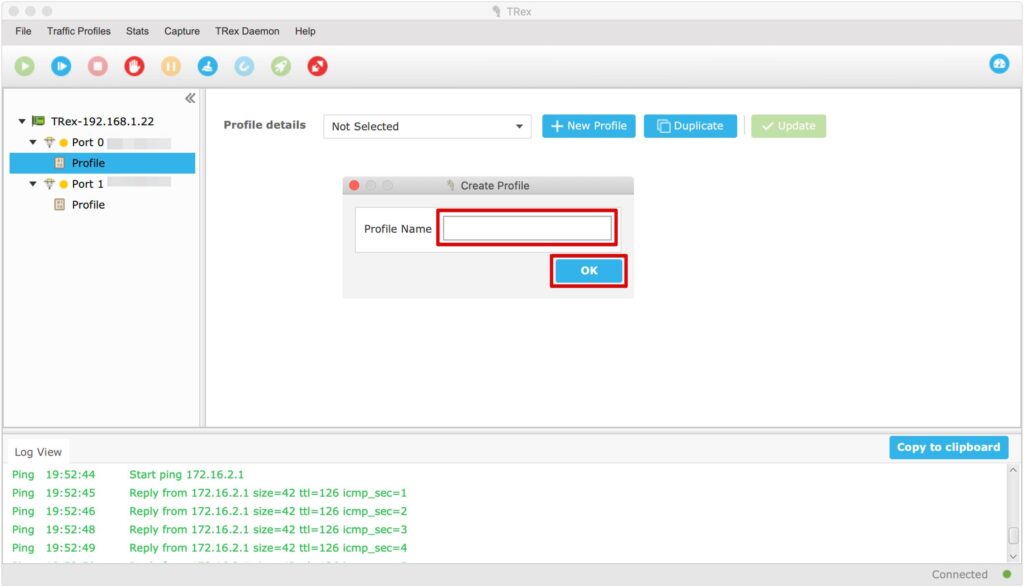
プロファイル名を入力し、OKをクリックします。
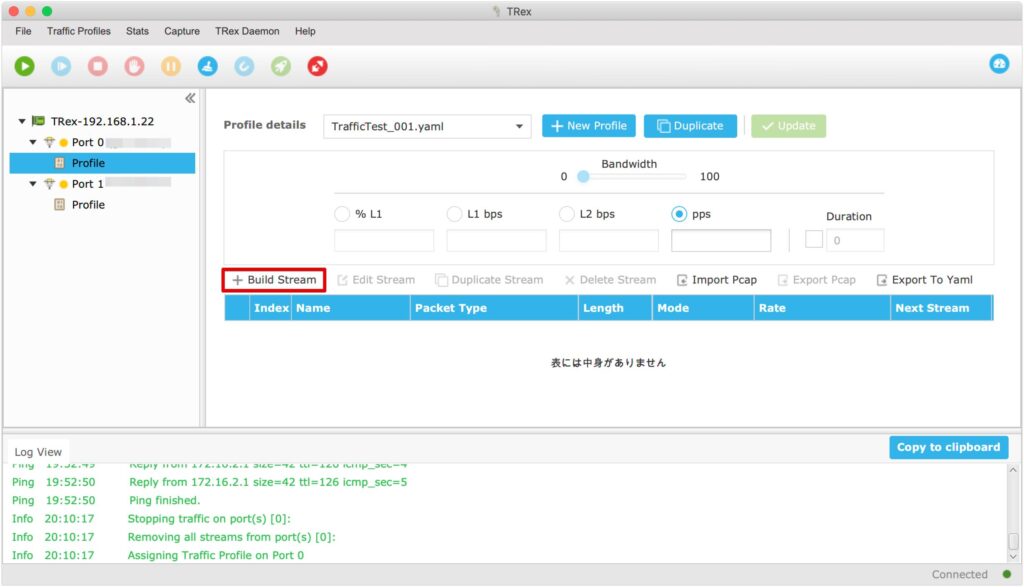
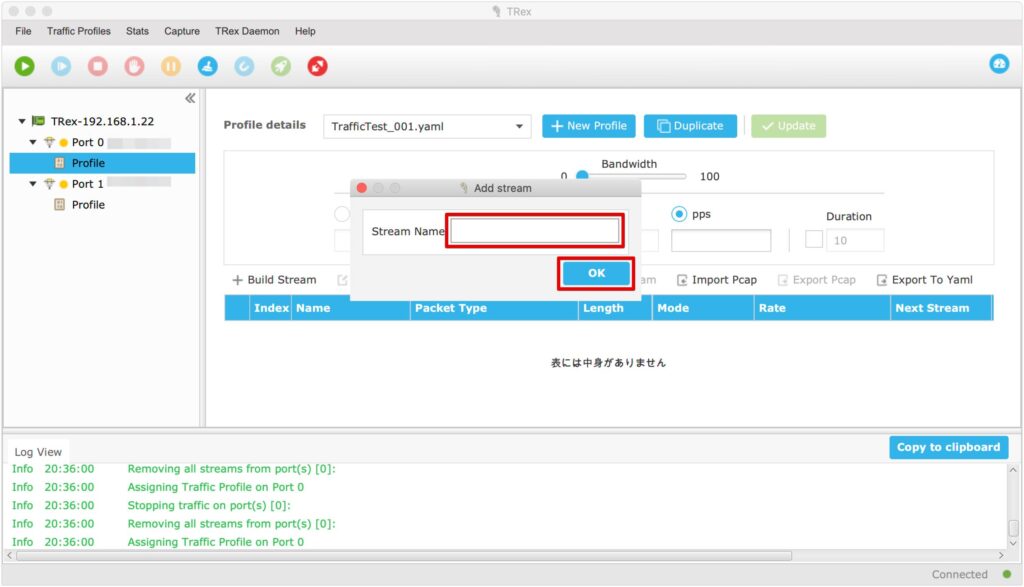
「+Build Stream」をクリックします。
ストリーム名を入力し、OKをクリックします。
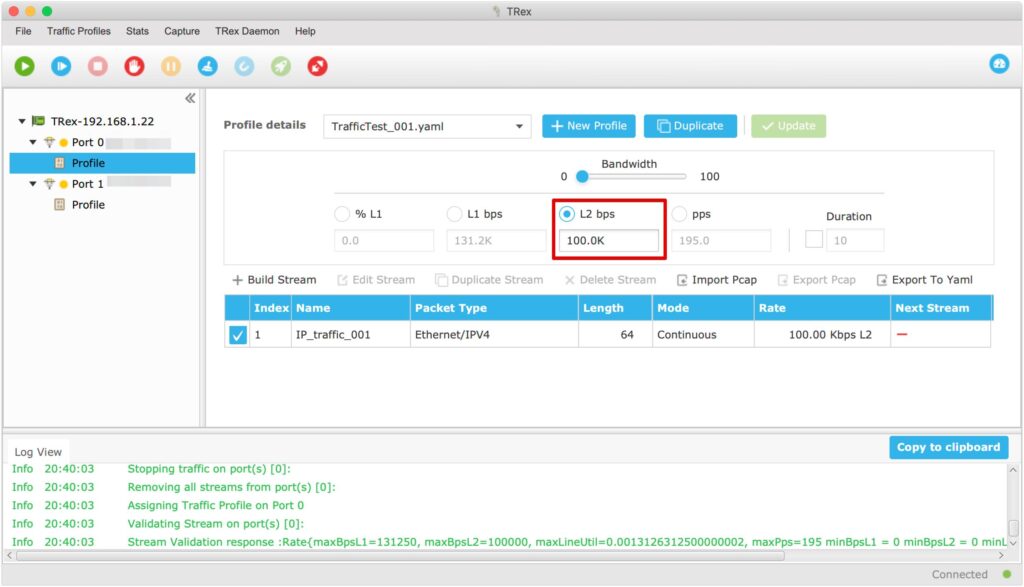
ストリームの編集画面です。
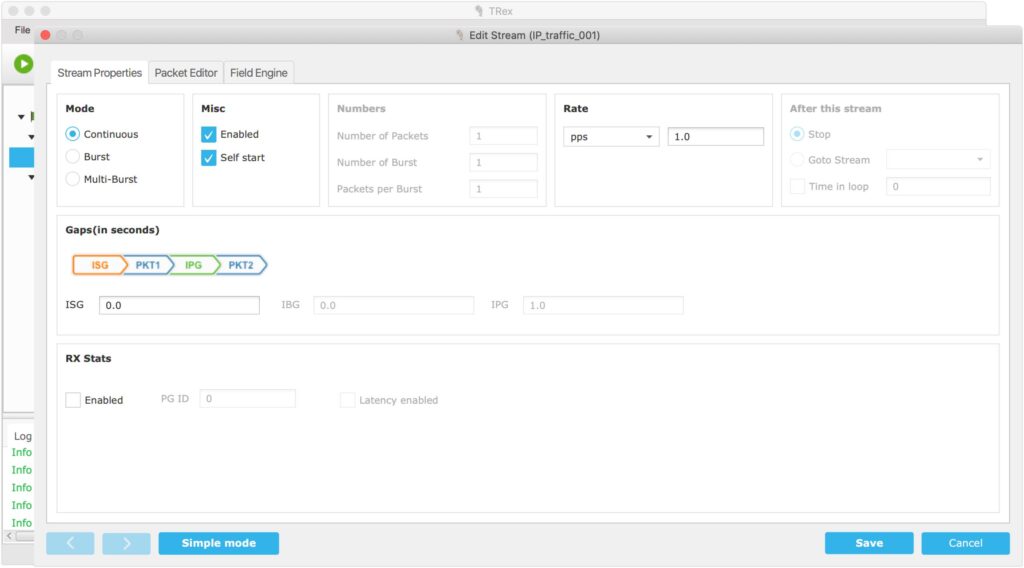
今回はL2レベルでの通信速度を100Kbps、TCP/UDPを指定しないIP通信を作成します。
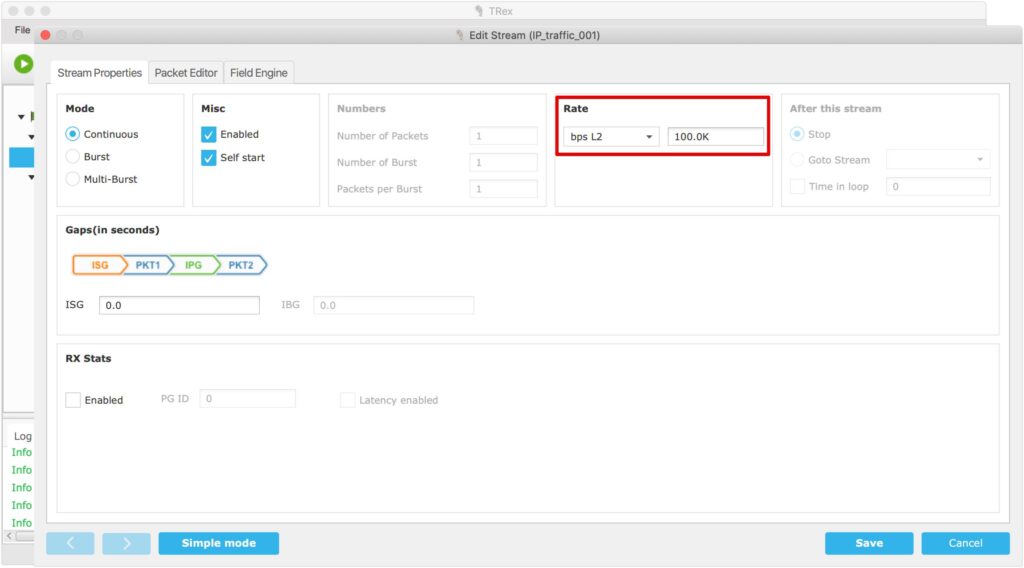
Rateで、「bps L2」を選択し、「100.0K」と入力します。
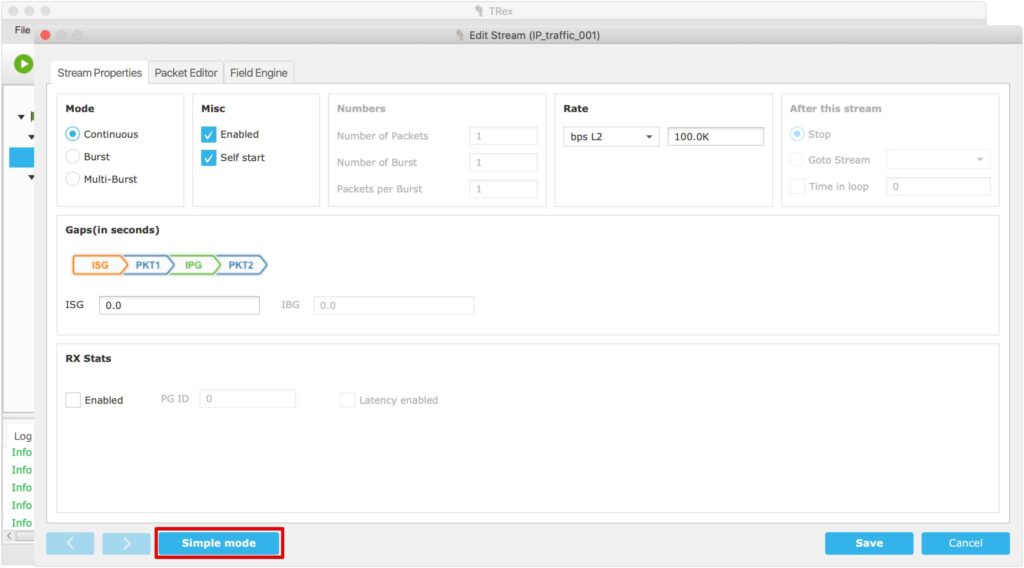
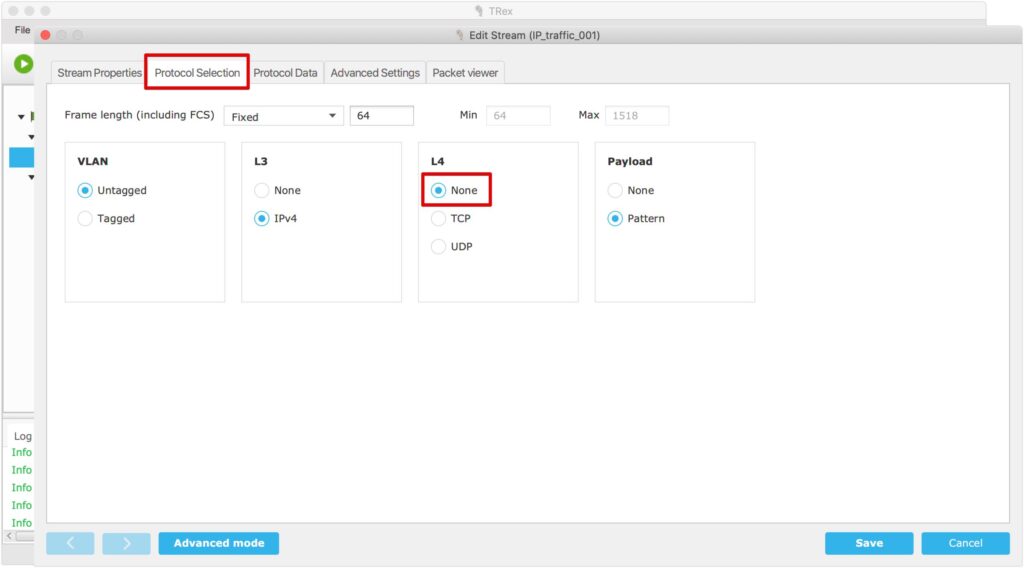
「Simple mode」をクリックします。
「Protocol Selection」タブへ移動し、L4で「None」を選択します。
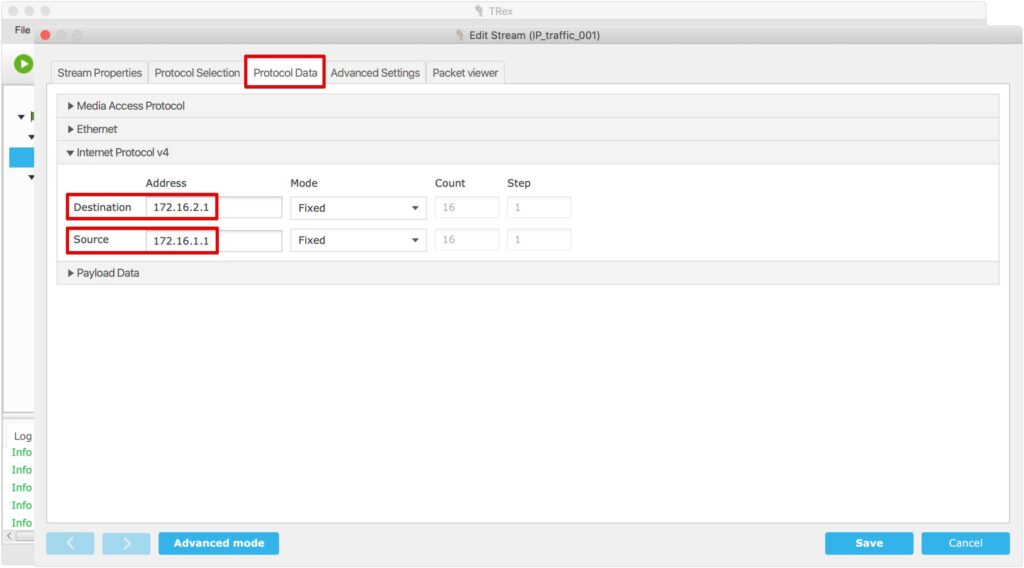
「Protocol Data」タブへ移動します。
Destinationには、eth2に設定したIPアドレス(172.16.2.1)を入力します。
Sourceには、eth1に設定したIPアドレス(172.16.1.1)を入力します。
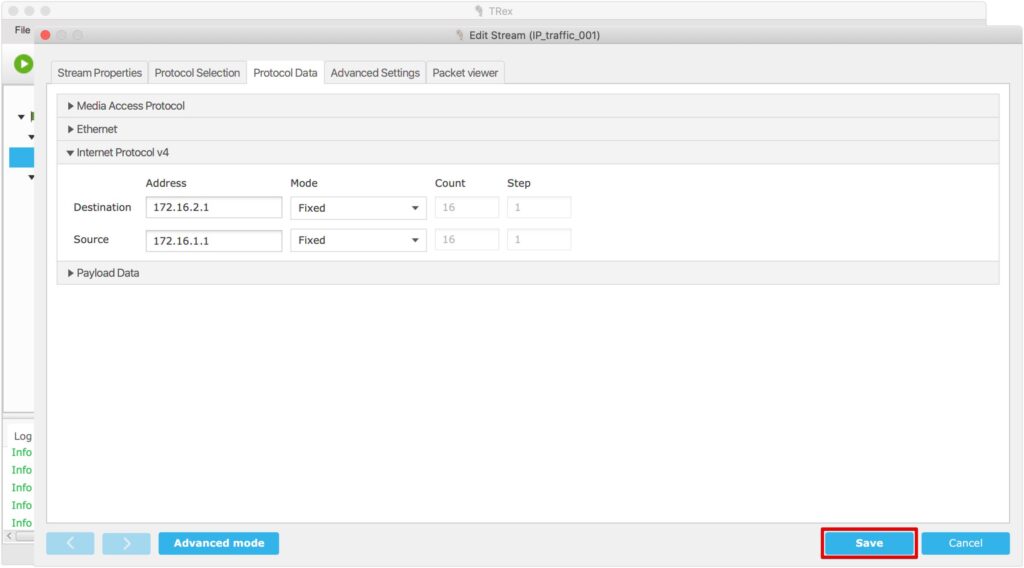
「Save」をクリックし、保存します。
設定したストリームが作成されています。
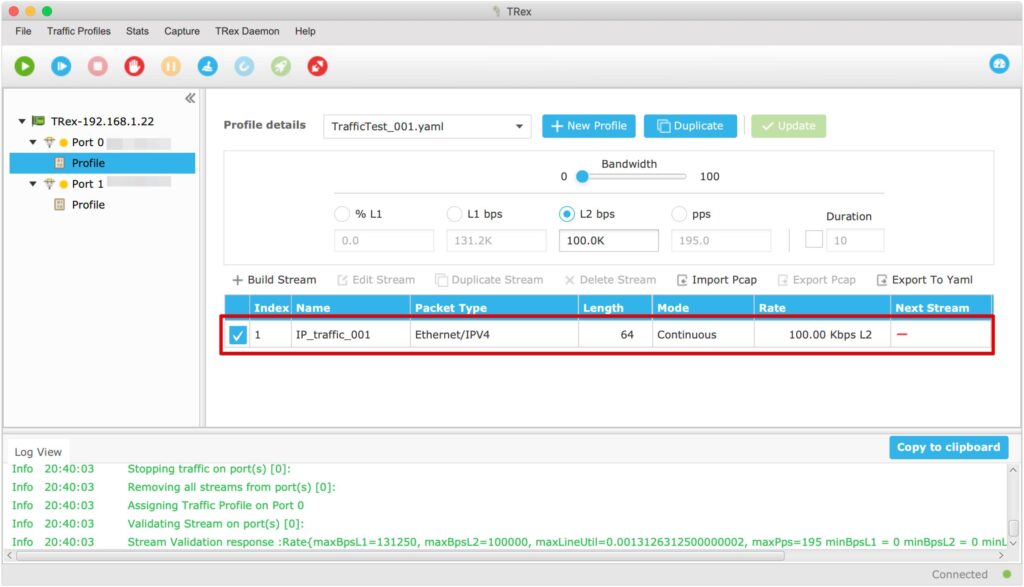
プロファイルの設定も、”L2 bps”を選択し”100.0K”と入力します。
トラフィック生成の開始
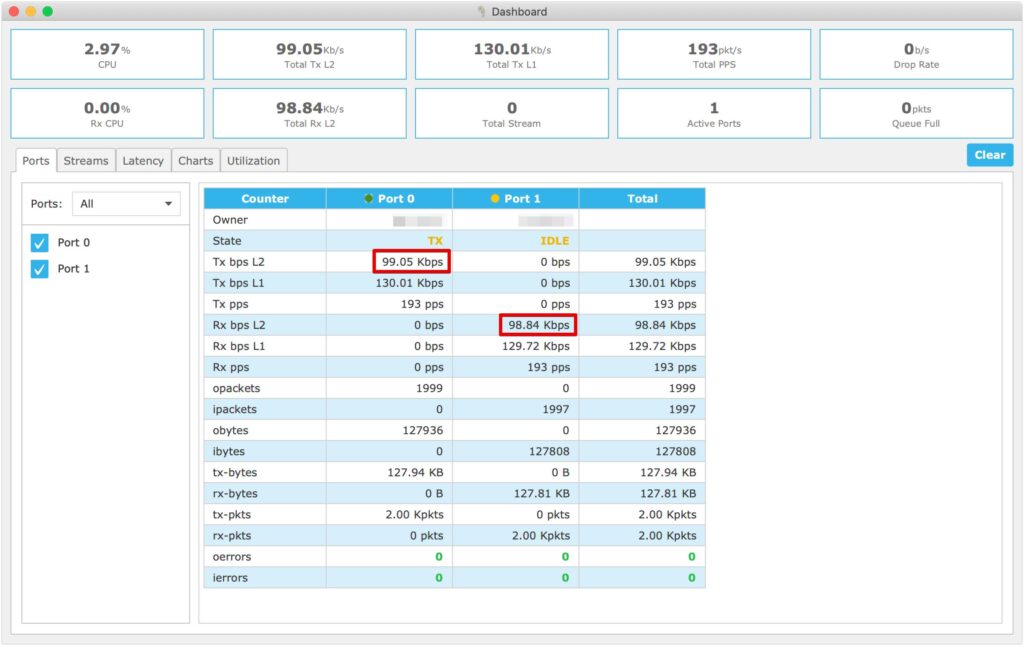
トラフィック生成を開始する前に、画面右上の「Dashboard」をクリックします。
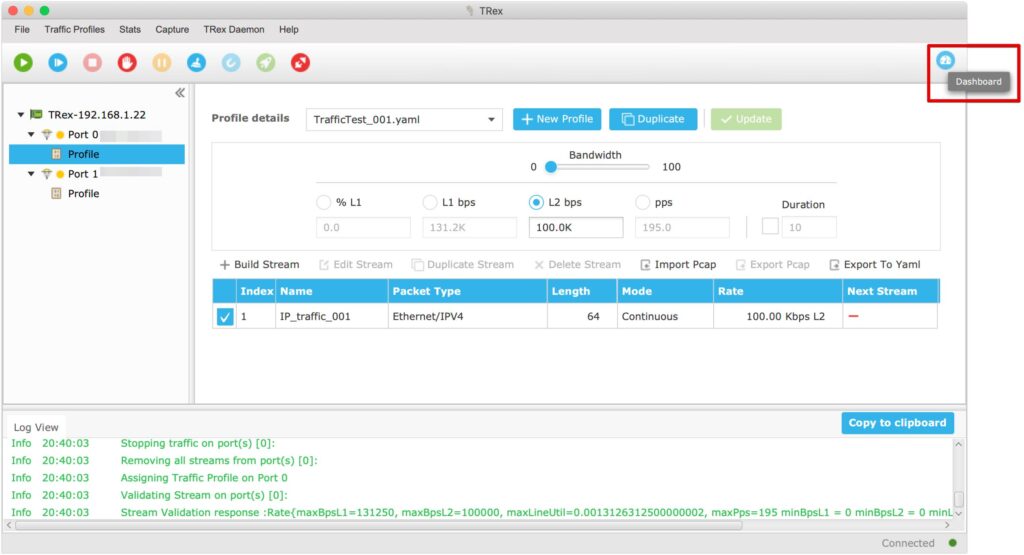
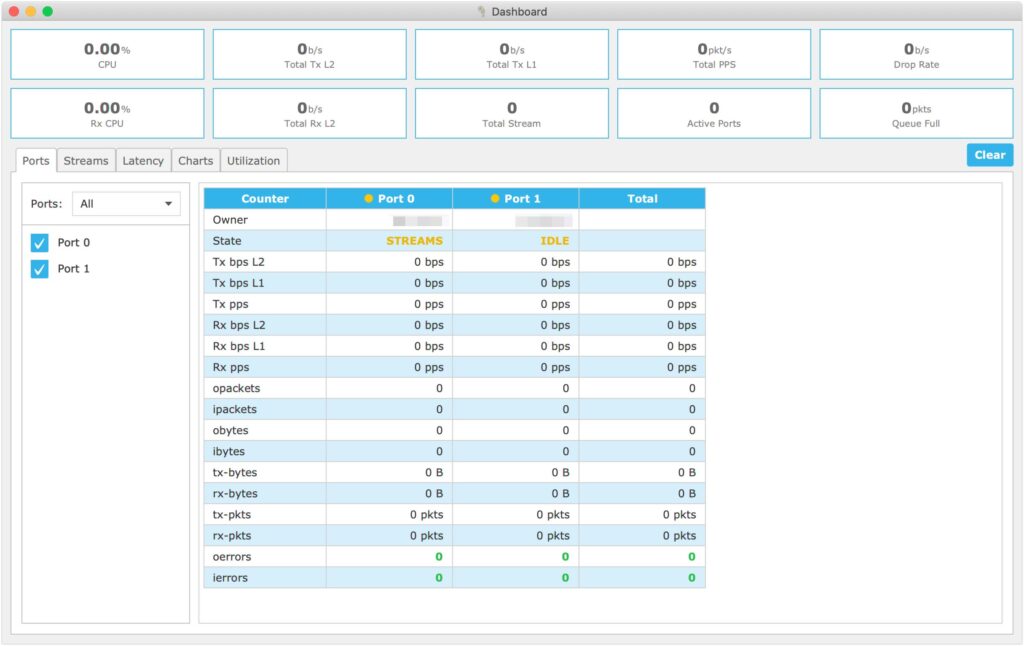
この画面でトラフィックの状況をモニタリングできます。
画面左上の「Start Transit」をクリックし、トラフィック生成を開始します。
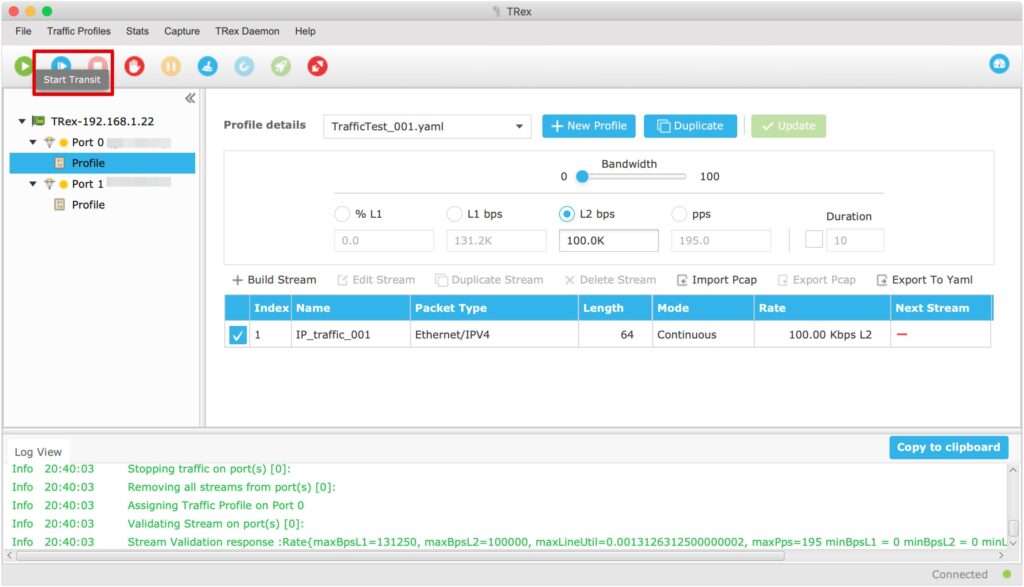
Dashboardの画面で、約100.0Kbpsの通信が発生していることが確認できます。
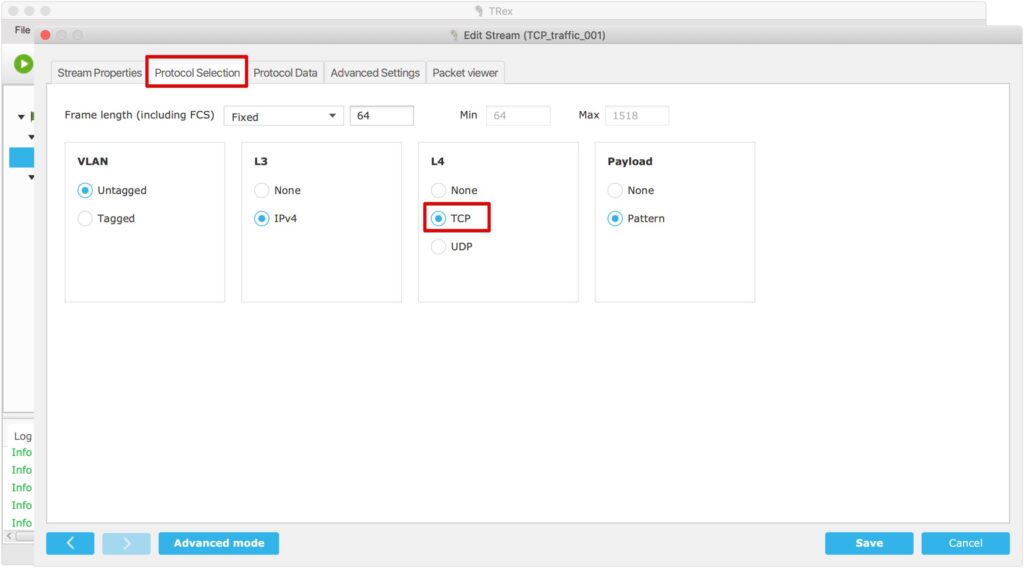
TCPをしているする場合は、「Protocol Selection」タブのL4で「TCP」を選択します。
「Protocol Data」タブの「Transmission Control Protocol」でポート番号を指定します。

これで、トラフィックジェネレーターの説明は完了です。