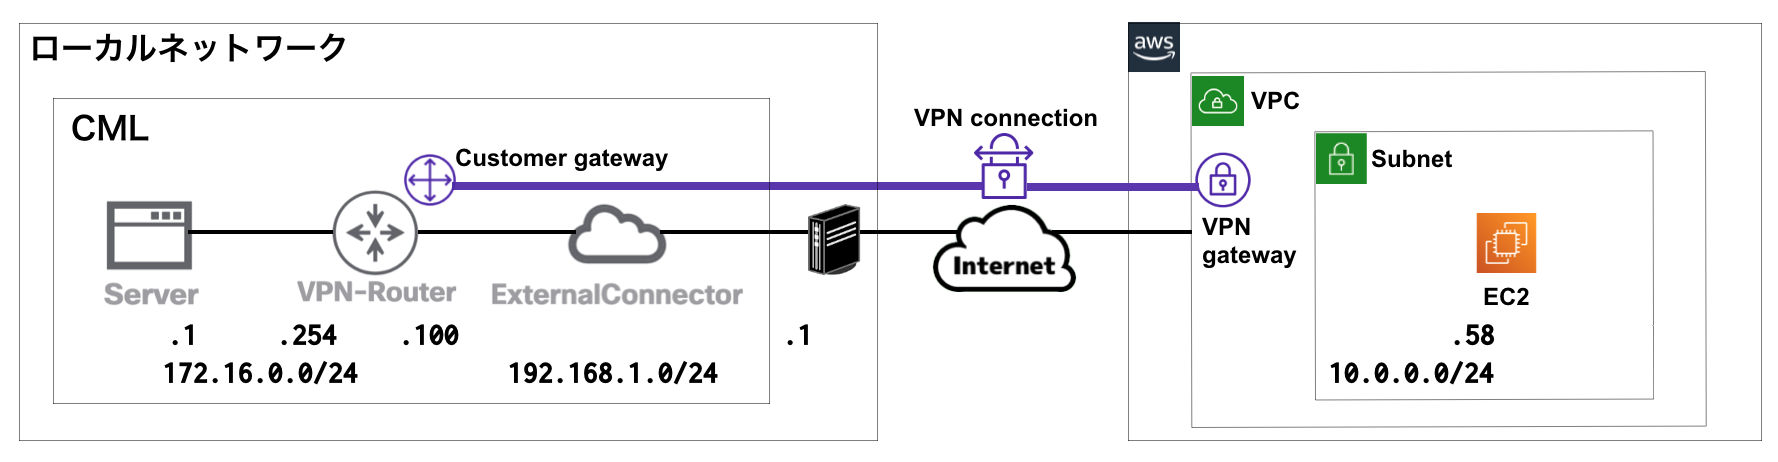
ネットワーク構成
下記の構成でAWSのサイト間VPNを構築しました。
AWS CLI によるVPN接続の作成と削除
VPN接続を作成すると、利用時間により課金されます。費用を抑えるためには、検証時のみVPN接続を作成する必要があります。都度、AWSコンソール画面からの作成は手間がかかるため、AWS CLI によるコマンドラインからの作成と削除方法を説明します。
ユーザーの作成
AWS CLI を利用するためのAWSユーザーを作成します。
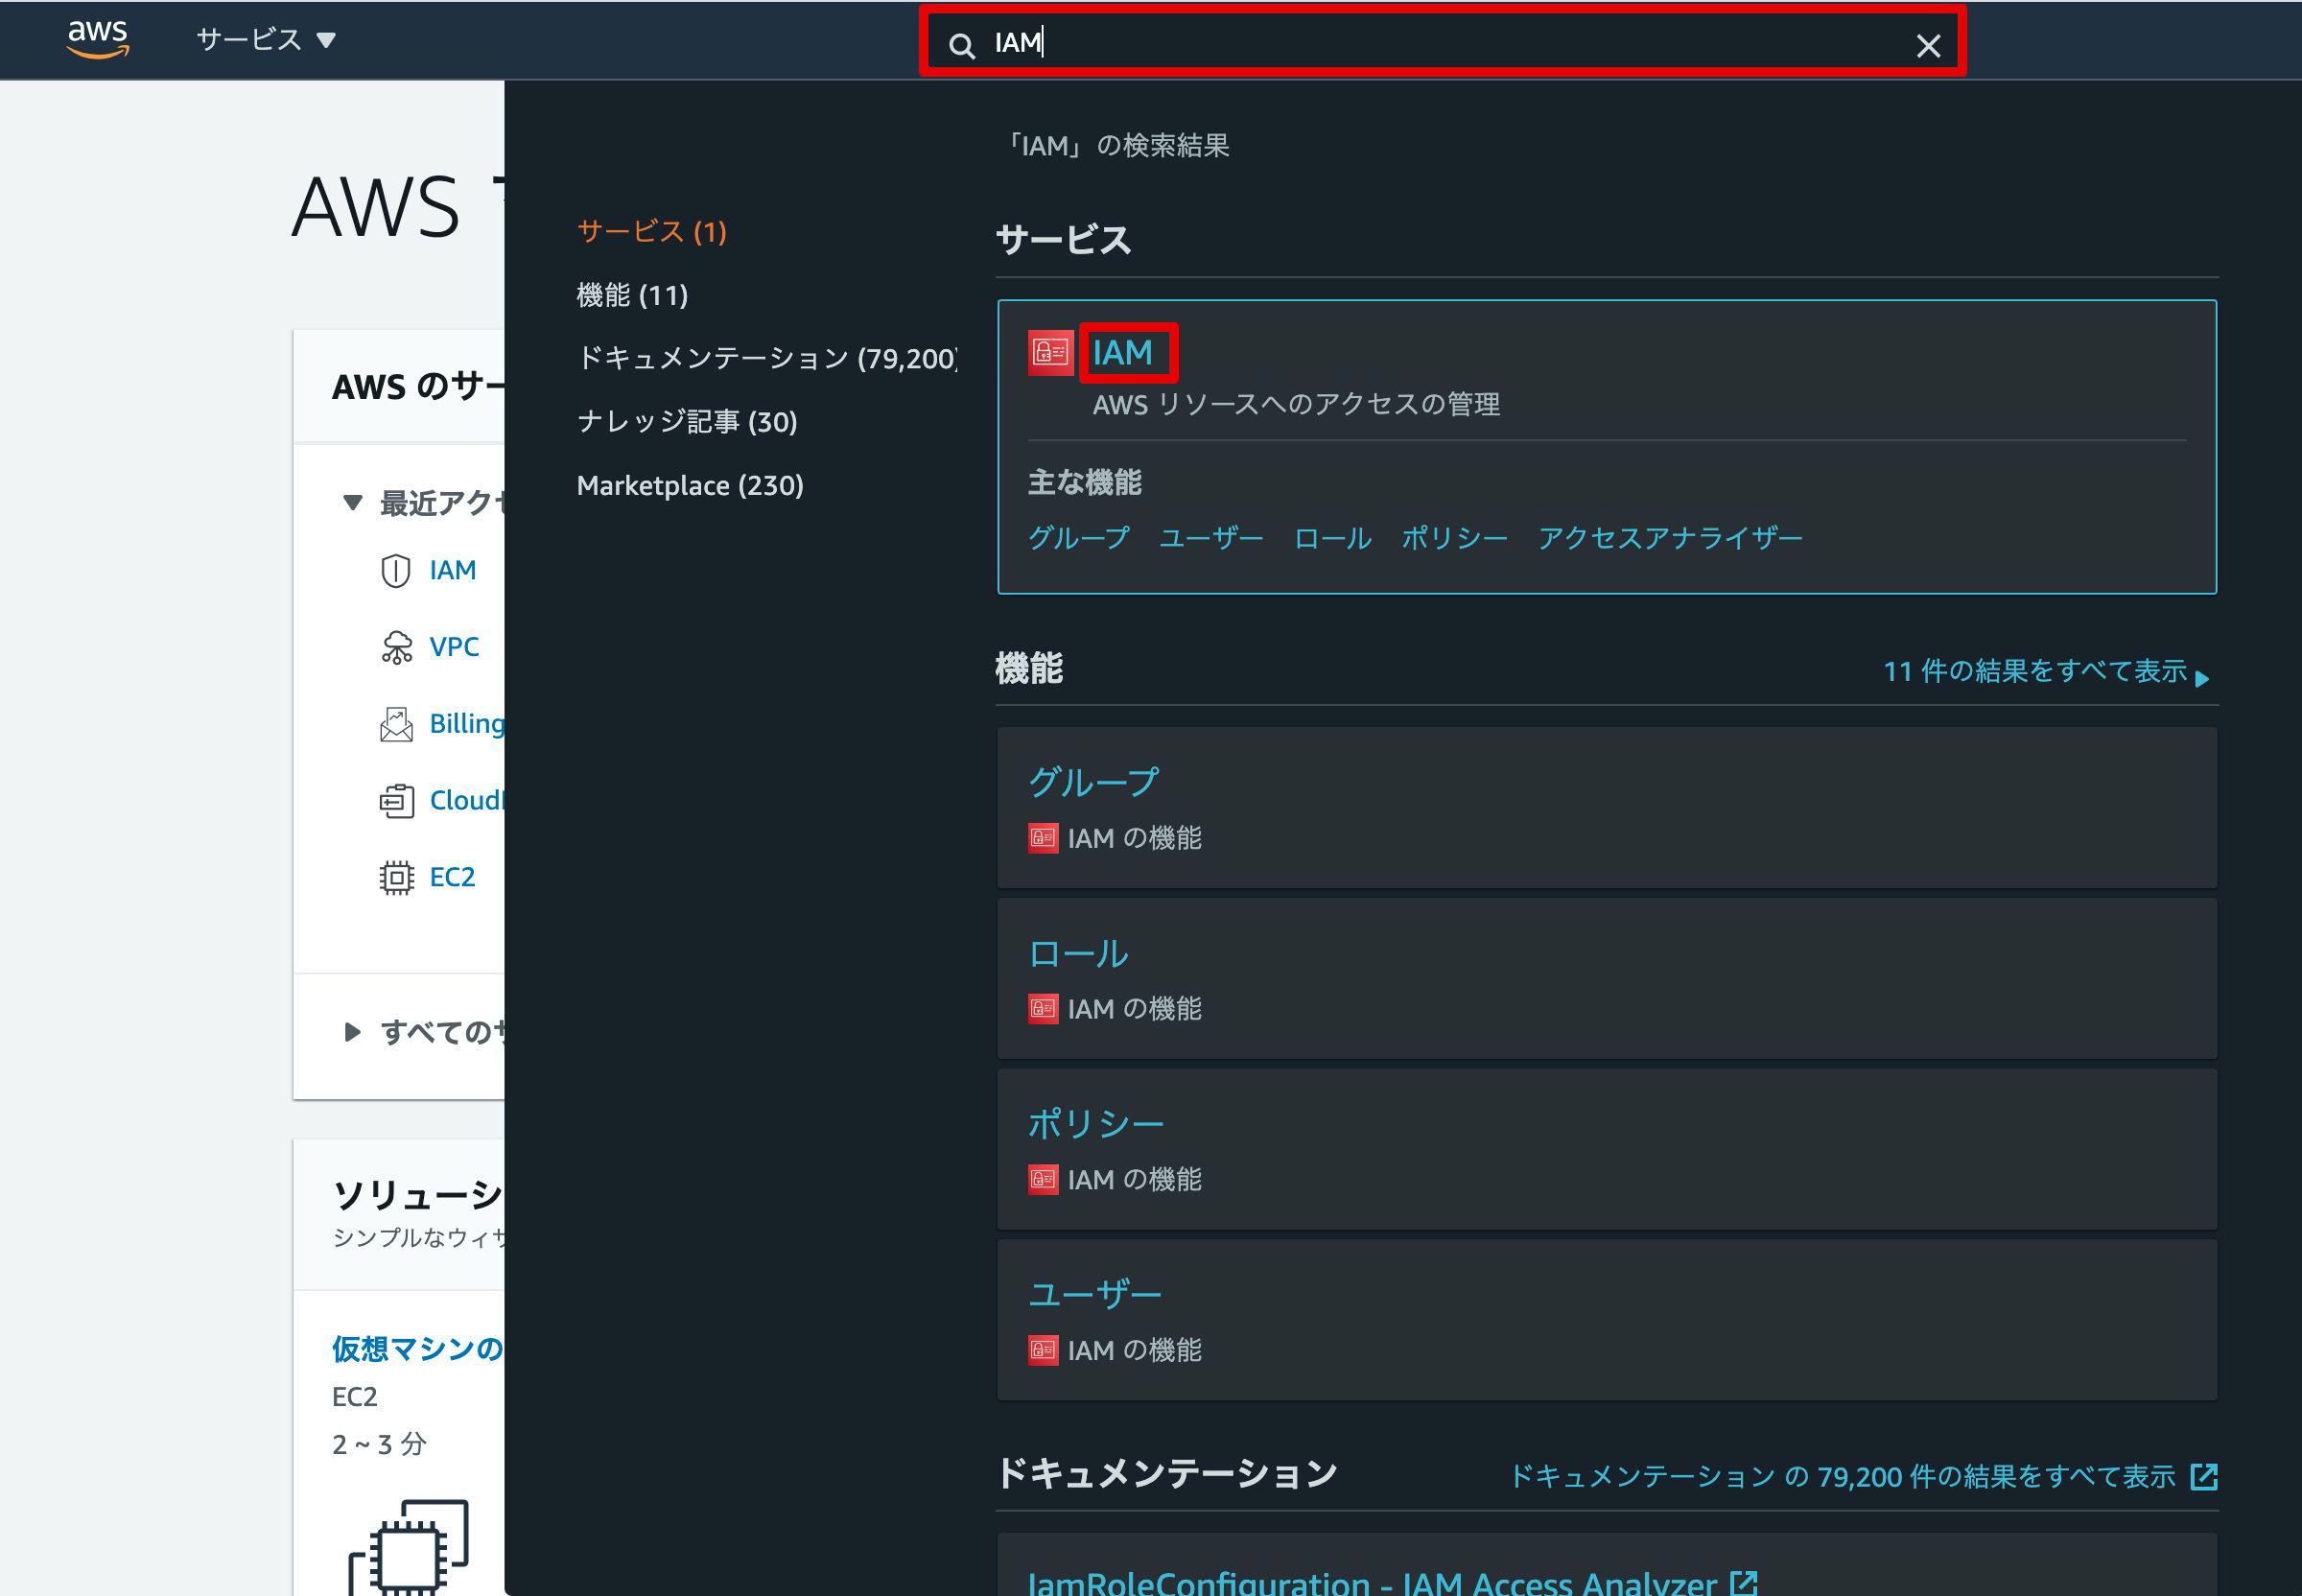
検索窓に”IAM”と入力し、表示される「IAM」をクリックします。
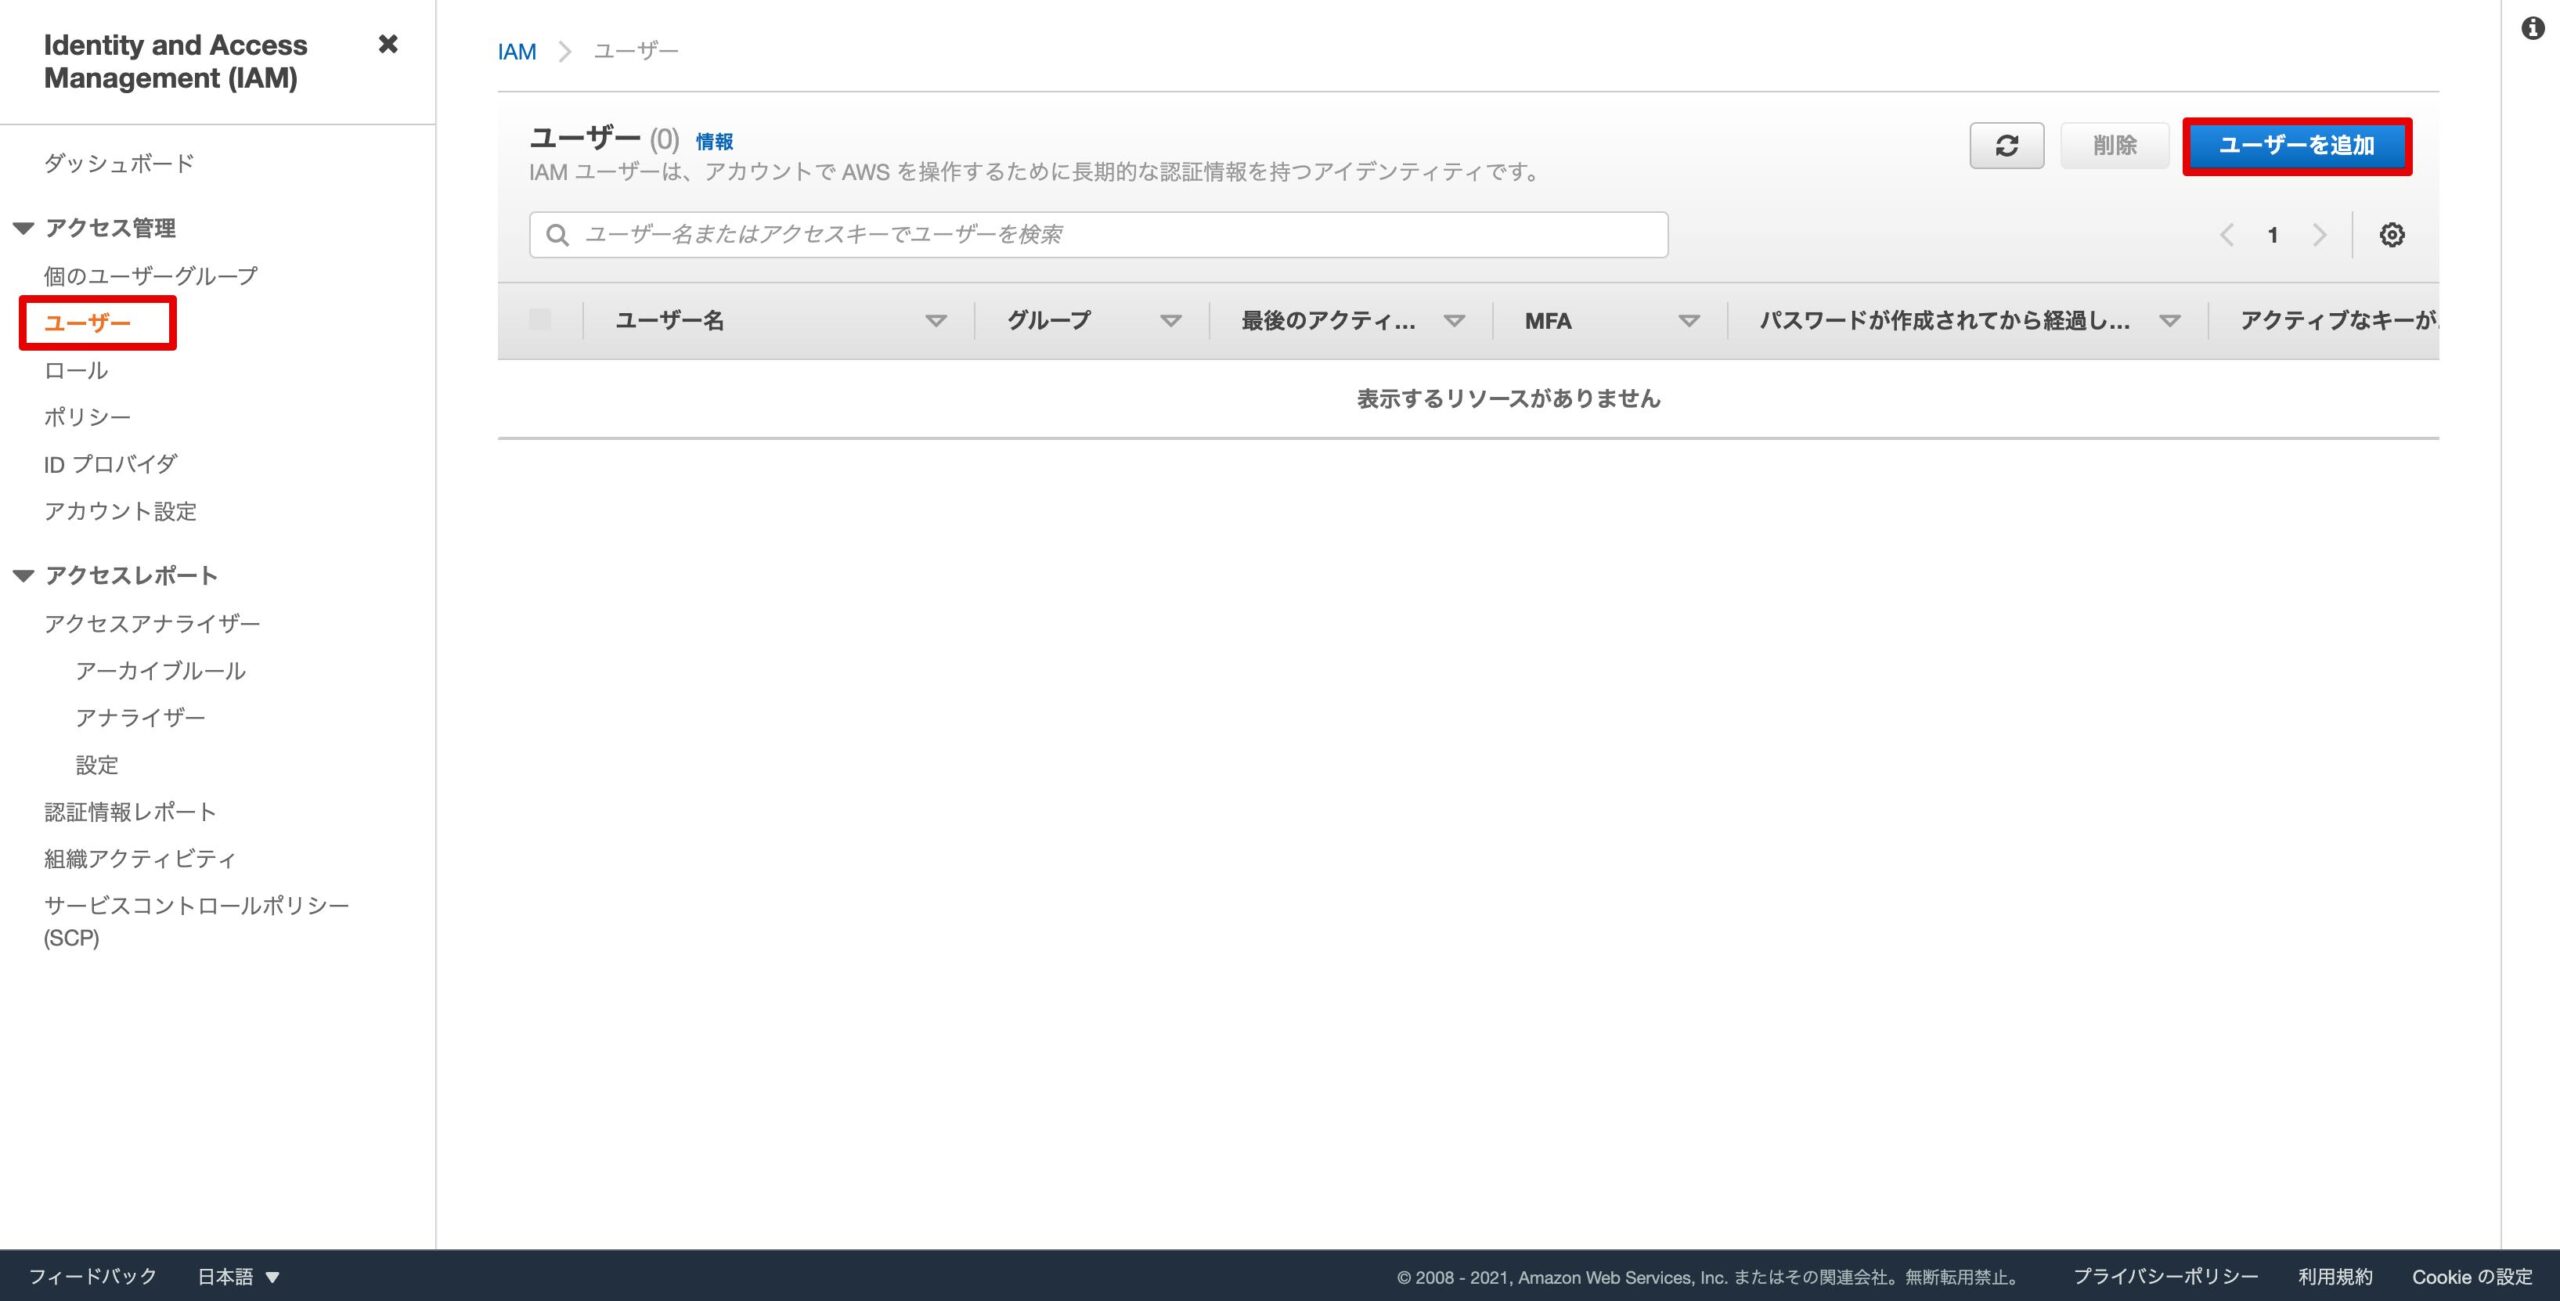
左のメニューで「ユーザー」を選択し、「ユーザーを追加」をクリックします。
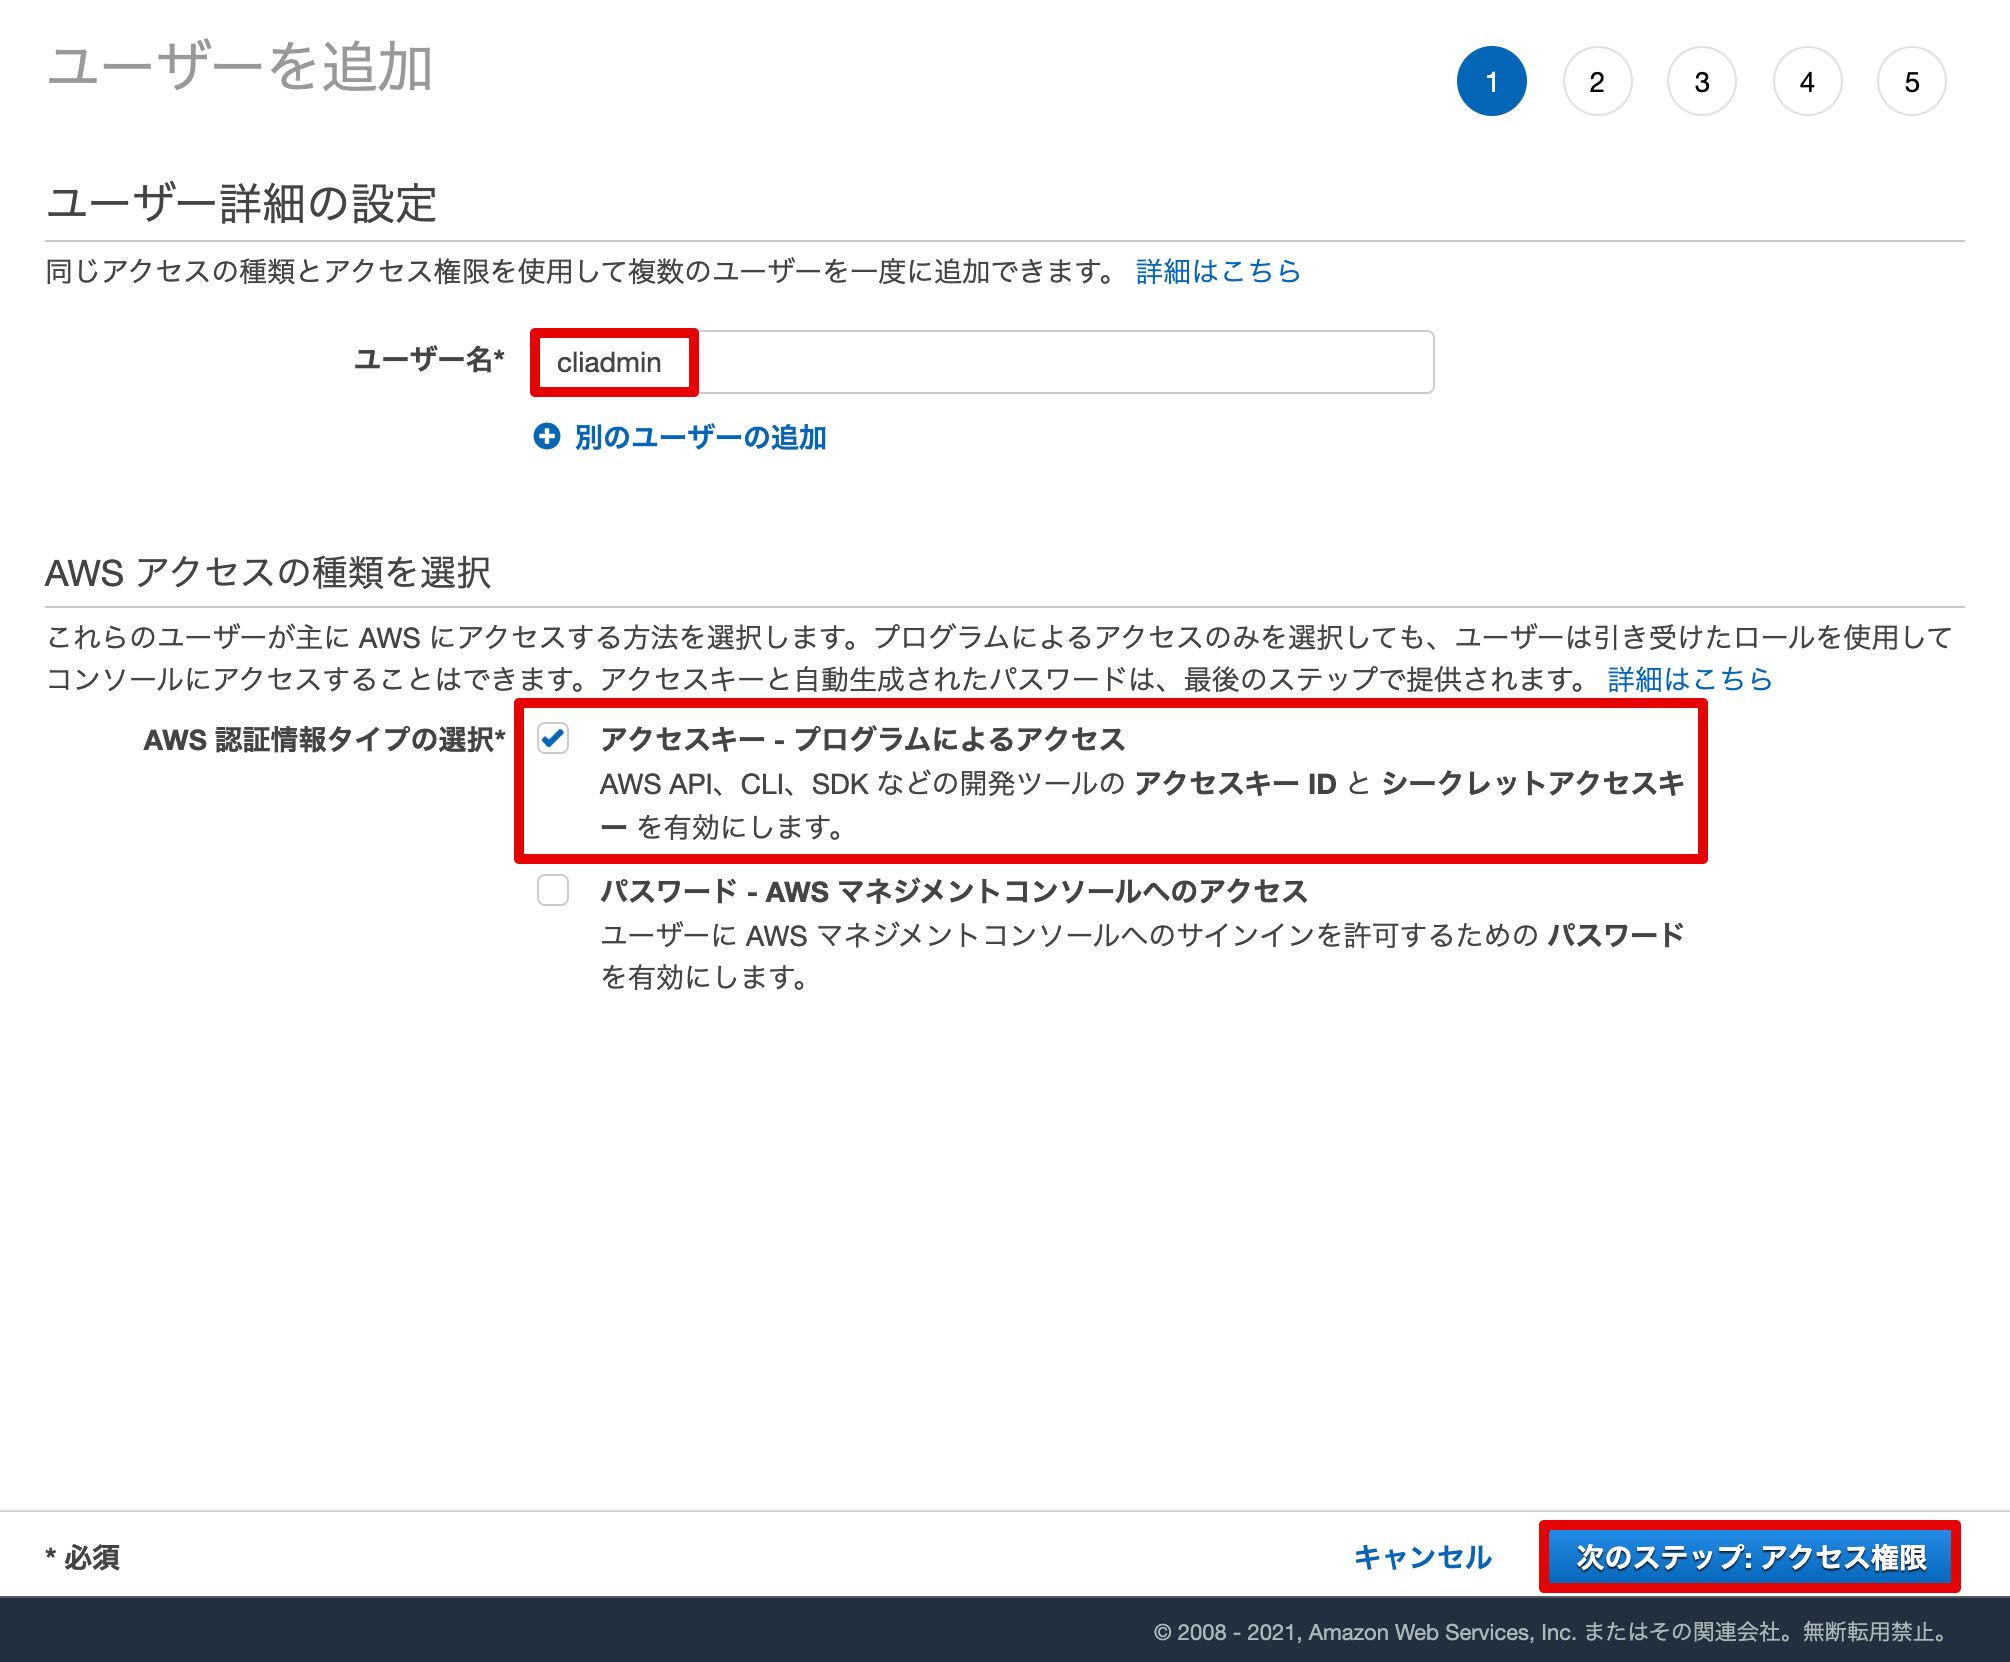
ユーザー名に任意の名前を入力します。(ここでは、”cliadmin”としています。)
認証情報タイプに関しては、CLI専用のユーザーとするため、「アクセスキー – プログラムによるアクセス」にチェックを入れます。
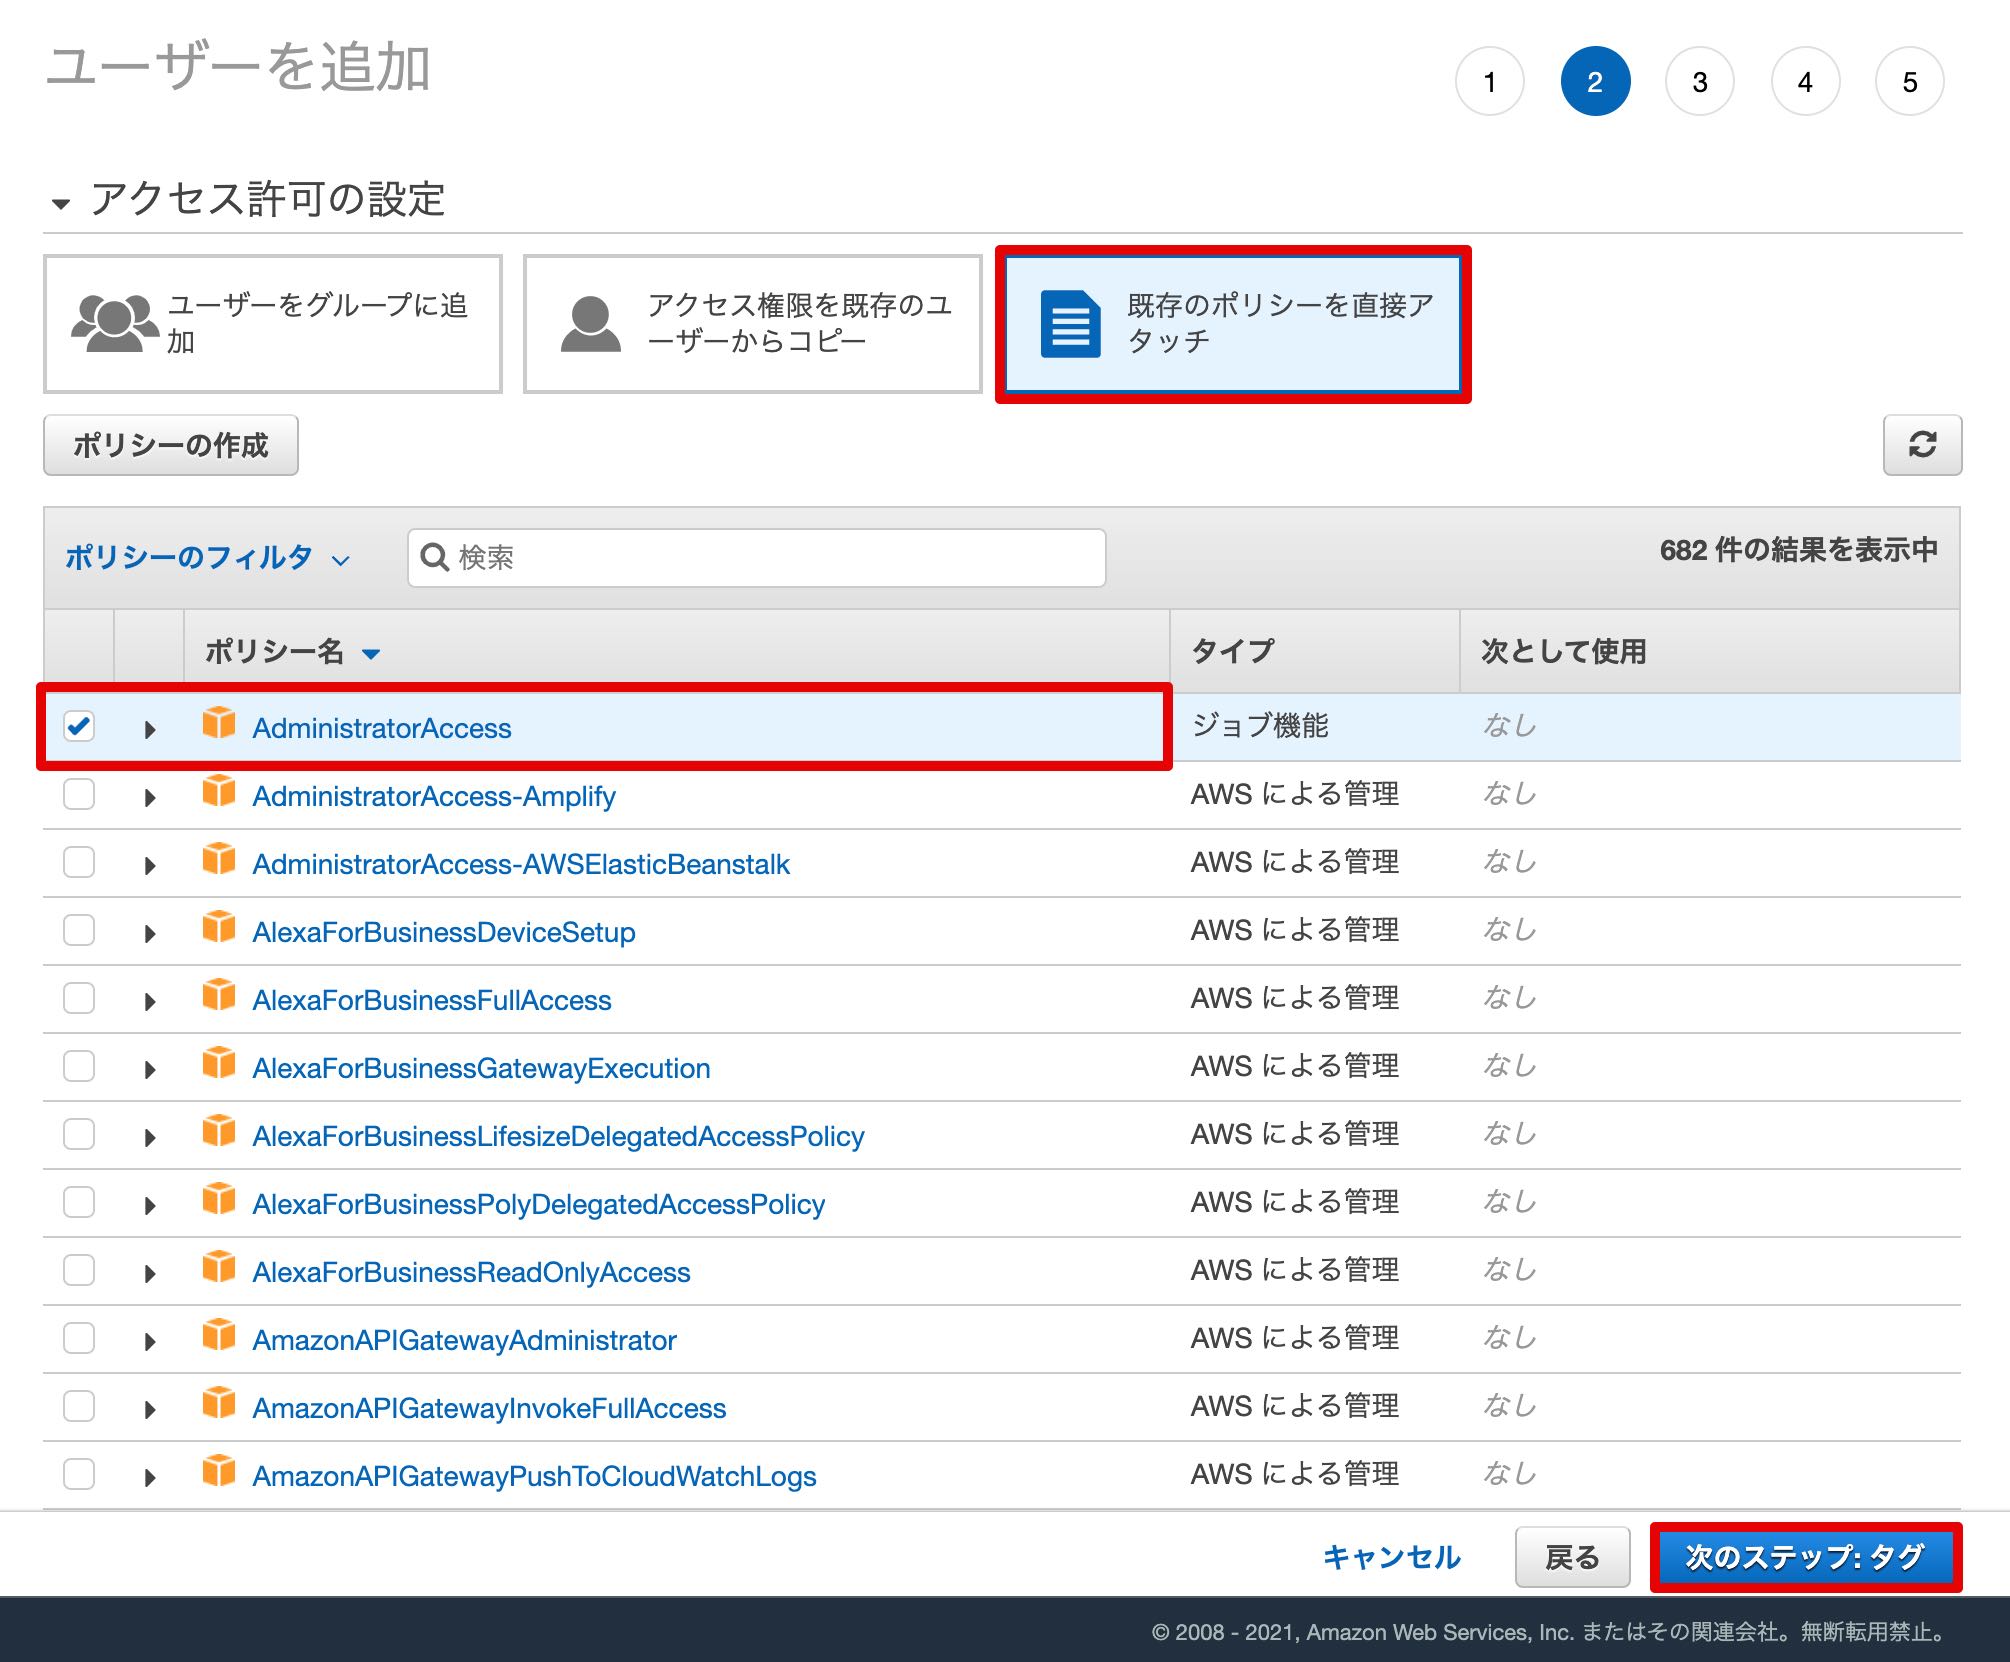
アクセス権限に関しては、「既存のポリシーを直接アタッチ」を選択し、必要なアクセス権限を追加します。ここでは、管理者として全権限を付与するため、「AdministratorAccess」を追加しています。
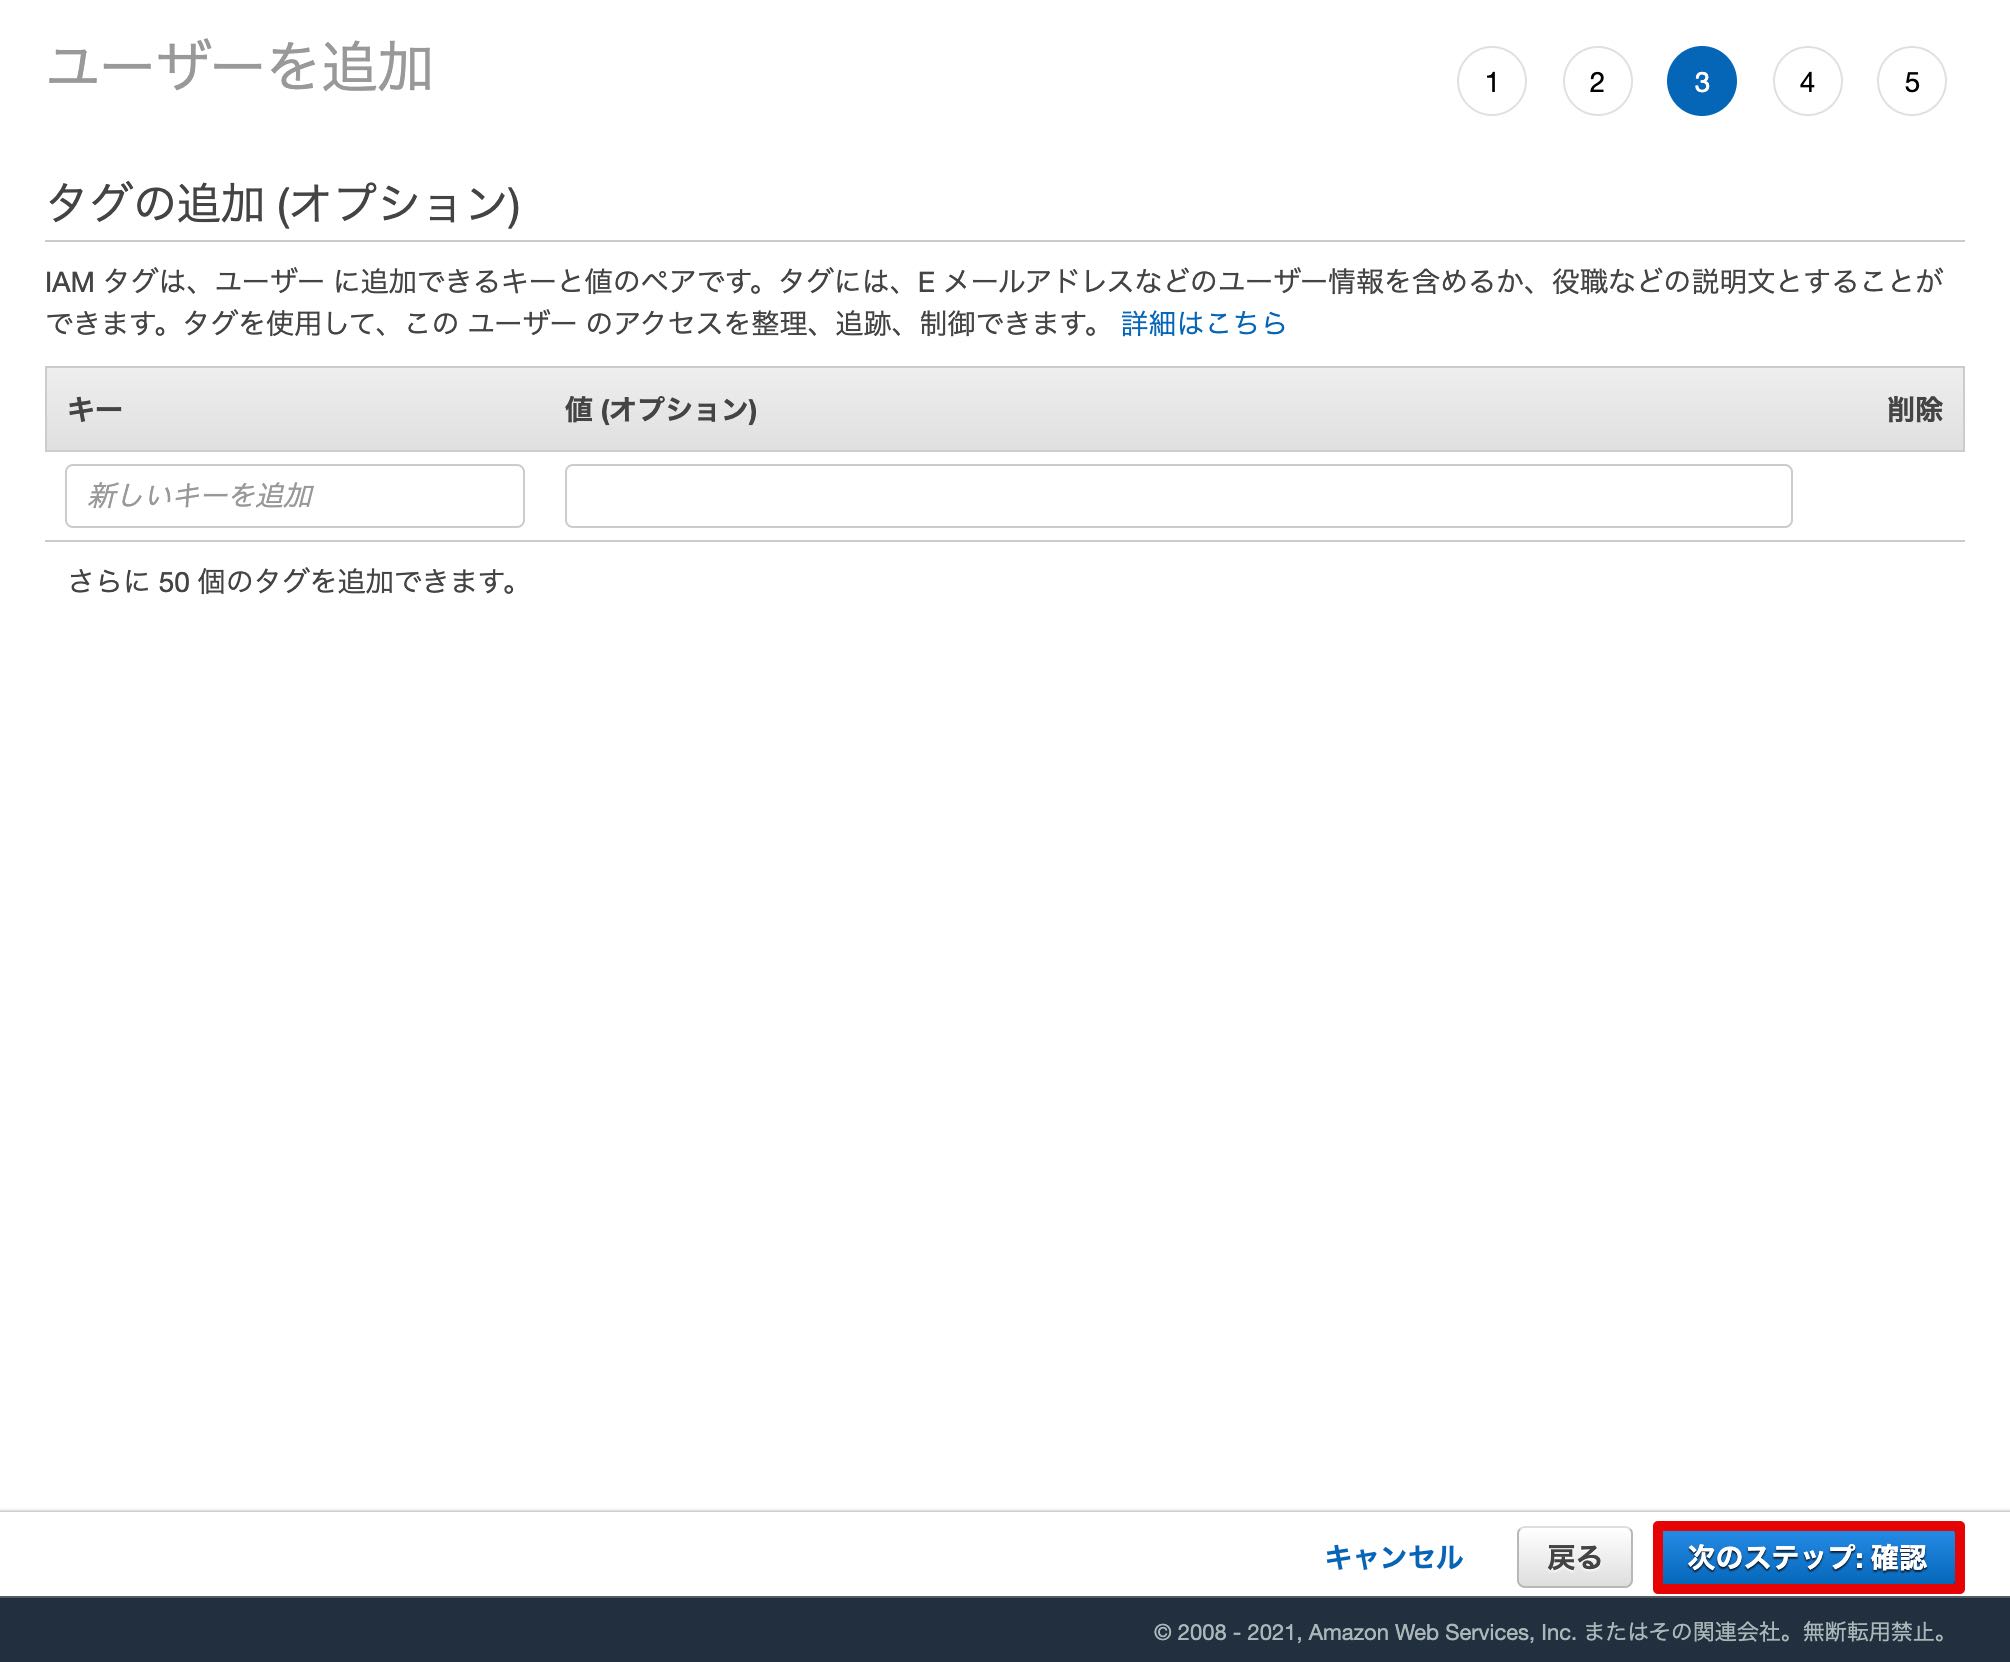
必要に応じてタグを追加します。(必須ではありません。)
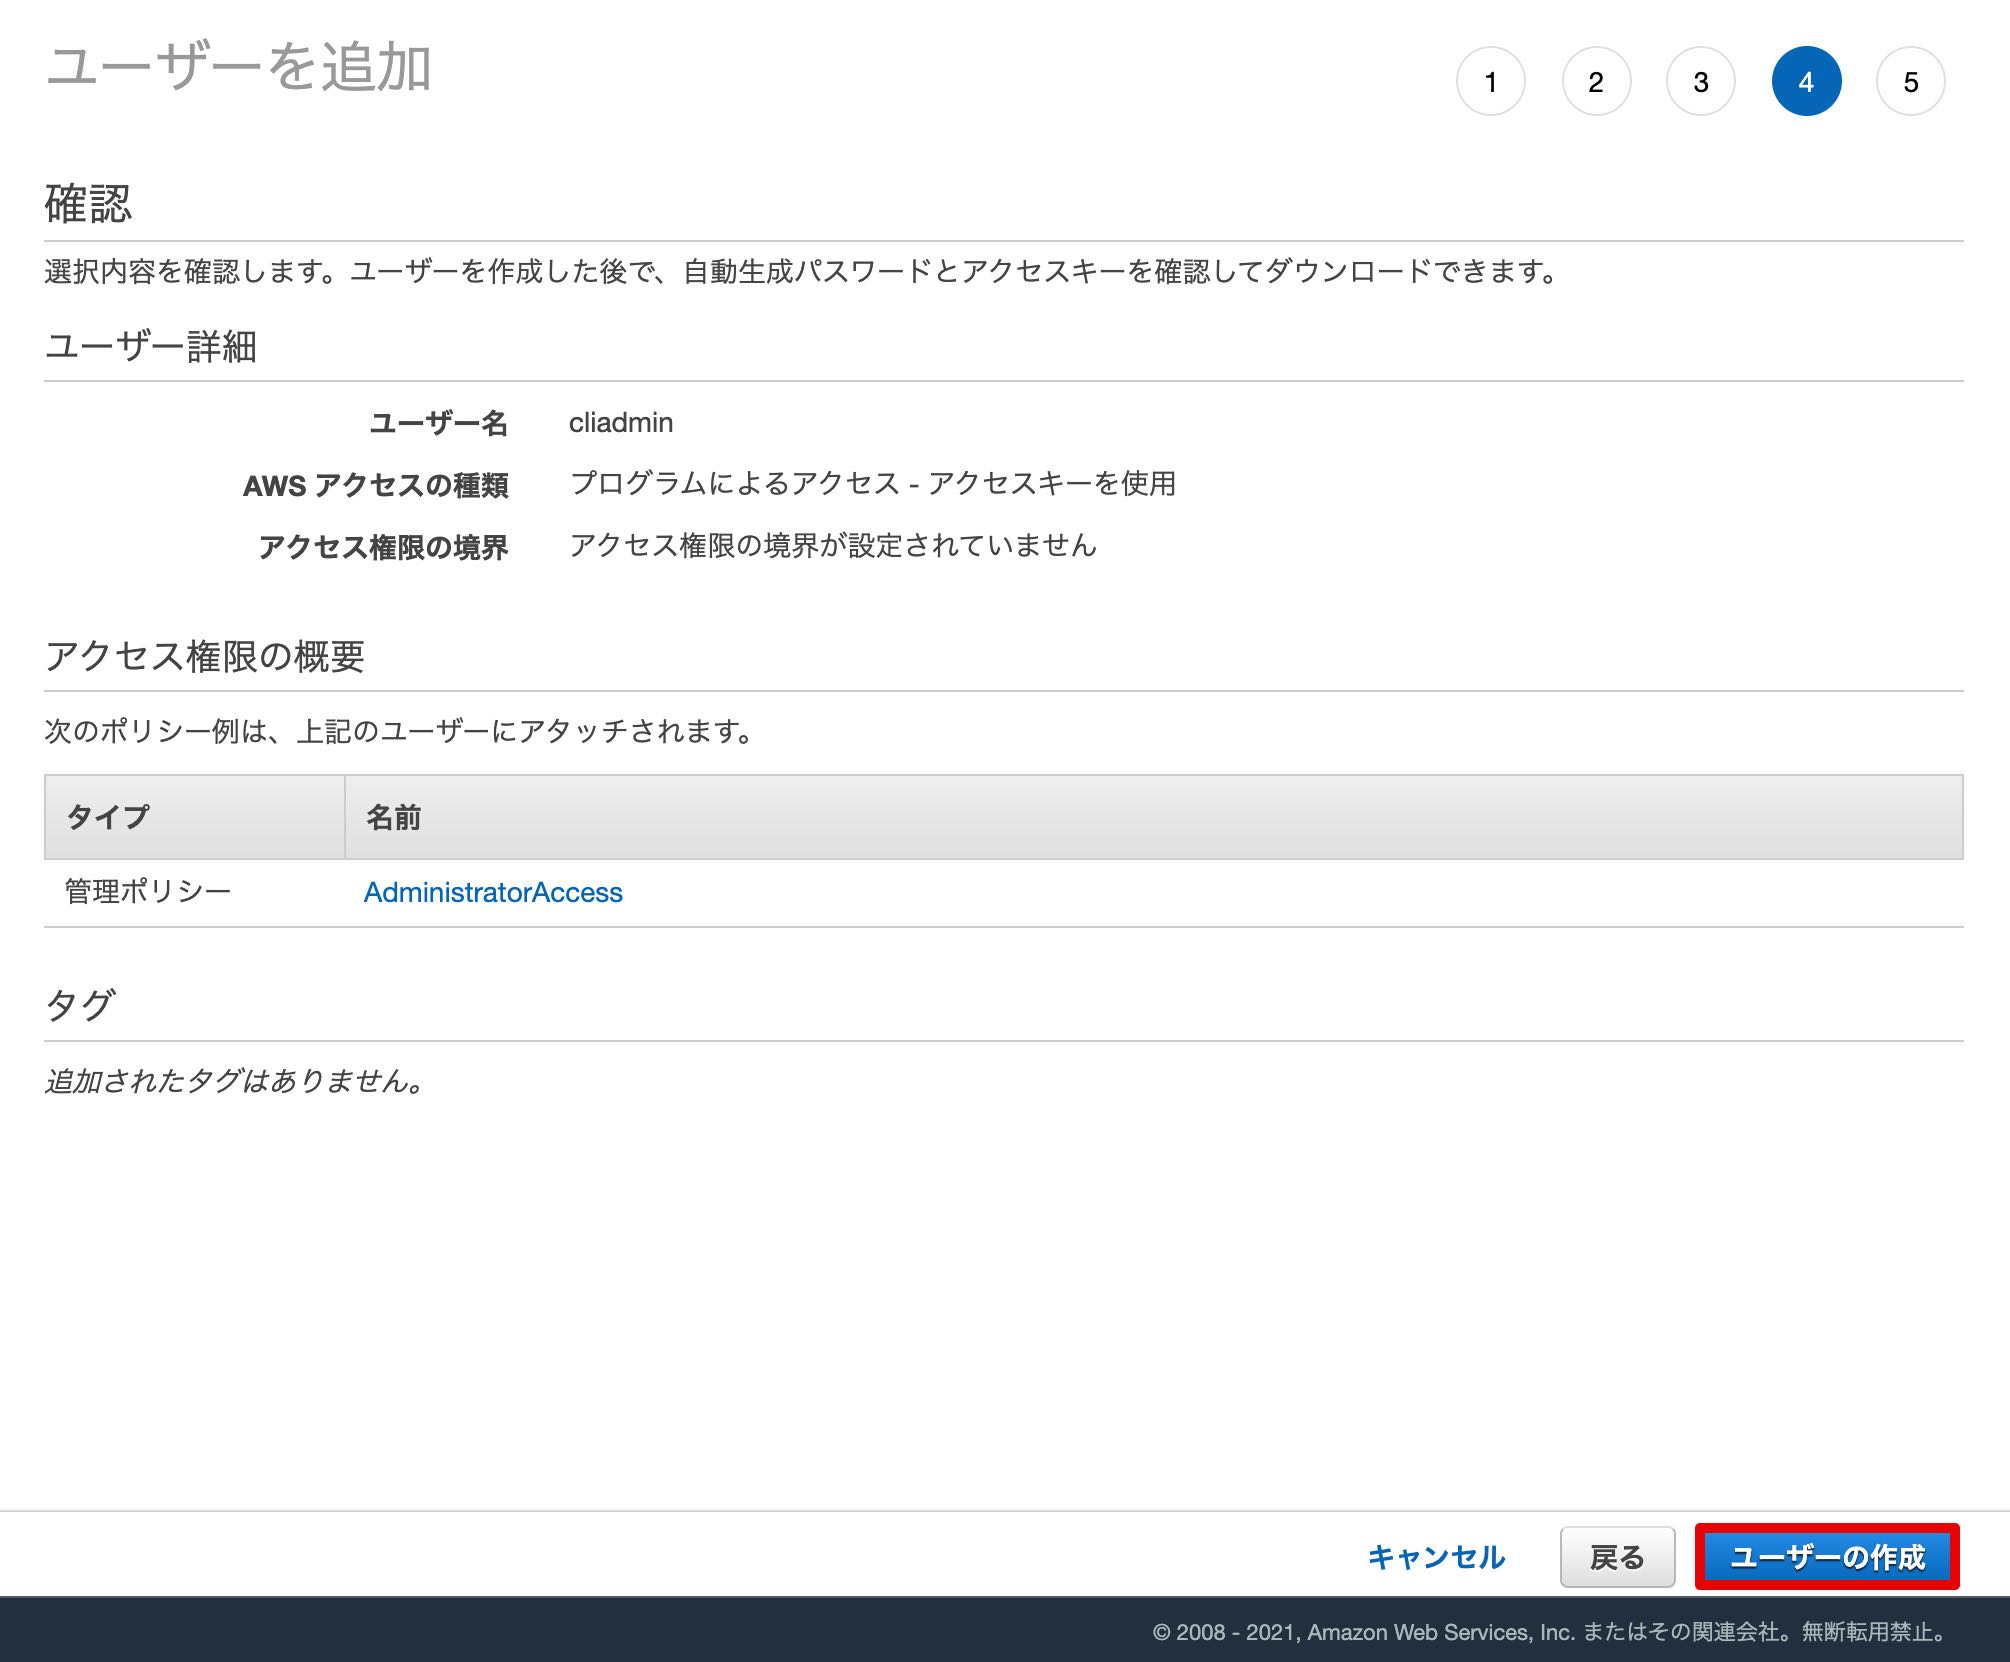
設定内容を確認し、「ユーザーの作成」をクリックします。
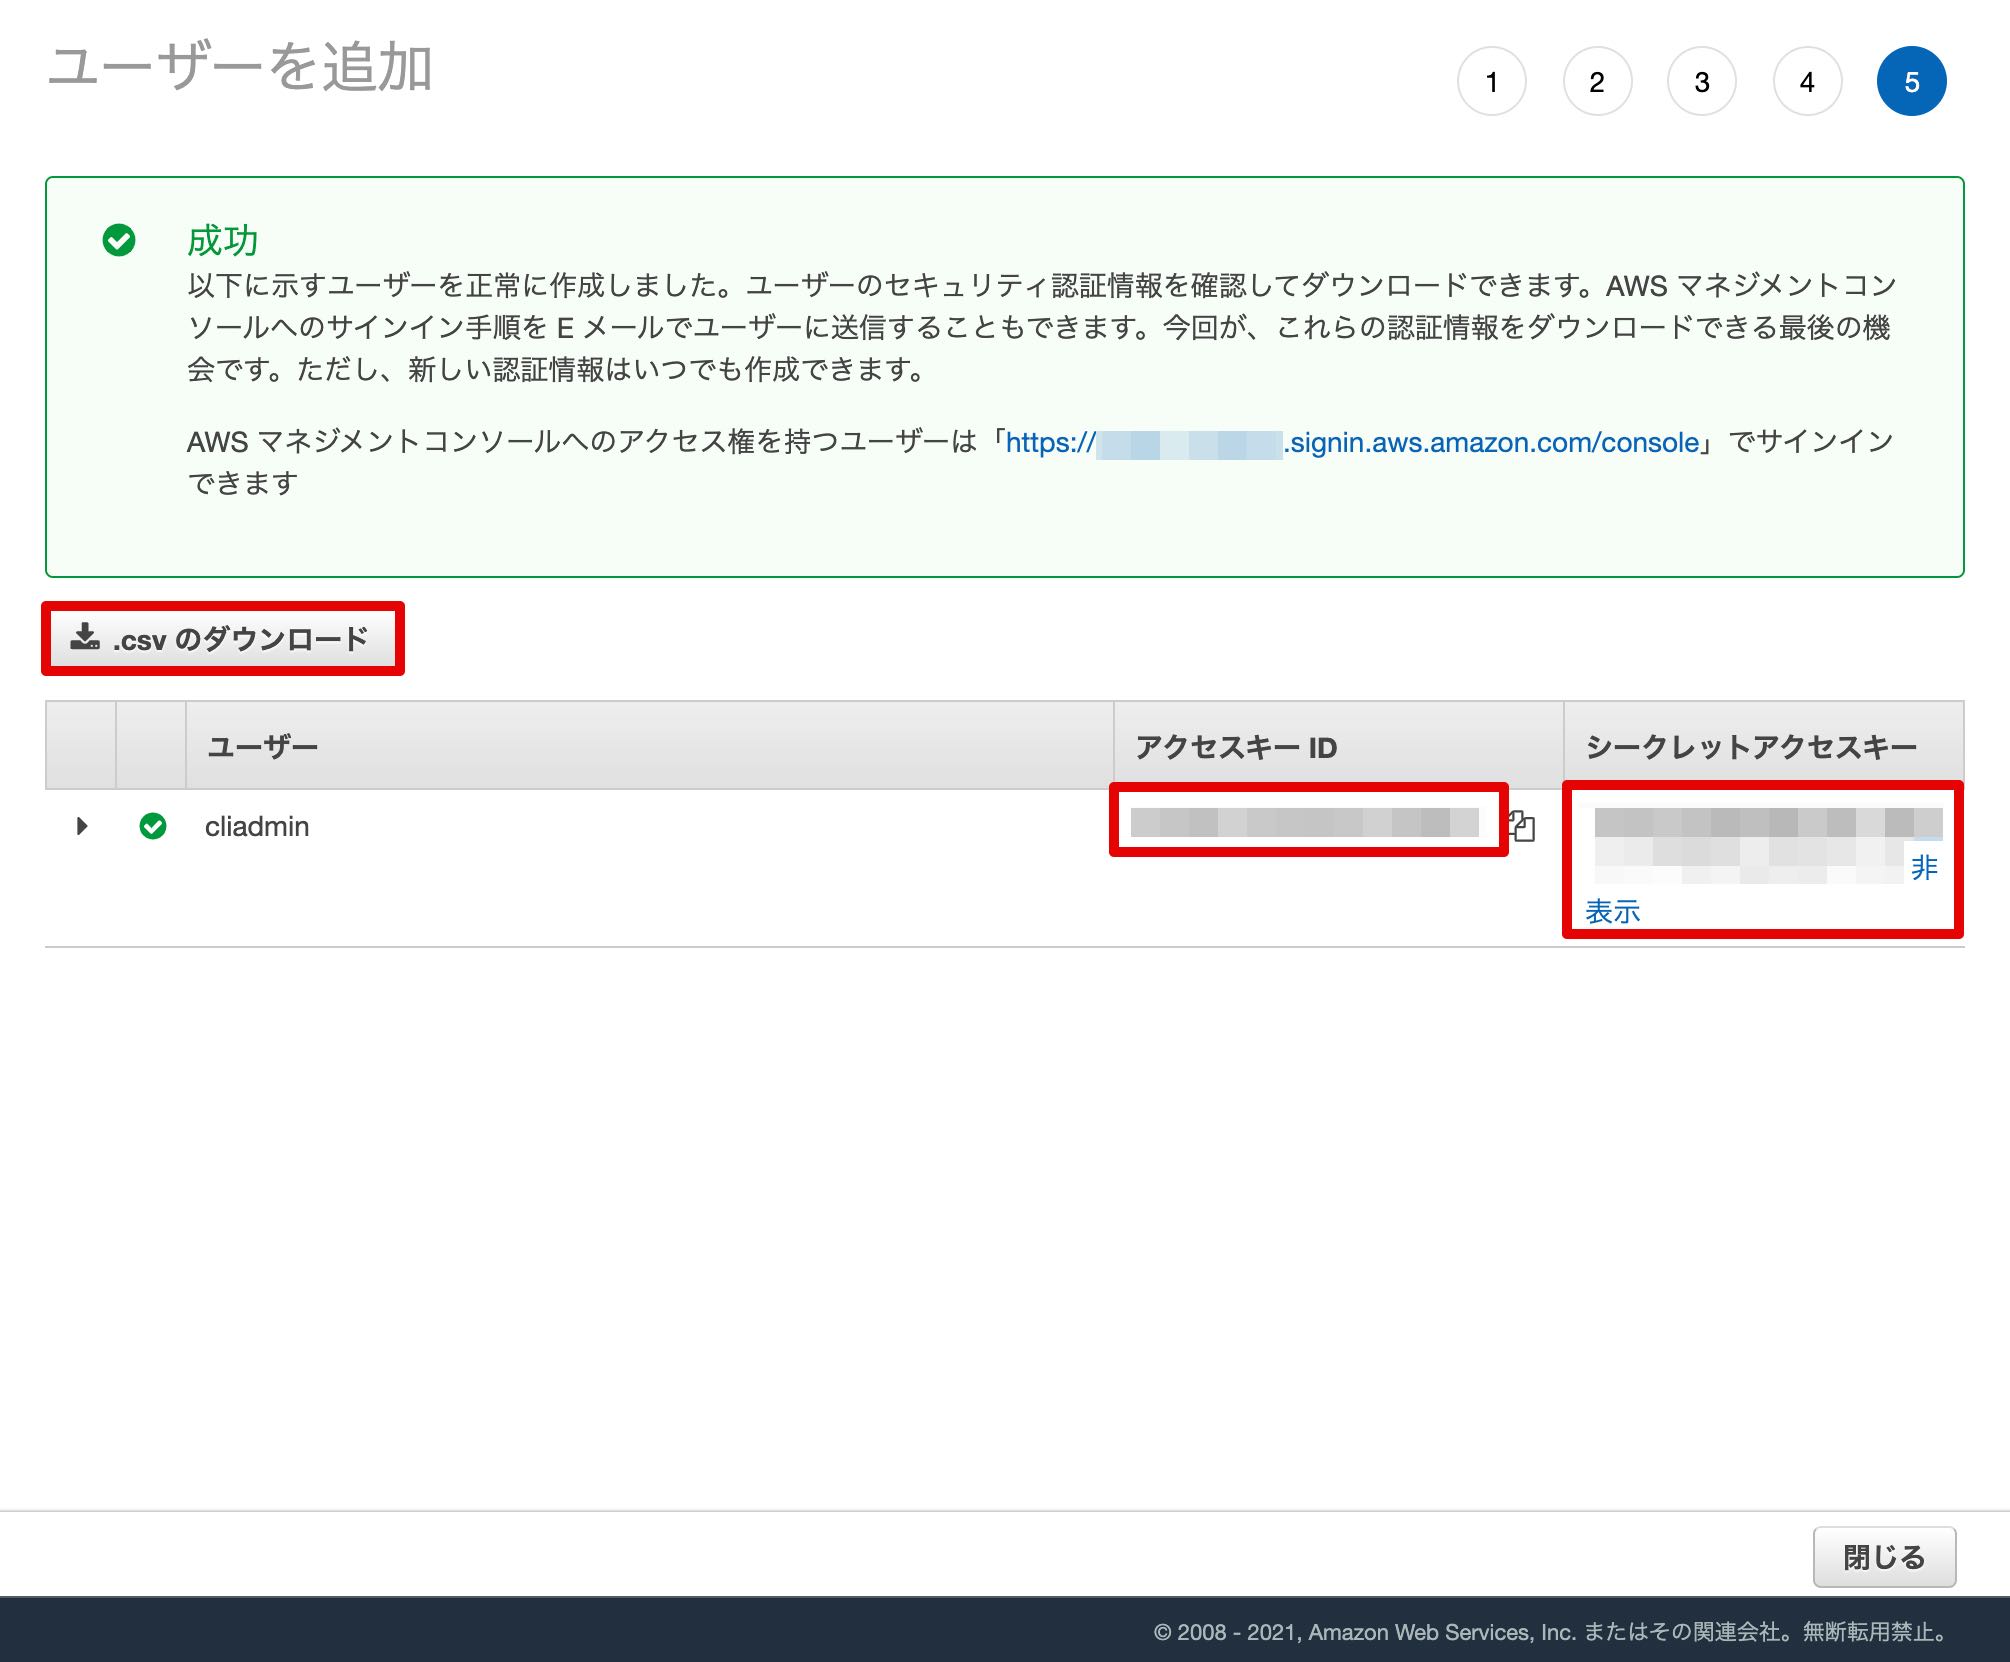
「シークレットアクセスキー」を表示します。
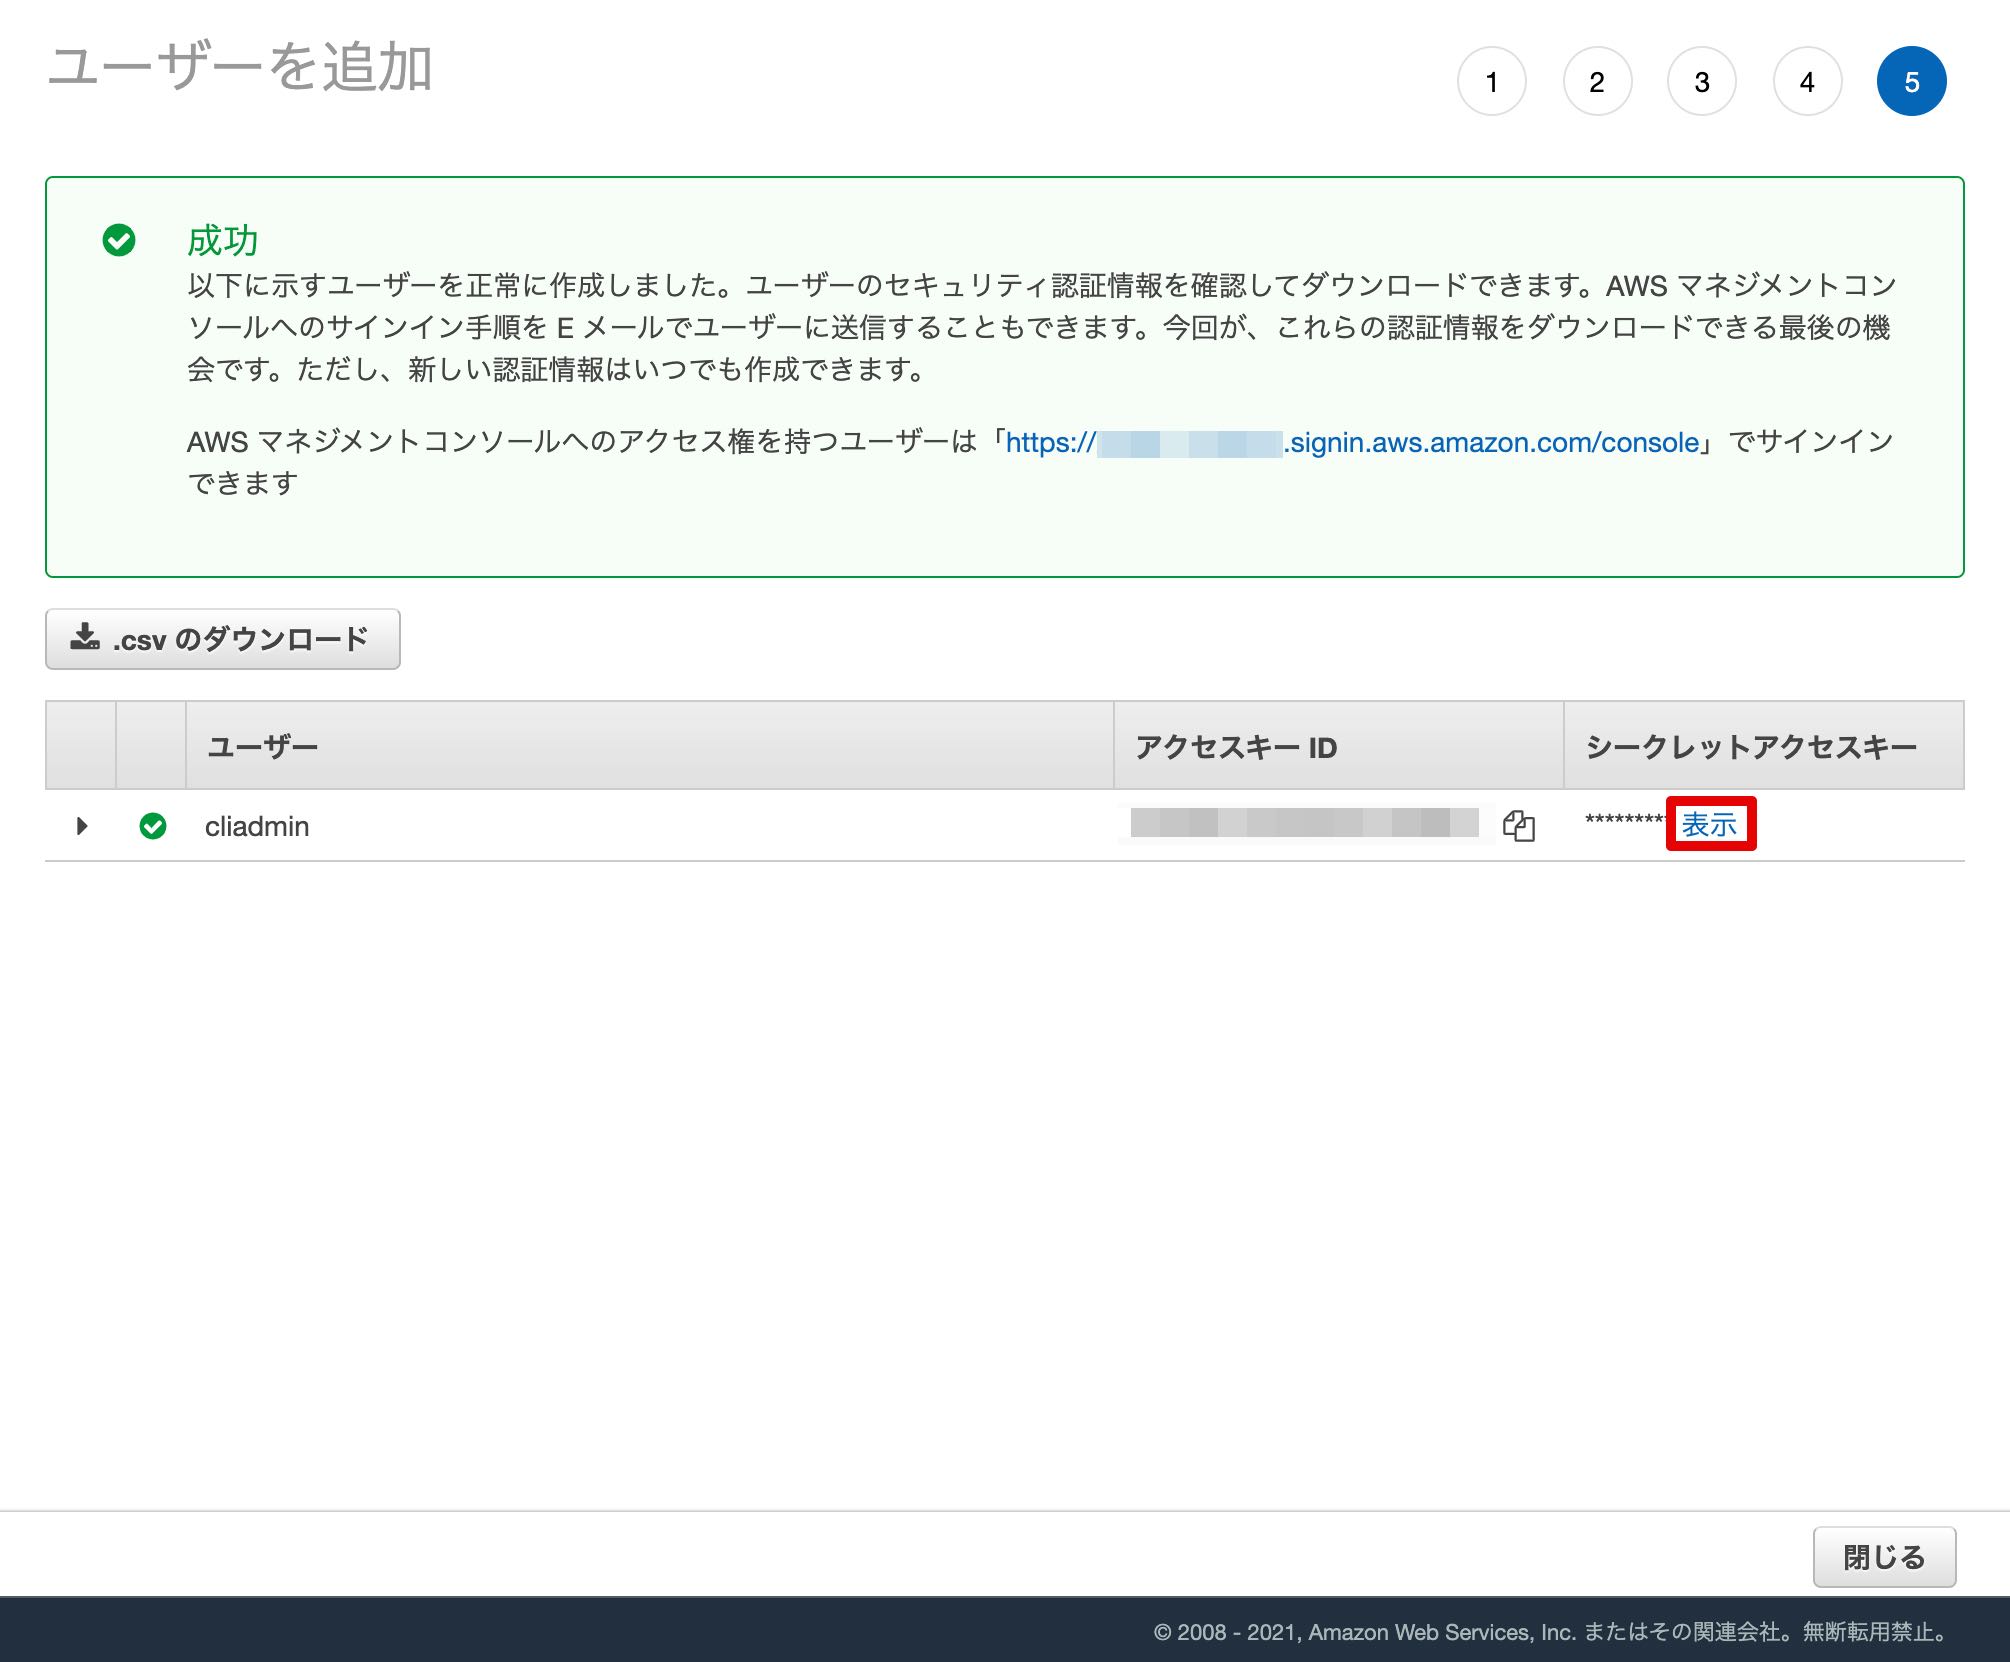
“アクセスキーID”と”シークレットアクセスキー”をコピーするか、CSVをダウンロードして保存します。
AWS CLI の設定
EC2のマシンイメージで「Amazon Linux」を選択している場合、AWS CLIのインストールは不要なため、設定を行えばすぐに利用ができます。
初期設定を確認するために、EC2上で下記のコマンドを実施します。
aws configure list何も設定されていないことがわかります。
[ec2-user@ip-10-0-0-100 ~]$ aws configure list
      Name               Value             Type    Location
      ----               -----             ----    --------
   profile           <not set>             None        None
access_key           <not set>             None        None
secret_key           <not set>             None        None
    region           <not set>             None        None
作成したユーザーのプロファイルを設定します。
aws configure --profile cliadmin下記を設定します。
AWS Access Key ID [None]:アクセスキーIDを入力
AWS Secret Access Key [None]: シークレットアクセスキーを入力
Default region name [None]: ap-northeast-1を入力(EC2を配置しているリージョン)
Default output format [None]: 入力不要(デフォルトでjson形式)
設定したユーザーをデフォルトとして永続的に利用するために、環境変数を変更します。
sudo vi /etc/environment下記を追記します。
AWS_DEFAULT_PROFILE=cliadmin設定を反映するために、一度ログアウトして、再度ログインします。
再ログイン後、設定が反映されていることを確認します。
aws configure list[ec2-user@ip-10-0-0-100 ~]$ aws configure list
Name Value Type Location
---- ----- ---- --------
profile cliadmin manual --profile
access_key ******************** shared-credentials-file
secret_key ******************** shared-credentials-file
region ap-northeast-1 config-file ~/.aws/configカスタマーゲートウェイIDの確認
カスタマーゲートウェイのIDを確認します。(CustomerGatewayIdの値をメモします。)
aws ec2 describe-customer-gateways[ec2-user@ip-10-0-0-100 ~]$ aws ec2 describe-customer-gateways
{
"CustomerGateways": [
{
"Tags": [
{
"Value": "aws-vpn-test-cgw",
"Key": "Name"
}
],
"IpAddress": "xxx.xxx.xxx.xxx",
"State": "available",
"CustomerGatewayId": "cgw-xxxxxxxxxxxxxxxxx",
"BgpAsn": "65000",
"Type": "ipsec.1"
}
]
}仮想プライベートゲートウェイIDの確認
仮想プライベートゲートウェイのIDを確認します。(VpnGatewayIdの値をメモします。)
aws ec2 describe-vpn-gateways[ec2-user@ip-10-0-0-100 ~]$ aws ec2 describe-vpn-gateways
{
"VpnGateways": [
{
"Tags": [
{
"Value": "aws-vpn-test-vgw",
"Key": "Name"
}
],
"VpcAttachments": [
{
"State": "attached",
"VpcId": "vpc-xxxxxxxxxxxxxxxxx"
}
],
"AmazonSideAsn": 64512,
"State": "available",
"VpnGatewayId": "vgw-xxxxxxxxxxxxxxxxx",
"Type": "ipsec.1"
}
]
}クラウドフォーメーションのテンプレート作成
テンプレート作成用のディレクトリを作成します。
mkdir CloudFormation
cd CloudFormation
テンプレートファイルを作成します。
vi VPNConnection.yaml下記を記述します。
AWSTemplateFormatVersion: '2010-09-09'

Resources:
  # VPNConnection
  VPNConnection1:
    Type: AWS::EC2::VPNConnection
    Properties:
      Type: ipsec.1
      StaticRoutesOnly: true
      VpnTunnelOptionsSpecifications:
        - TunnelInsideCidr: 169.254.173.148/30 ※トンネル1の内部 IPv4 CIDR
          PreSharedKey: ******************************** ※トンネル1の事前共有キー
      CustomerGatewayId: cgw-xxxxxxxxxxxxxxxxx ※カスタマーゲートウェイID
      VpnGatewayId: vgw-xxxxxxxxxxxxxxxxx ※仮想プライベートゲートウェイID
      Tags:
        - Key: Name
          Value: aws-vpn-test
  VPNConnectionRoute1:
    Type: AWS::EC2::VPNConnectionRoute
    Properties:
      DestinationCidrBlock: 192.168.1.0/24
      VpnConnectionId:
        !Ref VPNConnection1
  VPNConnectionRoute2:
    Type: AWS::EC2::VPNConnectionRoute
    Properties:
      DestinationCidrBlock: 172.16.0.0/24
      VpnConnectionId:
        !Ref VPNConnection1
クラウドフォーメーションのスタック作成
クラウドフォーメーションのスタックを作成し、テンプレートに記述したサイト間VPN接続を作成します。
aws cloudformation create-stack --stack-name vpnteststack --template-body file://VPNConnection.yaml[ec2-user@ip-10-0-0-100 CloudFormation]$ aws cloudformation create-stack --stack-name vpnteststack --template-body file://VPNConnection.yaml
{
"StackId": "arn:aws:cloudformation:ap-northeast-1:xxxxxxxxxxxx:stack/vpnteststack/xxxxxxxxxxxxxxxxxxxxxxxxxxxxxxxxxxxx"
}作成したスタックを確認します。
aws cloudformation describe-stacksステータスが”CREATE_IN_PROGRESS”となっていて、作成中であることがわかります。
[ec2-user@ip-10-0-0-100 CloudFormation]$ aws cloudformation describe-stacks
{
"Stacks": [
{
"StackId": "arn:aws:cloudformation:ap-northeast-1:xxxxxxxxxxxx:stack/vpnteststack/xxxxxxxxxxxxxxxxxxxxxxxxxxxxxxxxxxxx",
"DriftInformation": {
"StackDriftStatus": "NOT_CHECKED"
},
"Tags": [],
"CreationTime": "xxxx-xx-xxT22:23:16.497Z",
"StackName": "vpnteststack",
"NotificationARNs": [],
"StackStatus": "CREATE_IN_PROGRESS",
"DisableRollback": false,
"RollbackConfiguration": {}
}
]
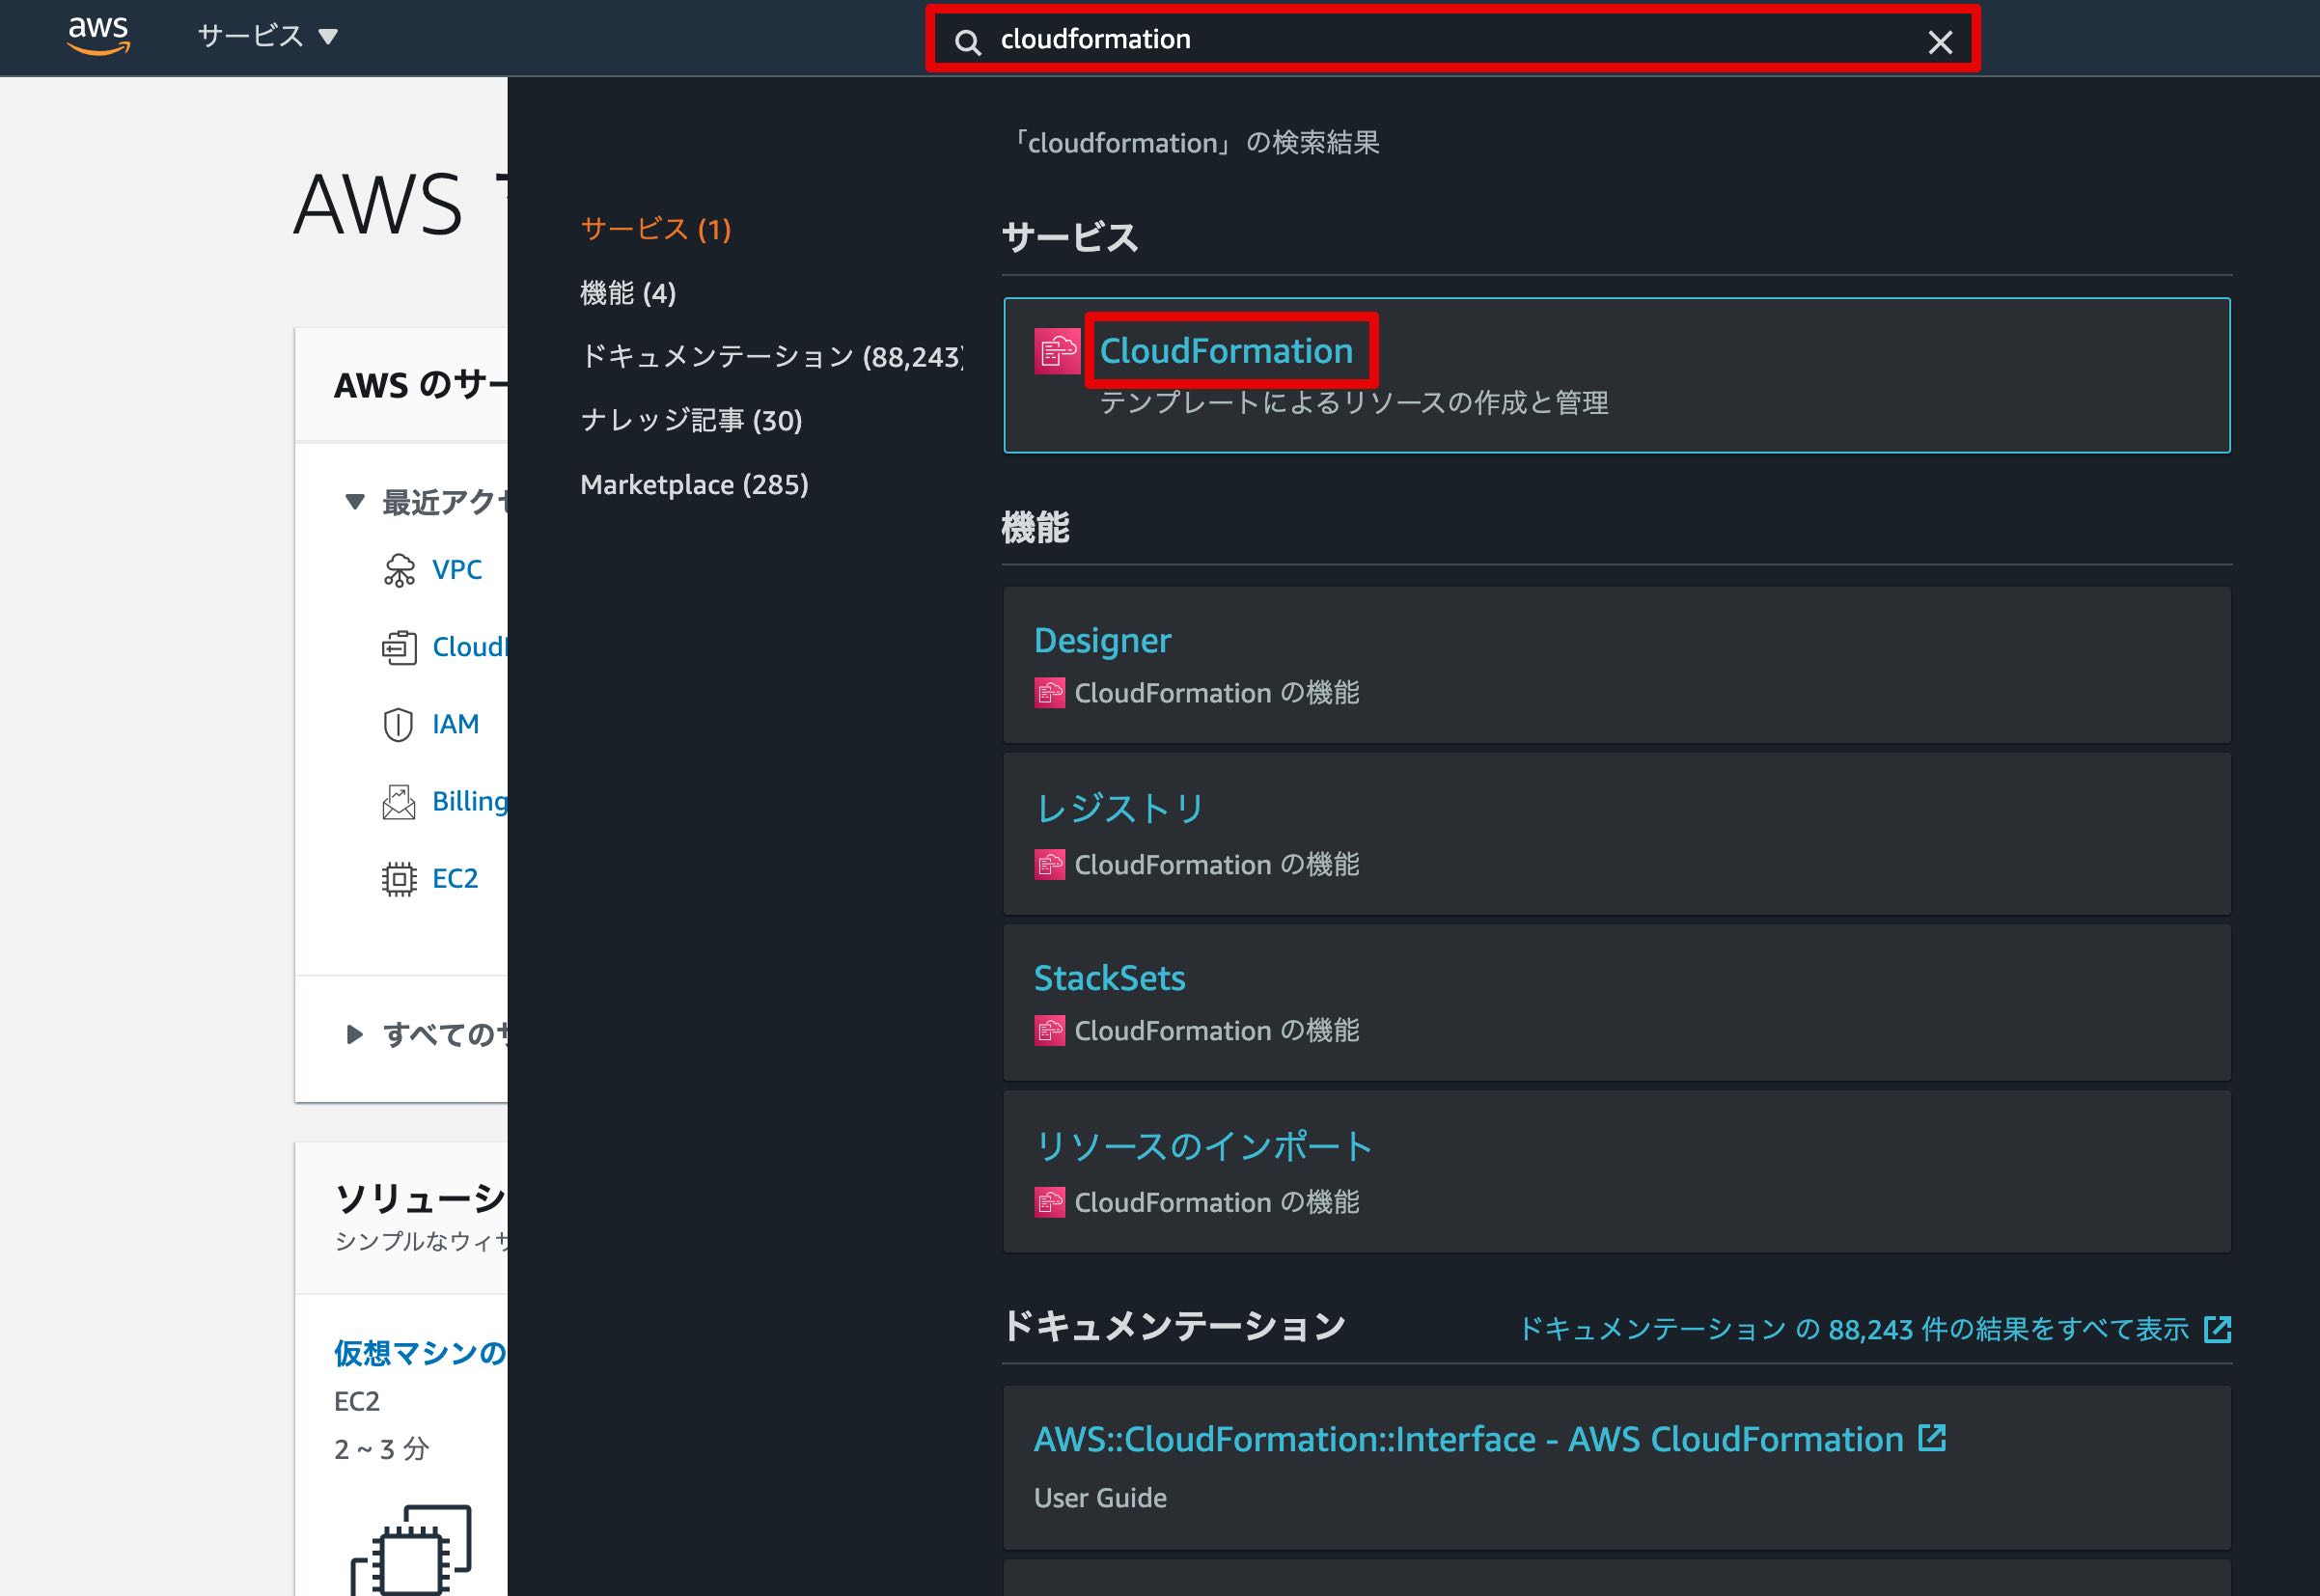
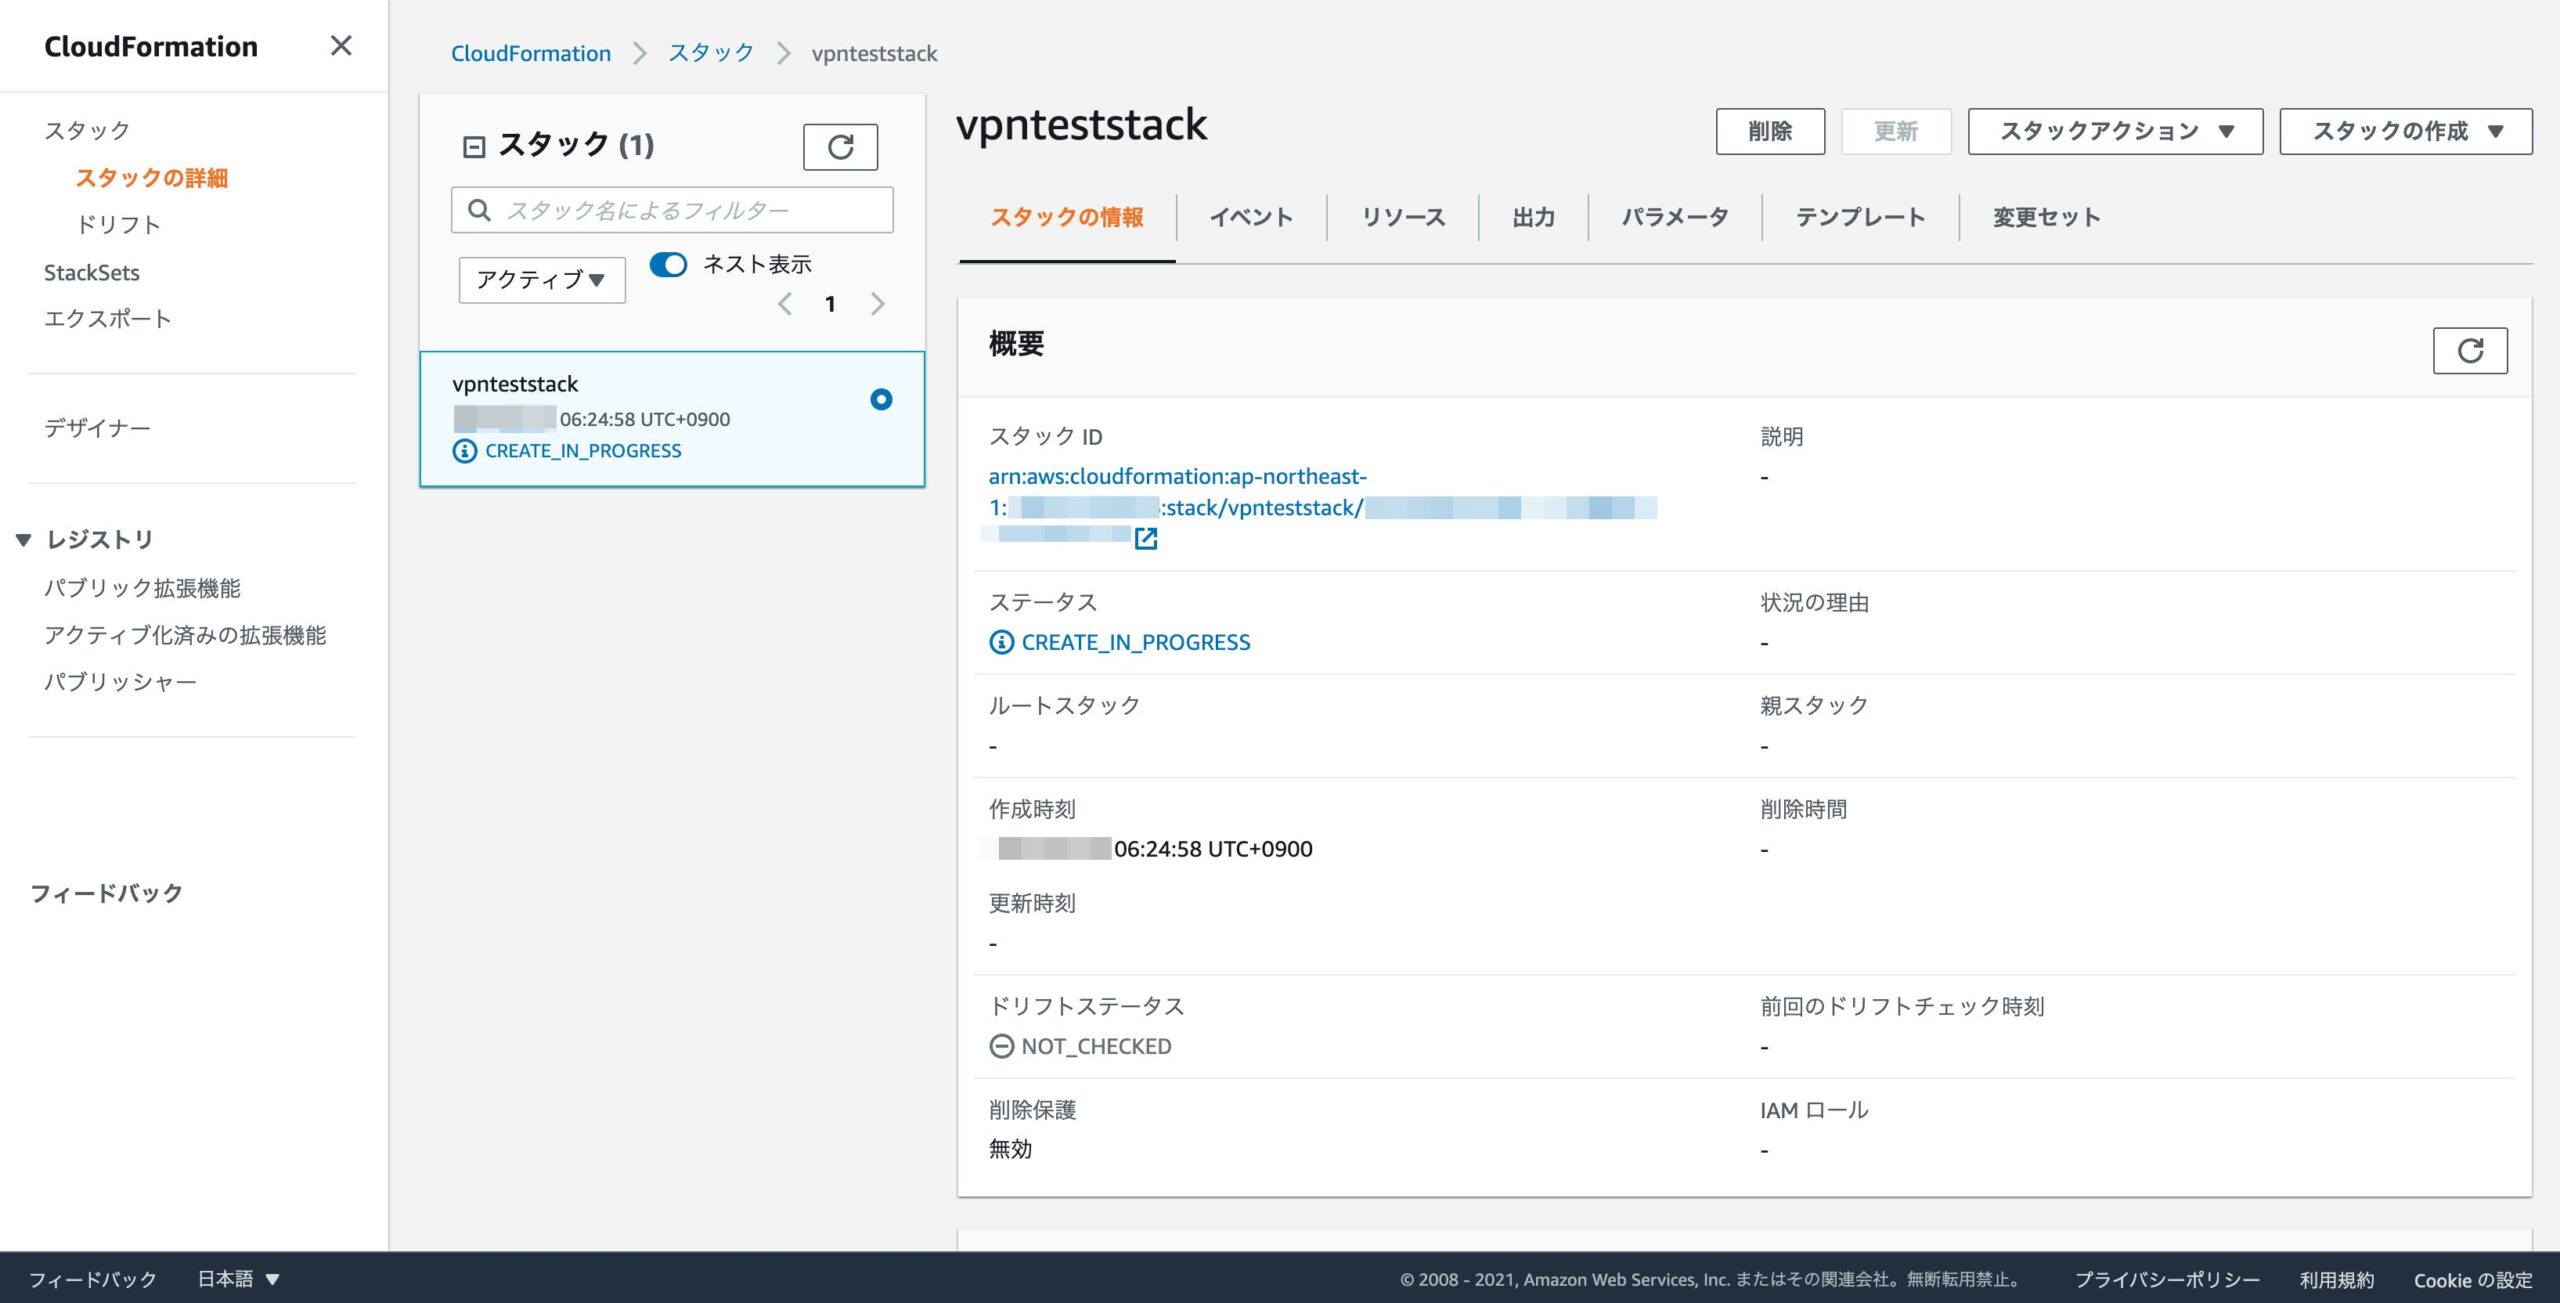
}AWSの画面でも確認します。検索窓に”cloudformation”と入力し、表示される「CloudFormation」をクリックします。
左のメニューで「スタック」を選択し、作成したスタックが表示されていることを確認します。
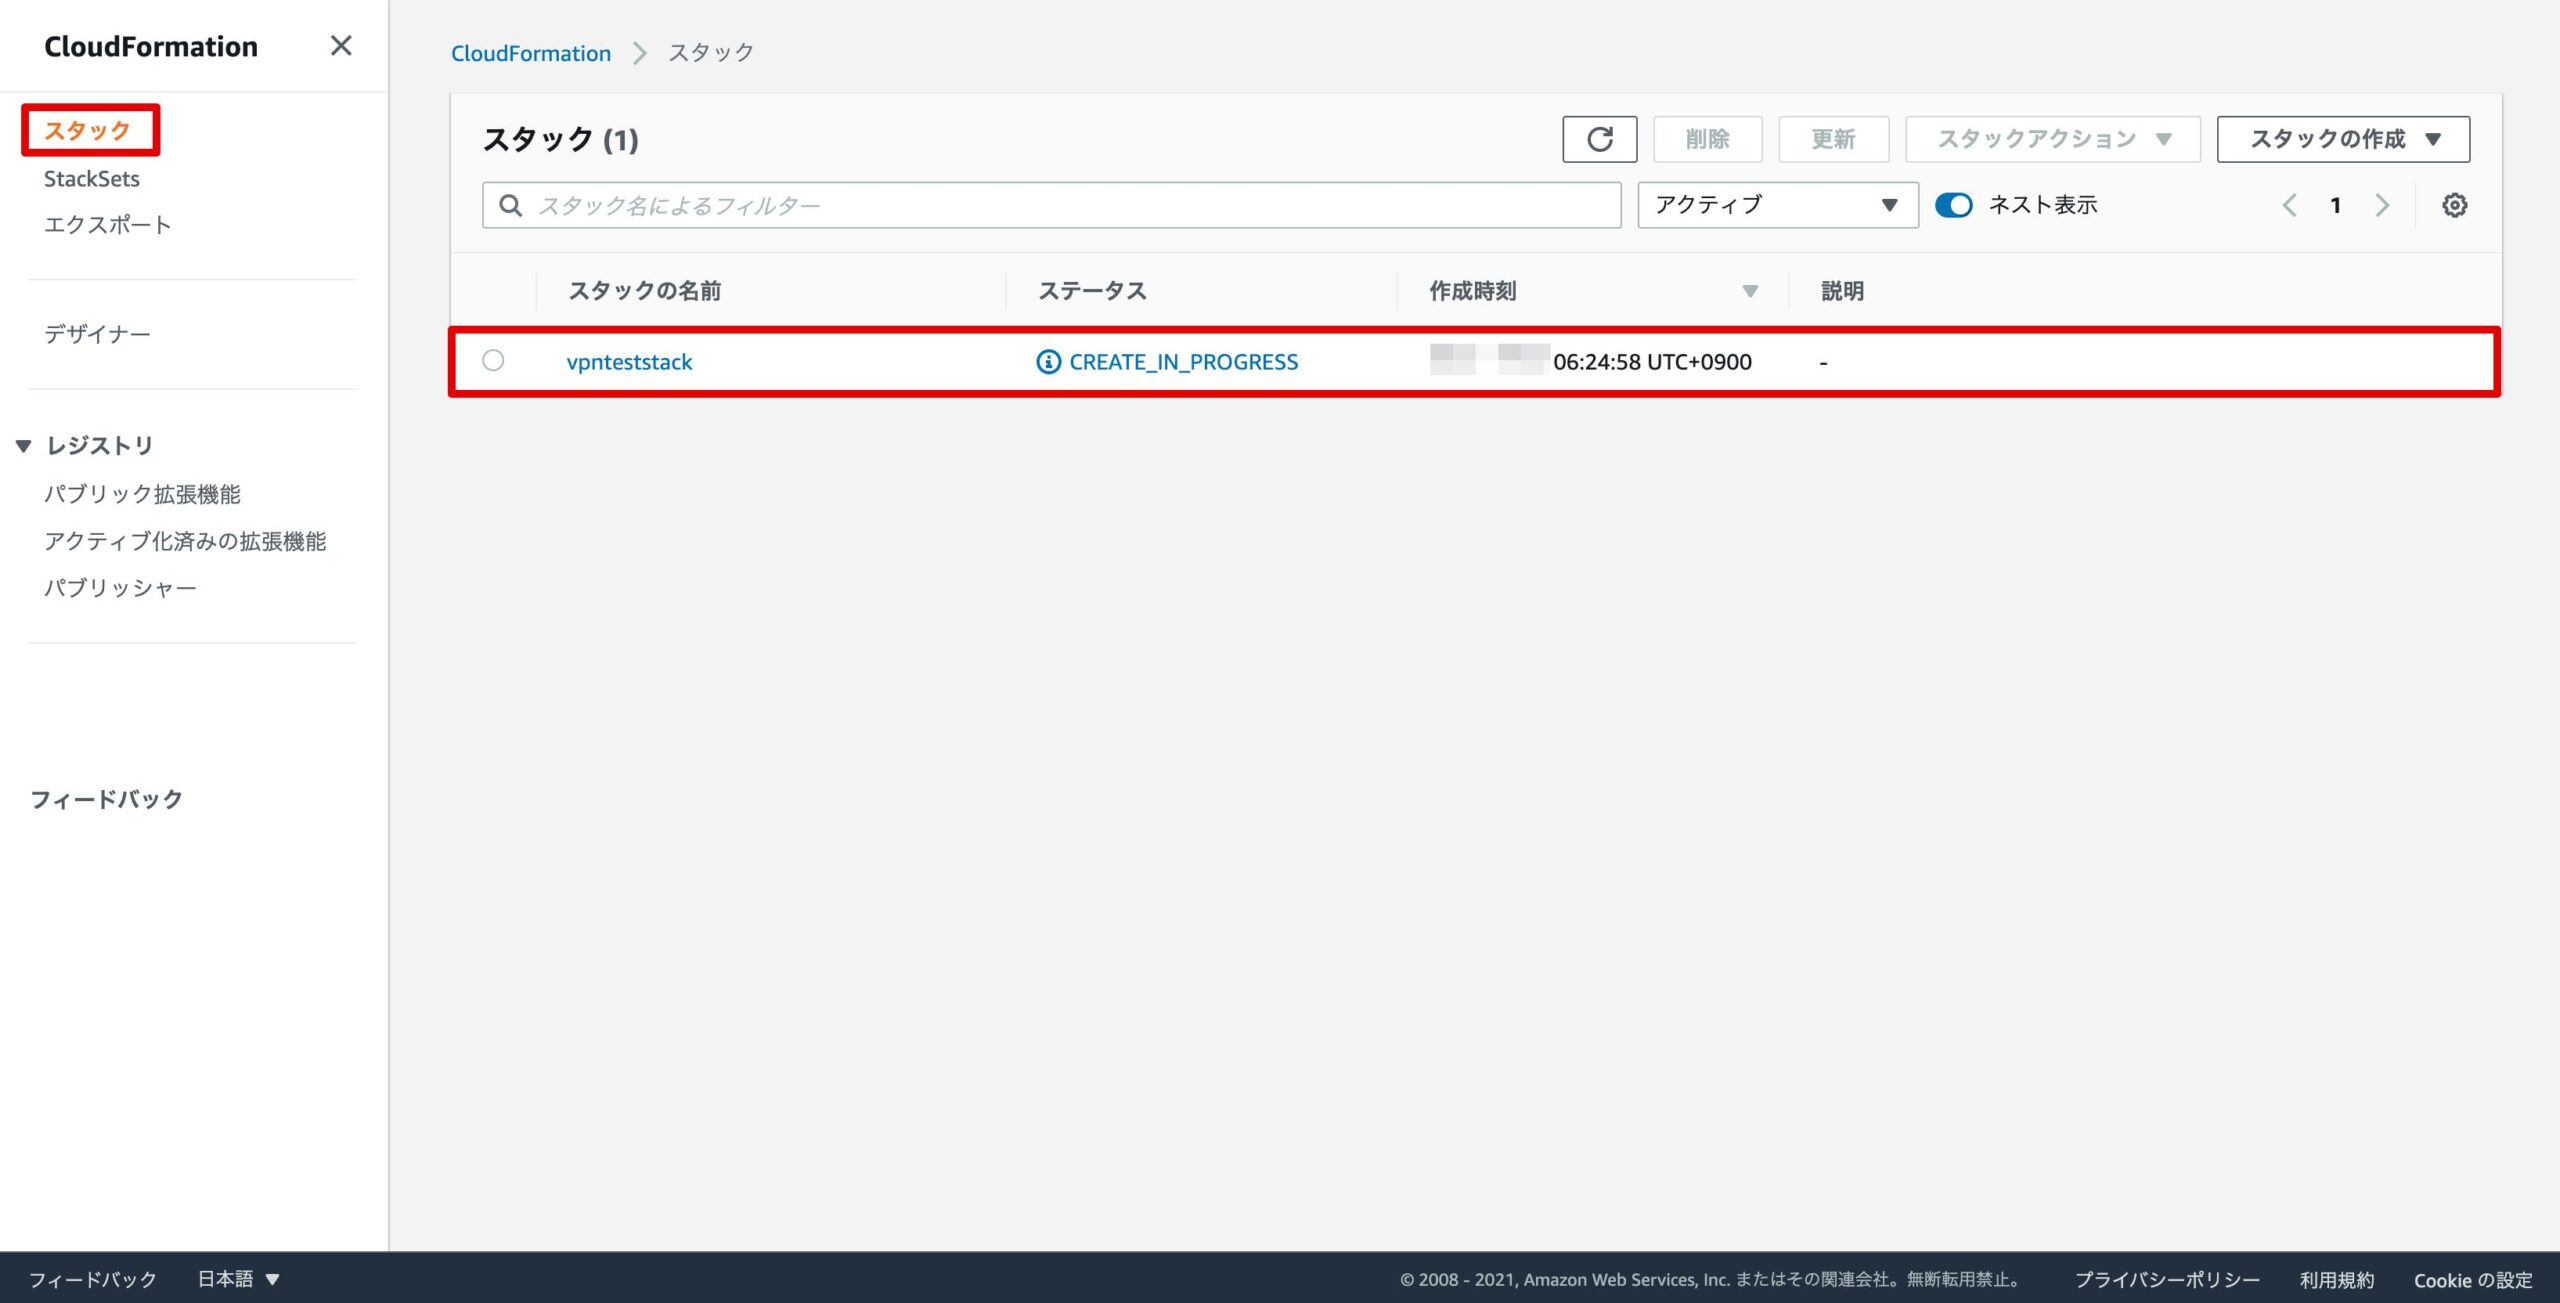
対象のスタックをクリックすると詳細が表示されます。
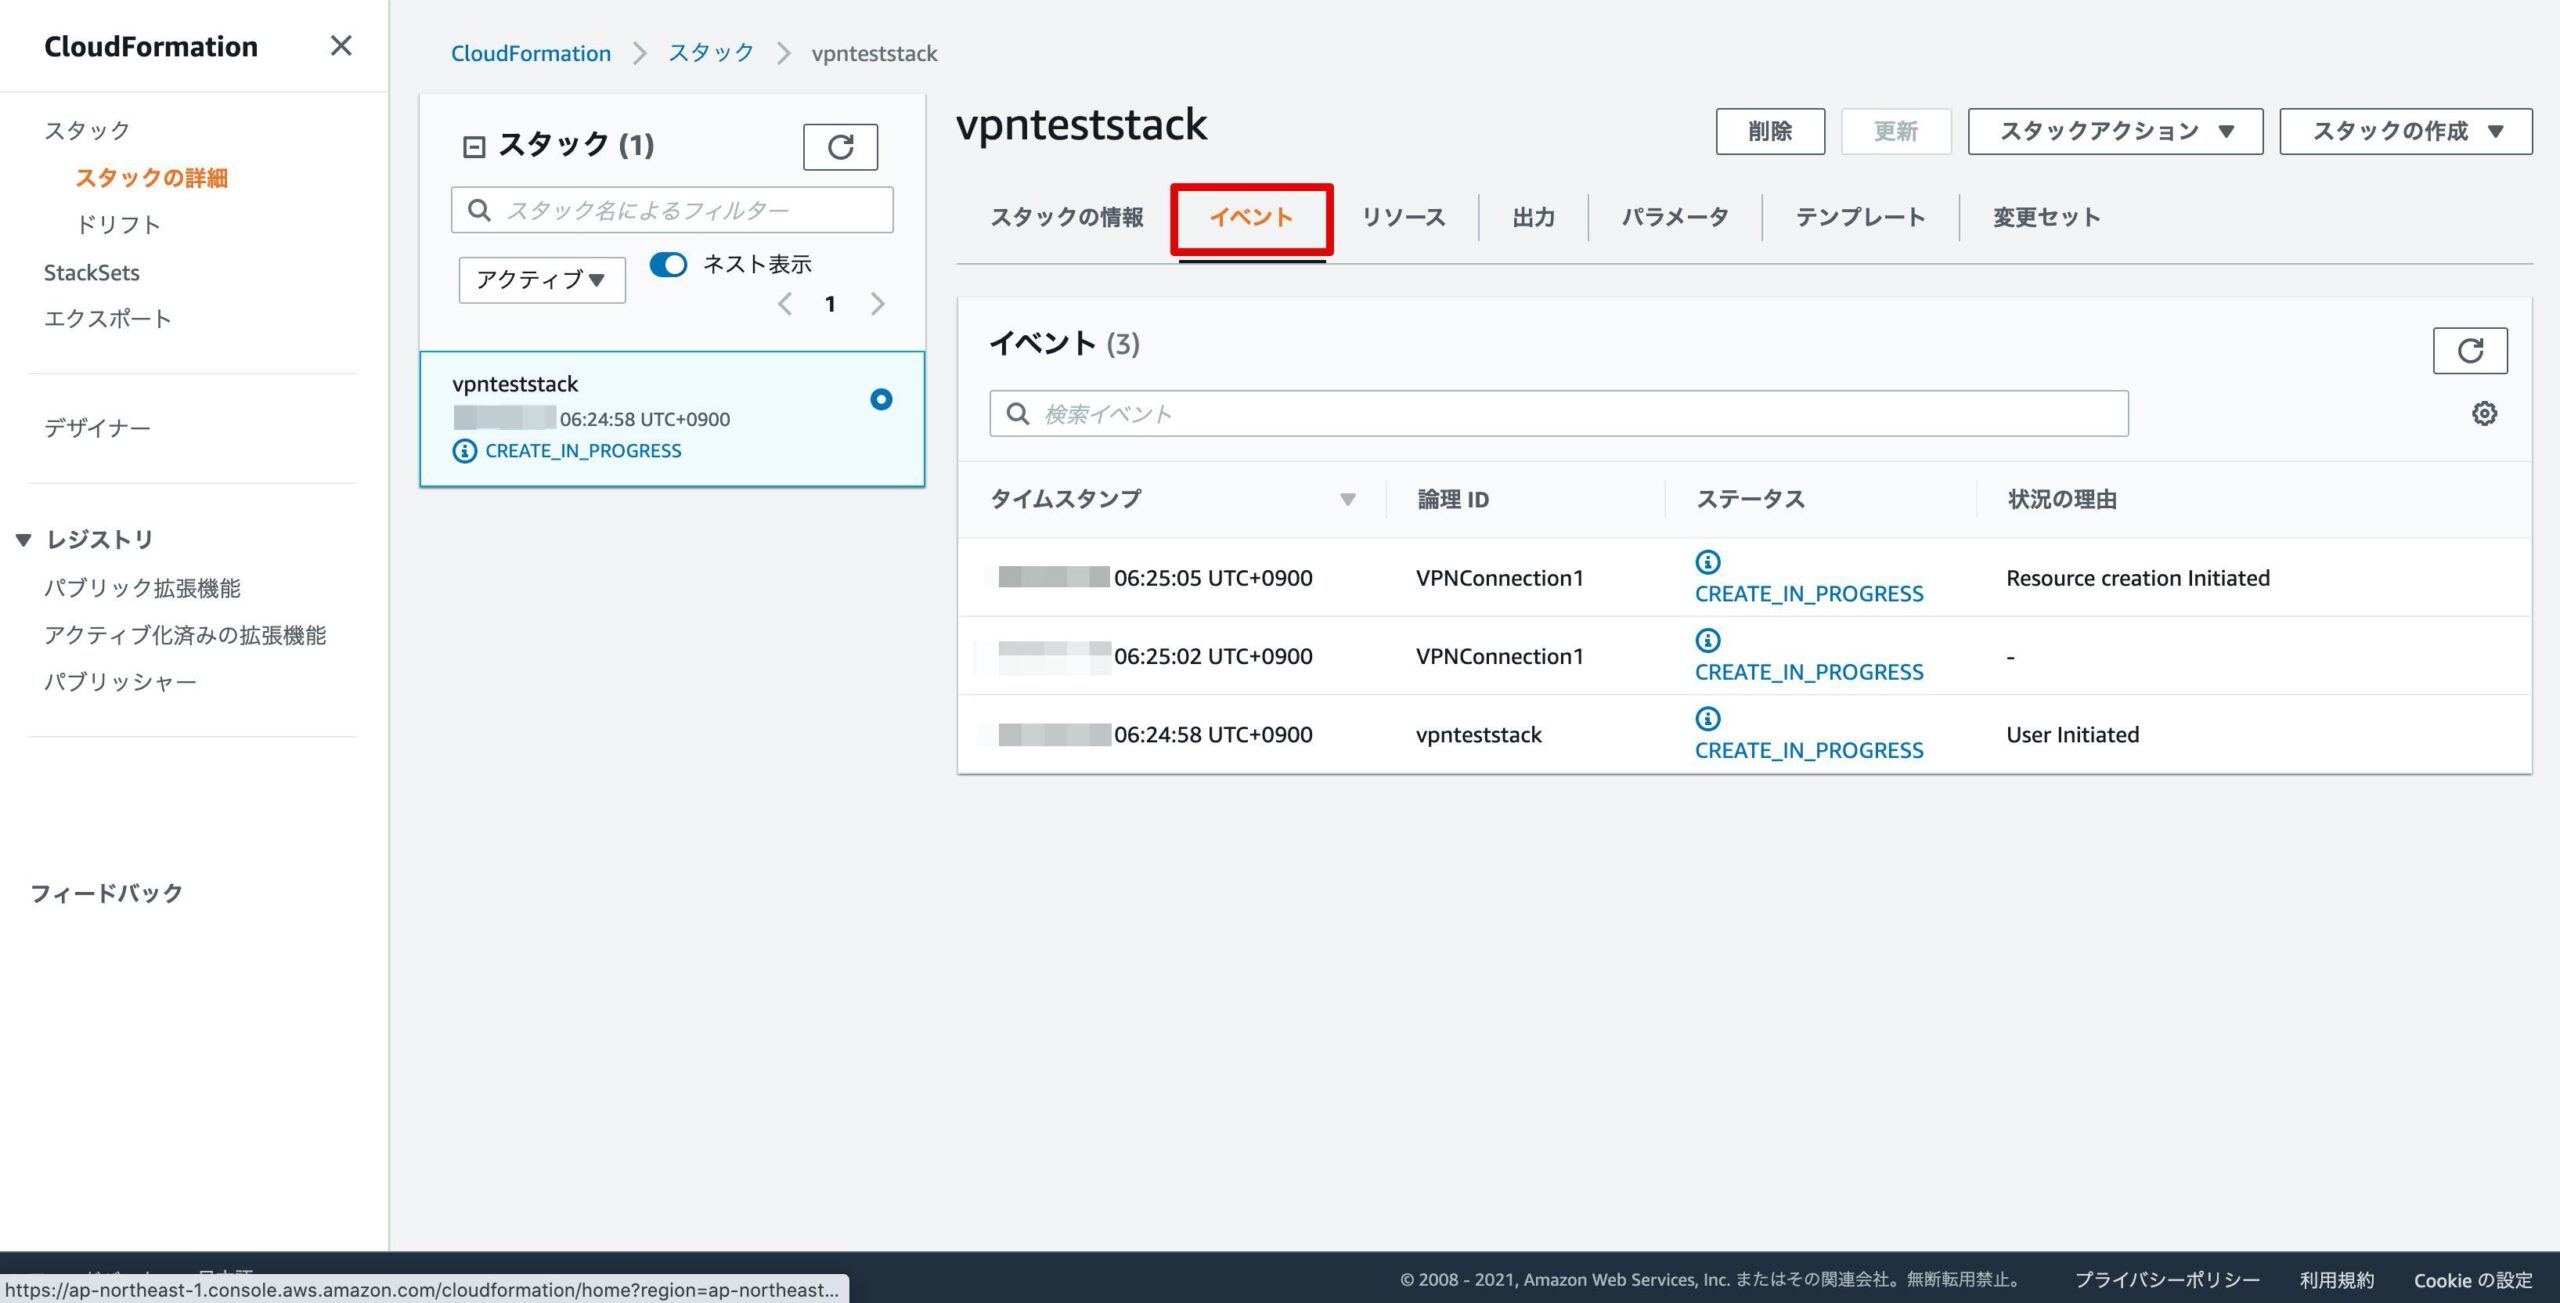
「イベント」タブでスタック内のリソースの作成状況が確認できます。
数分後にもう一度確認すると、ステータスが”CREATE_COMPLETE”となり、スタックの作成が完了していることがわかります。
aws cloudformation describe-stacks[ec2-user@ip-10-0-0-100 CloudFormation]$ aws cloudformation describe-stacks
{
"Stacks": [
{
"StackId": "arn:aws:cloudformation:ap-northeast-1:xxxxxxxxxxxx:stack/vpnteststack/xxxxxxxxxxxxxxxxxxxxxxxxxxxxxxxxxxxx",
"DriftInformation": {
"StackDriftStatus": "NOT_CHECKED"
},
"Tags": [],
"CreationTime": "xxxx-xx-xxT22:23:16.497Z",
"StackName": "vpnteststack",
"NotificationARNs": [],
"StackStatus": "CREATE_COMPLETE",
"DisableRollback": false,
"RollbackConfiguration": {}
}
]
}
サイト間VPN接続の確認
クラウドフォーメーションにより作成されたサイト間VPN接続を確認します。
aws ec2 describe-vpn-connections[ec2-user@ip-10-0-0-100 CloudFormation]$ aws ec2 describe-vpn-connections
{
"VpnConnections": [
{
"Category": "VPN",
"VpnConnectionId": "vpn-xxxxxxxxxxxxxxxxx",
"Tags": [
{
"Value": "vpnteststack",
"Key": "aws:cloudformation:stack-name"
},
{
"Value": "VPNConnection1",
"Key": "aws:cloudformation:logical-id"
},
{
"Value": "arn:aws:cloudformation:ap-northeast-1:xxxxxxxxxxxx:stack/vpnteststack/xxxxxxxxxxxxxxxxxxxxxxxxxxxxxxxxxxxx",
"Key": "aws:cloudformation:stack-id"
},
{
"Value": "aws-vpn-test",
"Key": "Name"
}
],
〜・〜・〜・〜・〜 中略 〜・〜・〜・〜・〜
"Routes": [
{
"DestinationCidrBlock": "172.16.0.0/24",
"State": "available"
},
{
"DestinationCidrBlock": "192.168.1.0/24",
"State": "available"
}
],
"State": "available",
"VpnGatewayId": "vgw-xxxxxxxxxxxxxxxx",
"CustomerGatewayId": "cgw-xxxxxxxxxxxxxxxxx",
"Type": "ipsec.1",
"Options": {
"RemoteIpv4NetworkCidr": "0.0.0.0/0",
"EnableAcceleration": false,
"TunnelInsideIpVersion": "ipv4",
"TunnelOptions": [
{
"TunnelInsideCidr": "169.254.173.148/30",
"PreSharedKey": "xxxxxxxxxxxxxxxxxxxxxxxxxxxxxxxx",
"OutsideIpAddress": "xxx.xxx.xxx.xxx"
},
{
"TunnelInsideCidr": "169.254.209.216/30",
"PreSharedKey": "xxxxxxxxxxxxxxxxxxxxxxxxxxxxxxxx",
"OutsideIpAddress": "xxx.xxx.xxx.xxx"
}
],
"StaticRoutesOnly": true,
"LocalIpv4NetworkCidr": "0.0.0.0/0"
},
}
]
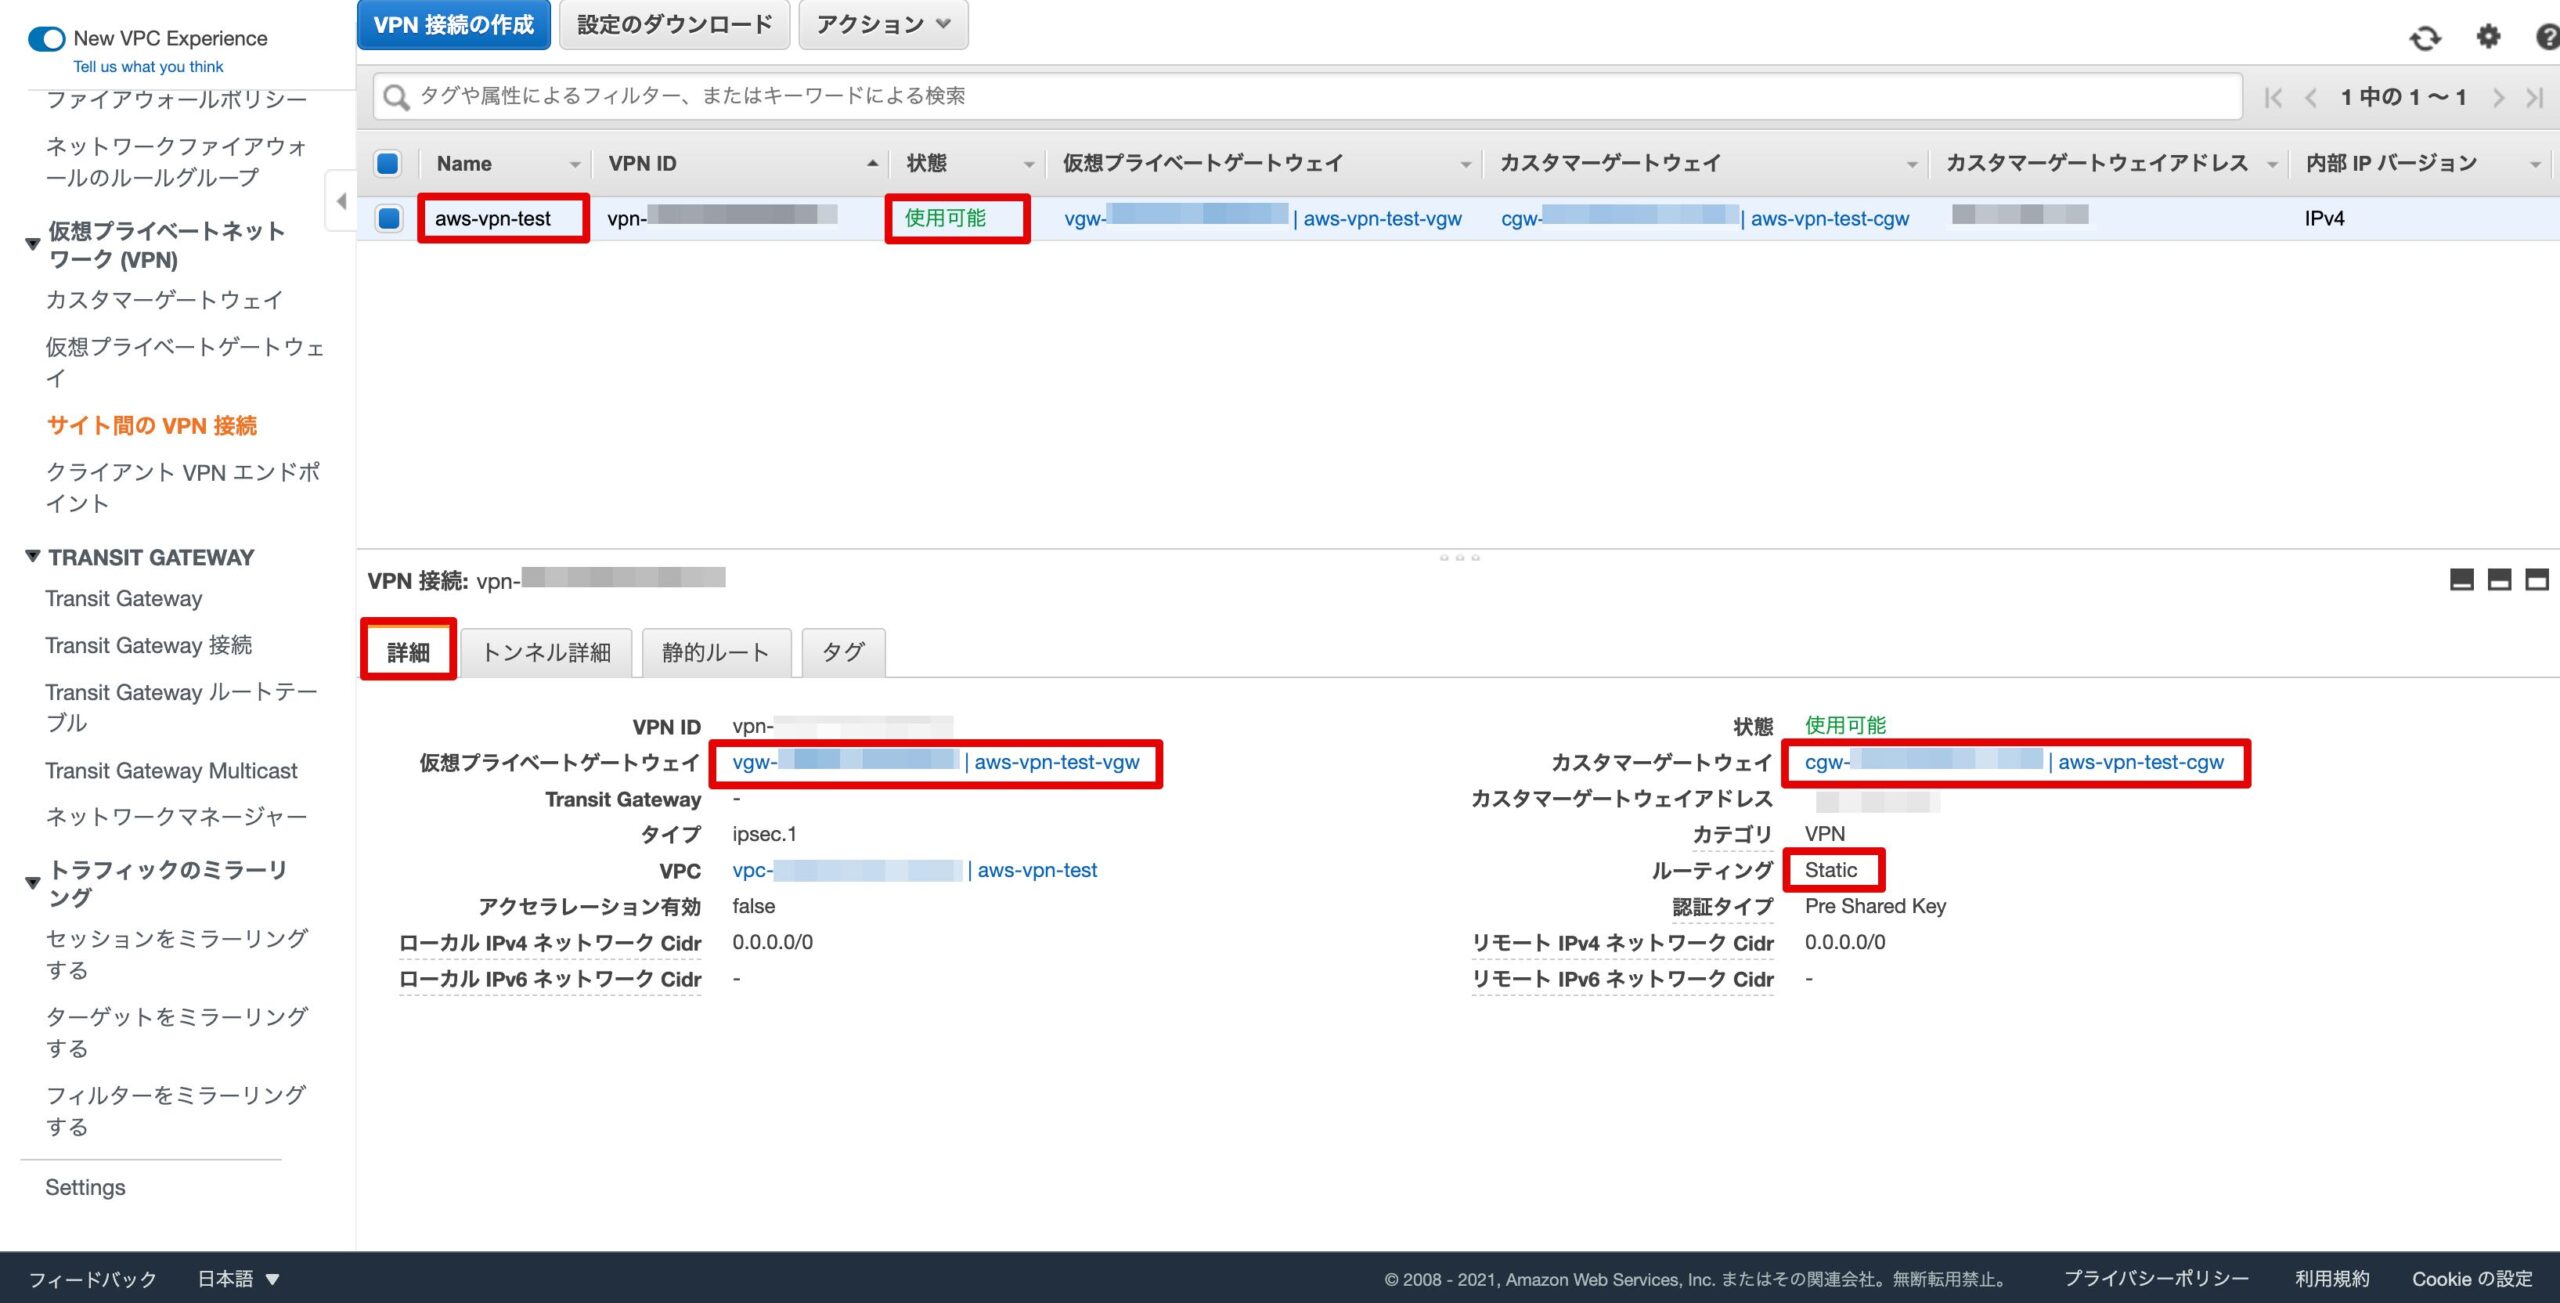
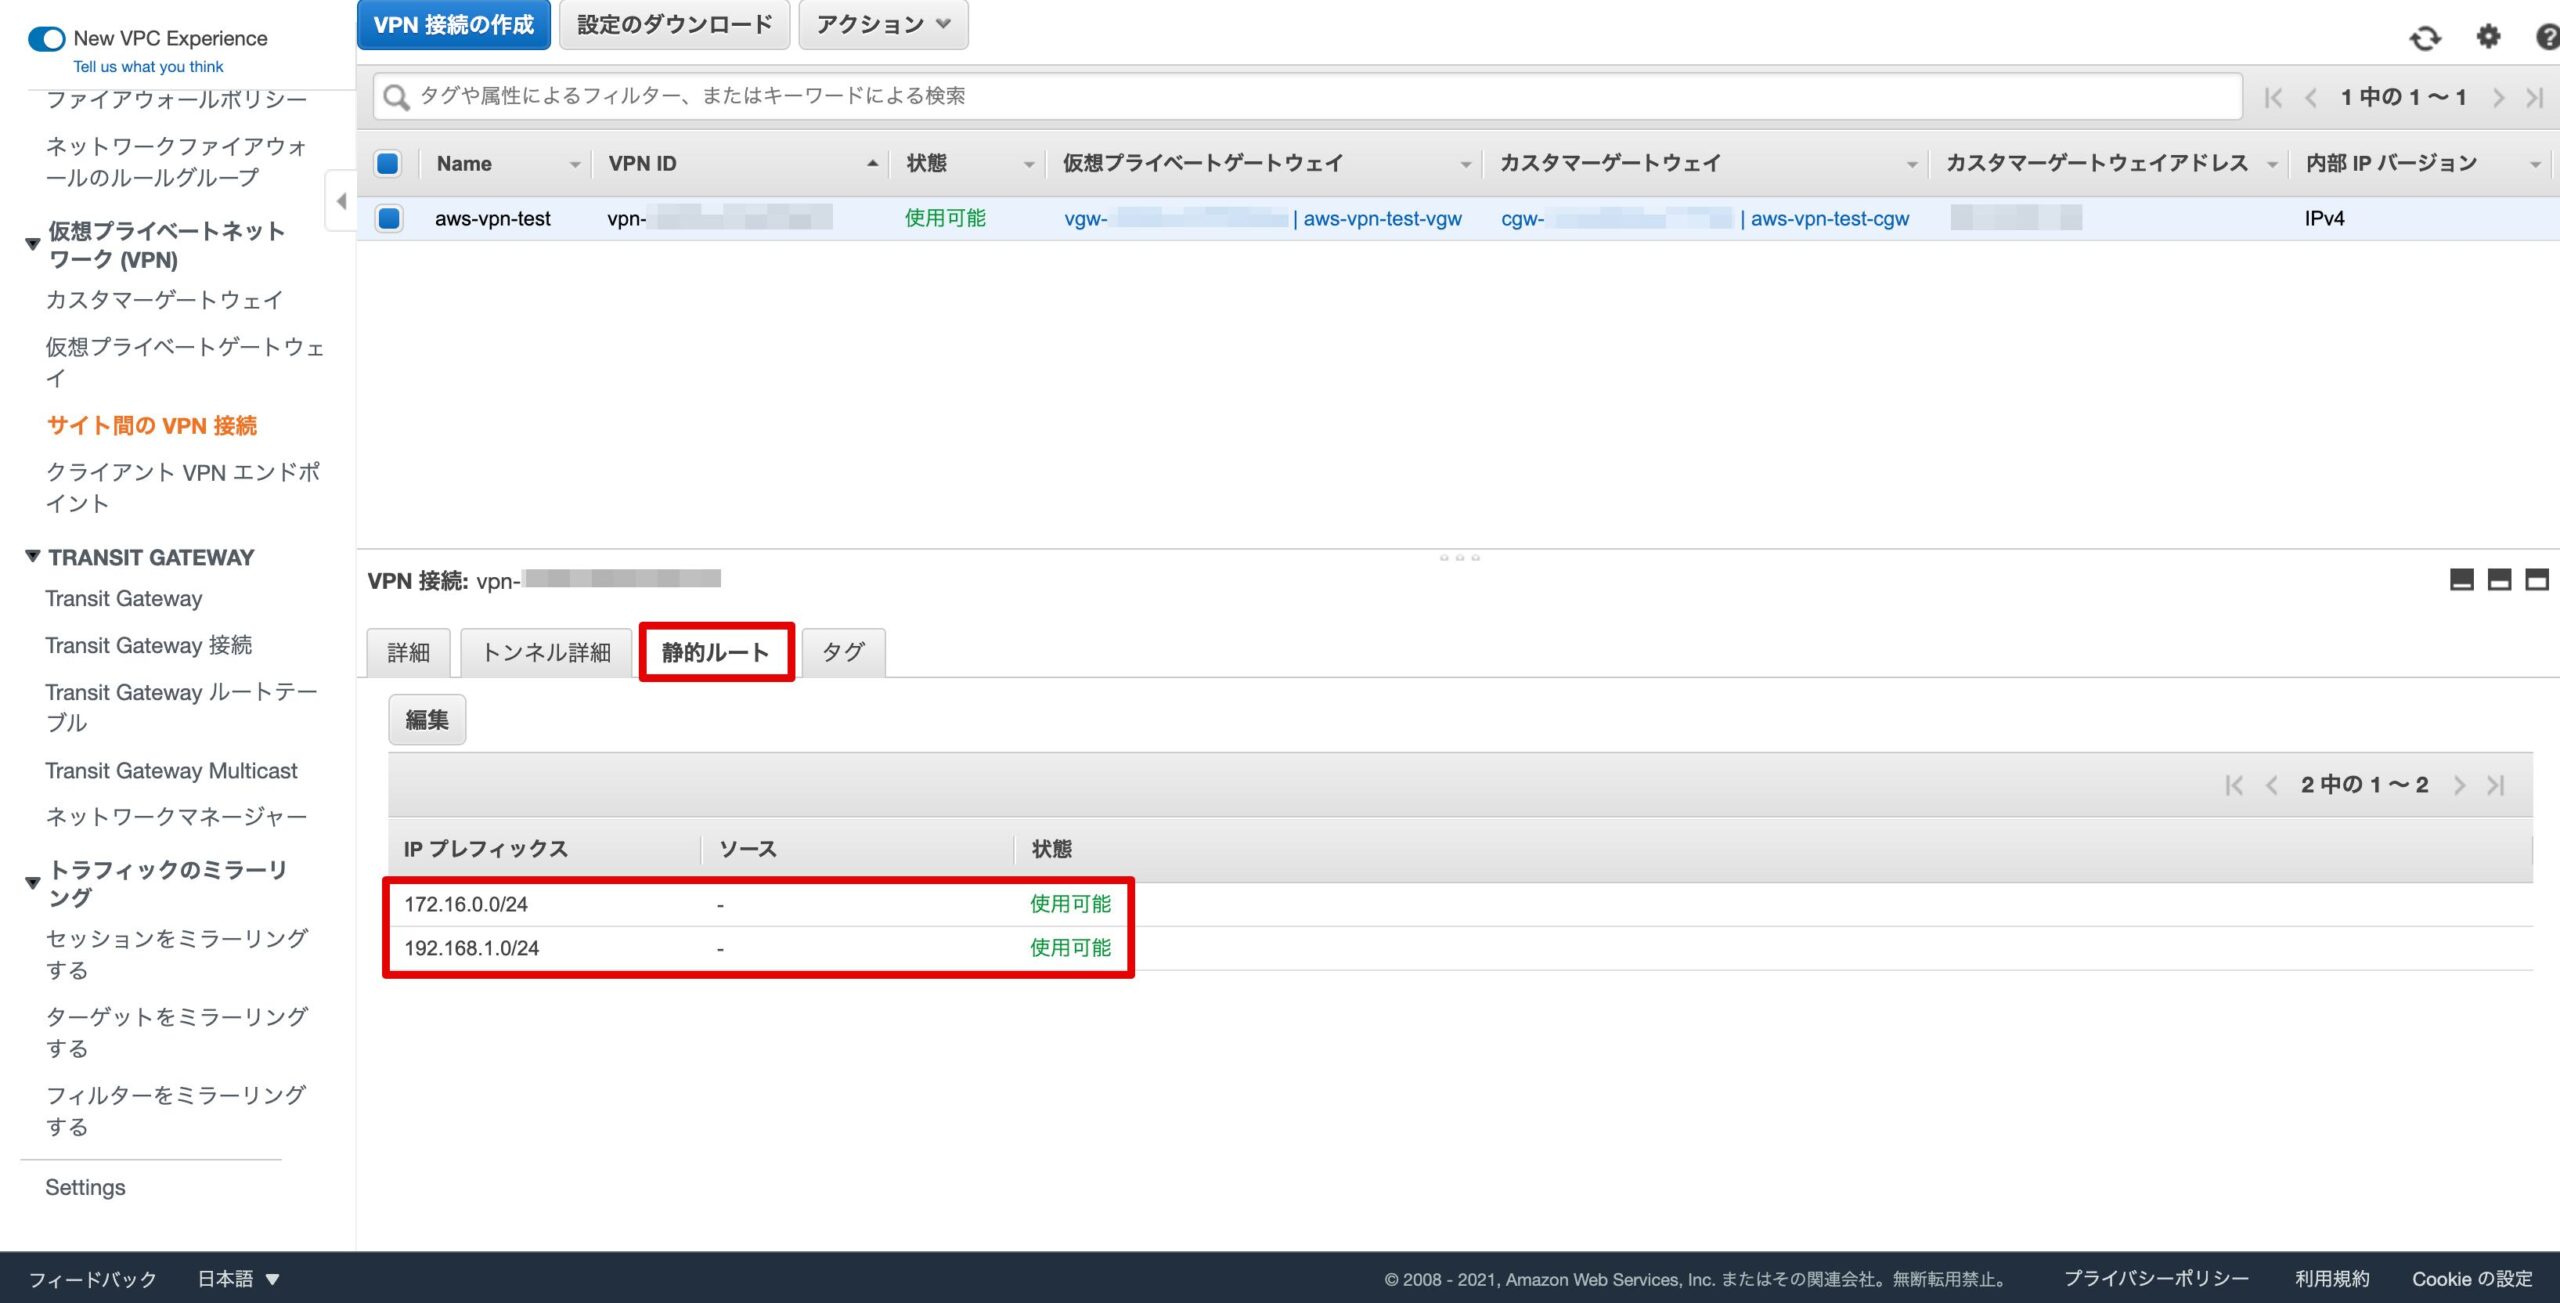
}AWSの画面でも確認します。
“aws-vpn-test”が作成され、使用可能となっています。
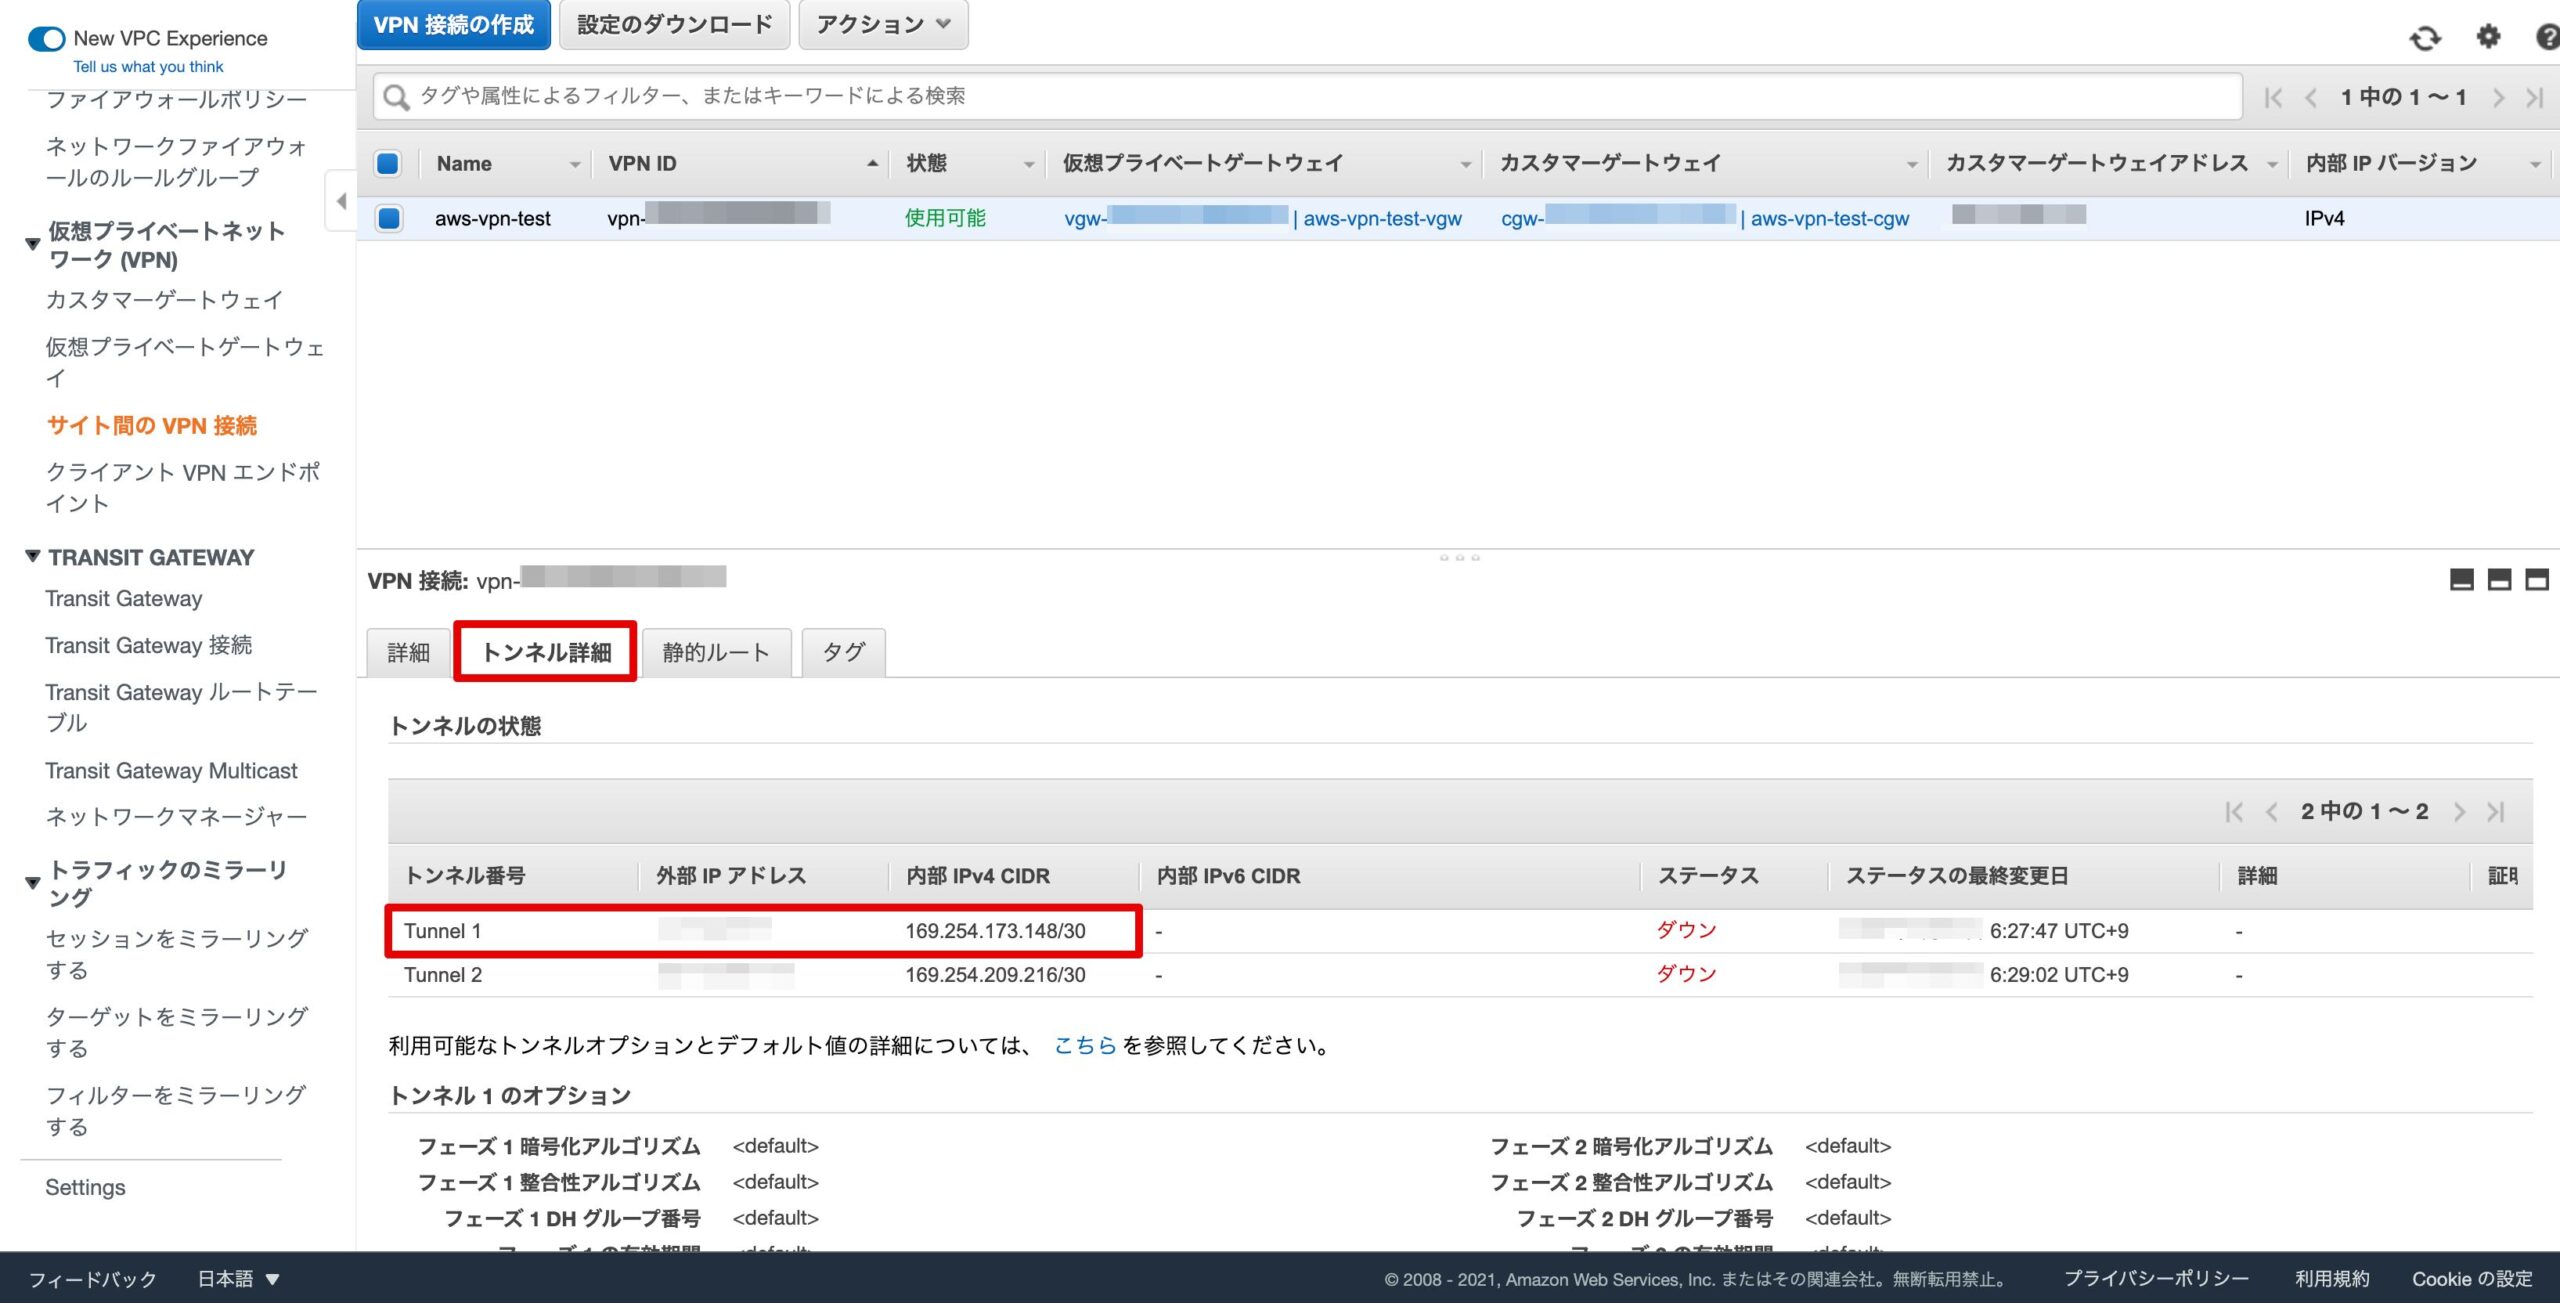
指定した内部 IPv4 CIDR でトンネル1が作成されています。
指定した静的ルートも追加され、使用可能となっています。
サイト間VPN接続の削除
対象のスタックを削除することにより、自動的にサイト間VPN接続を削除することができます。
AWS CLIを利用して、スタックを削除するには下記のコマンドを実行します。
aws cloudformation delete-stack --stack-name vpnteststackコマンド実行直後にスタックのステータスを確認すると、”DELETE_IN_PROGRESS”となっています。
aws cloudformation describe-stacks[ec2-user@ip-10-0-0-100 CloudFormation]$ aws cloudformation describe-stacks
{
"Stacks": [
{
"StackId": "arn:aws:cloudformation:ap-northeast-1:xxxxxxxxxxxx:stack/vpnteststack/xxxxxxxxxxxxxxxxxxxxxxxxxxxxxxxxxxxx",
"DriftInformation": {
"StackDriftStatus": "NOT_CHECKED"
},
"DeletionTime": "xxxx-xx-xxT22:53:08.707Z",
"Tags": [],
"CreationTime": "xxxx-xx-xxT22:23:16.497Z",
"StackName": "vpnteststack",
"NotificationARNs": [],
"StackStatus": "DELETE_IN_PROGRESS",
"DisableRollback": false,
"RollbackConfiguration": {}
}
]
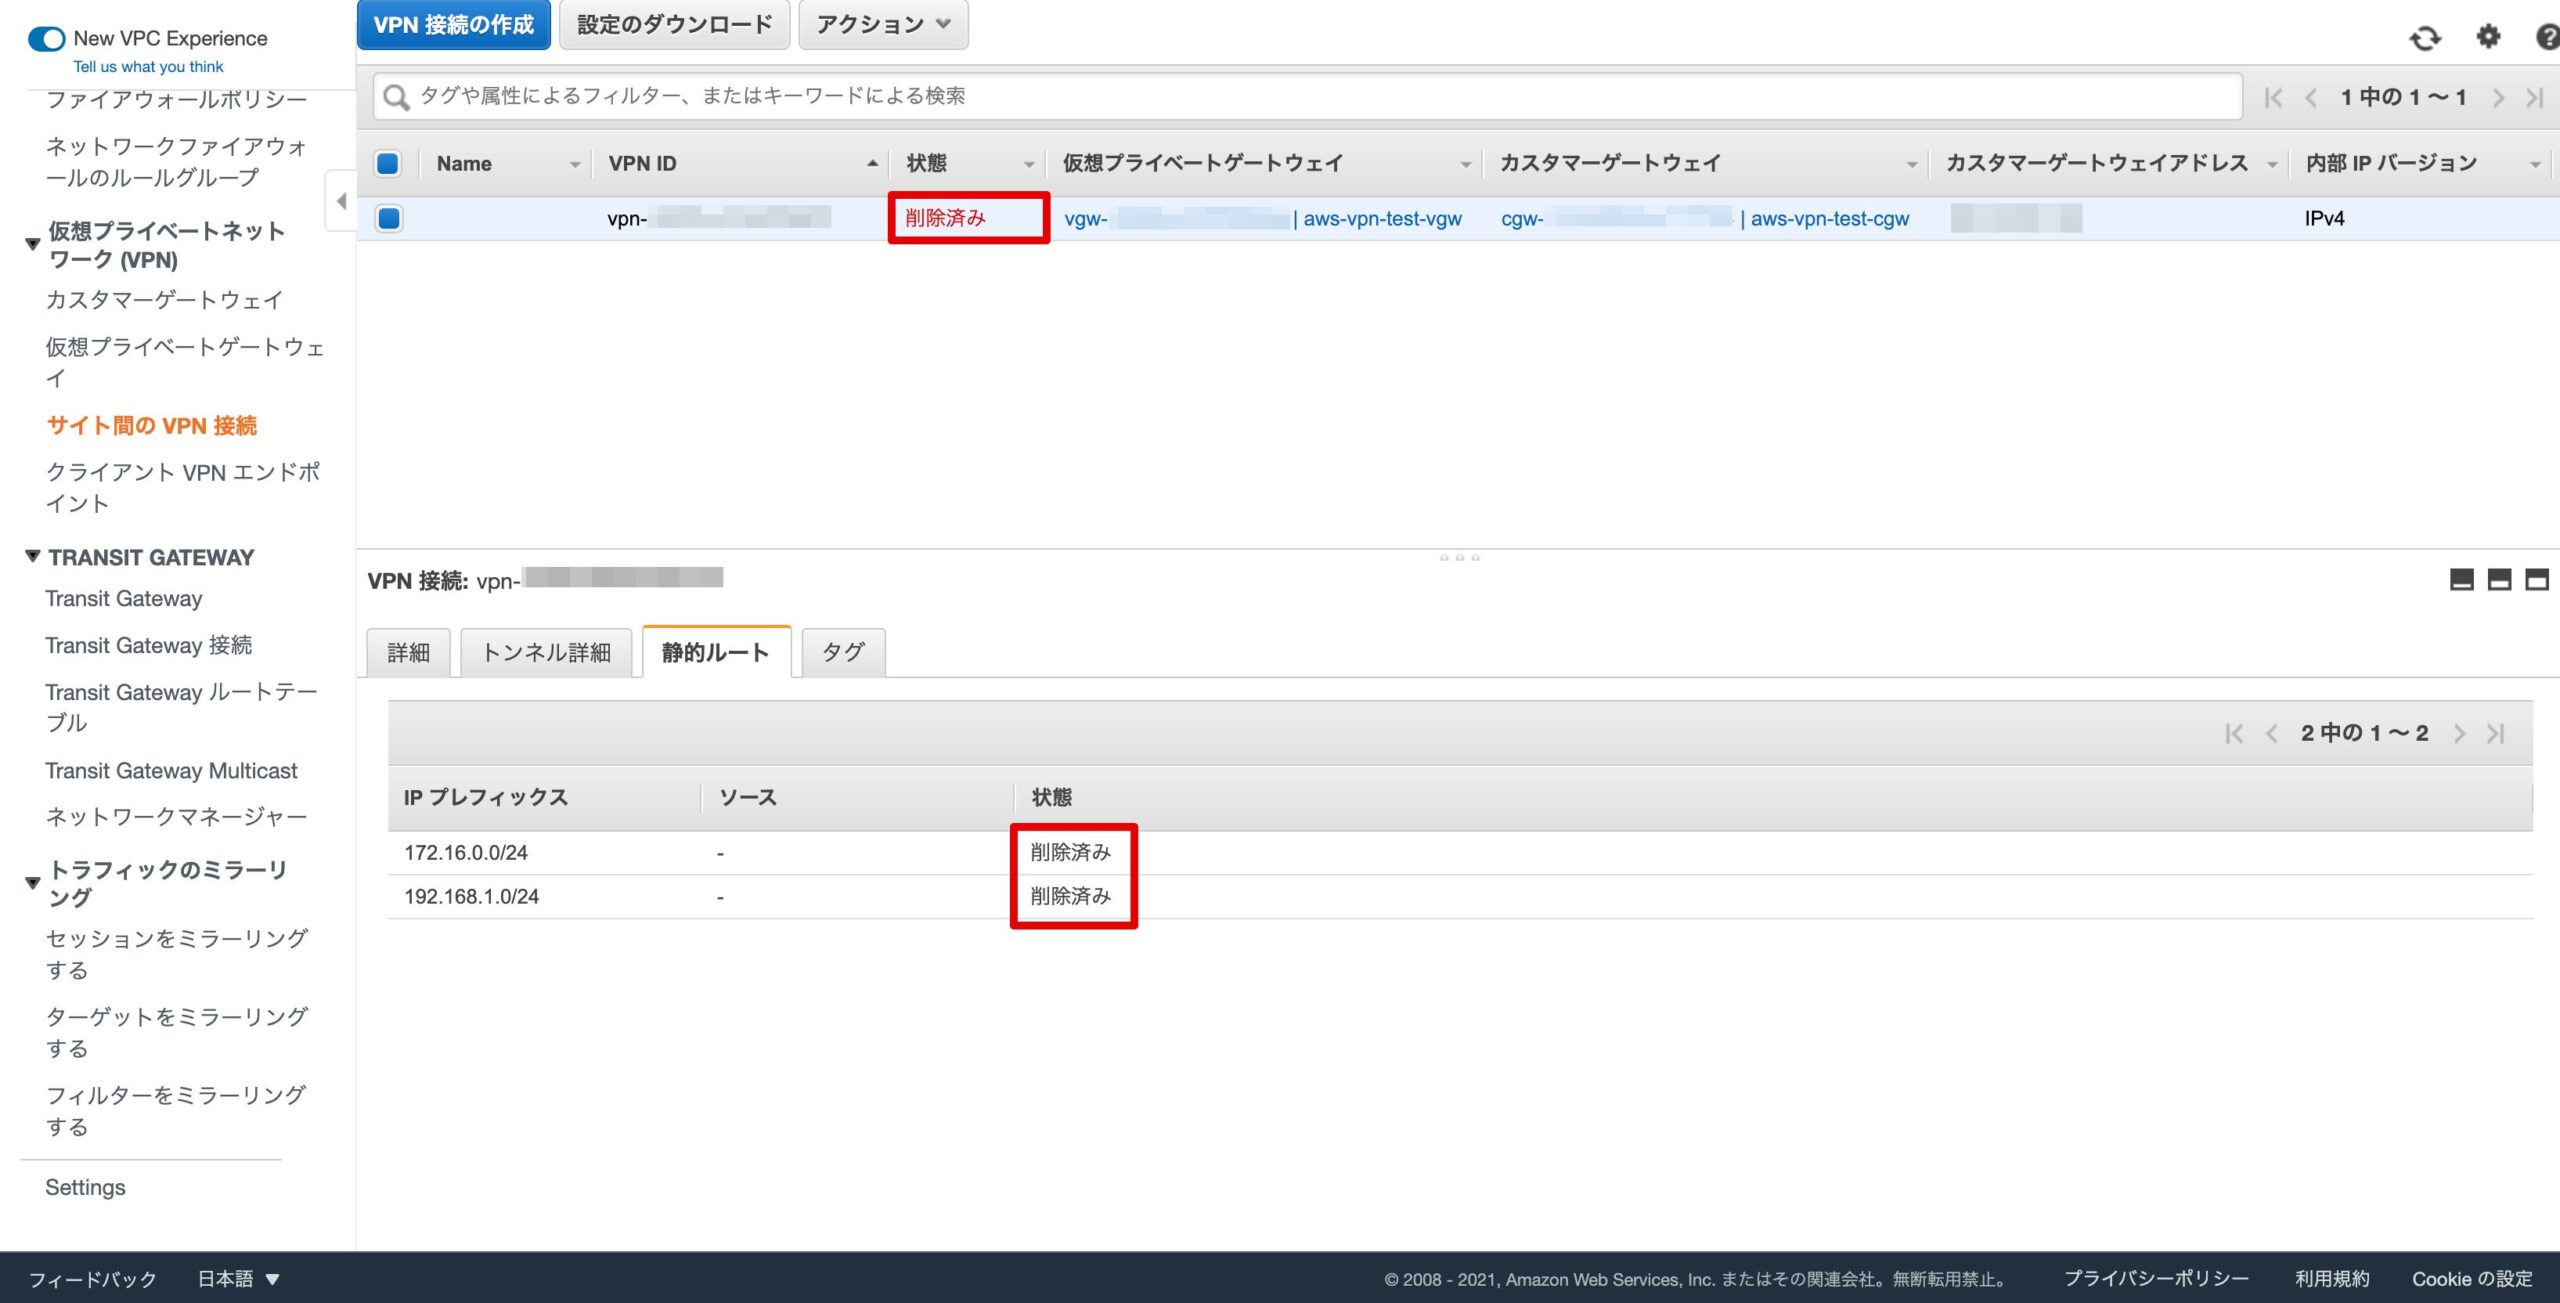
}AWSの画面上で確認すると、対象のスタックが削除されています。
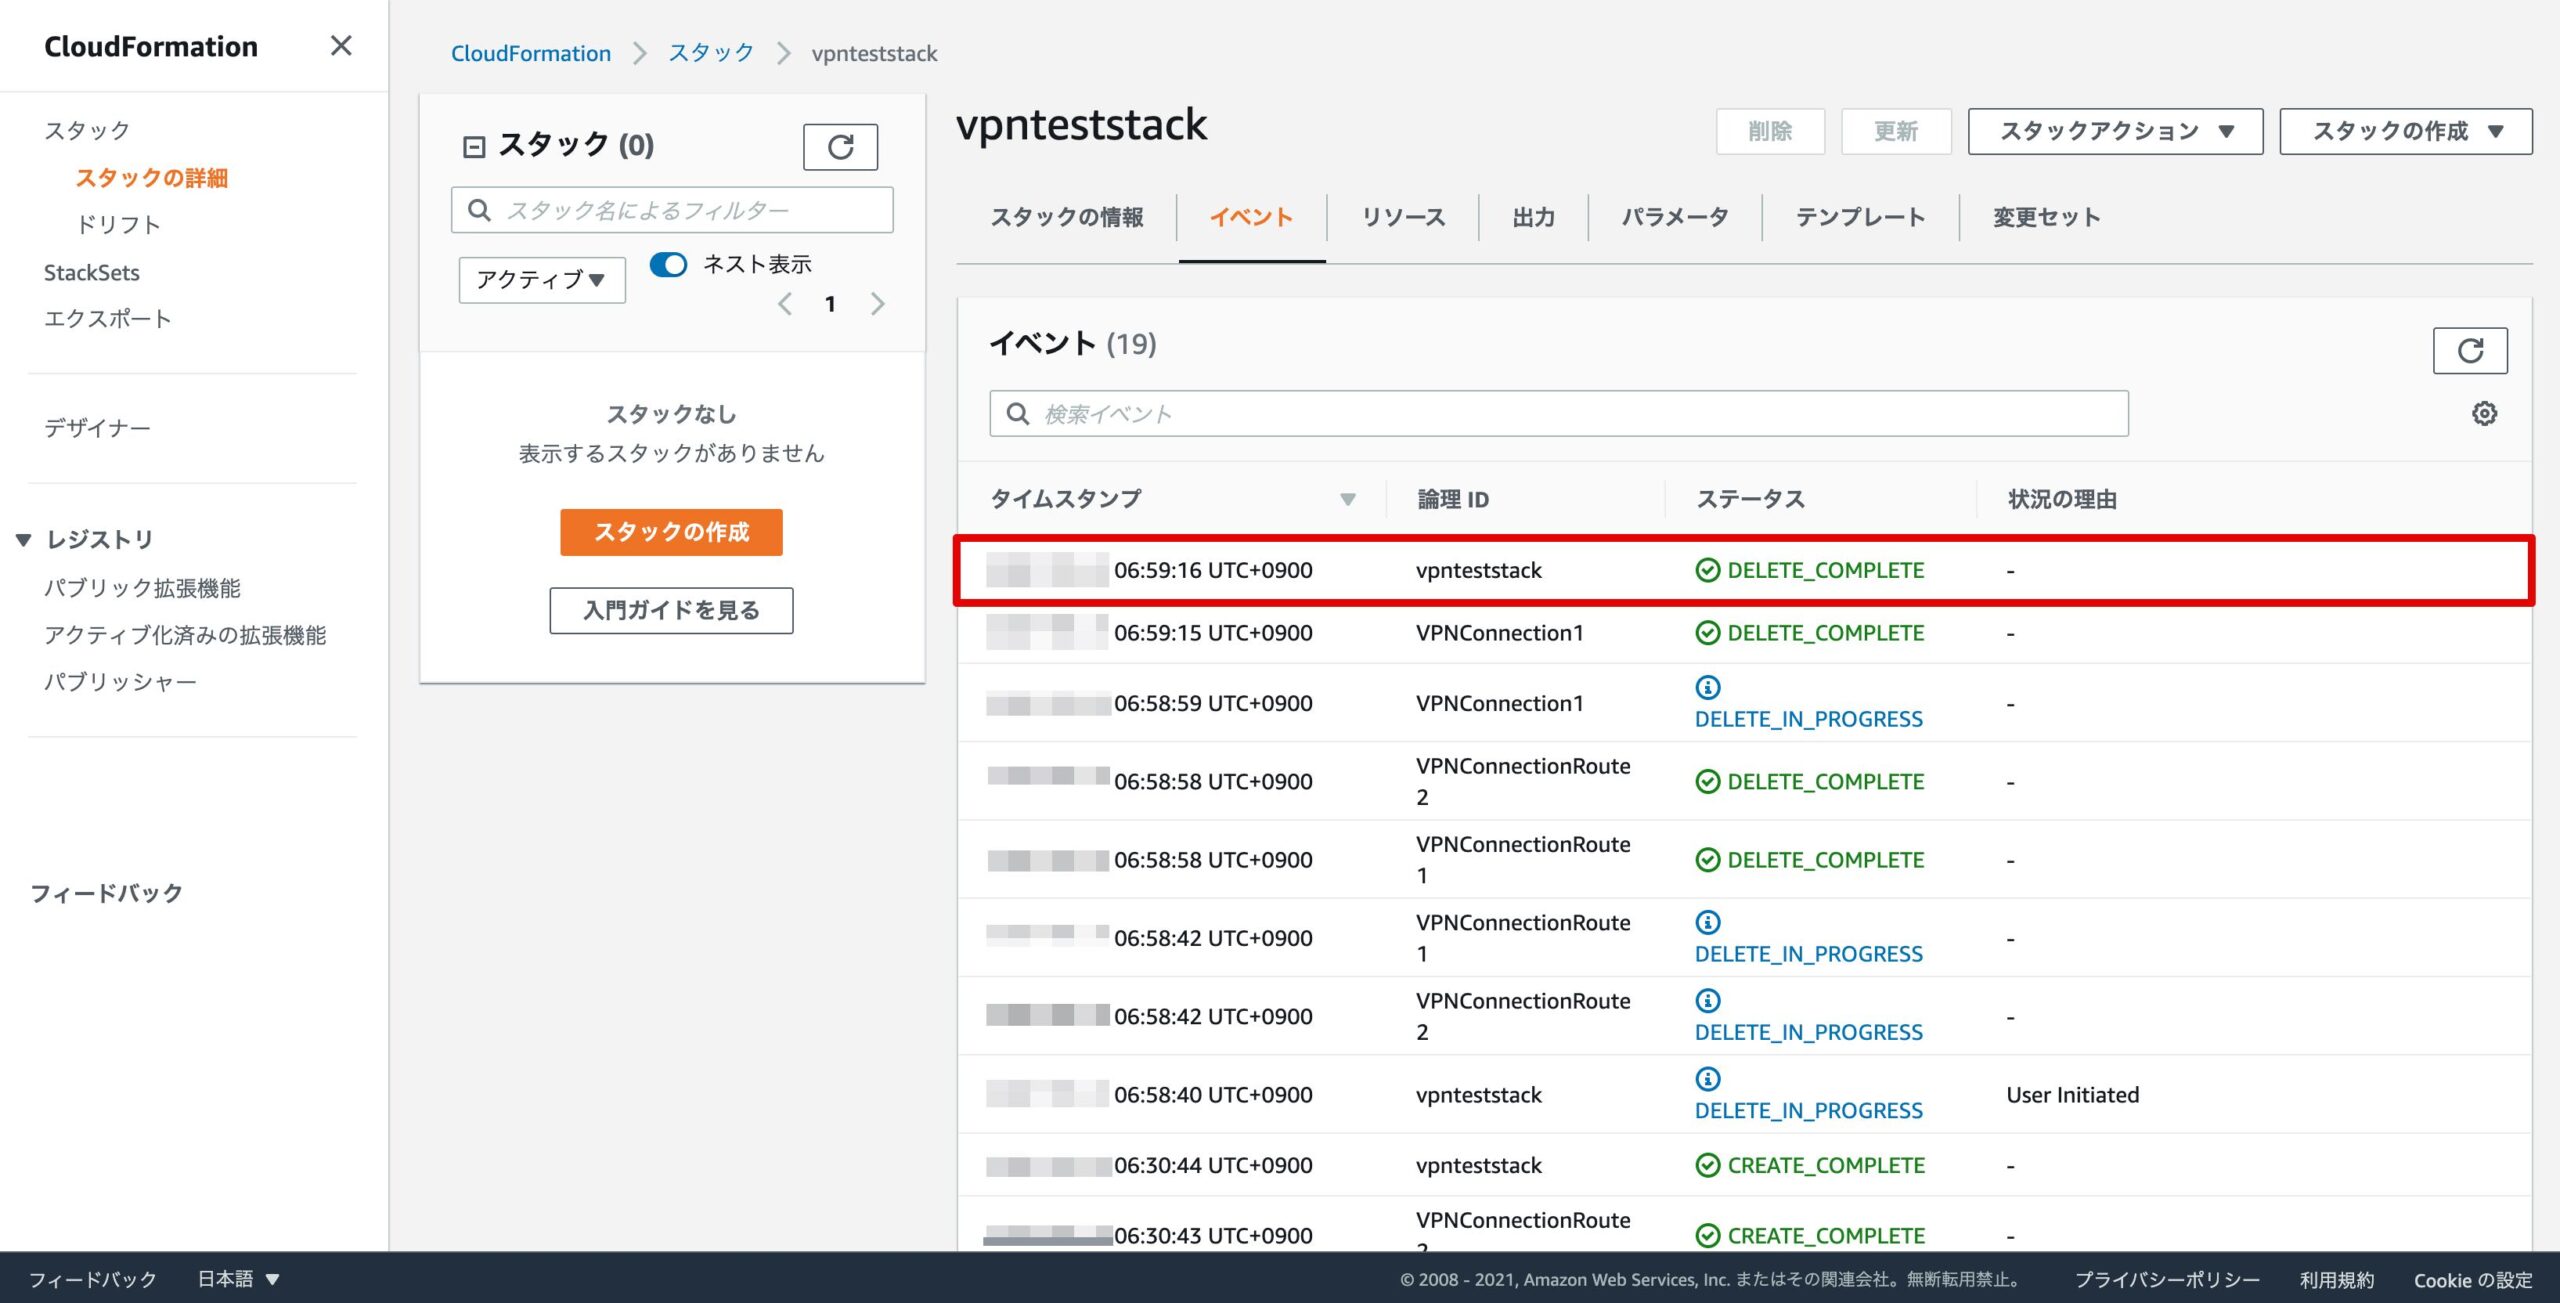
サイト間VPN接続に関しても、削除されていることがわかります。
これで、AWSサイト間VPNの構築(7.AWS CLI によるVPN接続の作成)の説明は完了です!