監視サーバーをAWS上で構築し、CML上のネットワーク機器/サーバーを監視します。監視ソフトウェアはZabbixを利用します。
【前回】AWS上での監視サーバー(Zabbix)構築【2.AWSのEC2構築】
【次回】AWS上での監視サーバー(Zabbix)構築【4.Zabbixのインストールと設定】
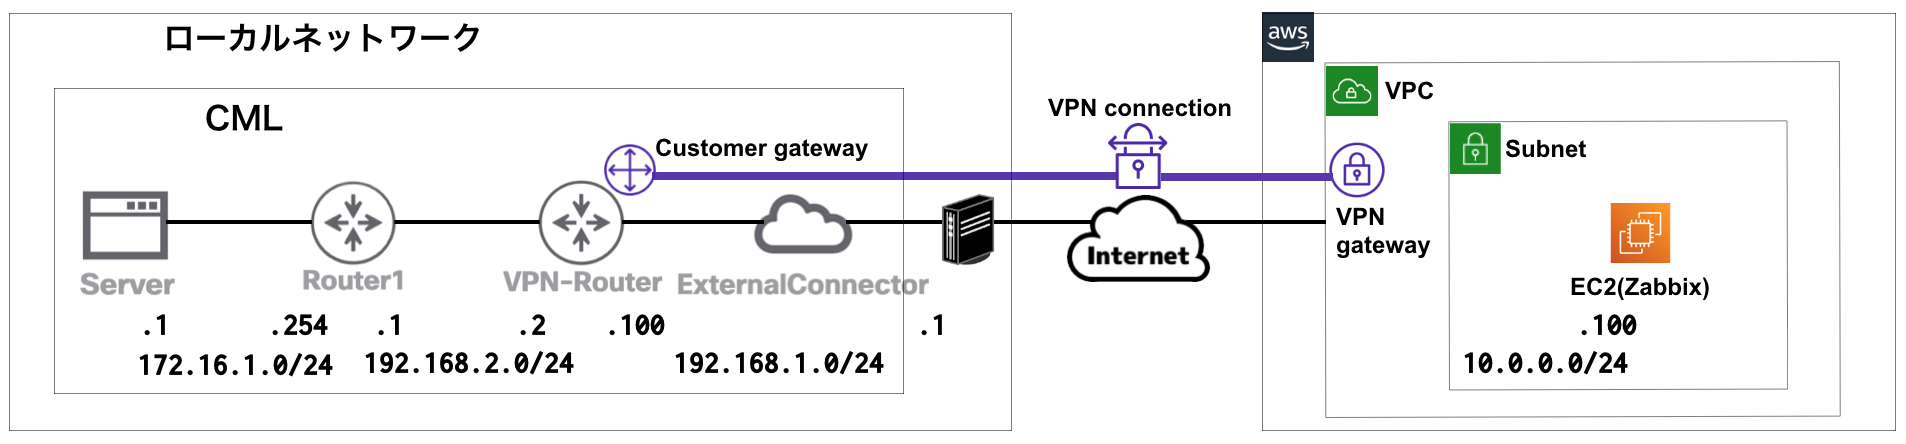
ネットワーク構成
下記のネットワーク環境を構築し、AWS上のEC2(Zabbixサーバー)から、CML上のネットワーク機器/サーバーを監視できるようにしていきます。
AWSのRDS構築
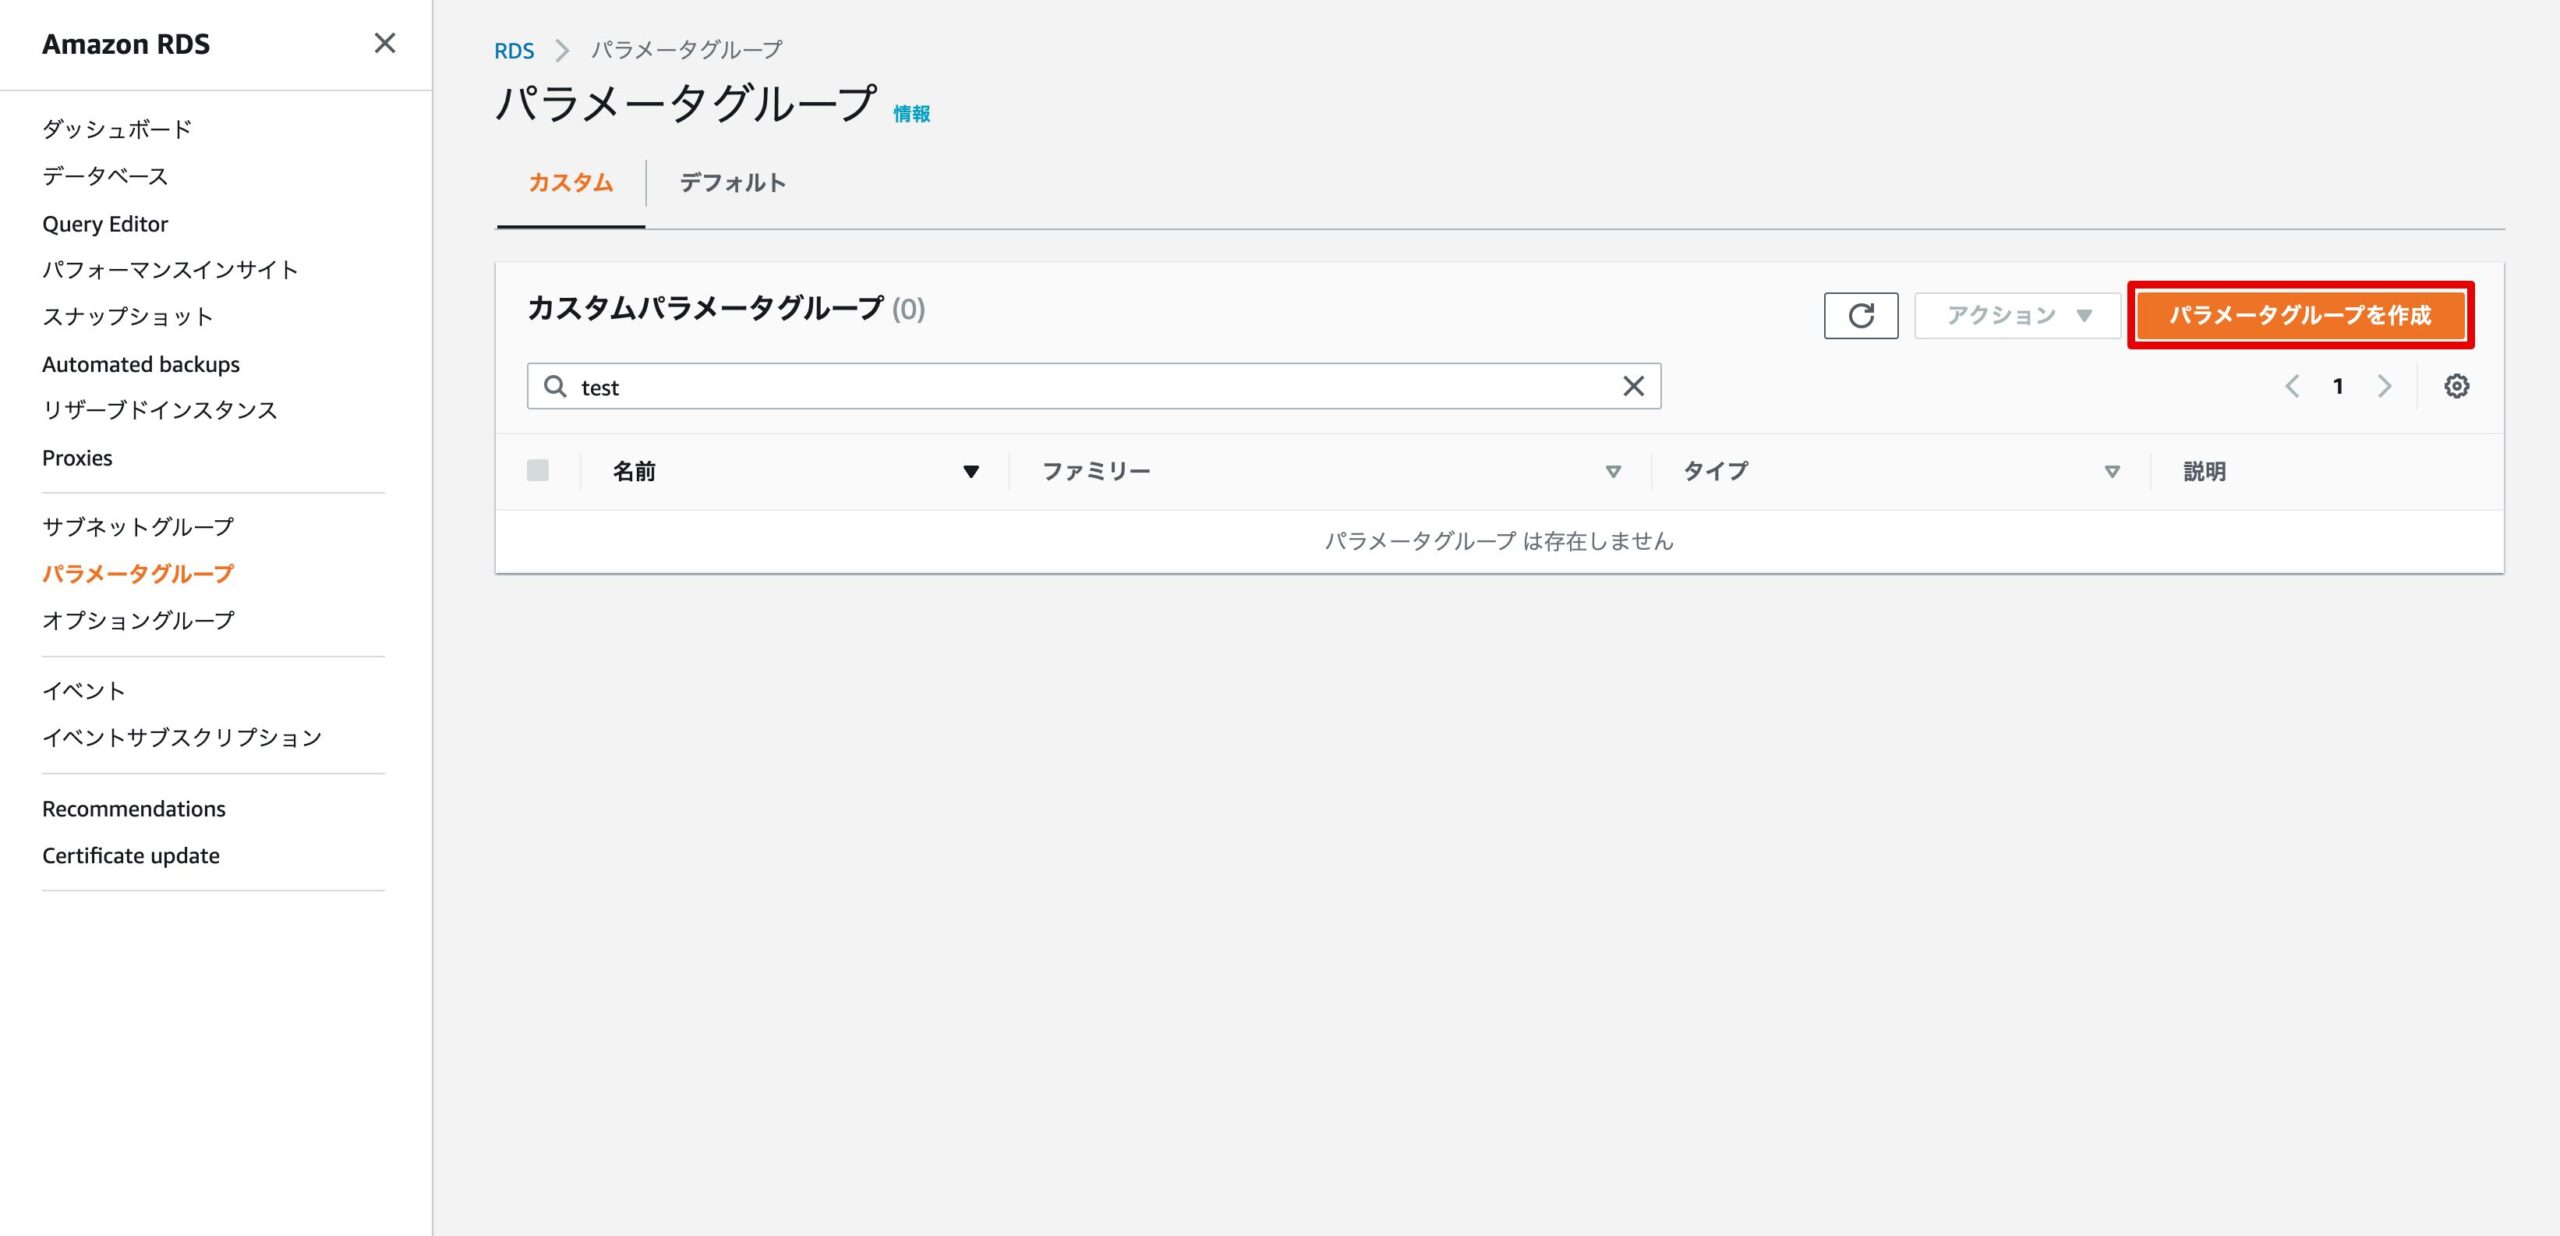
パラメータグループの作成
MyzSQL8.0以上では、デフォルトの設定ではZabbixが動作しないため、RDSを適用するパラメータグループを作成します。
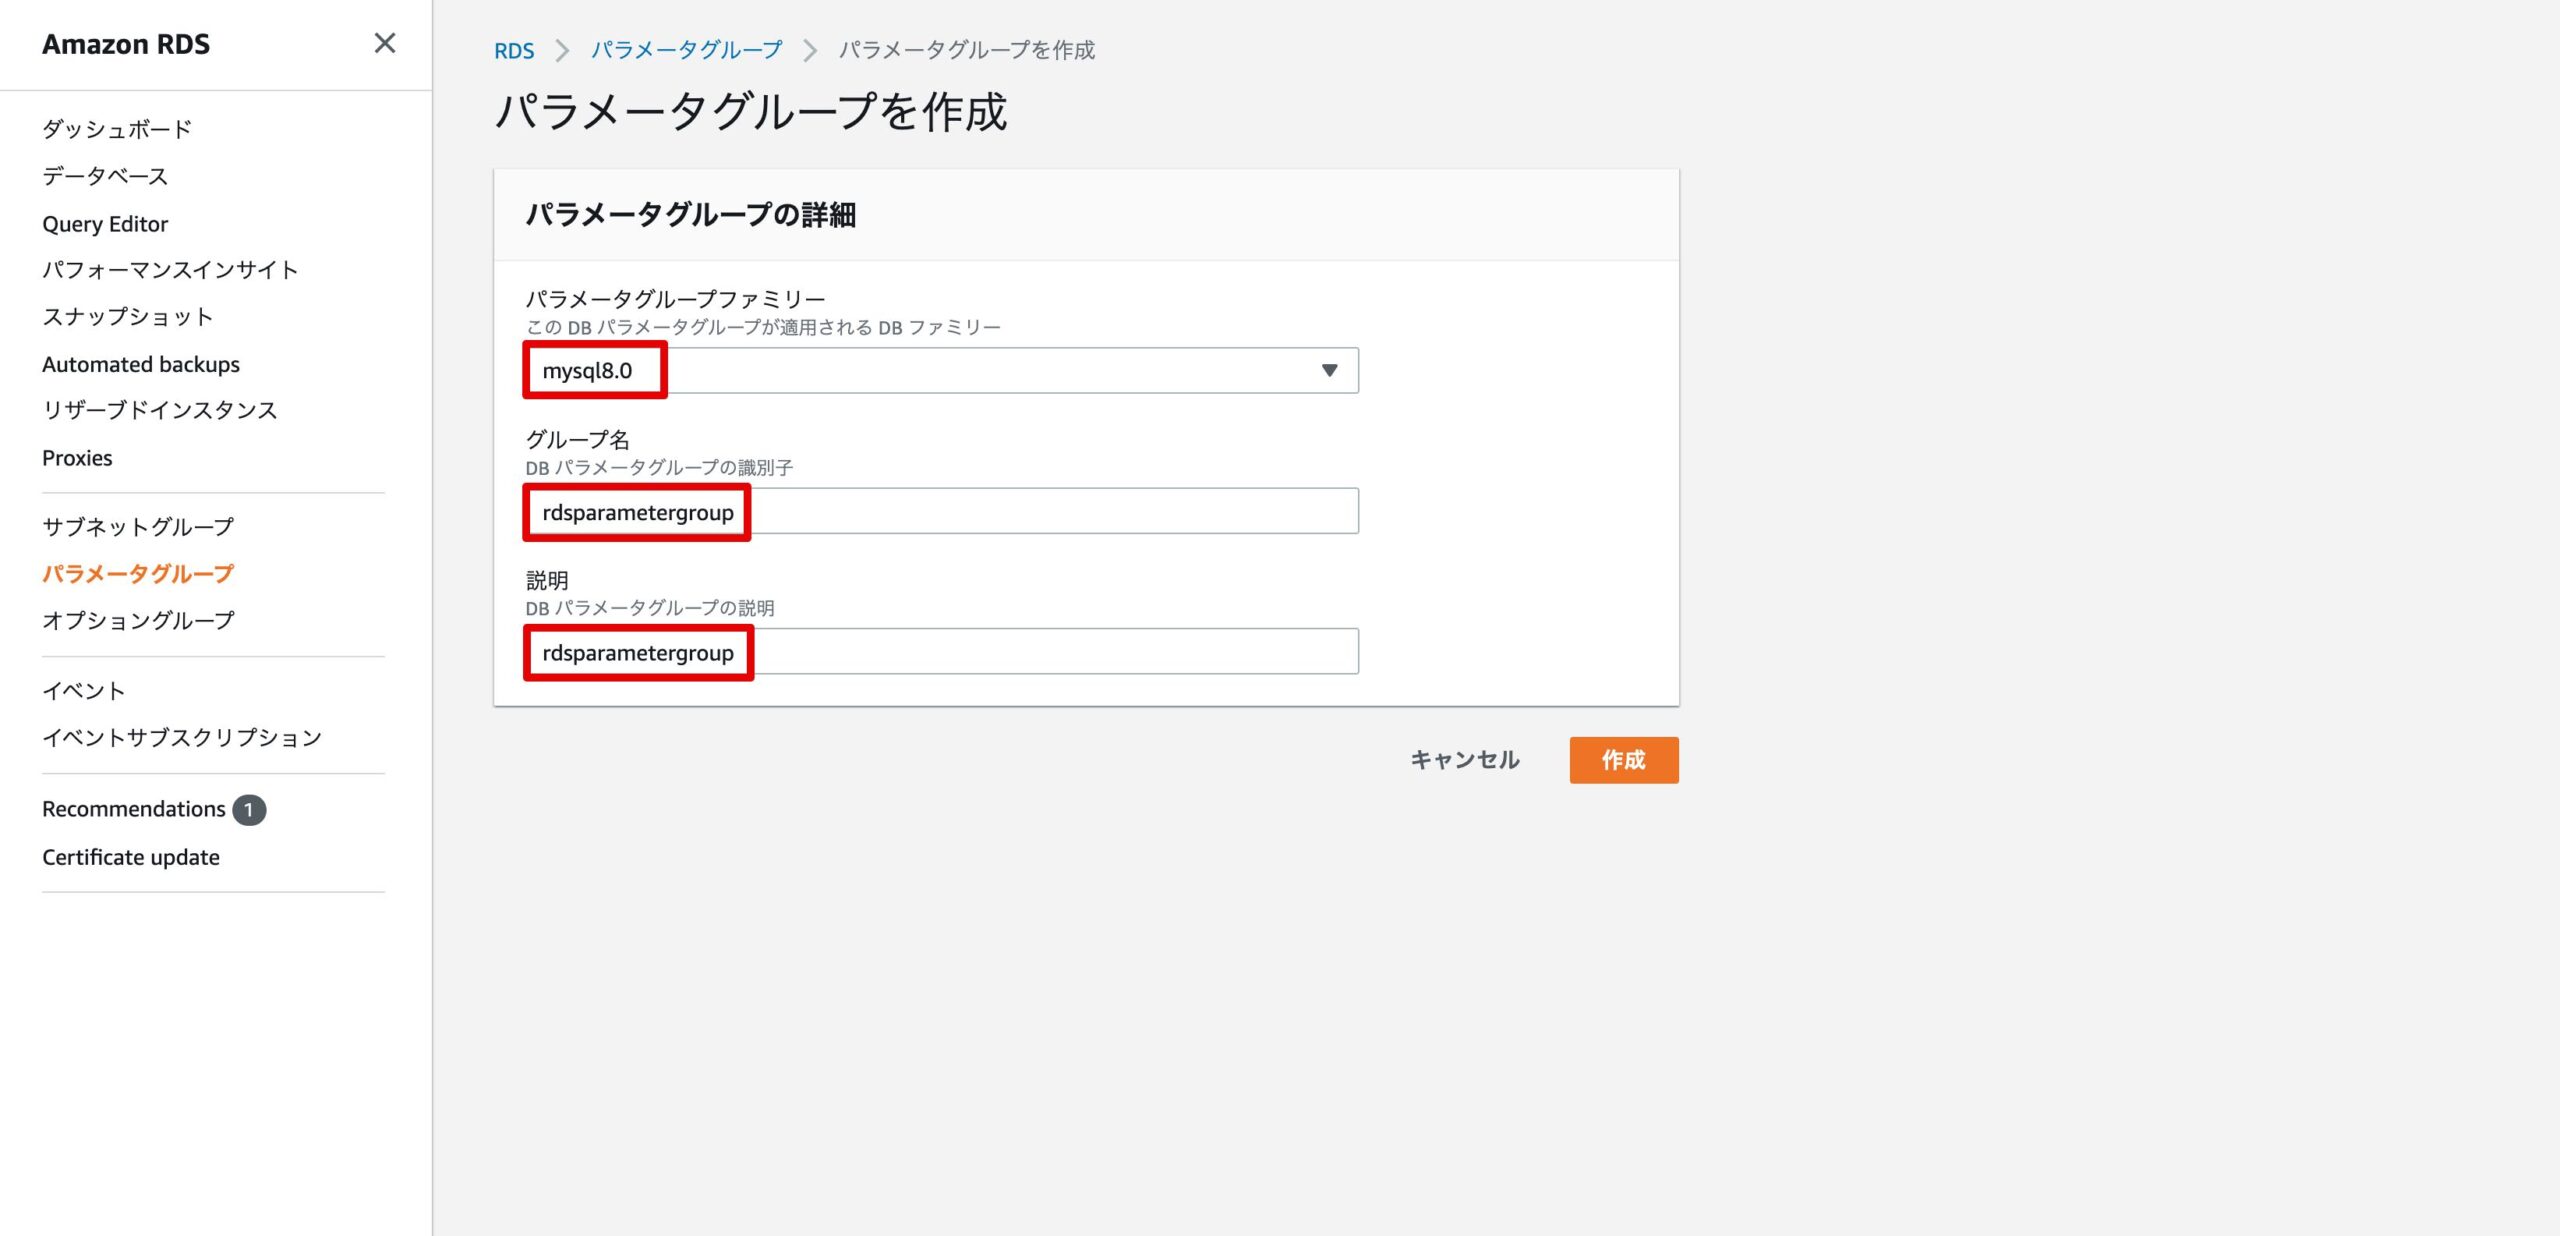
RDSの画面から、「パラメータグループを作成」をクリックします。
パラメータグループファミリーは、「mysql8.0」を選択します。グループ名/説明は、「rdsparametergroup」としています。
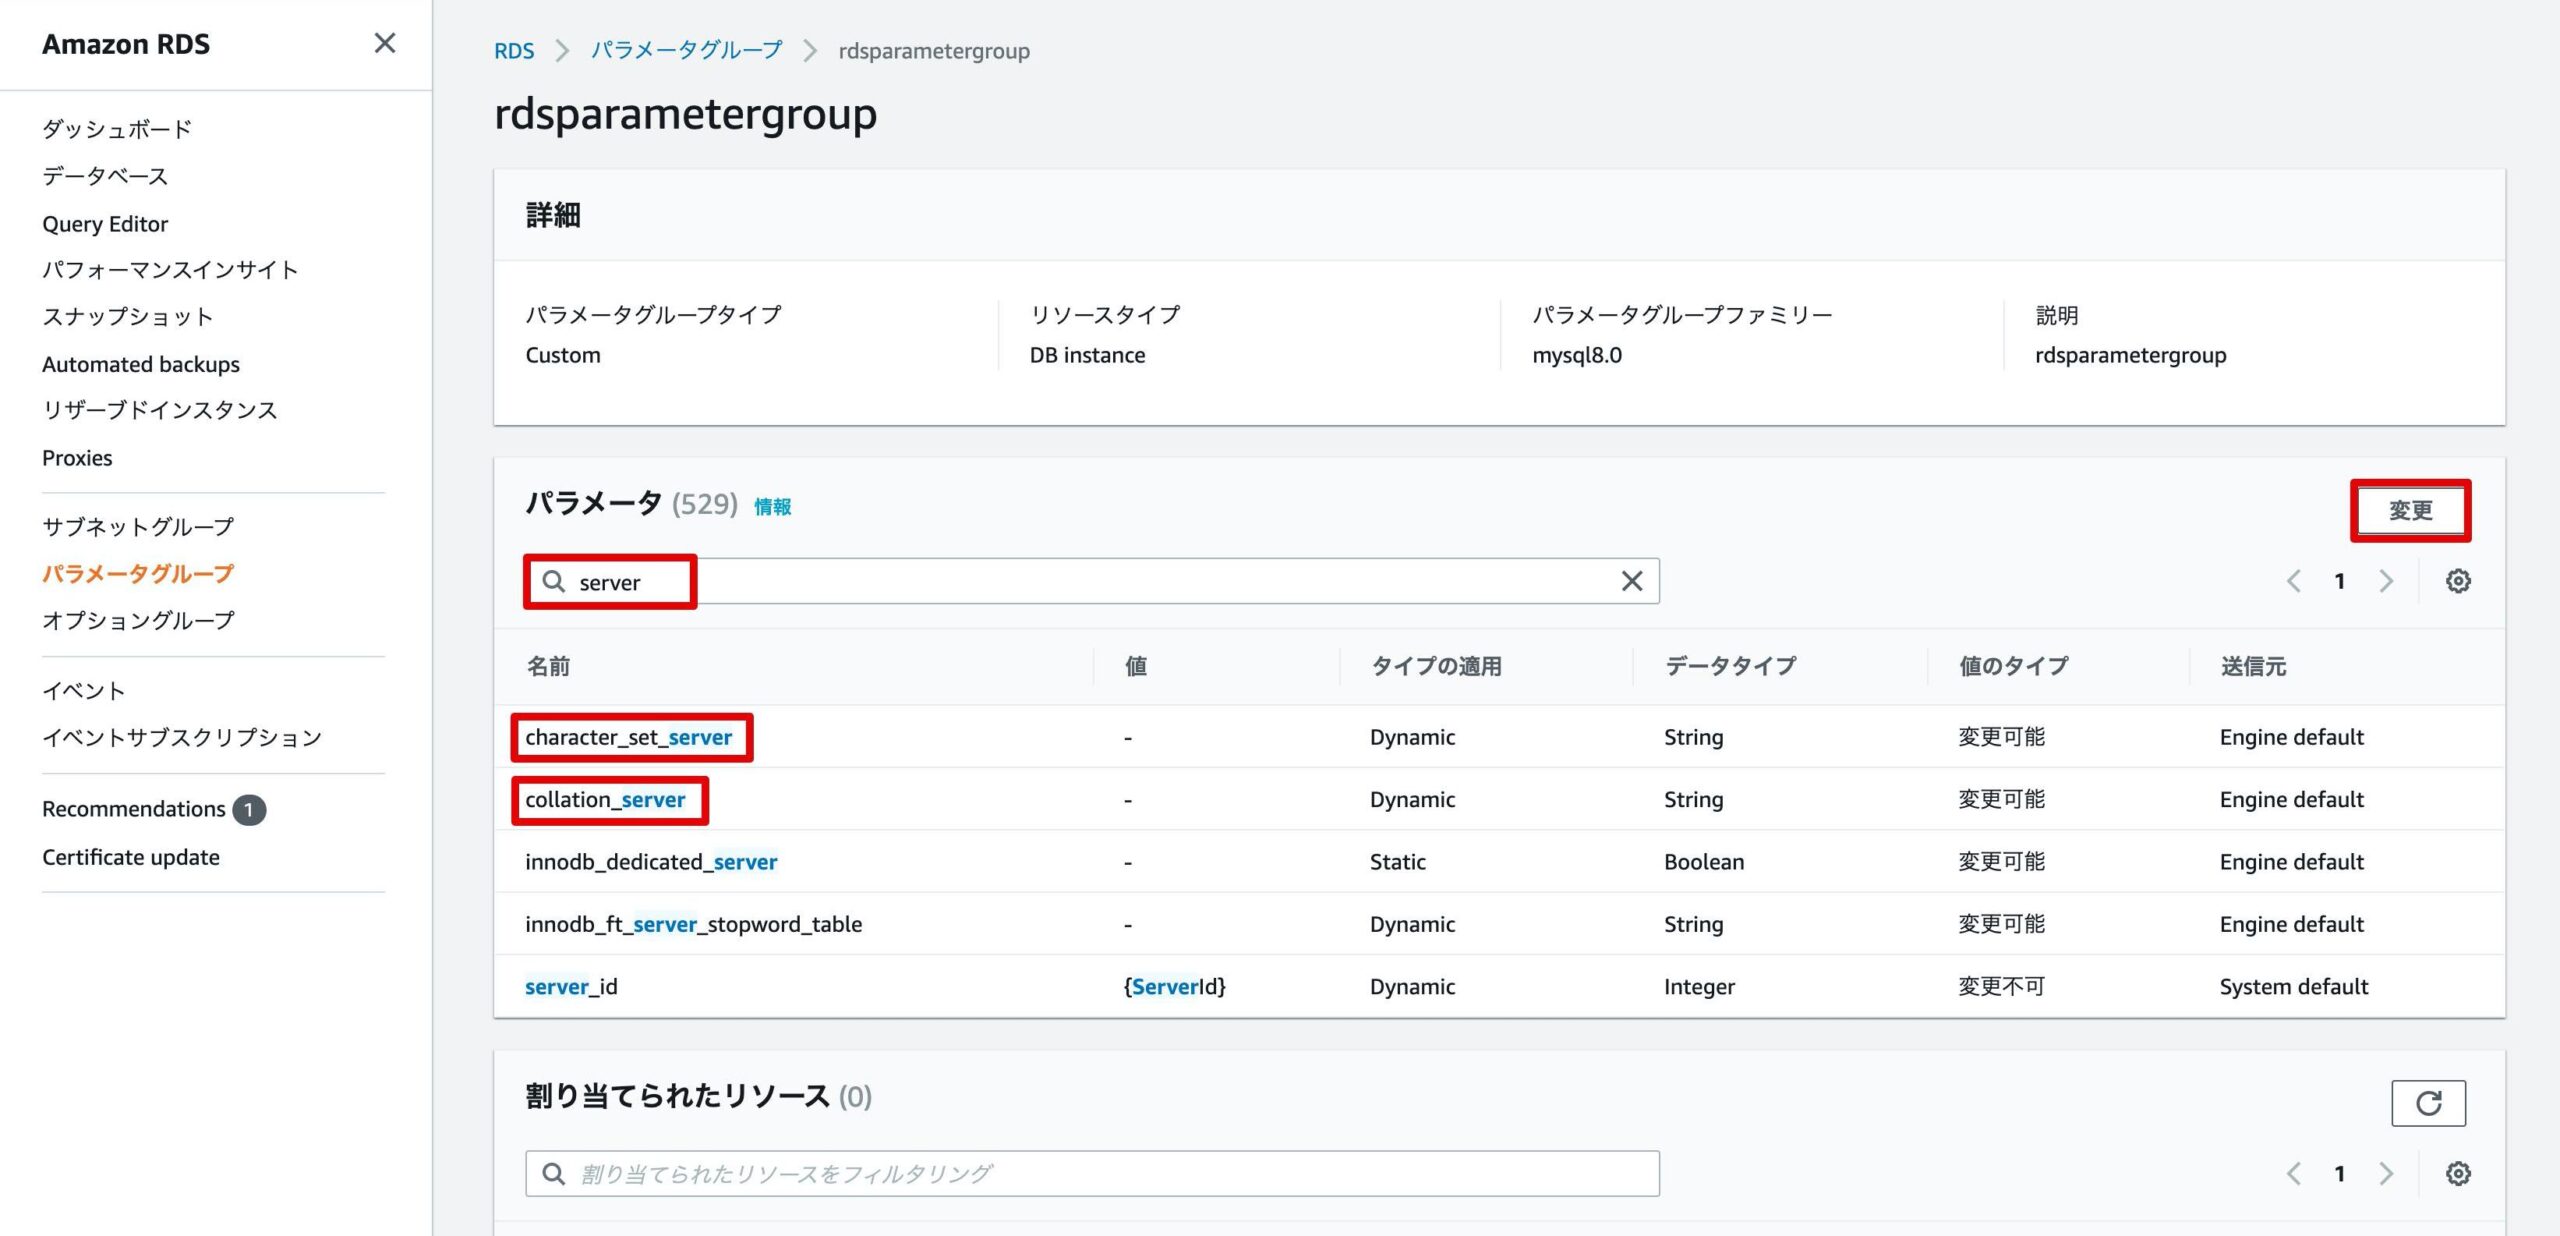
作成したパラメータグループをクリックします。

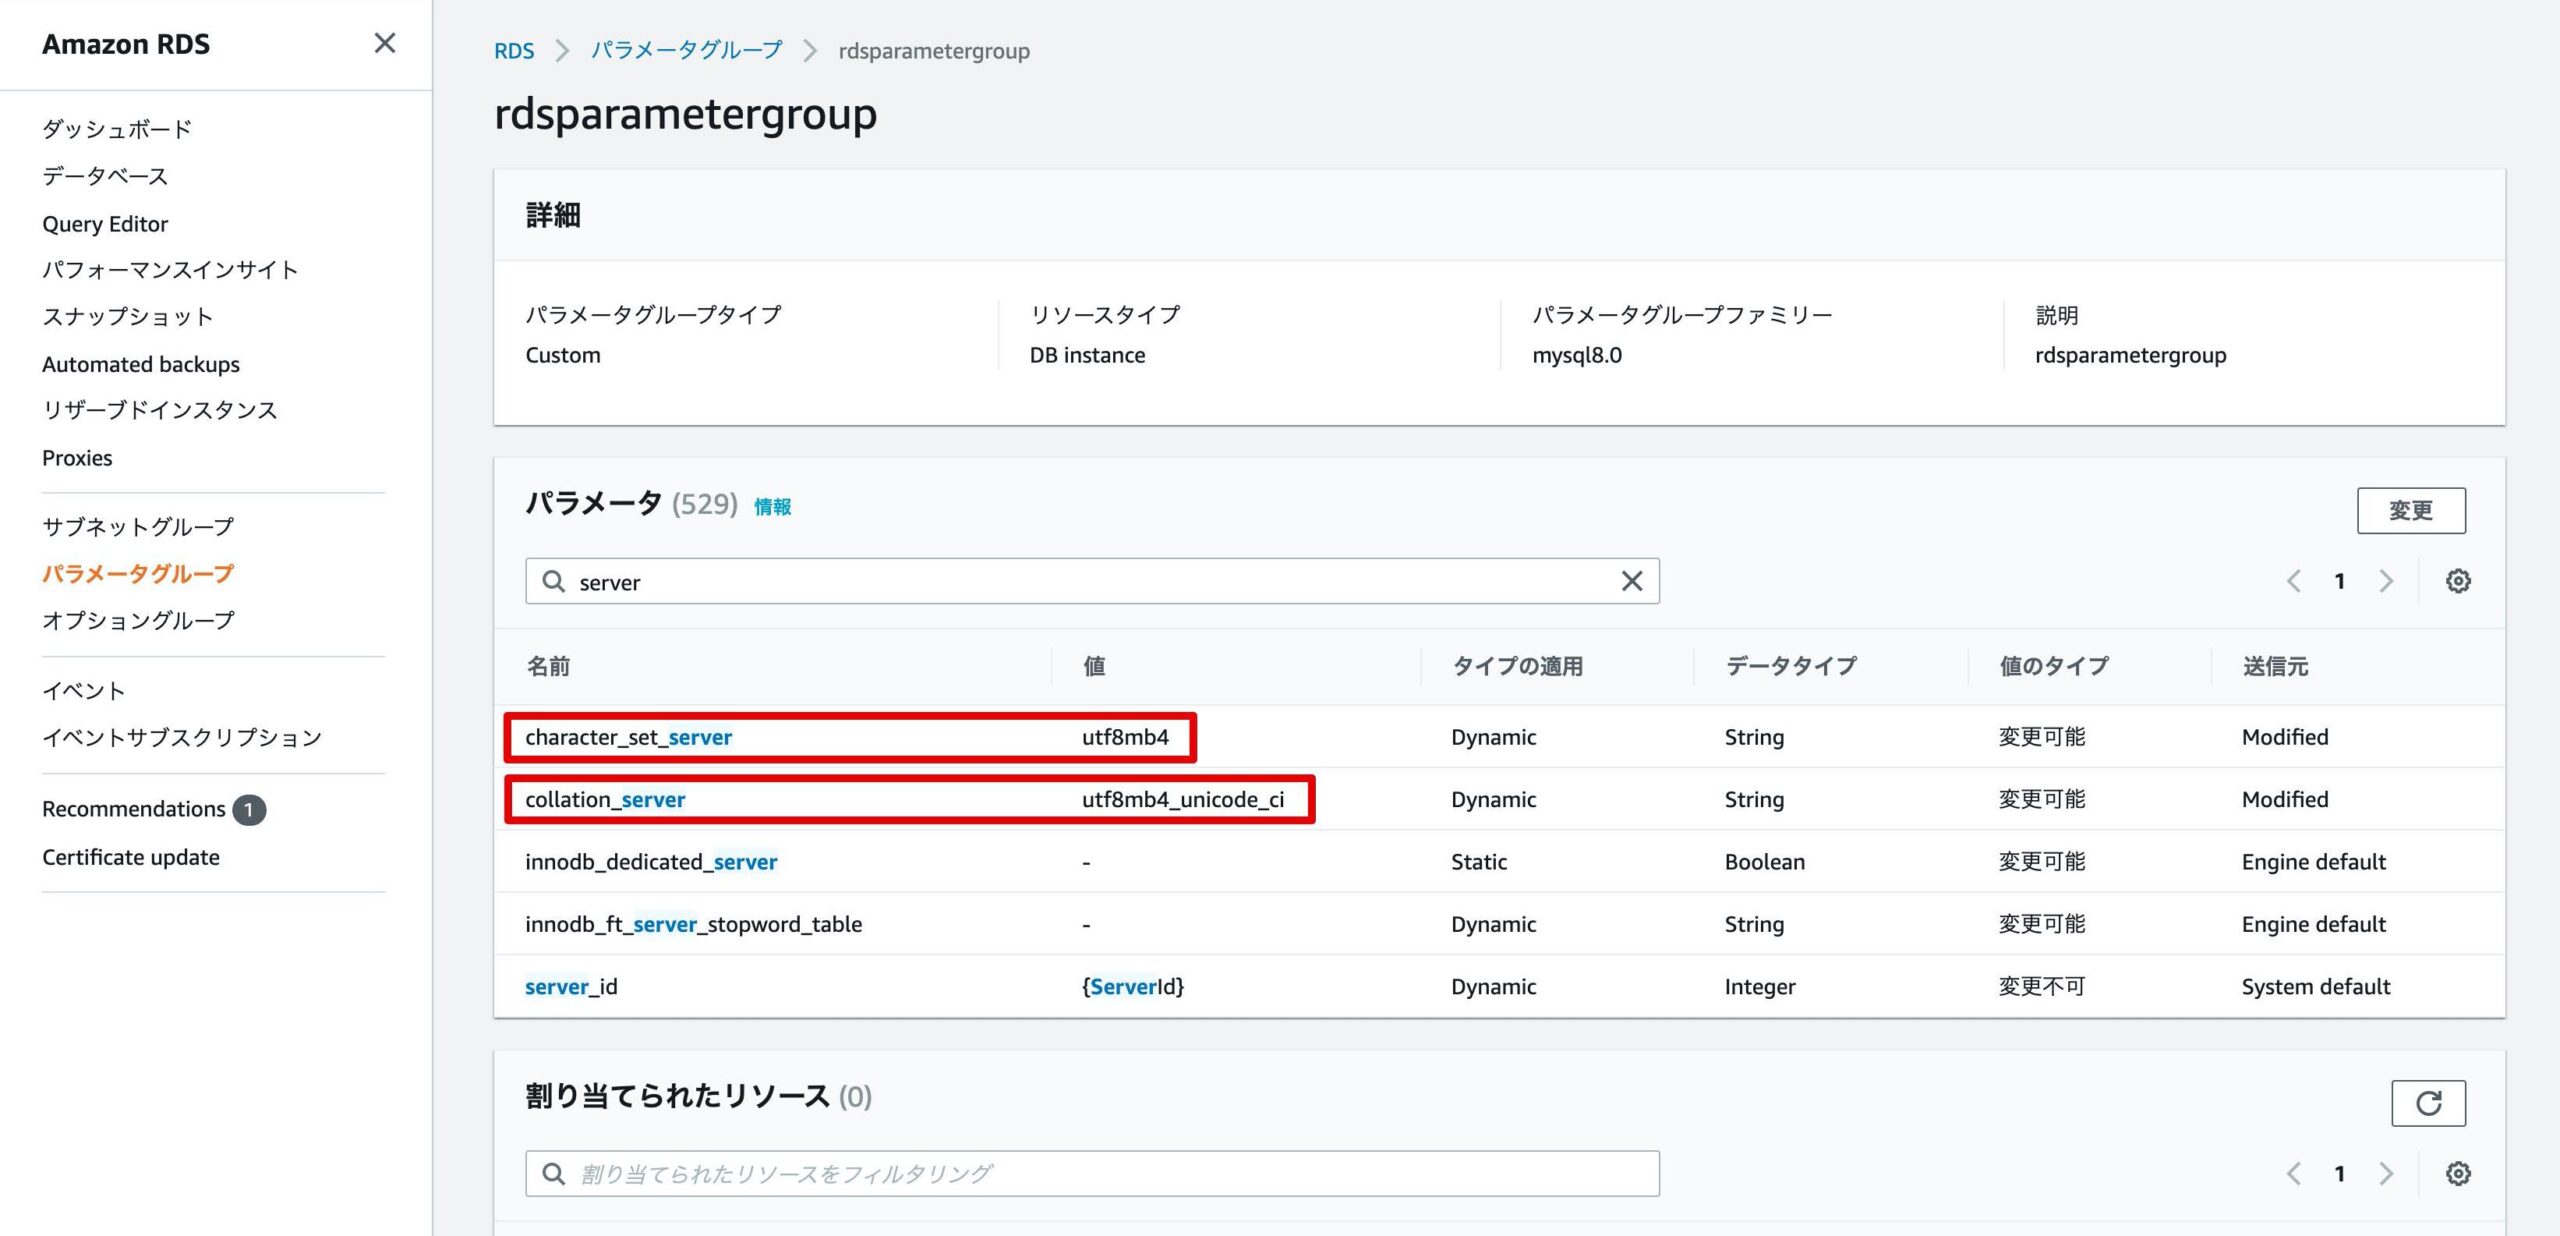
検索窓に”server”と入力し、「character_set_server」と「collation_server」が表示されることを確認し、「変更」をクリックします。
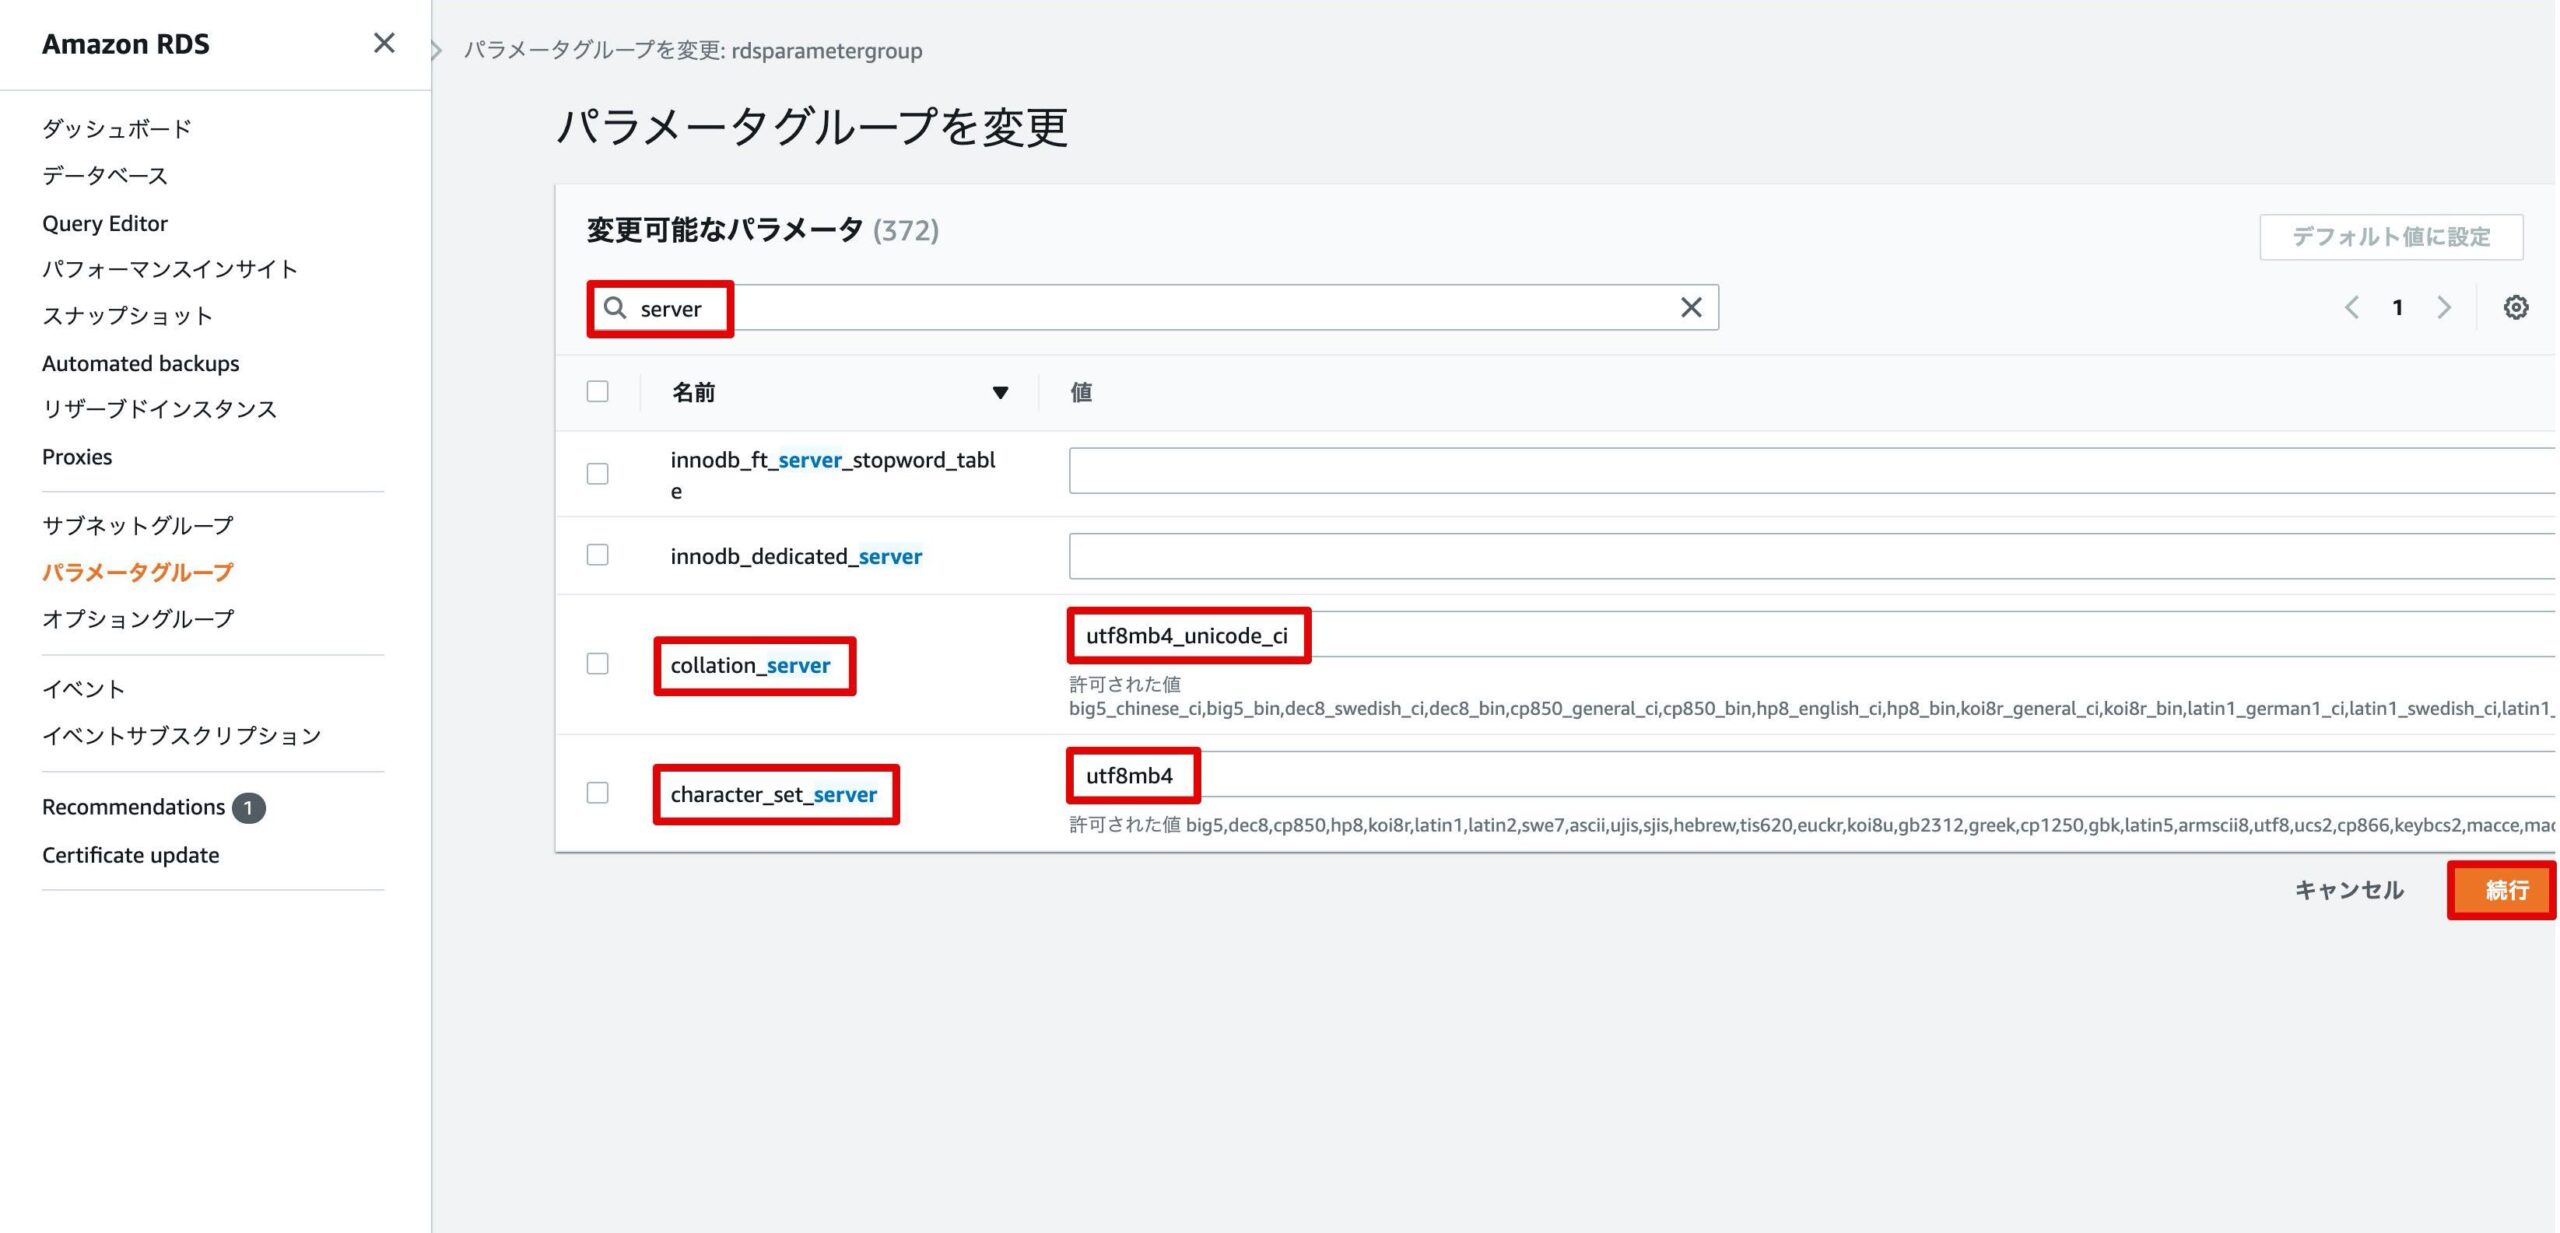
下記の通りに値を入力し、「続行」をクリックします。
character_set_server:utf8mb4
collation_server:utf8mb4_unicode_ci
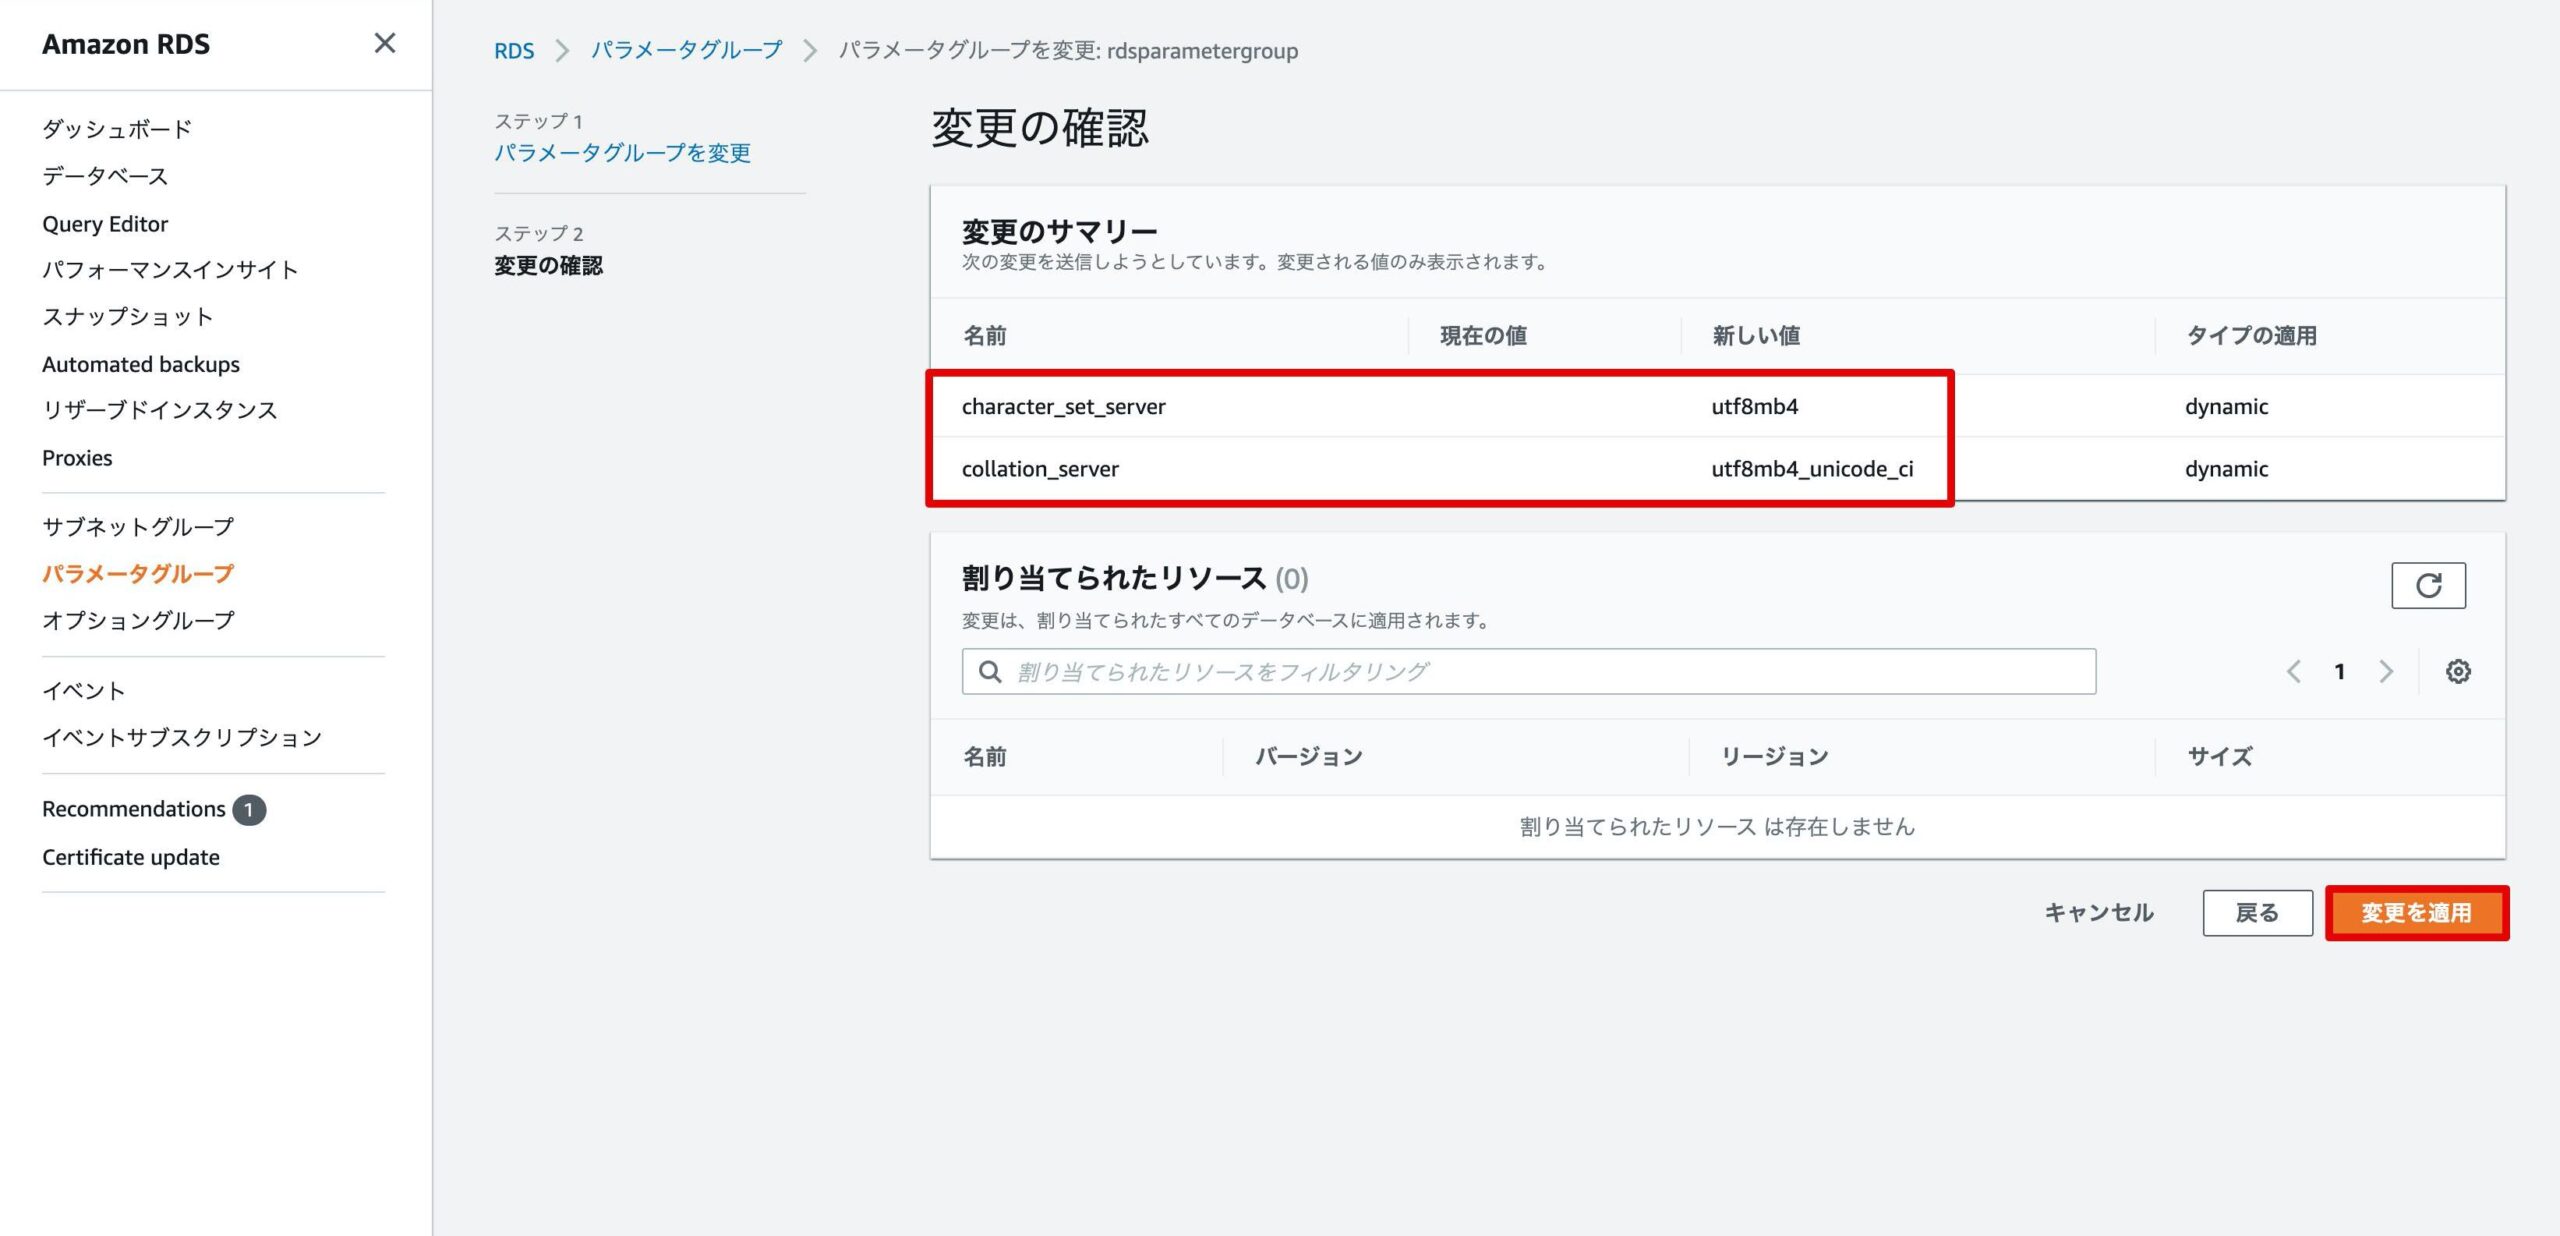
変更内容を確認し、「変更を適用」をクリックします。
パラメータグループが作成されたことを確認します。
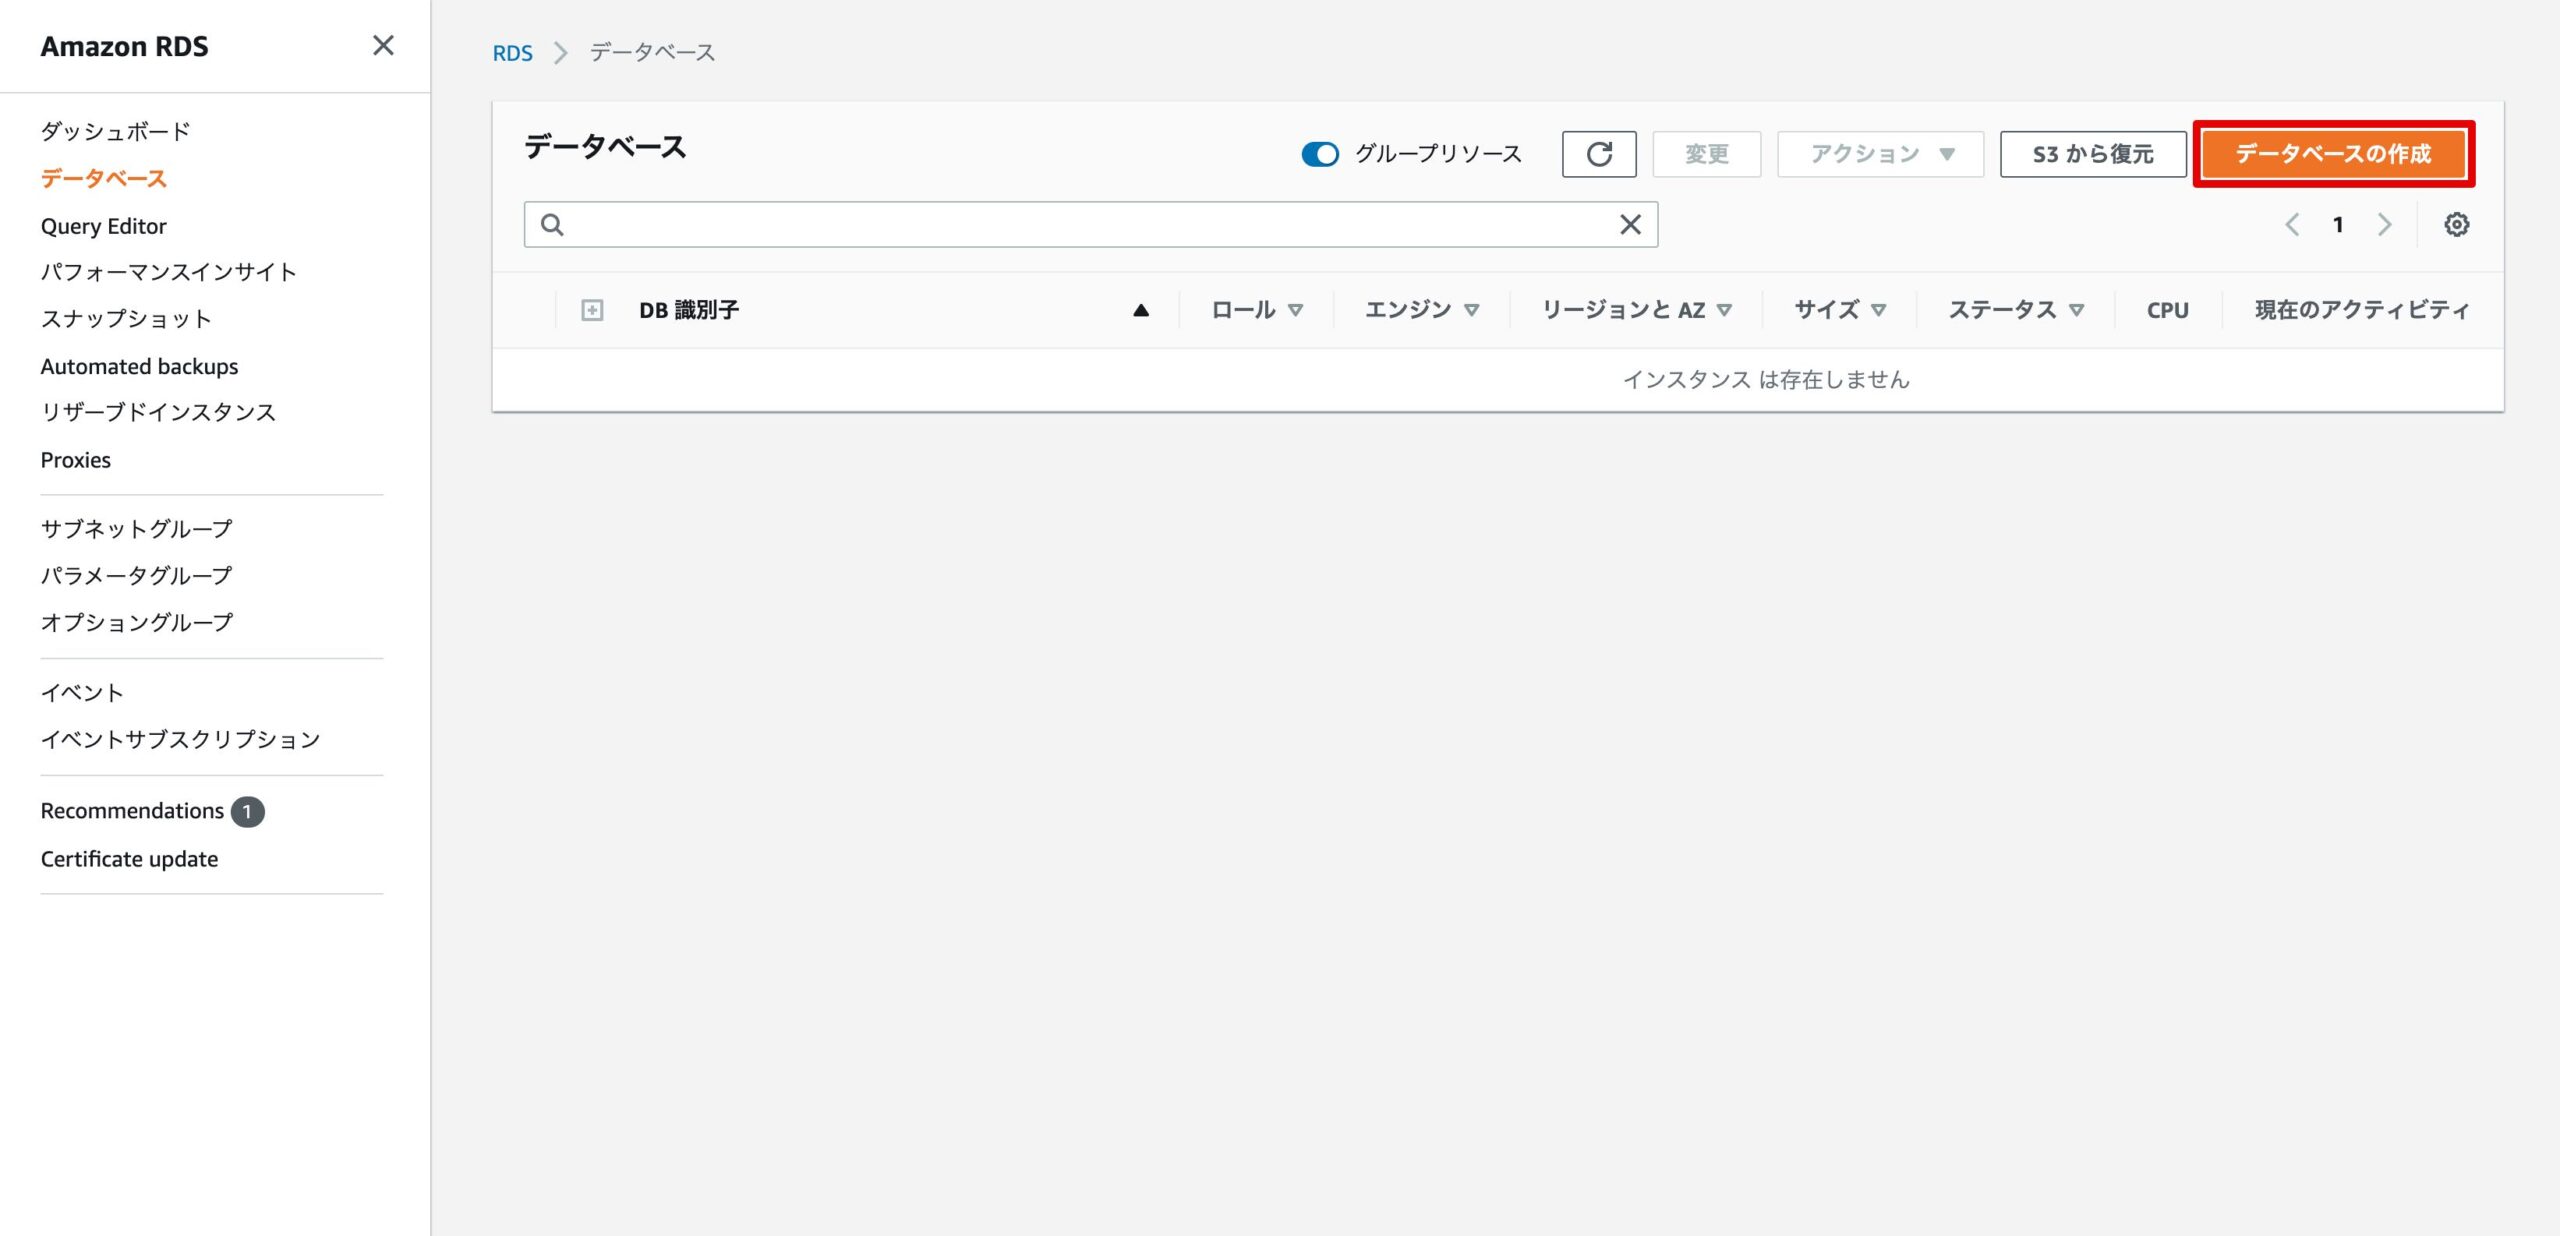
RDSの作成
RDSの画面から、「データベースの作成」をクリックします。
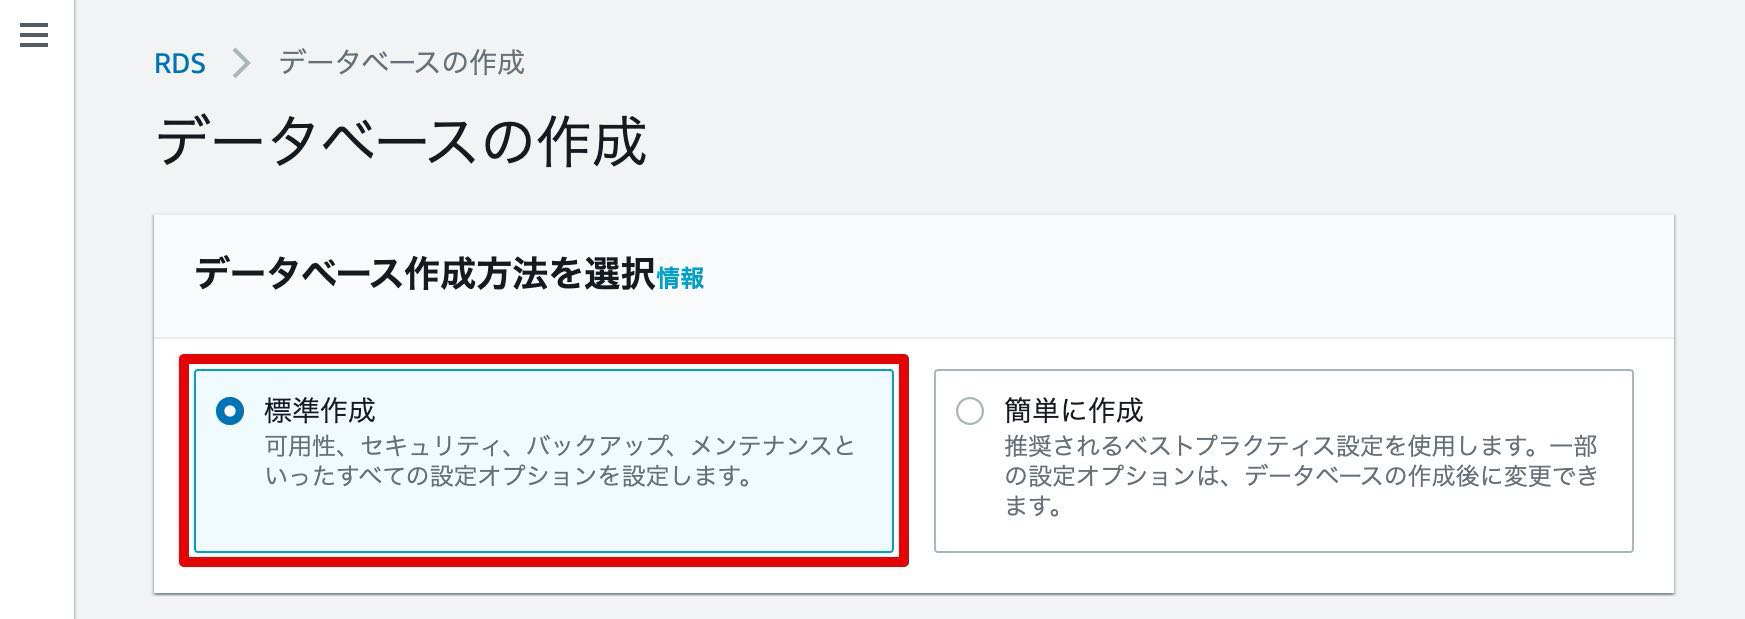
作成方法は、「標準作成」を選択します。
エンジンのタイプは、「MySQL」を選択します。

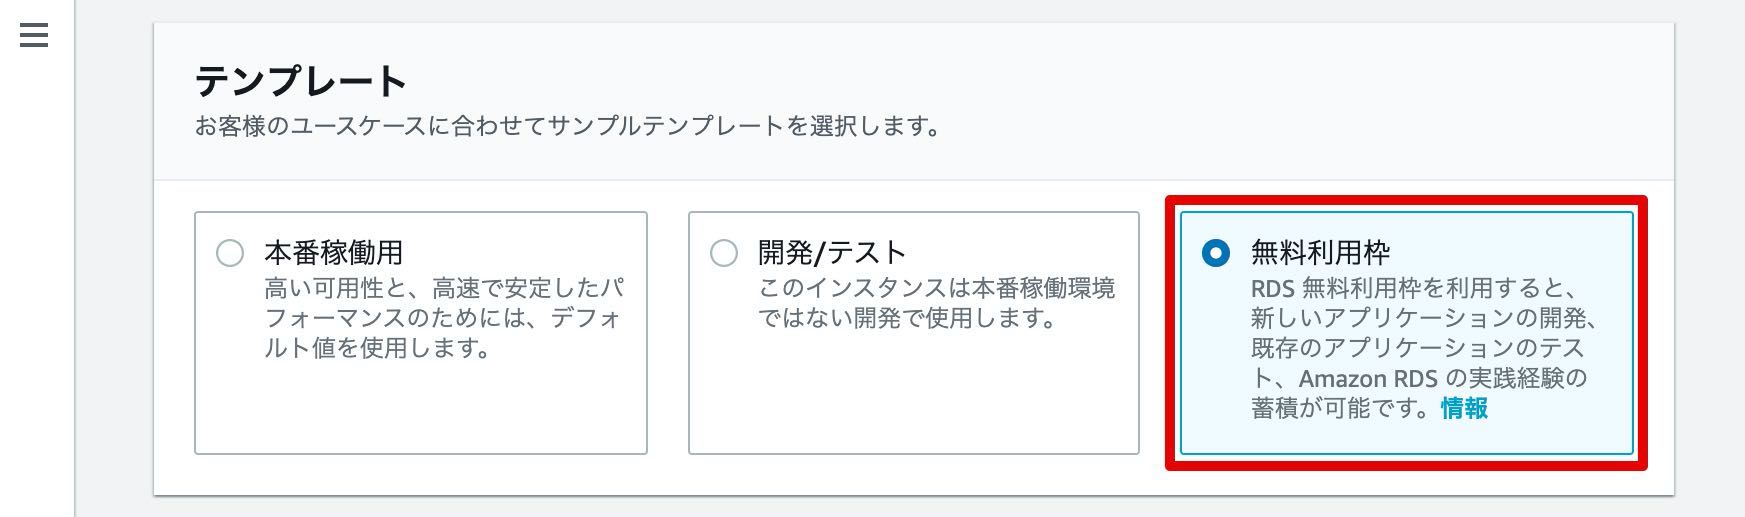
テンプレートは、「無料利用枠」を選択します。
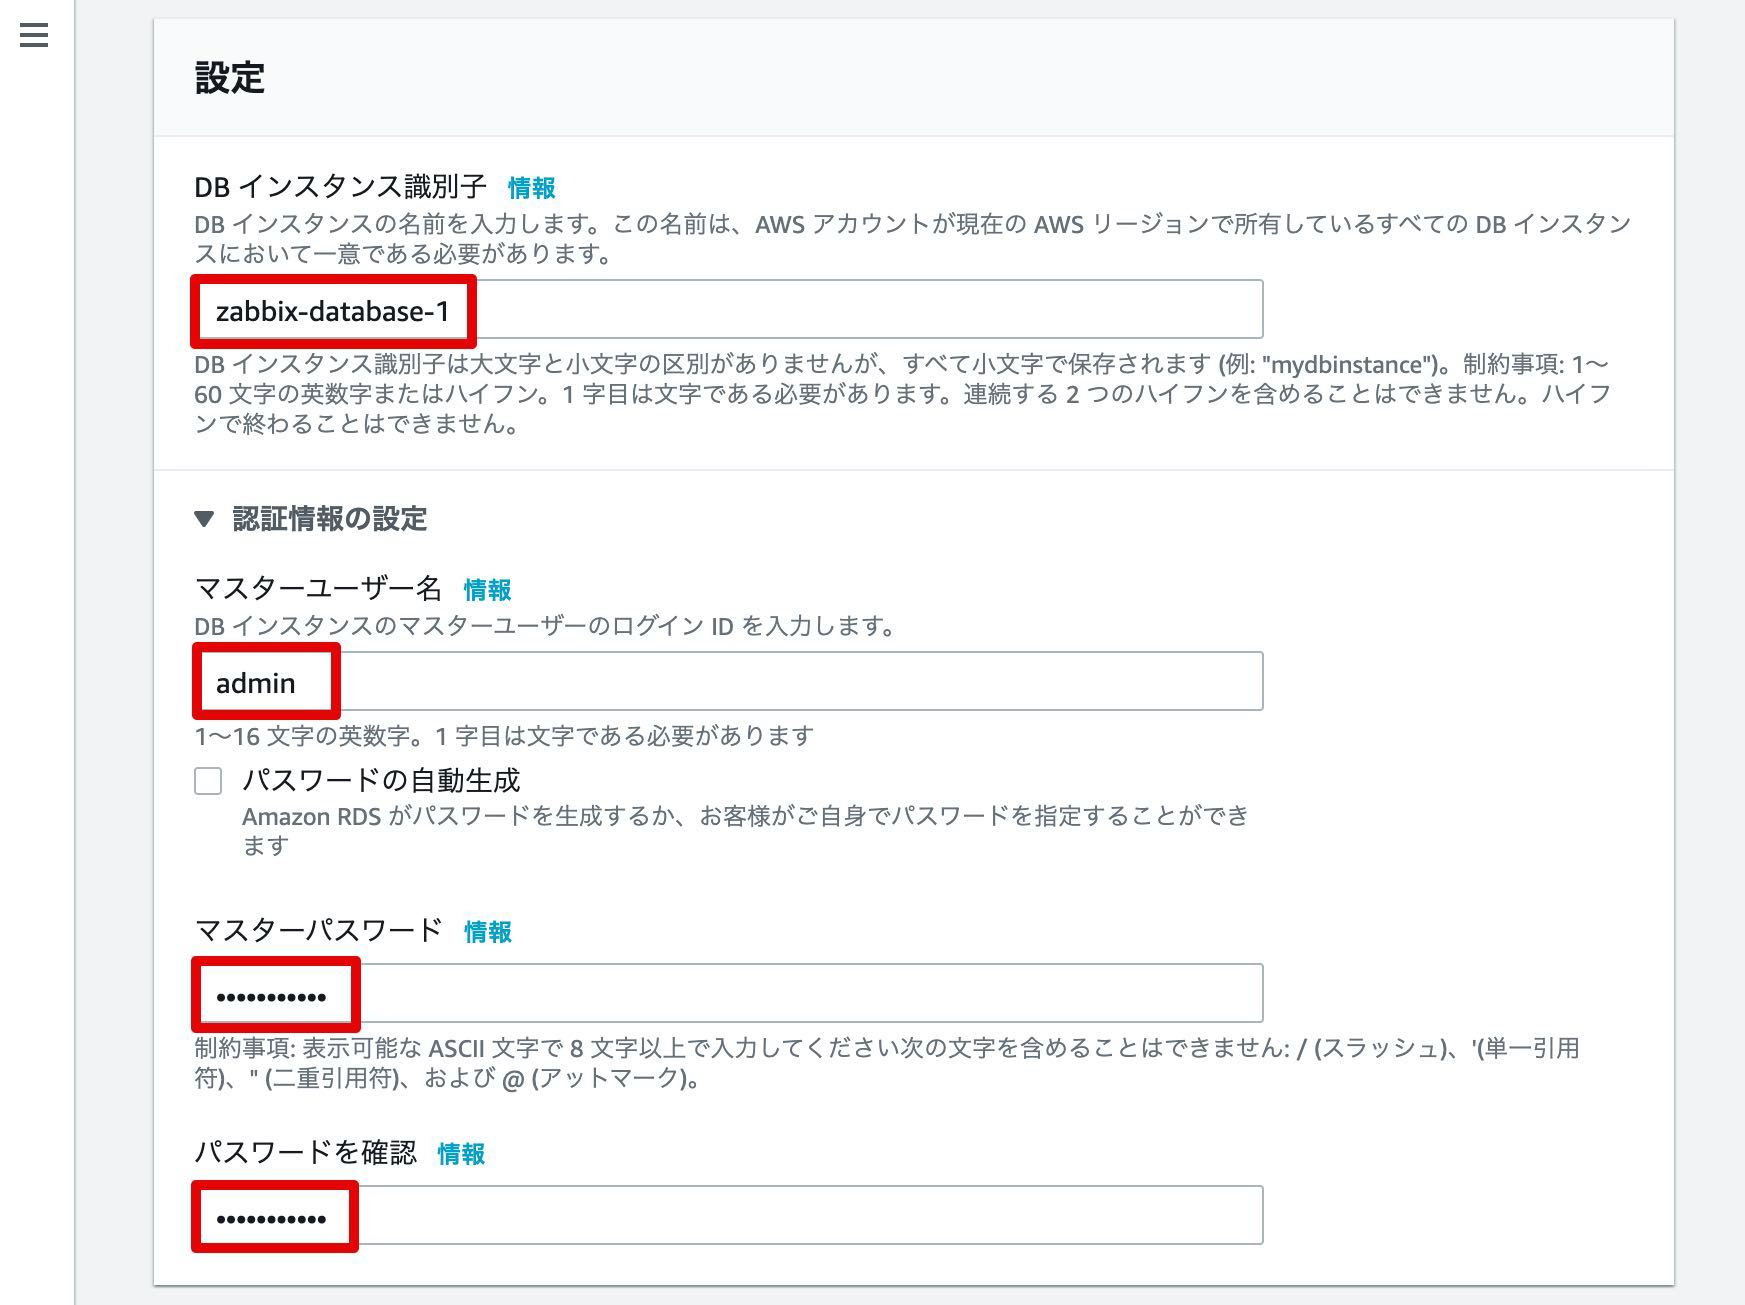
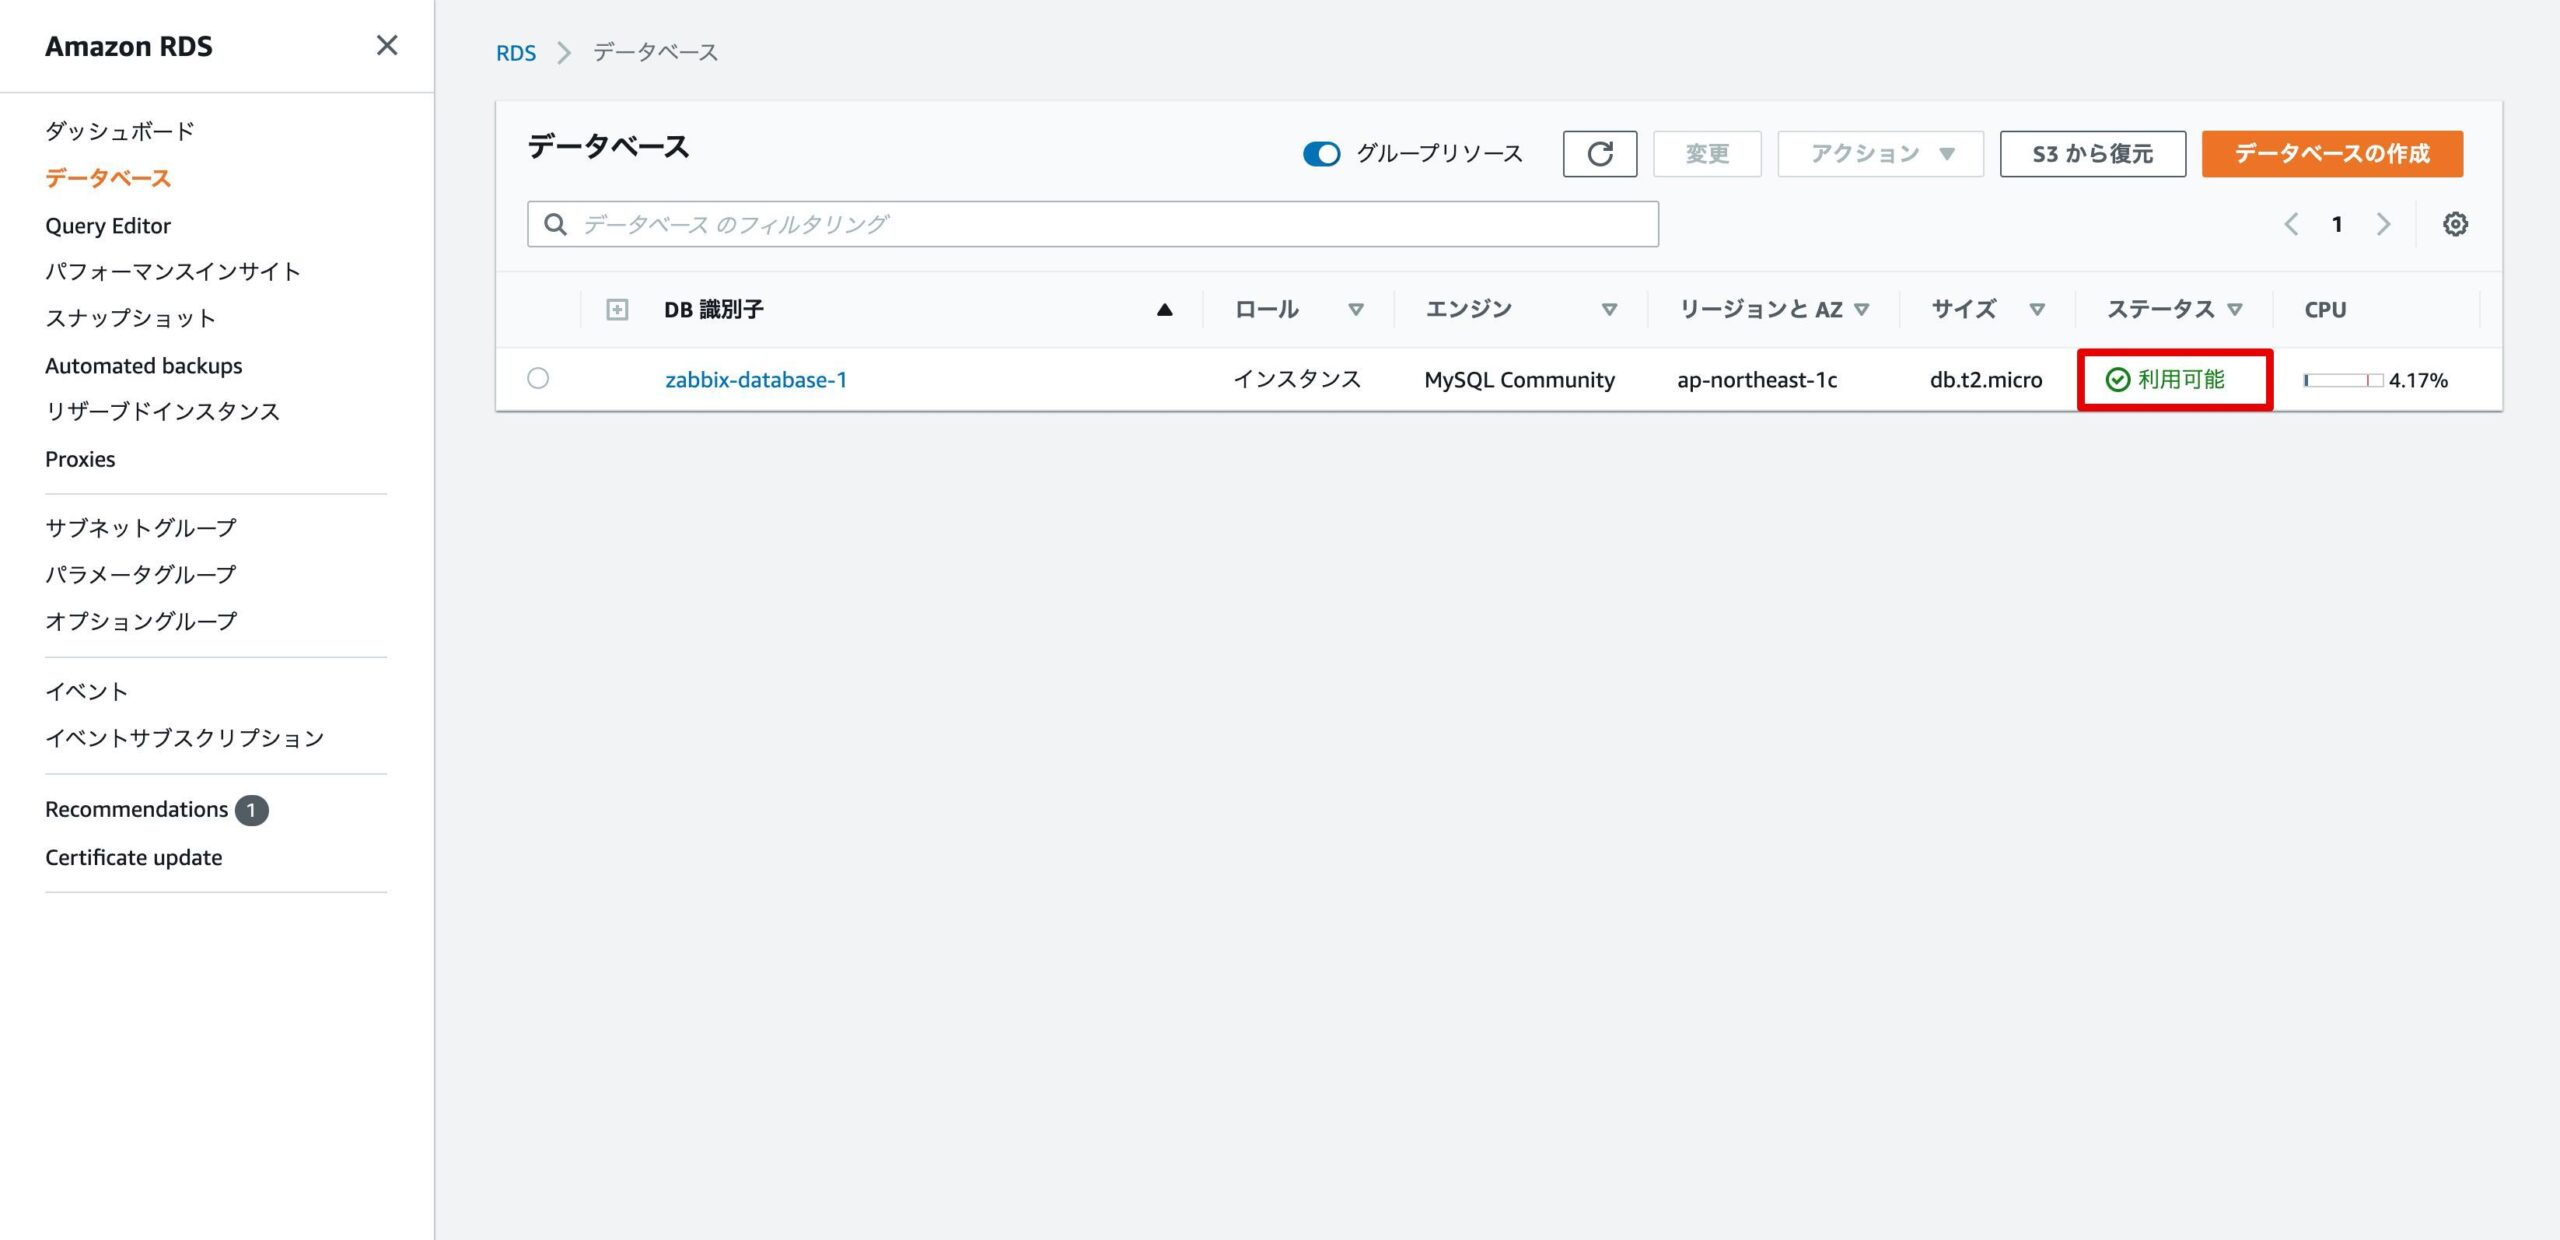
インスタンス識別子は、「zabbix-database-1」としています。
マスターユーザ名とマスターパスワードを入力します。
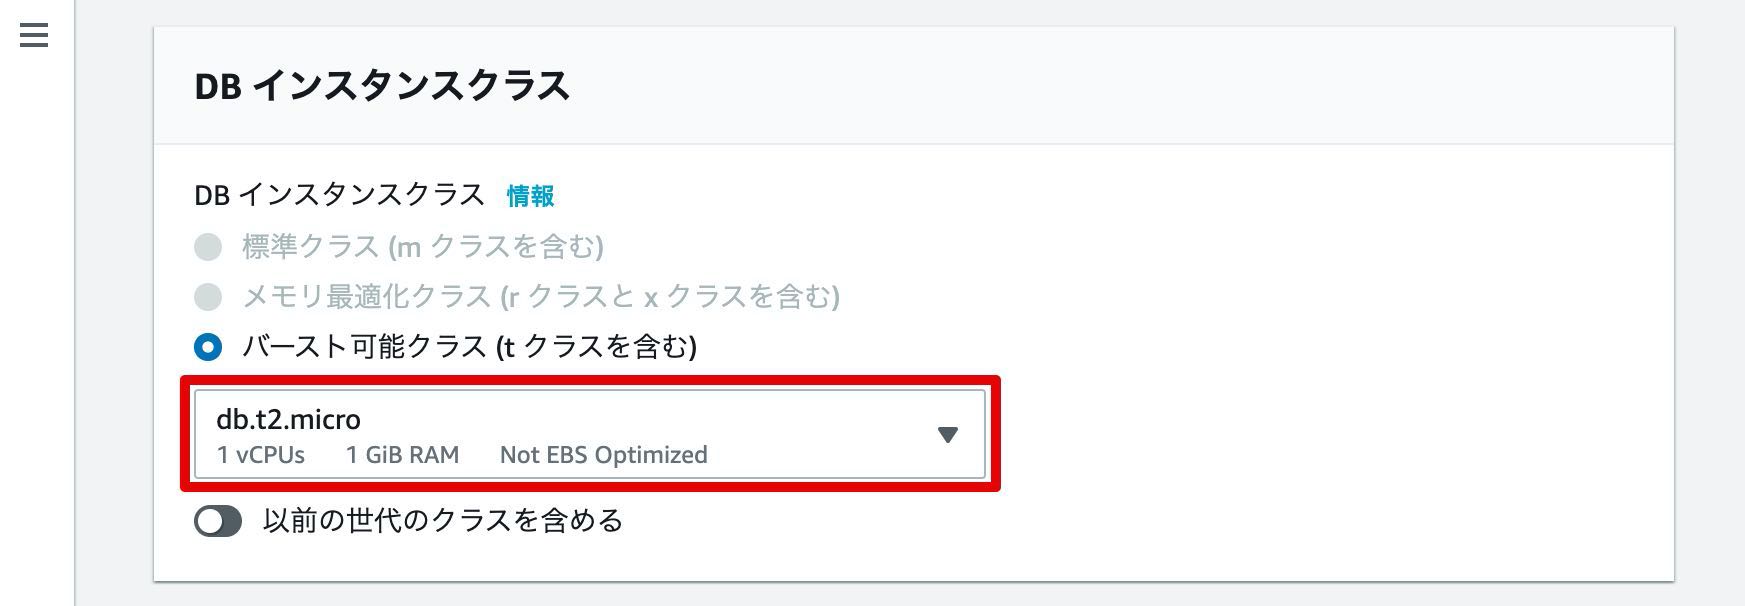
無料利用枠を利用する場合は、「db.t2.micro」が選択されます。
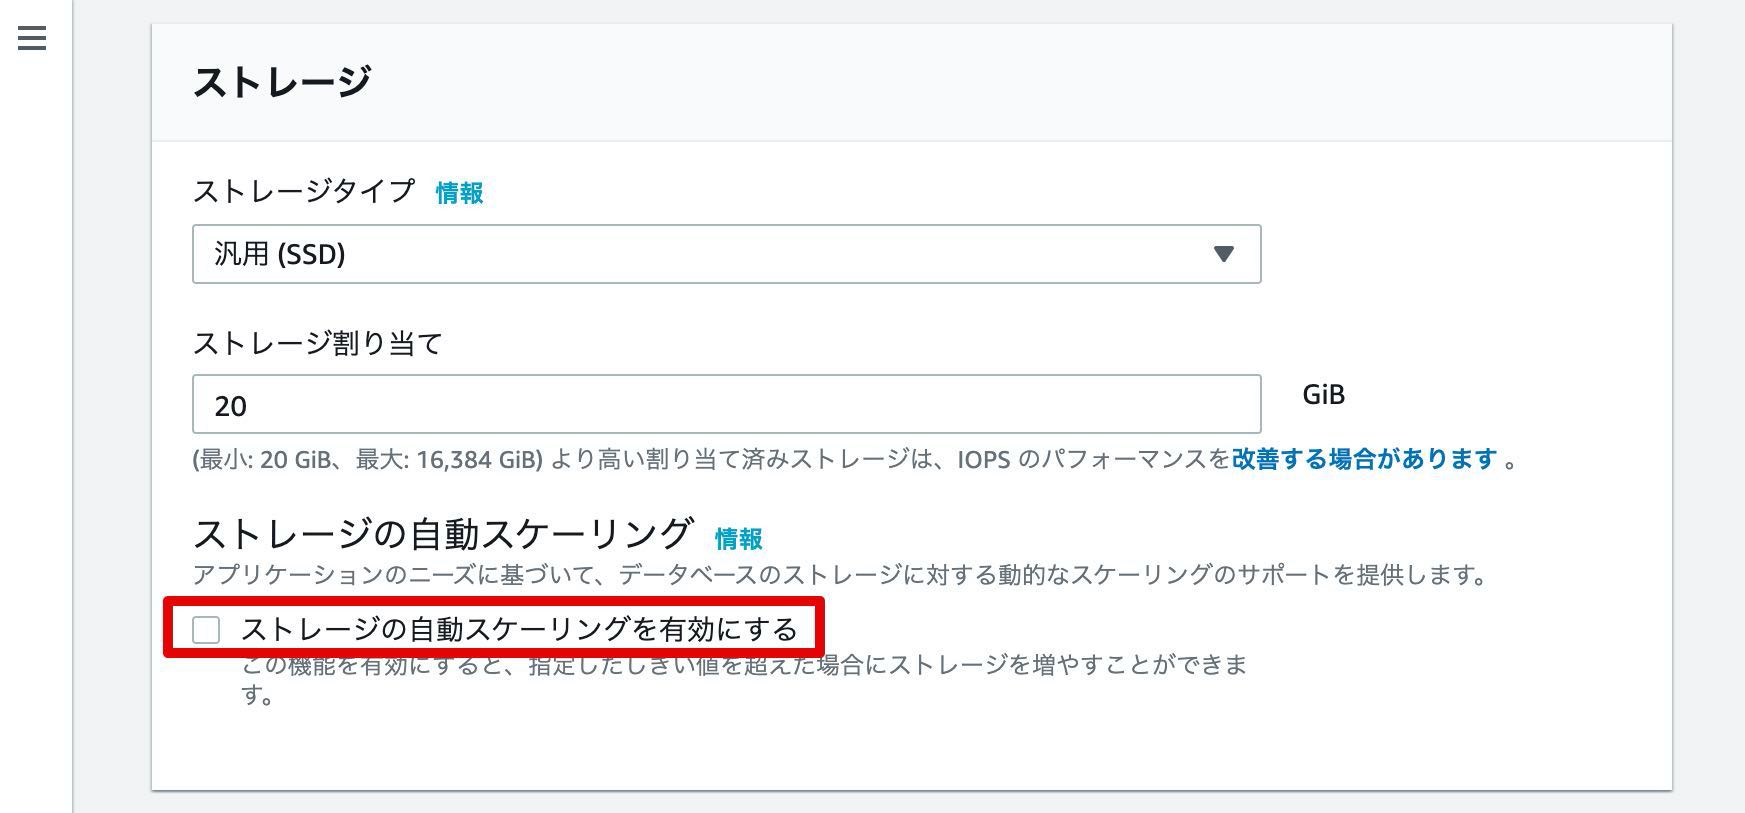
検証用のため、「ストレージの自動スケーリングを有効にする」のチェックを外します。
作成したVPC(aws-zabbix-test)を選択します。

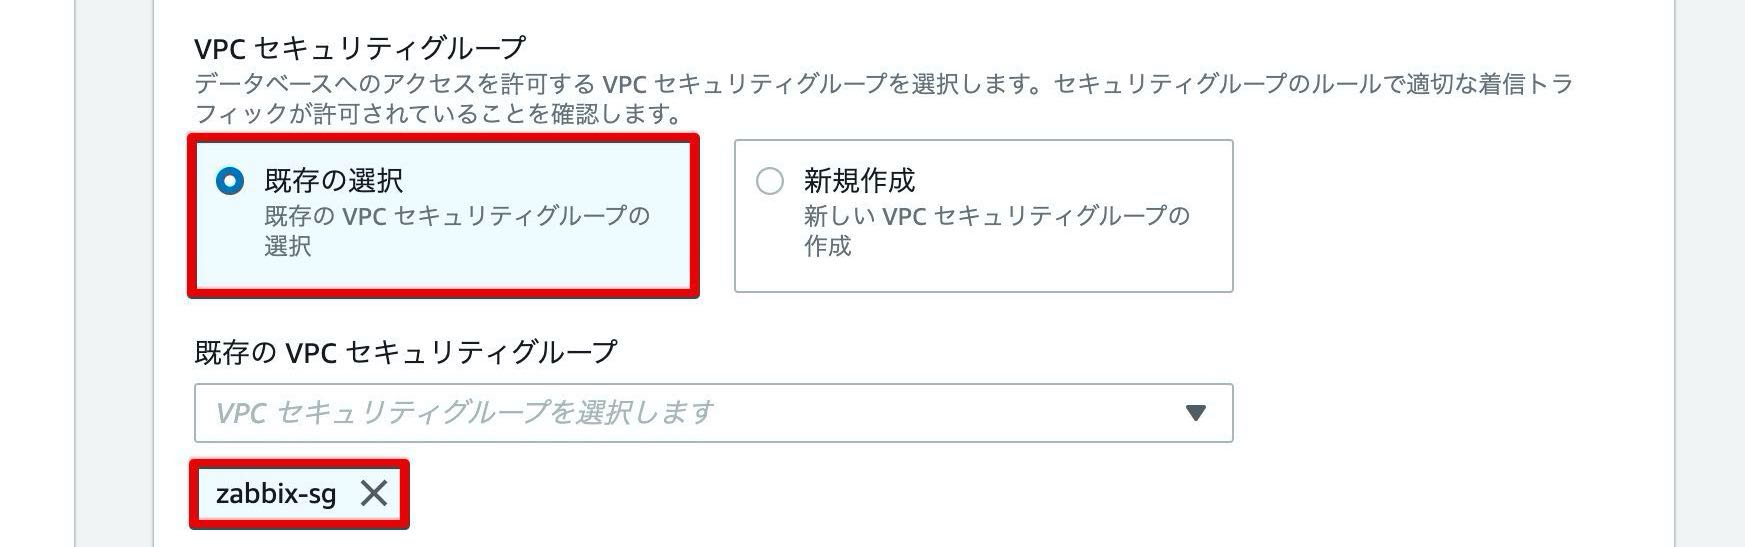
セキュリティグループは、「既存の選択」を選択し、作成したセキュリティグループ(zabbix-sg)を選択します。
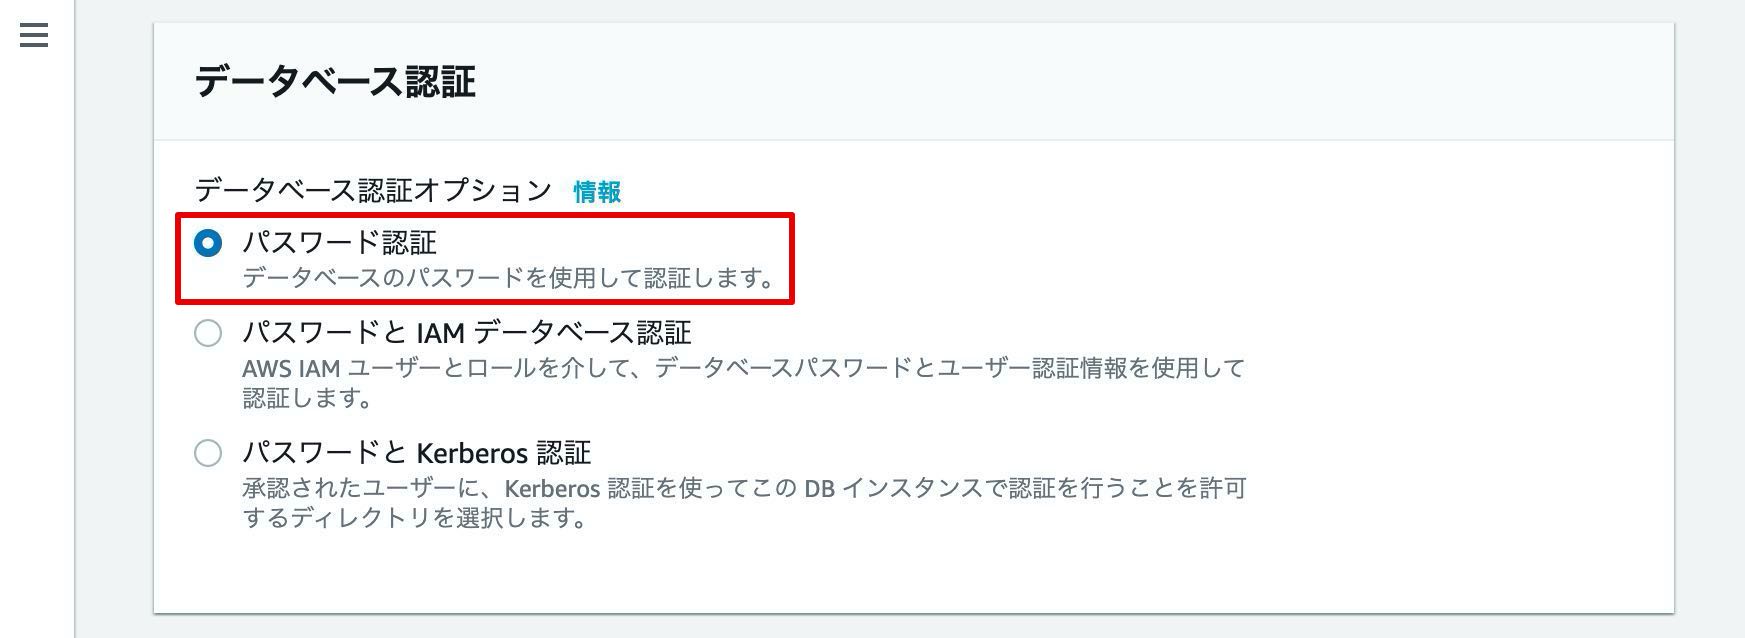
データベース認証は、「パスワード認証」を選択します。
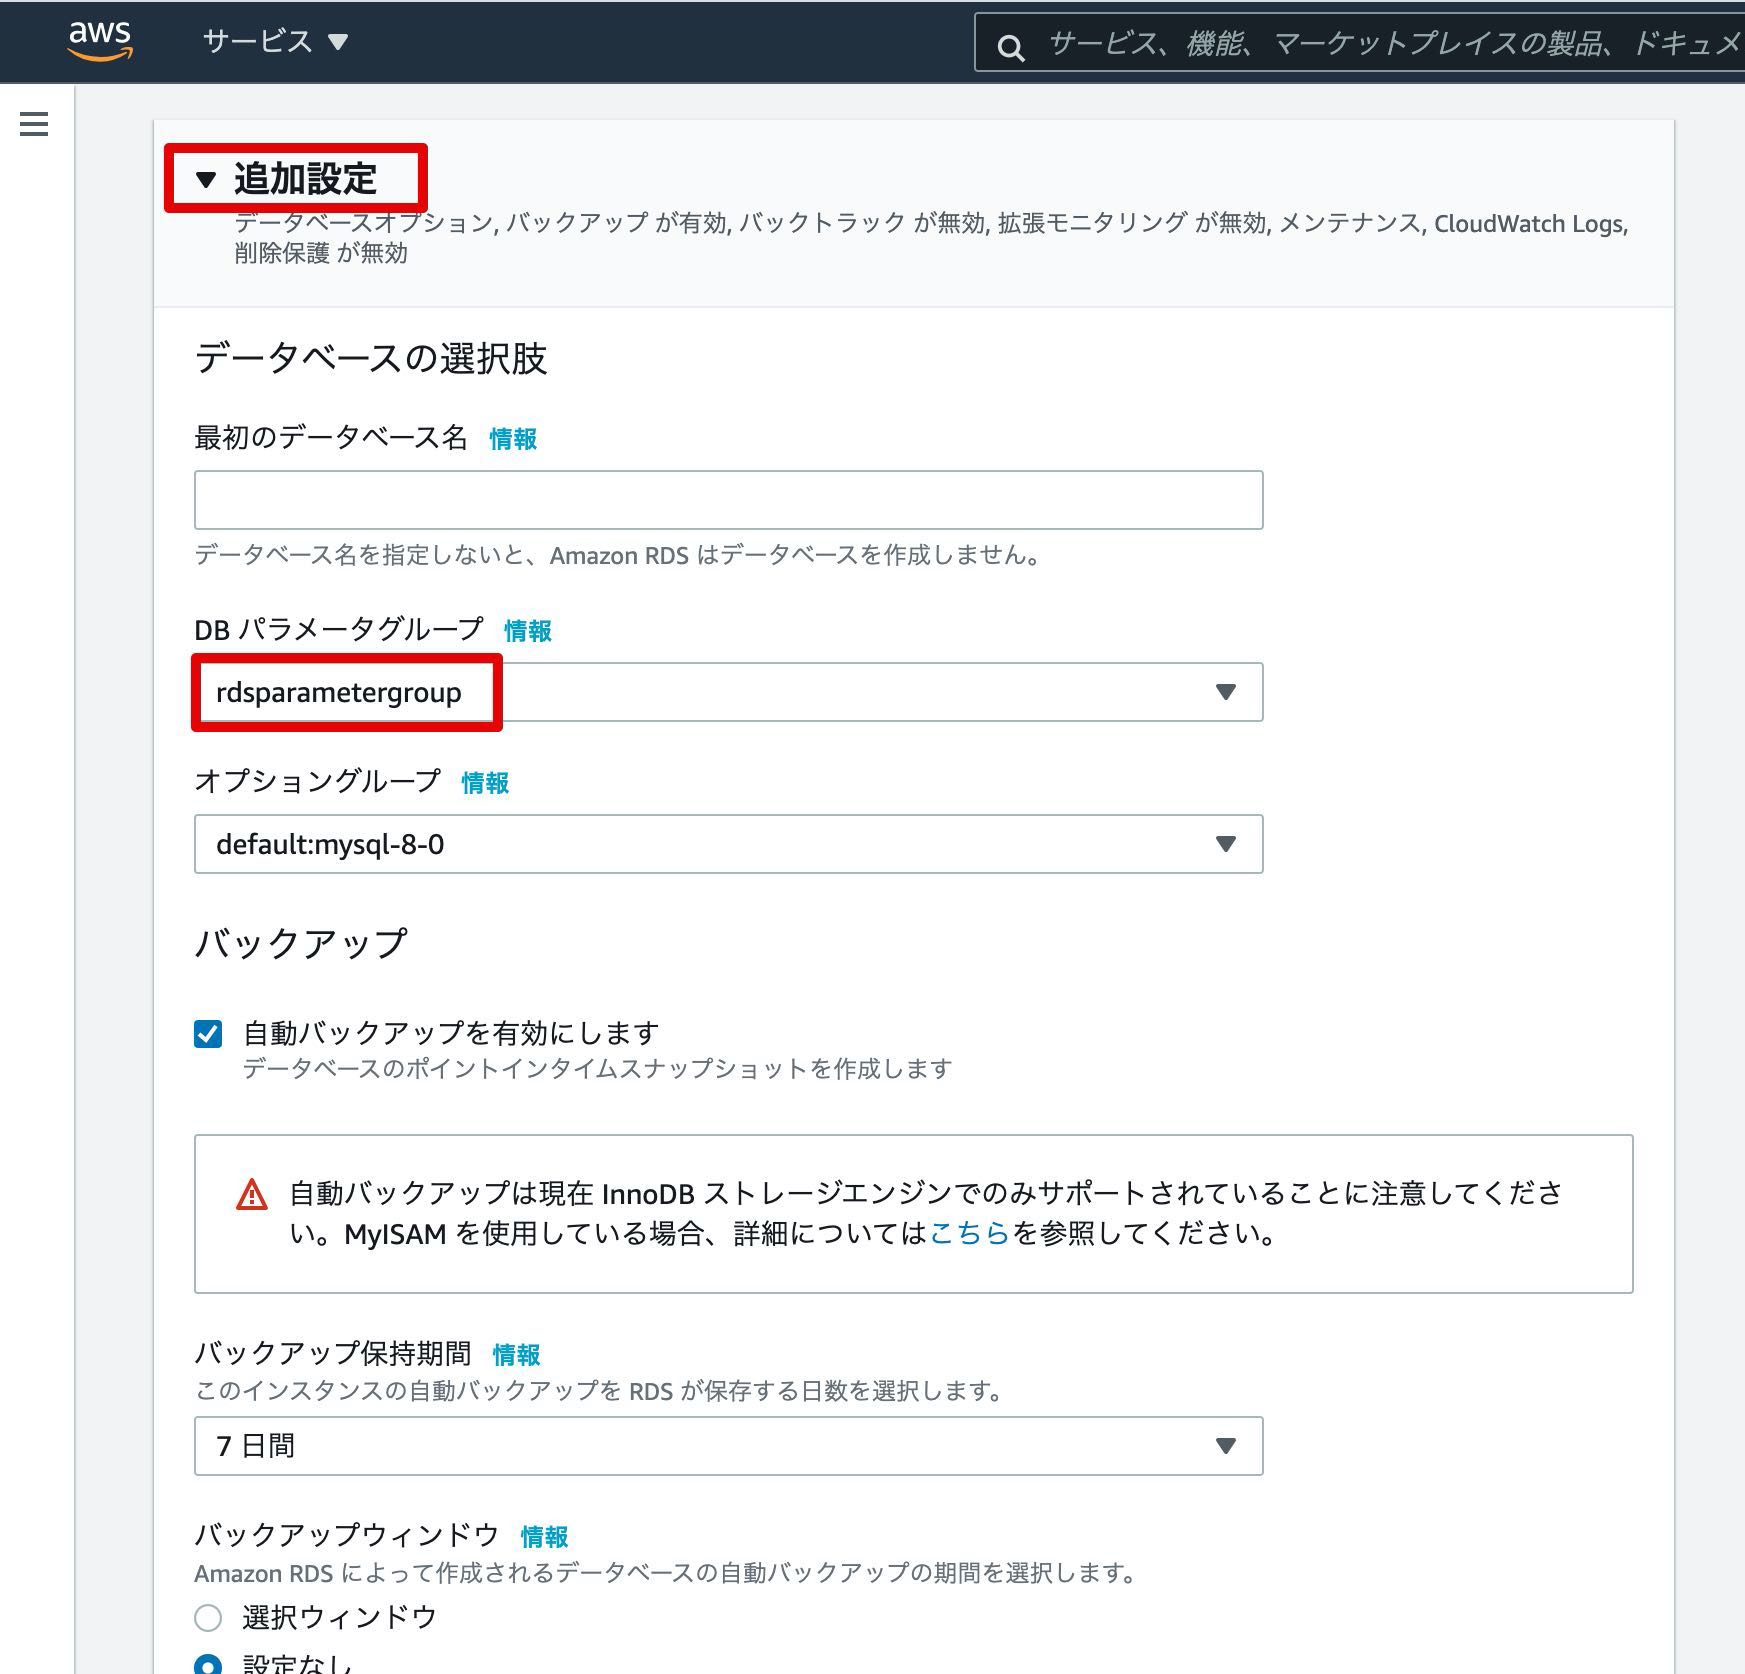
追加設定を展開し、DBパラメータグループで、”rdsparametergroup”を選択します。
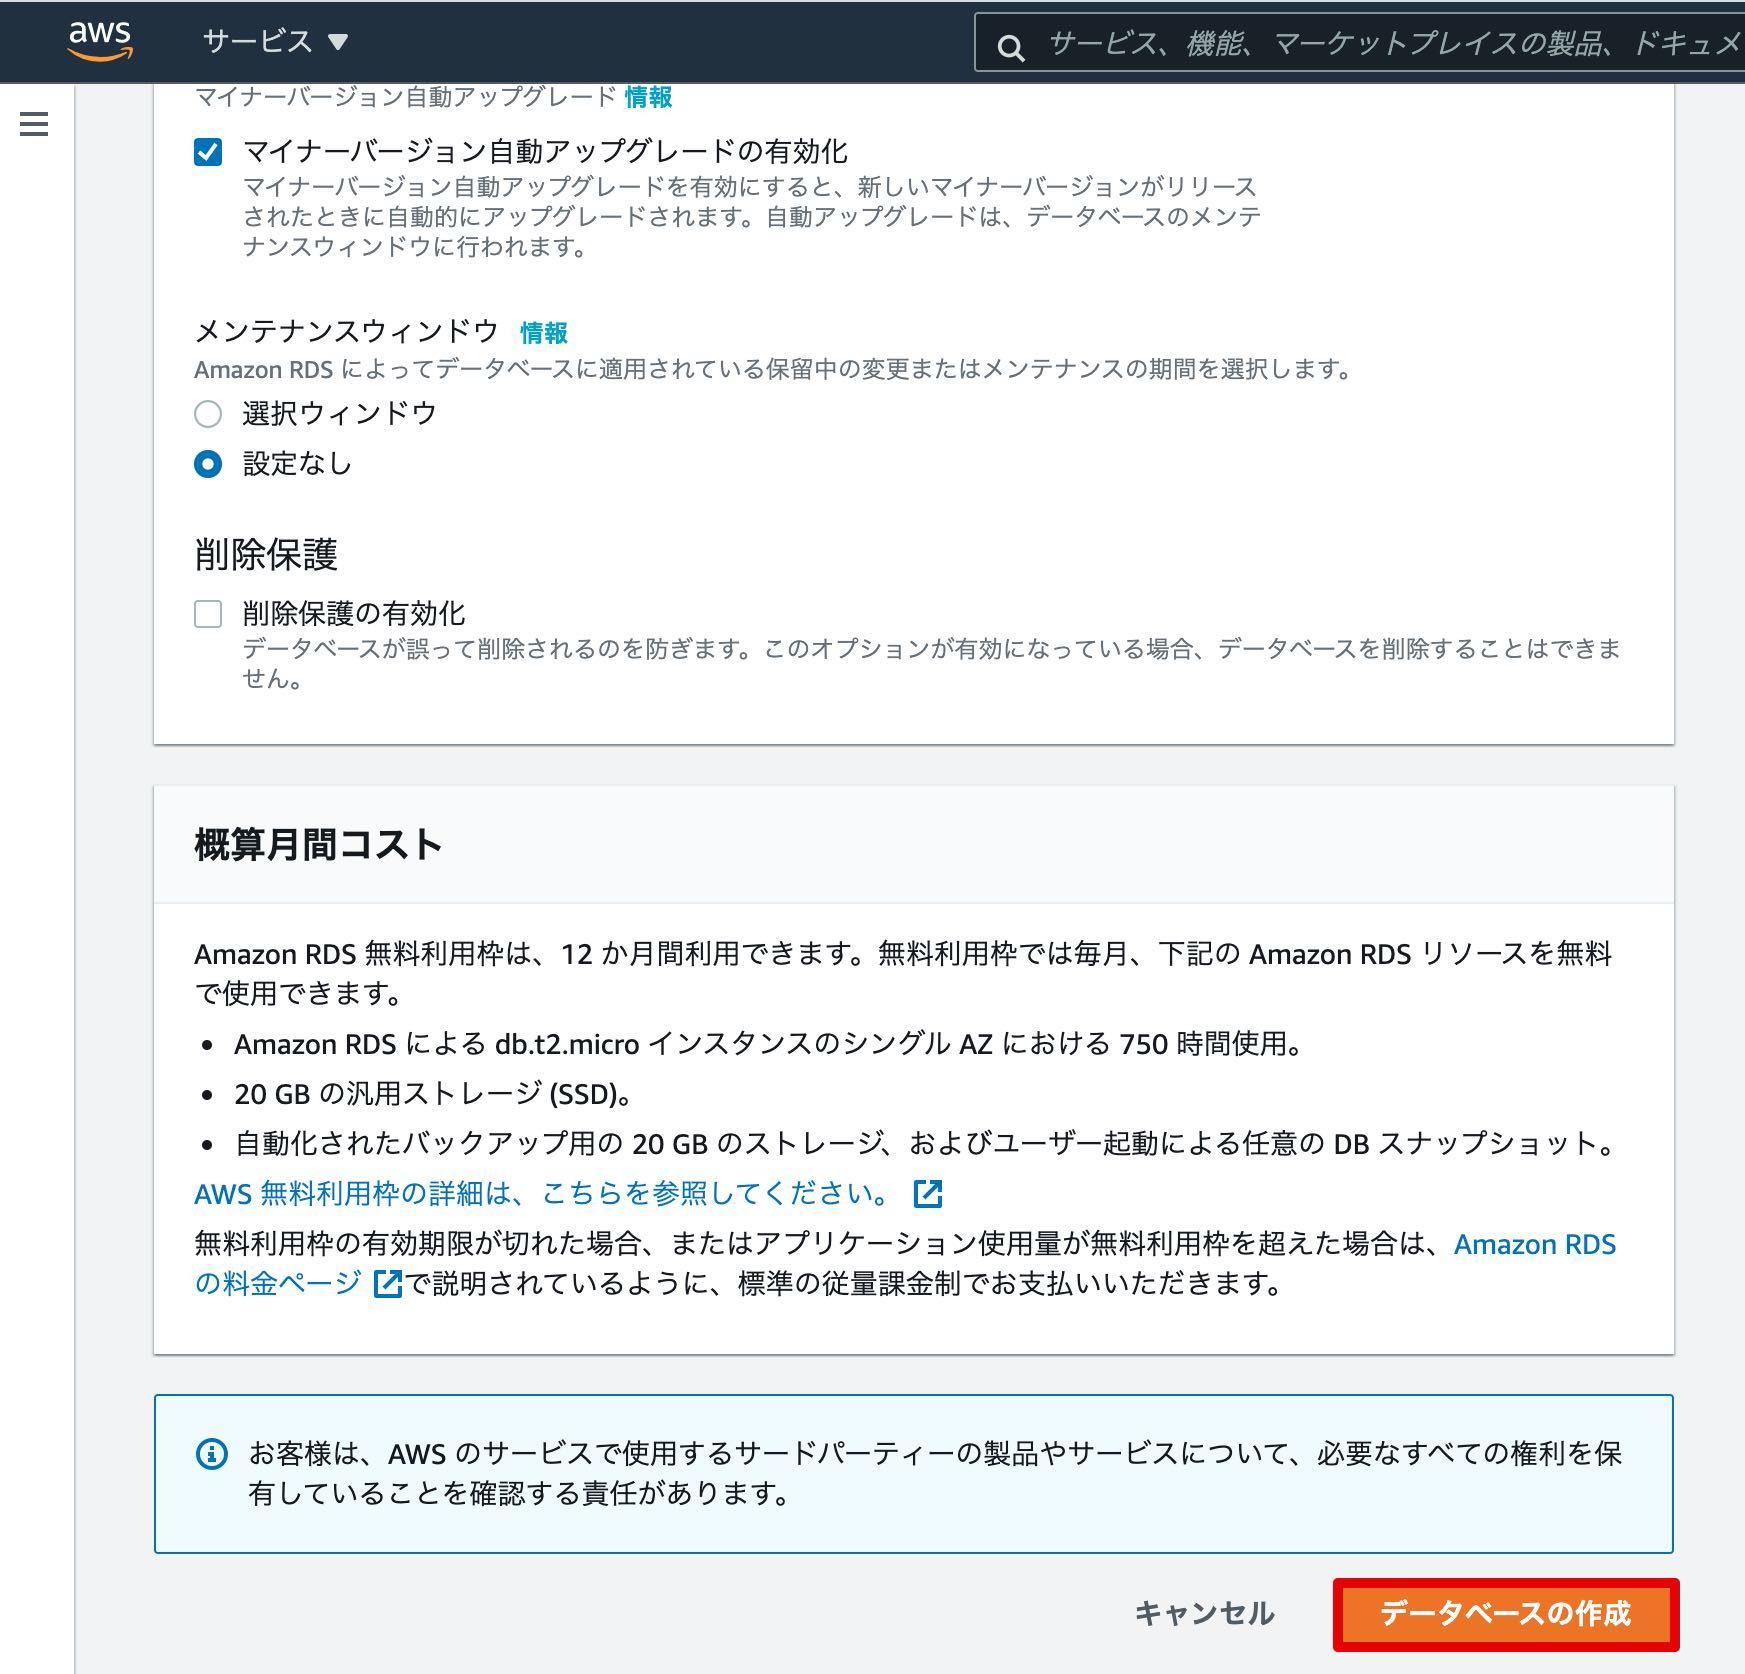
「データベースの作成」をクリックします。
下記のエラーが表示された場合は、こちらの手順を参考にサブネットを複数アベイラビリティゾーンに作成してください。
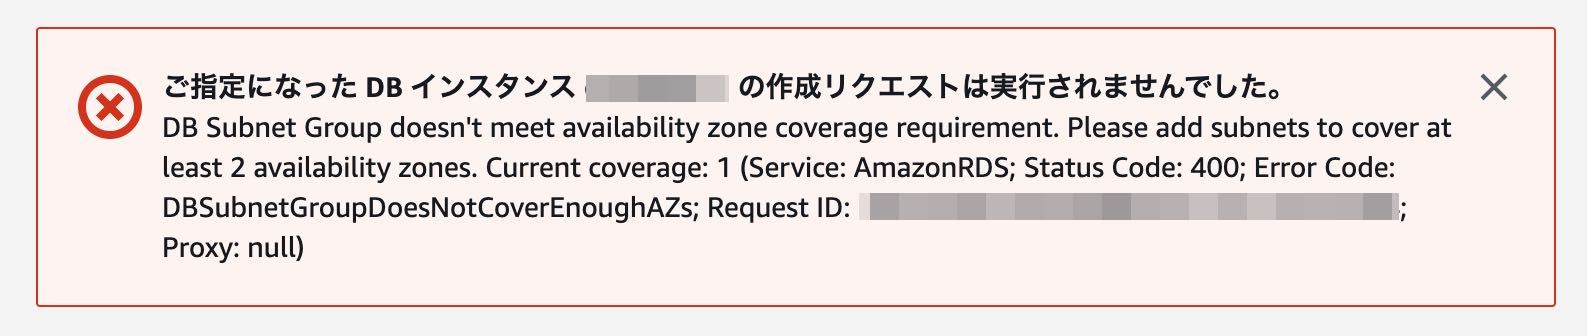
ご指定になった DB インスタンス xxxxxxxx の作成リクエストは実行されませんでした。
DB Subnet Group doesn’t meet availability zone coverage requirement. Please add subnets to cover at
least 2 availability zones. Current coverage: 1 (Service: AmazonRDS; Status Code: 400; Error Code:
DBSubnetGroupDoesNotCoverEnoughAZs; Request ID: xxxxxxxx-xxxx-xxxx-xxxx-xxxxxxxxxxxx;
Proxy: null)
ステータスが、「利用可能」となることを確認します。※数分かかります。
これで、AWS上での監視サーバー(Zabbix)構築【3.AWSのRDS作成】の説明は完了です!
【前回】AWS上での監視サーバー(Zabbix)構築【2.AWSのEC2構築】
【次回】AWS上での監視サーバー(Zabbix)構築【4.Zabbixのインストールと設定】