【前回】Azureサイト間VPNの構築(3.AzureのVPN構築)
【次回】Azureサイト間VPNの構築(5.Azure CLI によるVPN接続の作成)
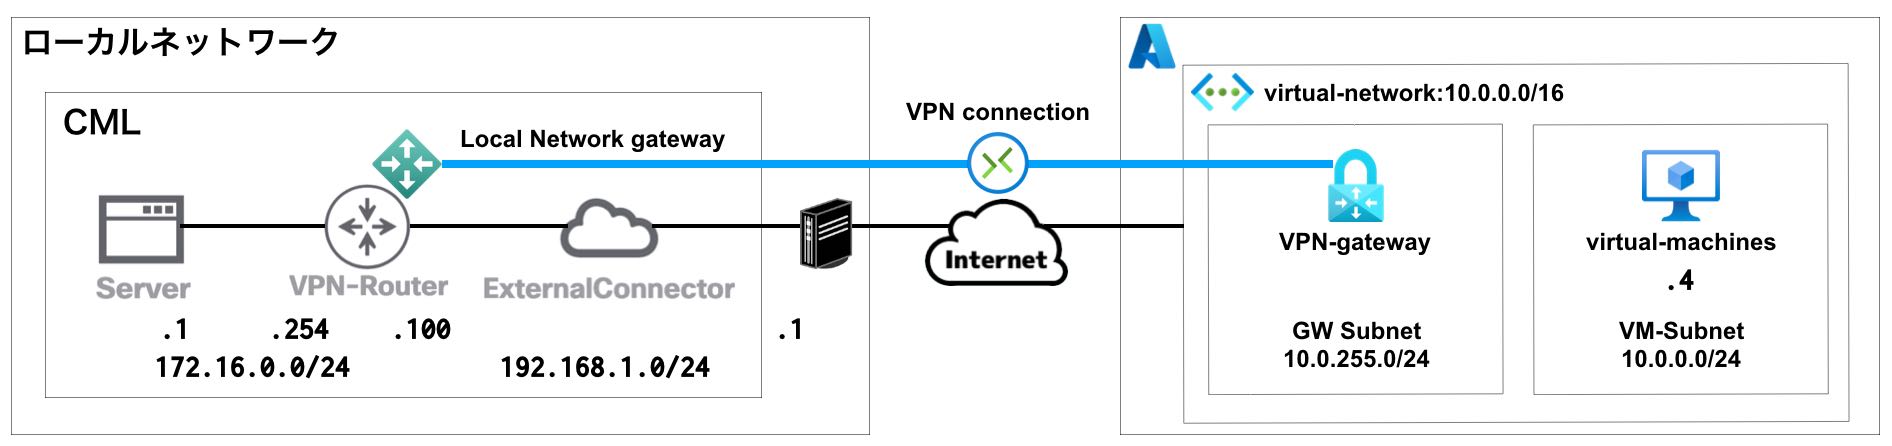
ネットワーク構成
下記のネットワーク構成で、CML上のLAN(172.16.0.0/24)とAzure上のサブネット(10.0.0.0/24)が直接通信できるようにします。
※Server(172.16.0.1)からVM(10.0.0.4)にPingによる疎通確認ができるようにしていきます。
CMLの構築
Azureのサイト間VPN接続の検証のためにCMLを構築します。
CMLの基本設定
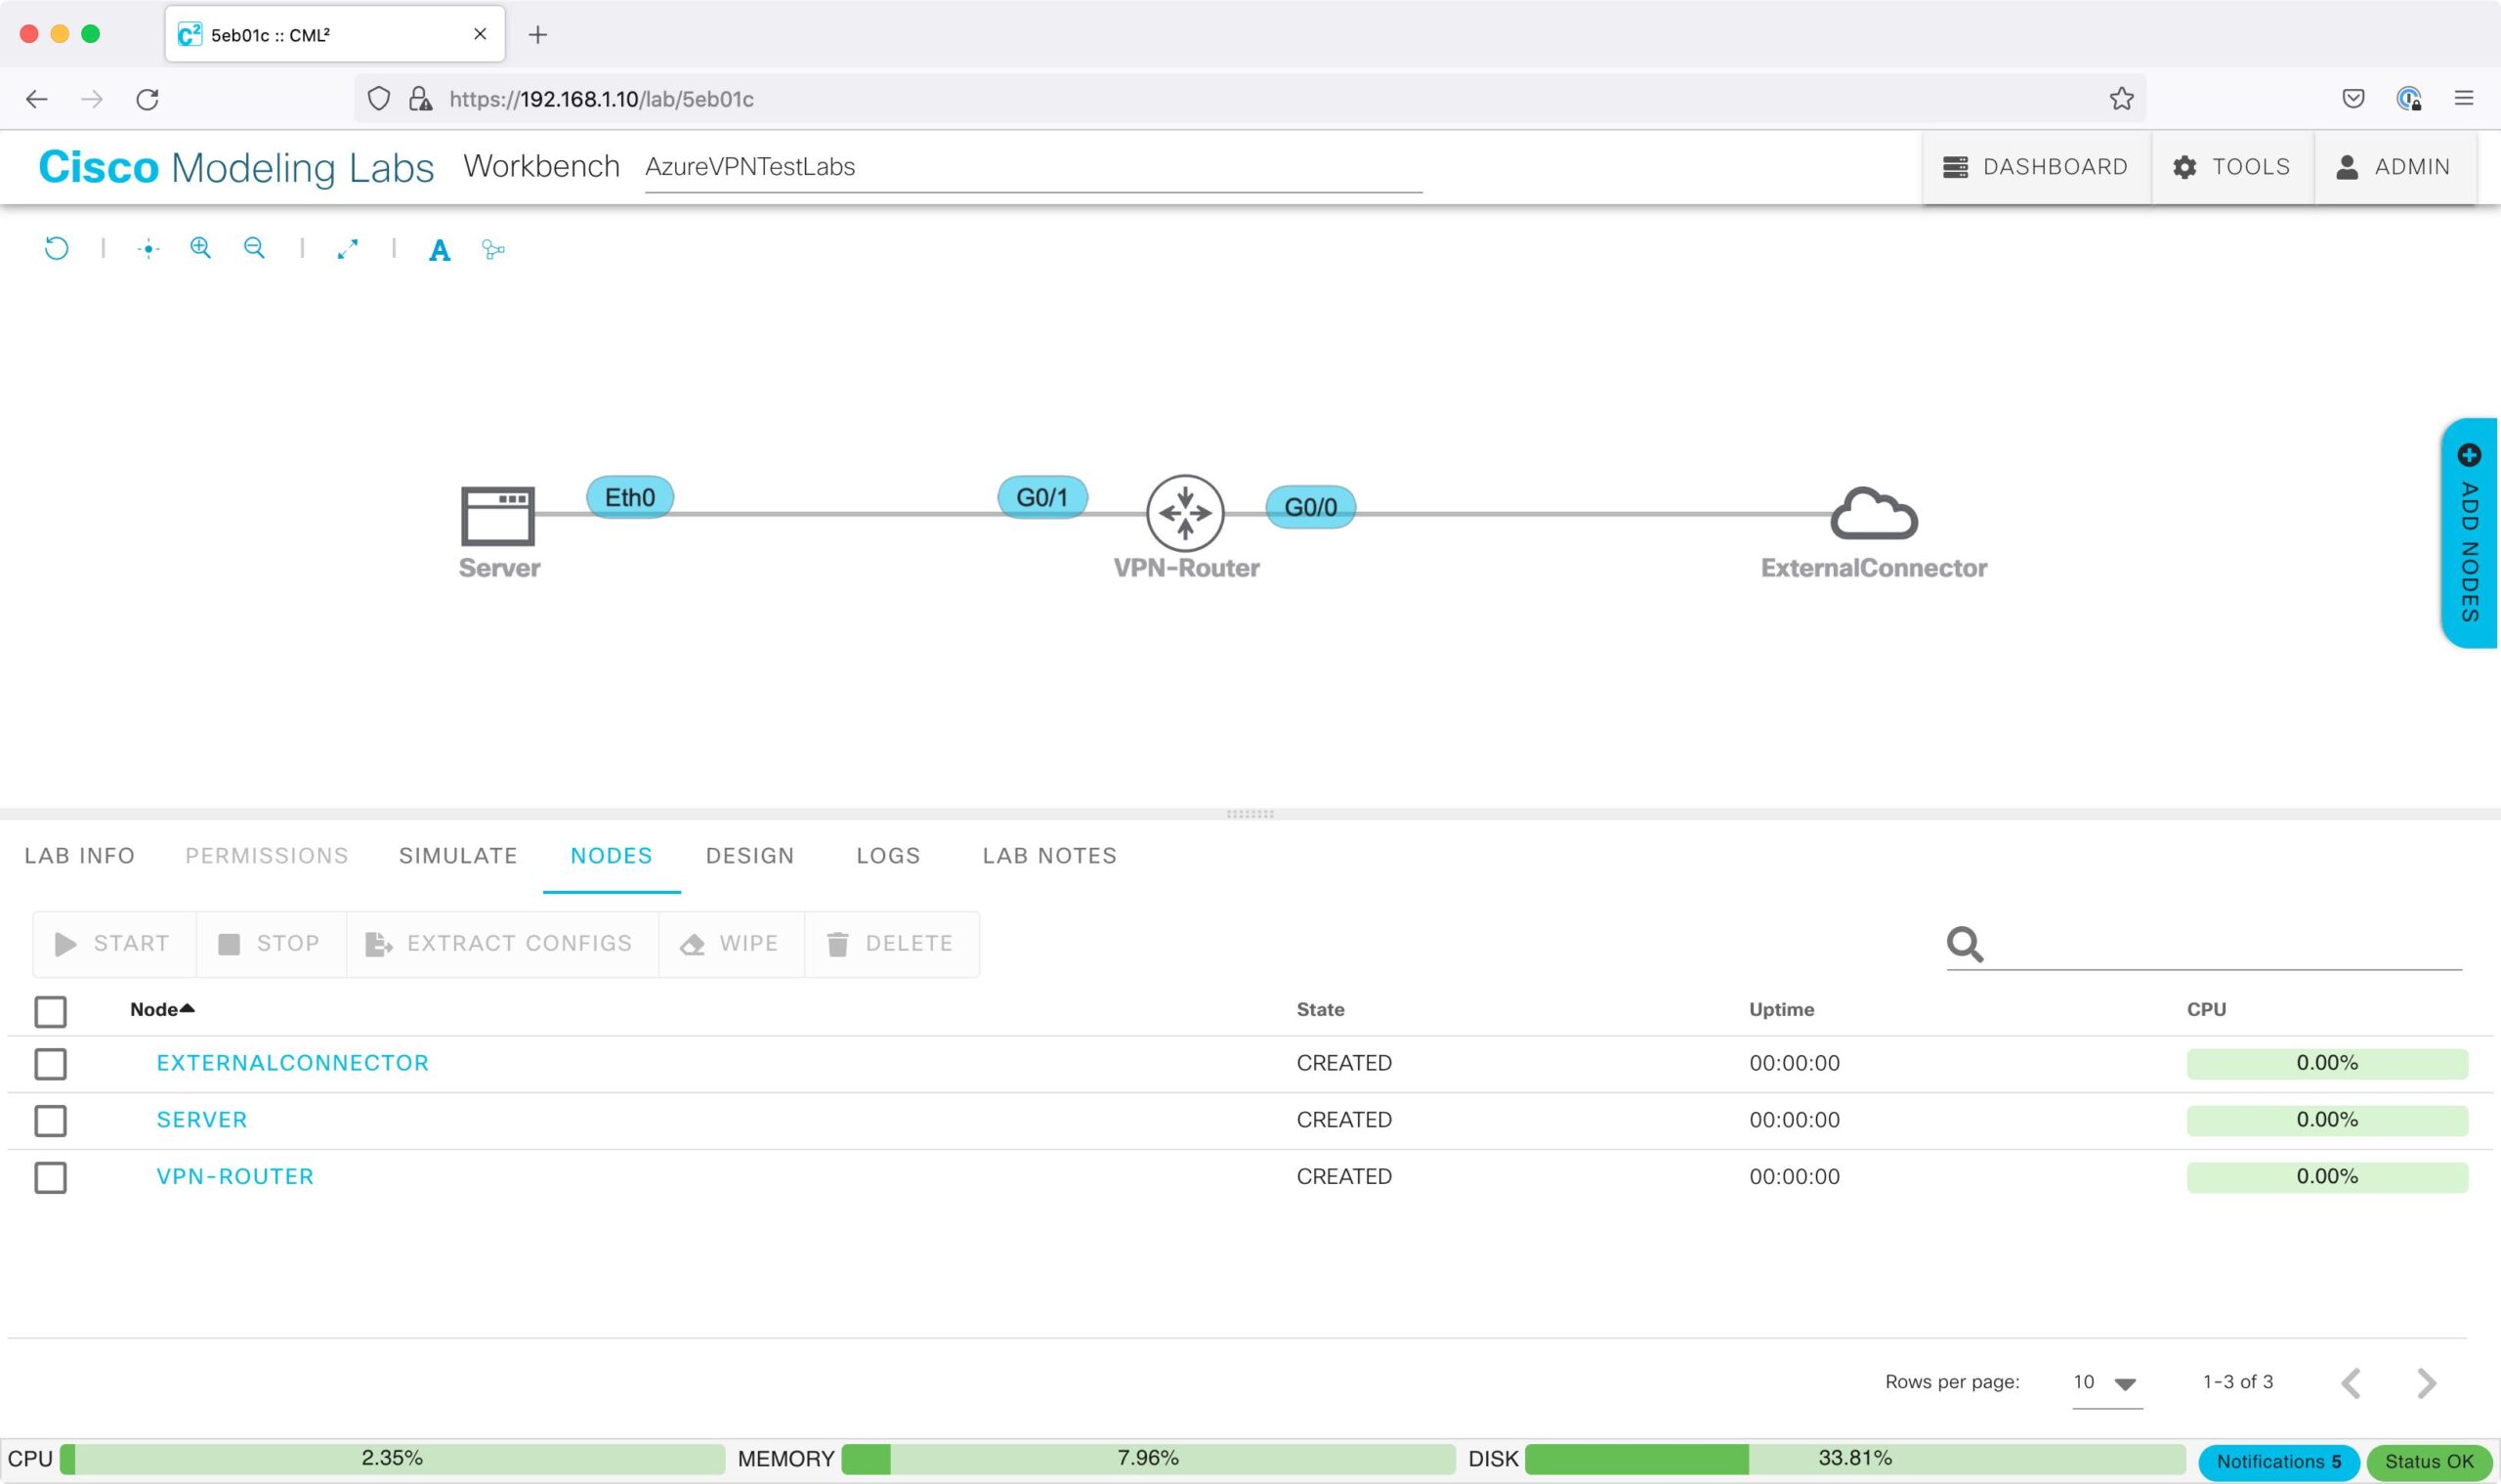
Server、IOSv(VPN-Router)、ExternalConnectorを配置します。
VPN-RouterのGi0/0をExternalConnectorに、Gi0/1をServerに接続します。
Serverは、「EDIT CONFIG」で下記の設定を行い起動します。
hostname Server
ifconfig eth0 172.16.0.1 netmask 255.255.255.0 up
route add -net 0.0.0.0/0 dev eth0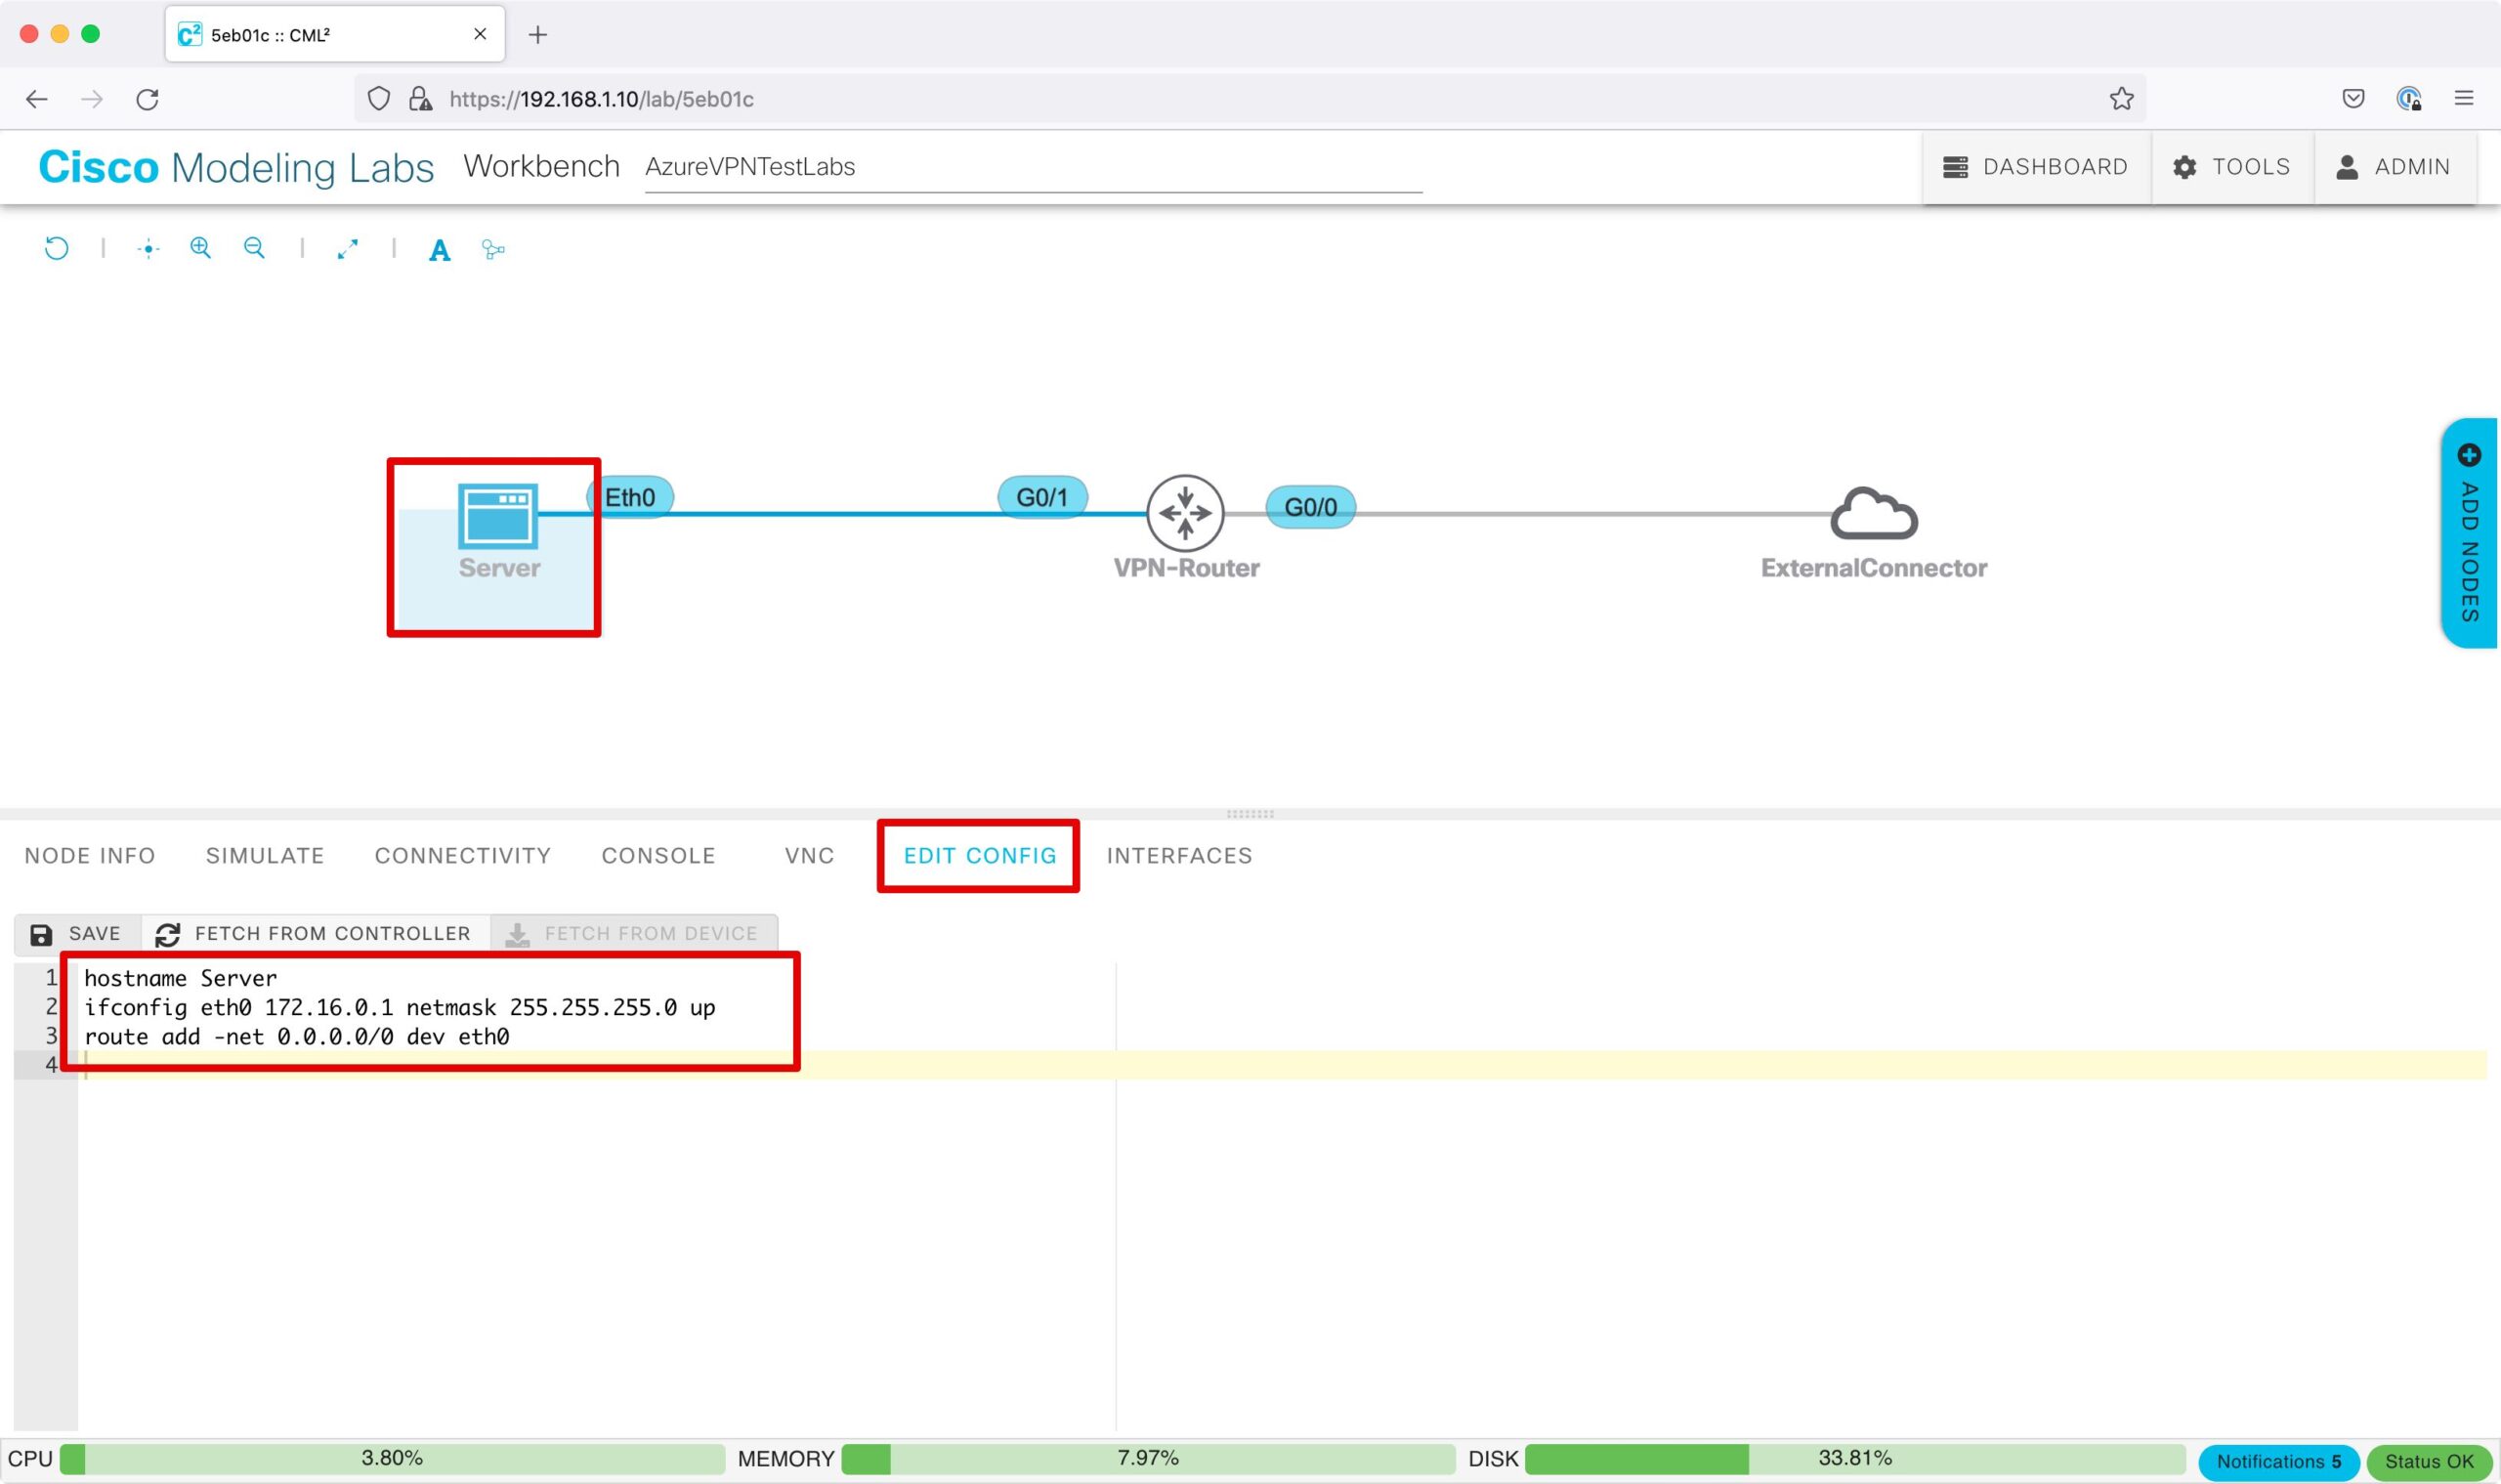
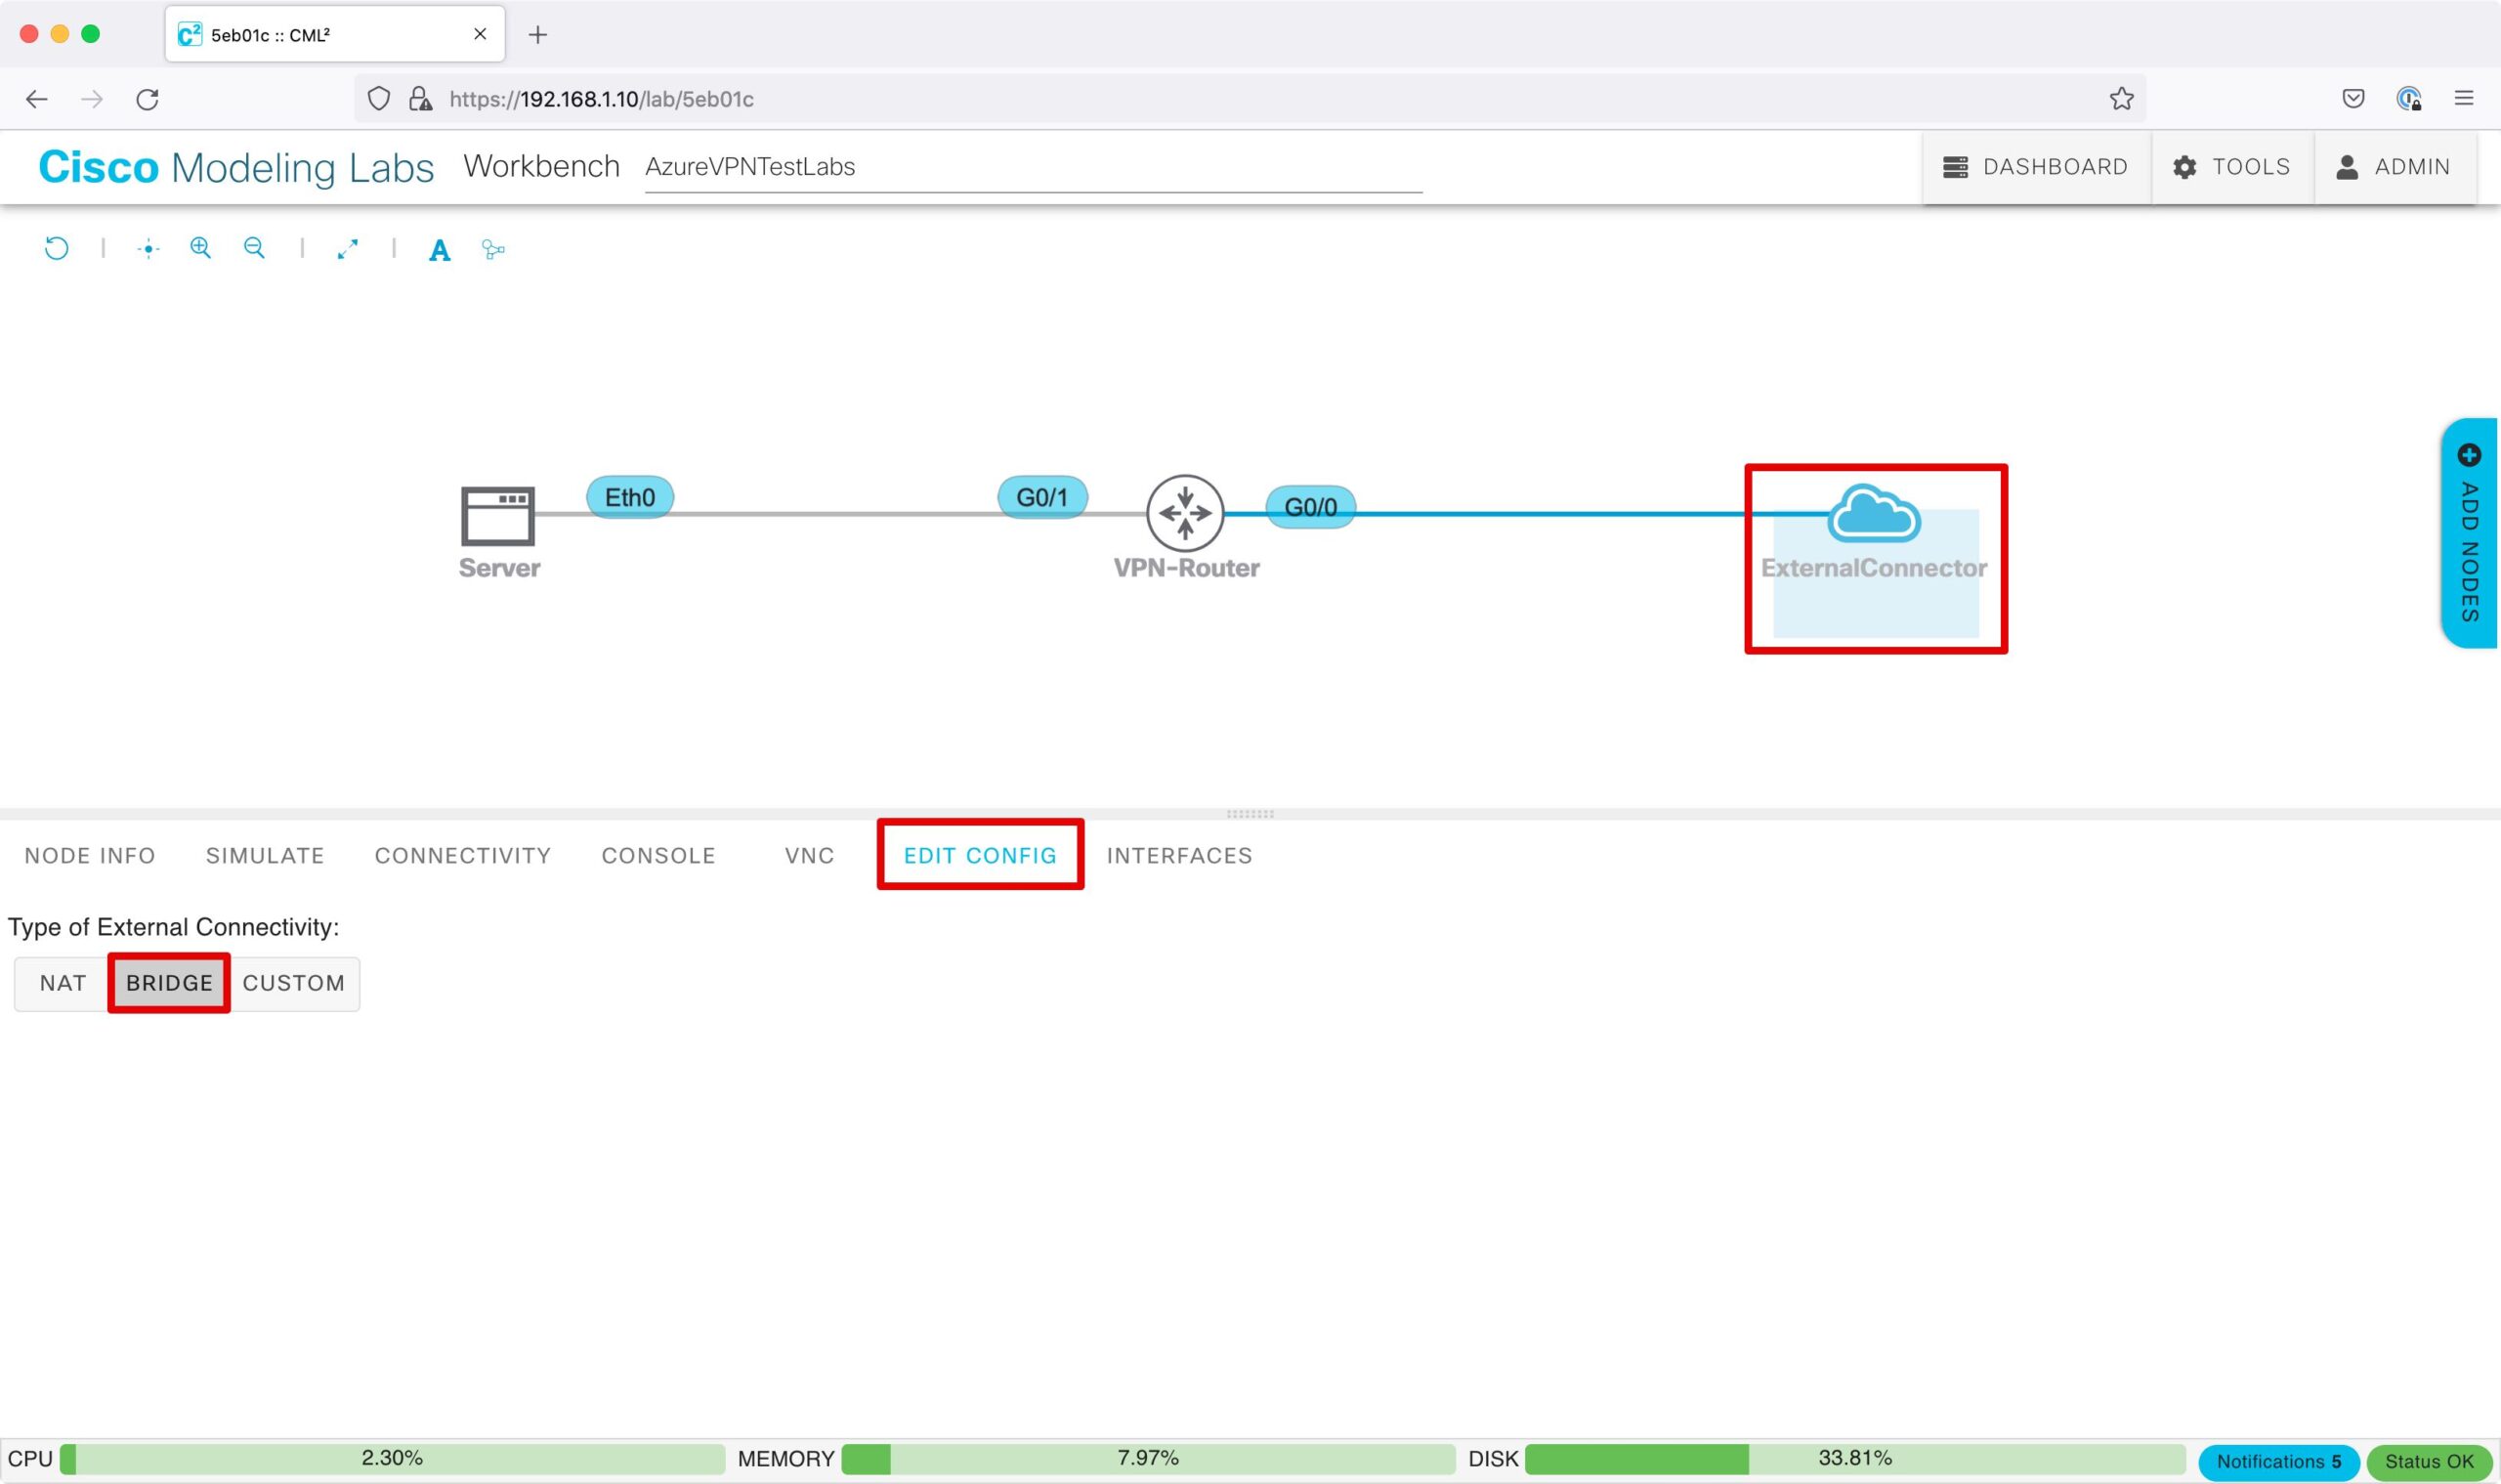
ExternalConnectorは、「EDIT CONFIG」で「BRIDGE」を選択します。
※CMLの外部ネットワーク接続の詳細はこちらで説明しています。
VPN-Routerのインターフェースを設定します。
int Gi0/0
ip address 192.168.1.100 255.255.255.0
no shut

int Gi0/1
ip address 172.16.0.254 255.255.255.0
no shut
VPN-RouterのインターフェースにIPアドレスが設定され、リンクアップしたことを確認します。
show ip int brief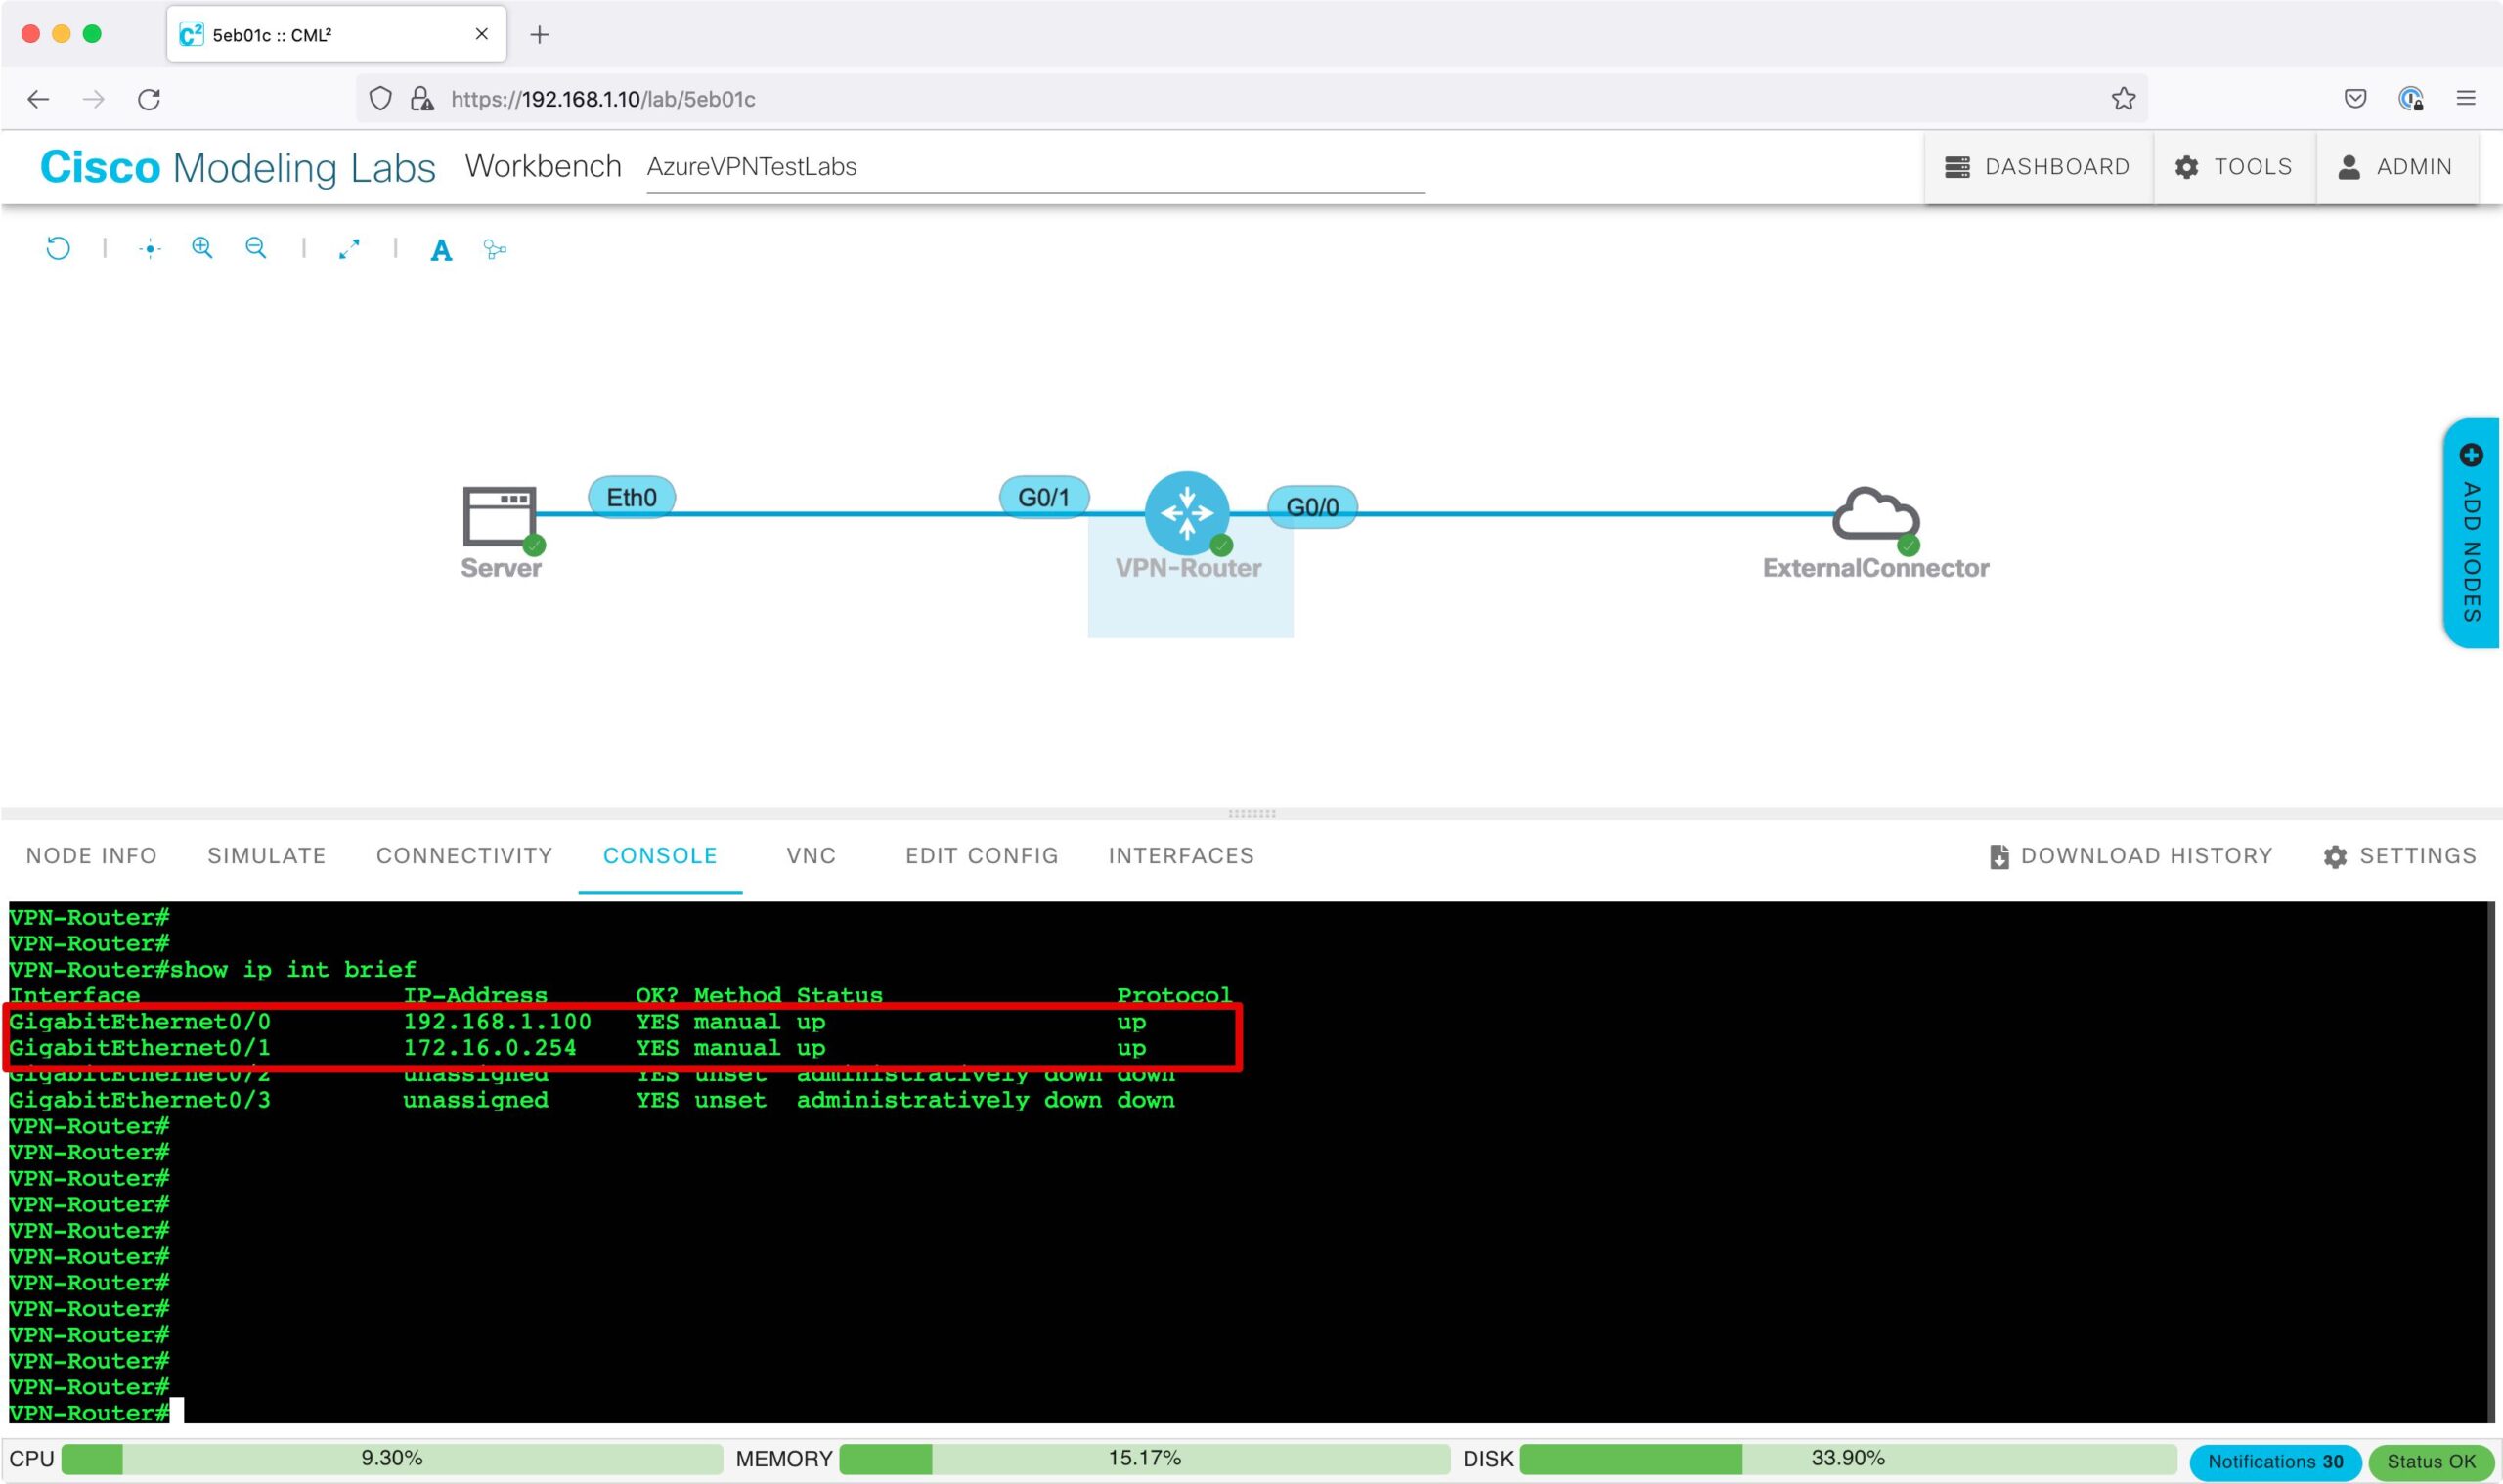
VPN-Routerのデフォルトルートを設定します。
ip route 0.0.0.0 0.0.0.0 192.168.1.1※デフォルトルートのネクストホップは、自身のローカル環境のルータのIPアドレスを設定します。下記のコマンドで確認できます。
route print -4
-----------------------------------------------------------------------
0.0.0.0           0.0.0.0        192.168.1.1
-----------------------------------------------------------------------netstat -rn -f inet | grep default
-----------------------------------------------------------------------
default 192.168.1.1
-----------------------------------------------------------------------VPN-Routerのデフォルトルートが設定されたことを確認します。
show ip route
隣接機器にPingを実施し、疎通可能であることを確認します。
ping 192.168.1.1
ping 172.16.0.1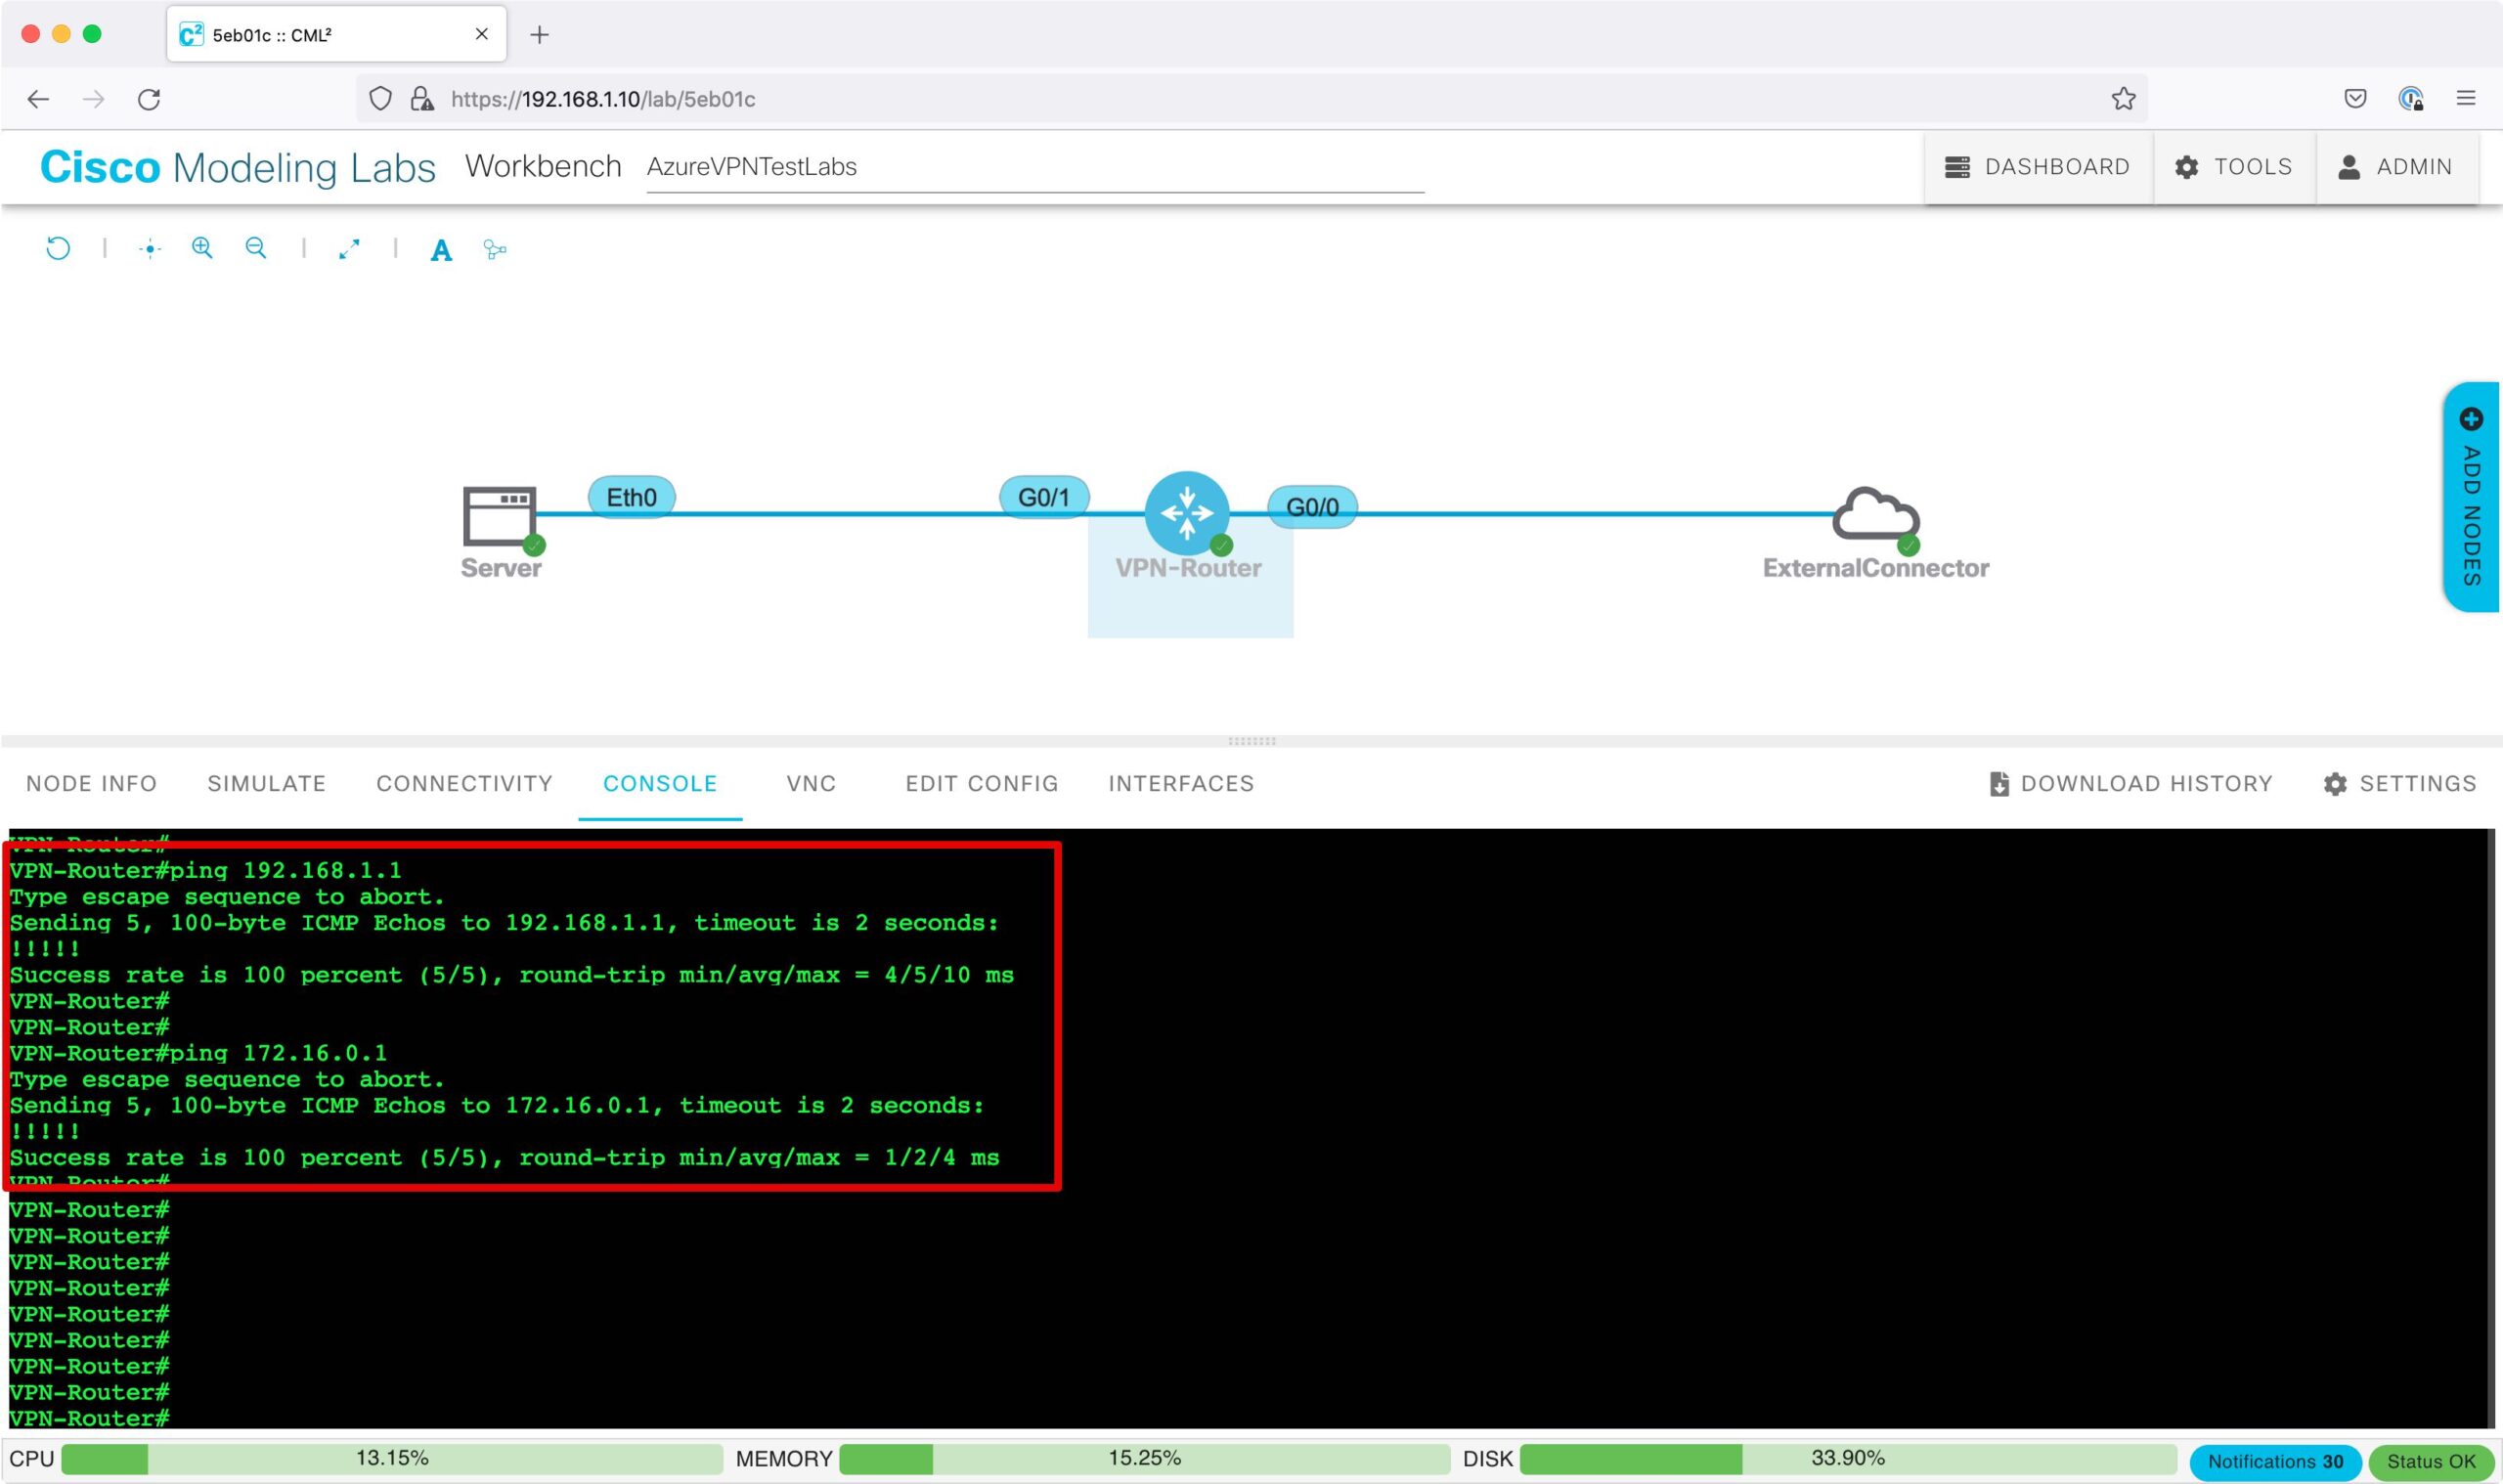
インターネット内のIPアドレスにPingを実施し、疎通可能であることを確認します。
ping 8.8.8.8 ※Googleが提供している「Google Public DNS」のIPアドレス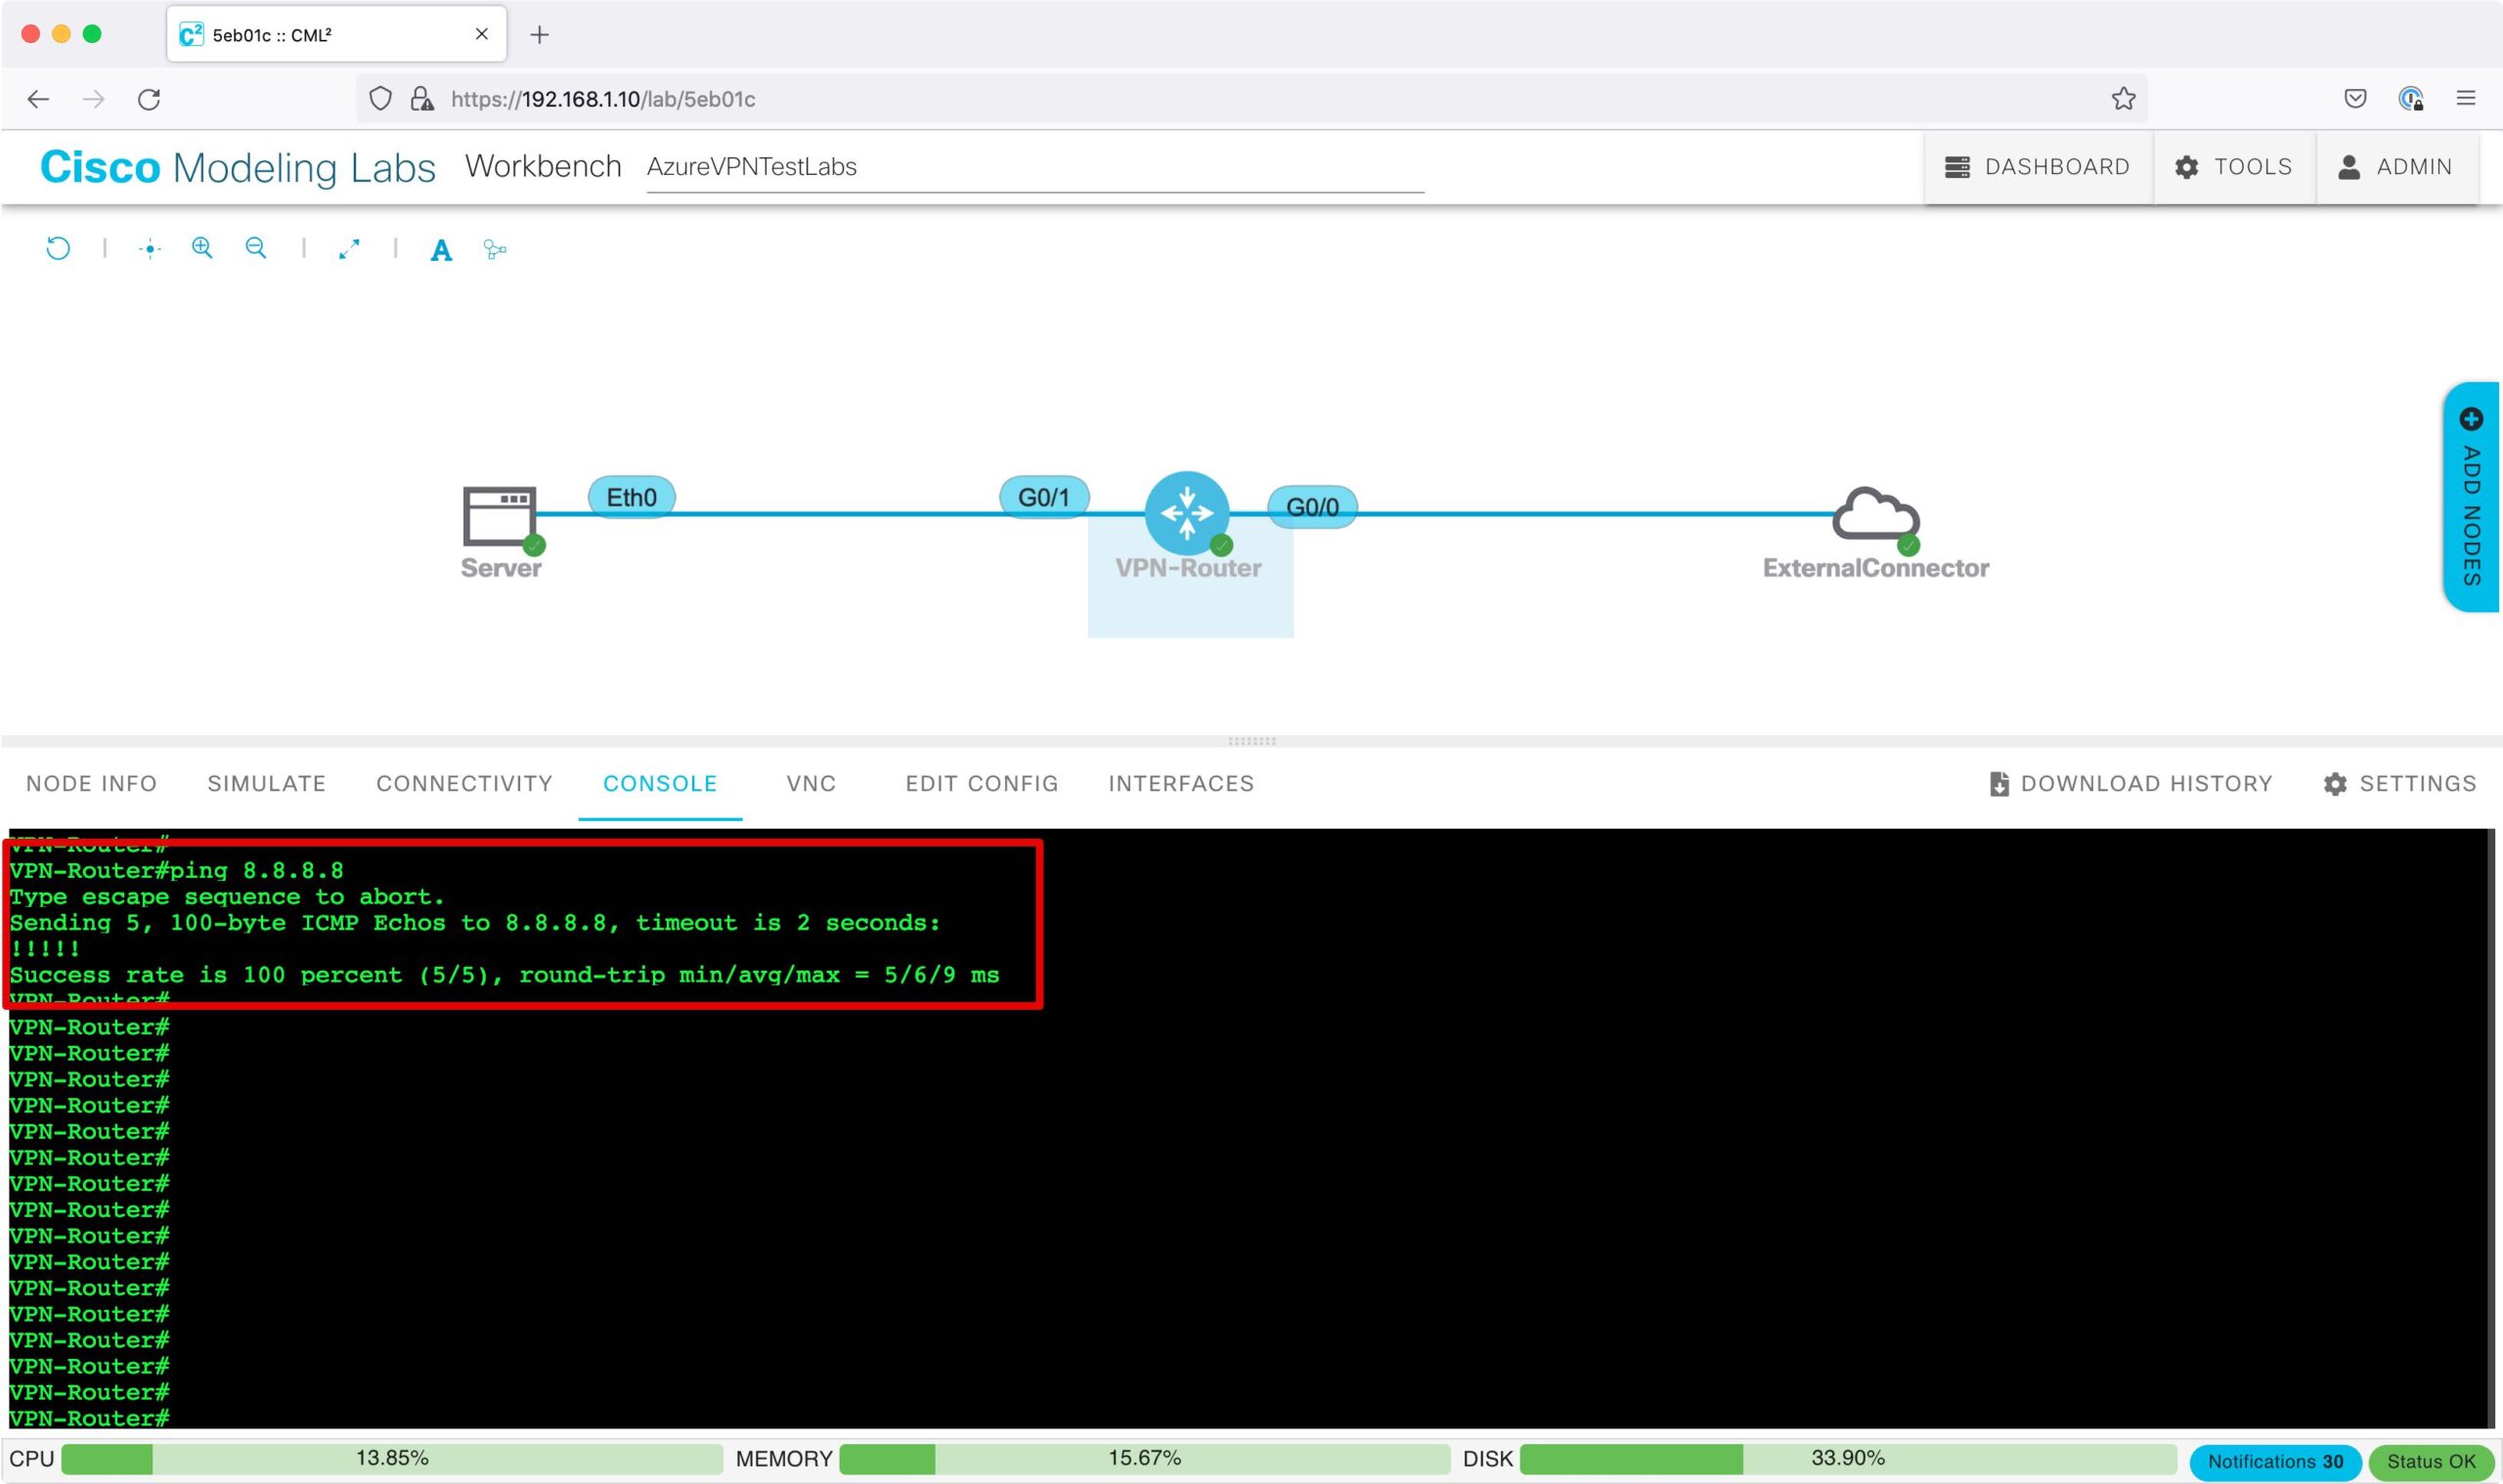
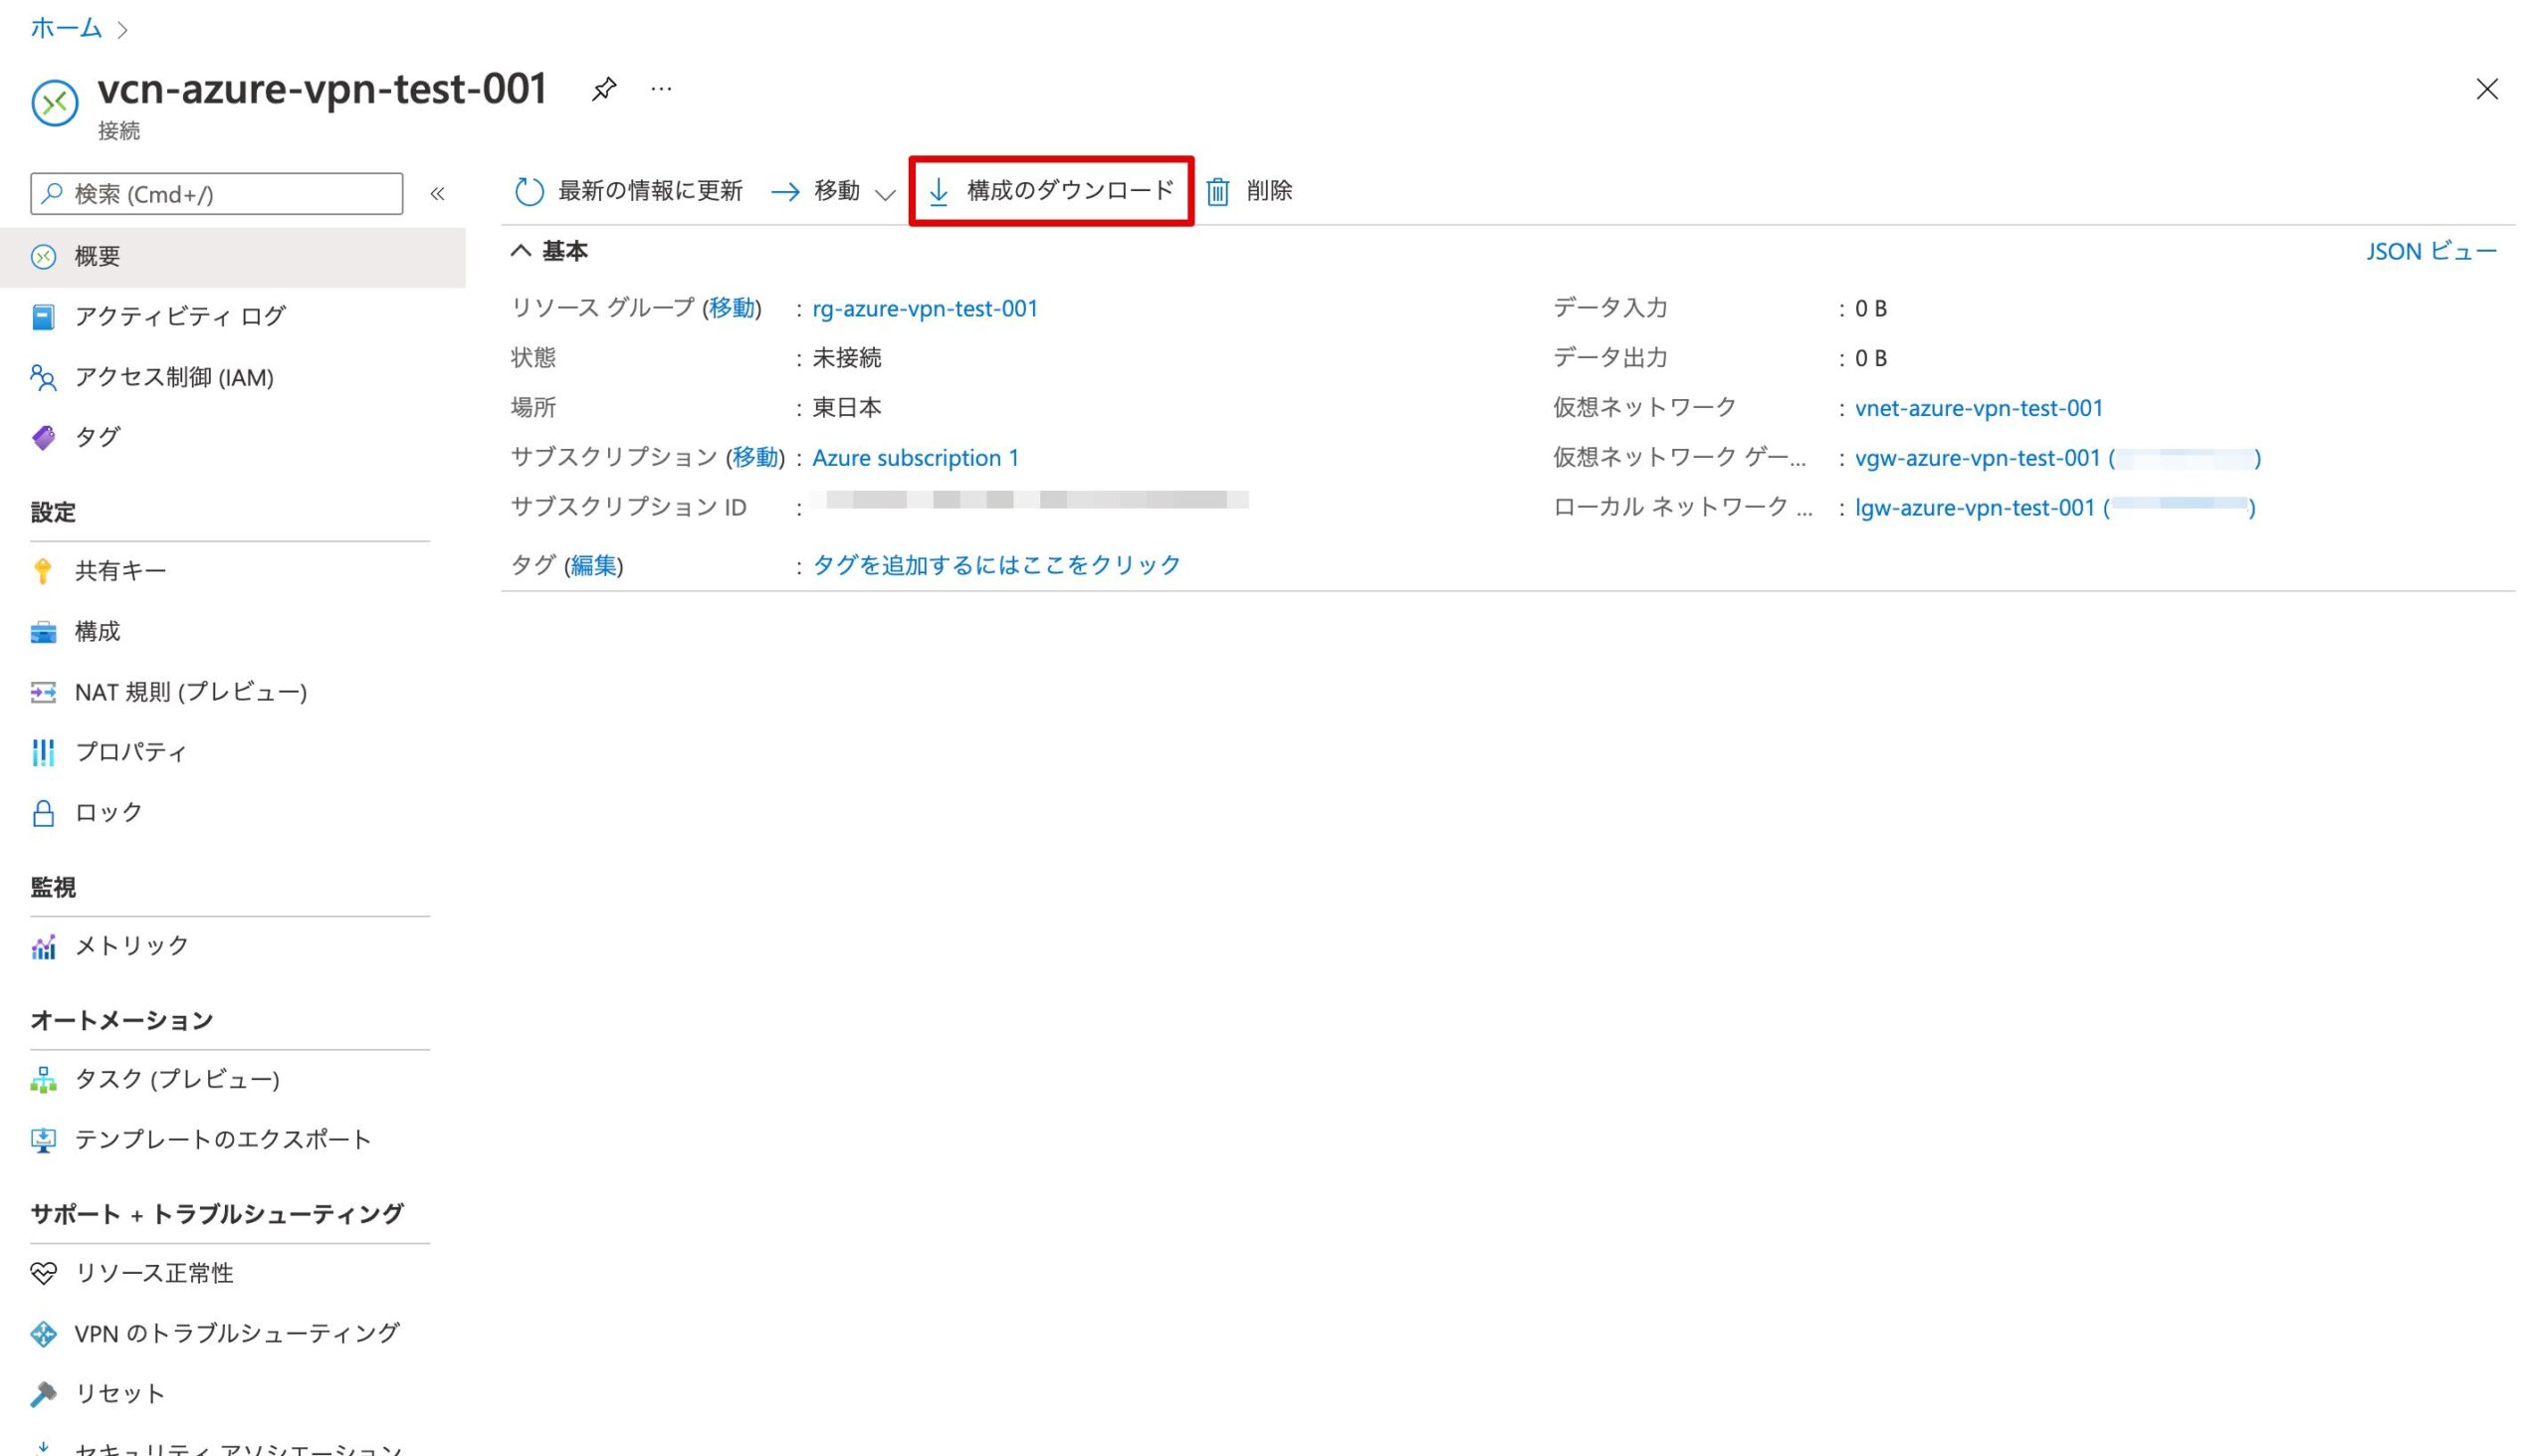
CMLのVPN設定
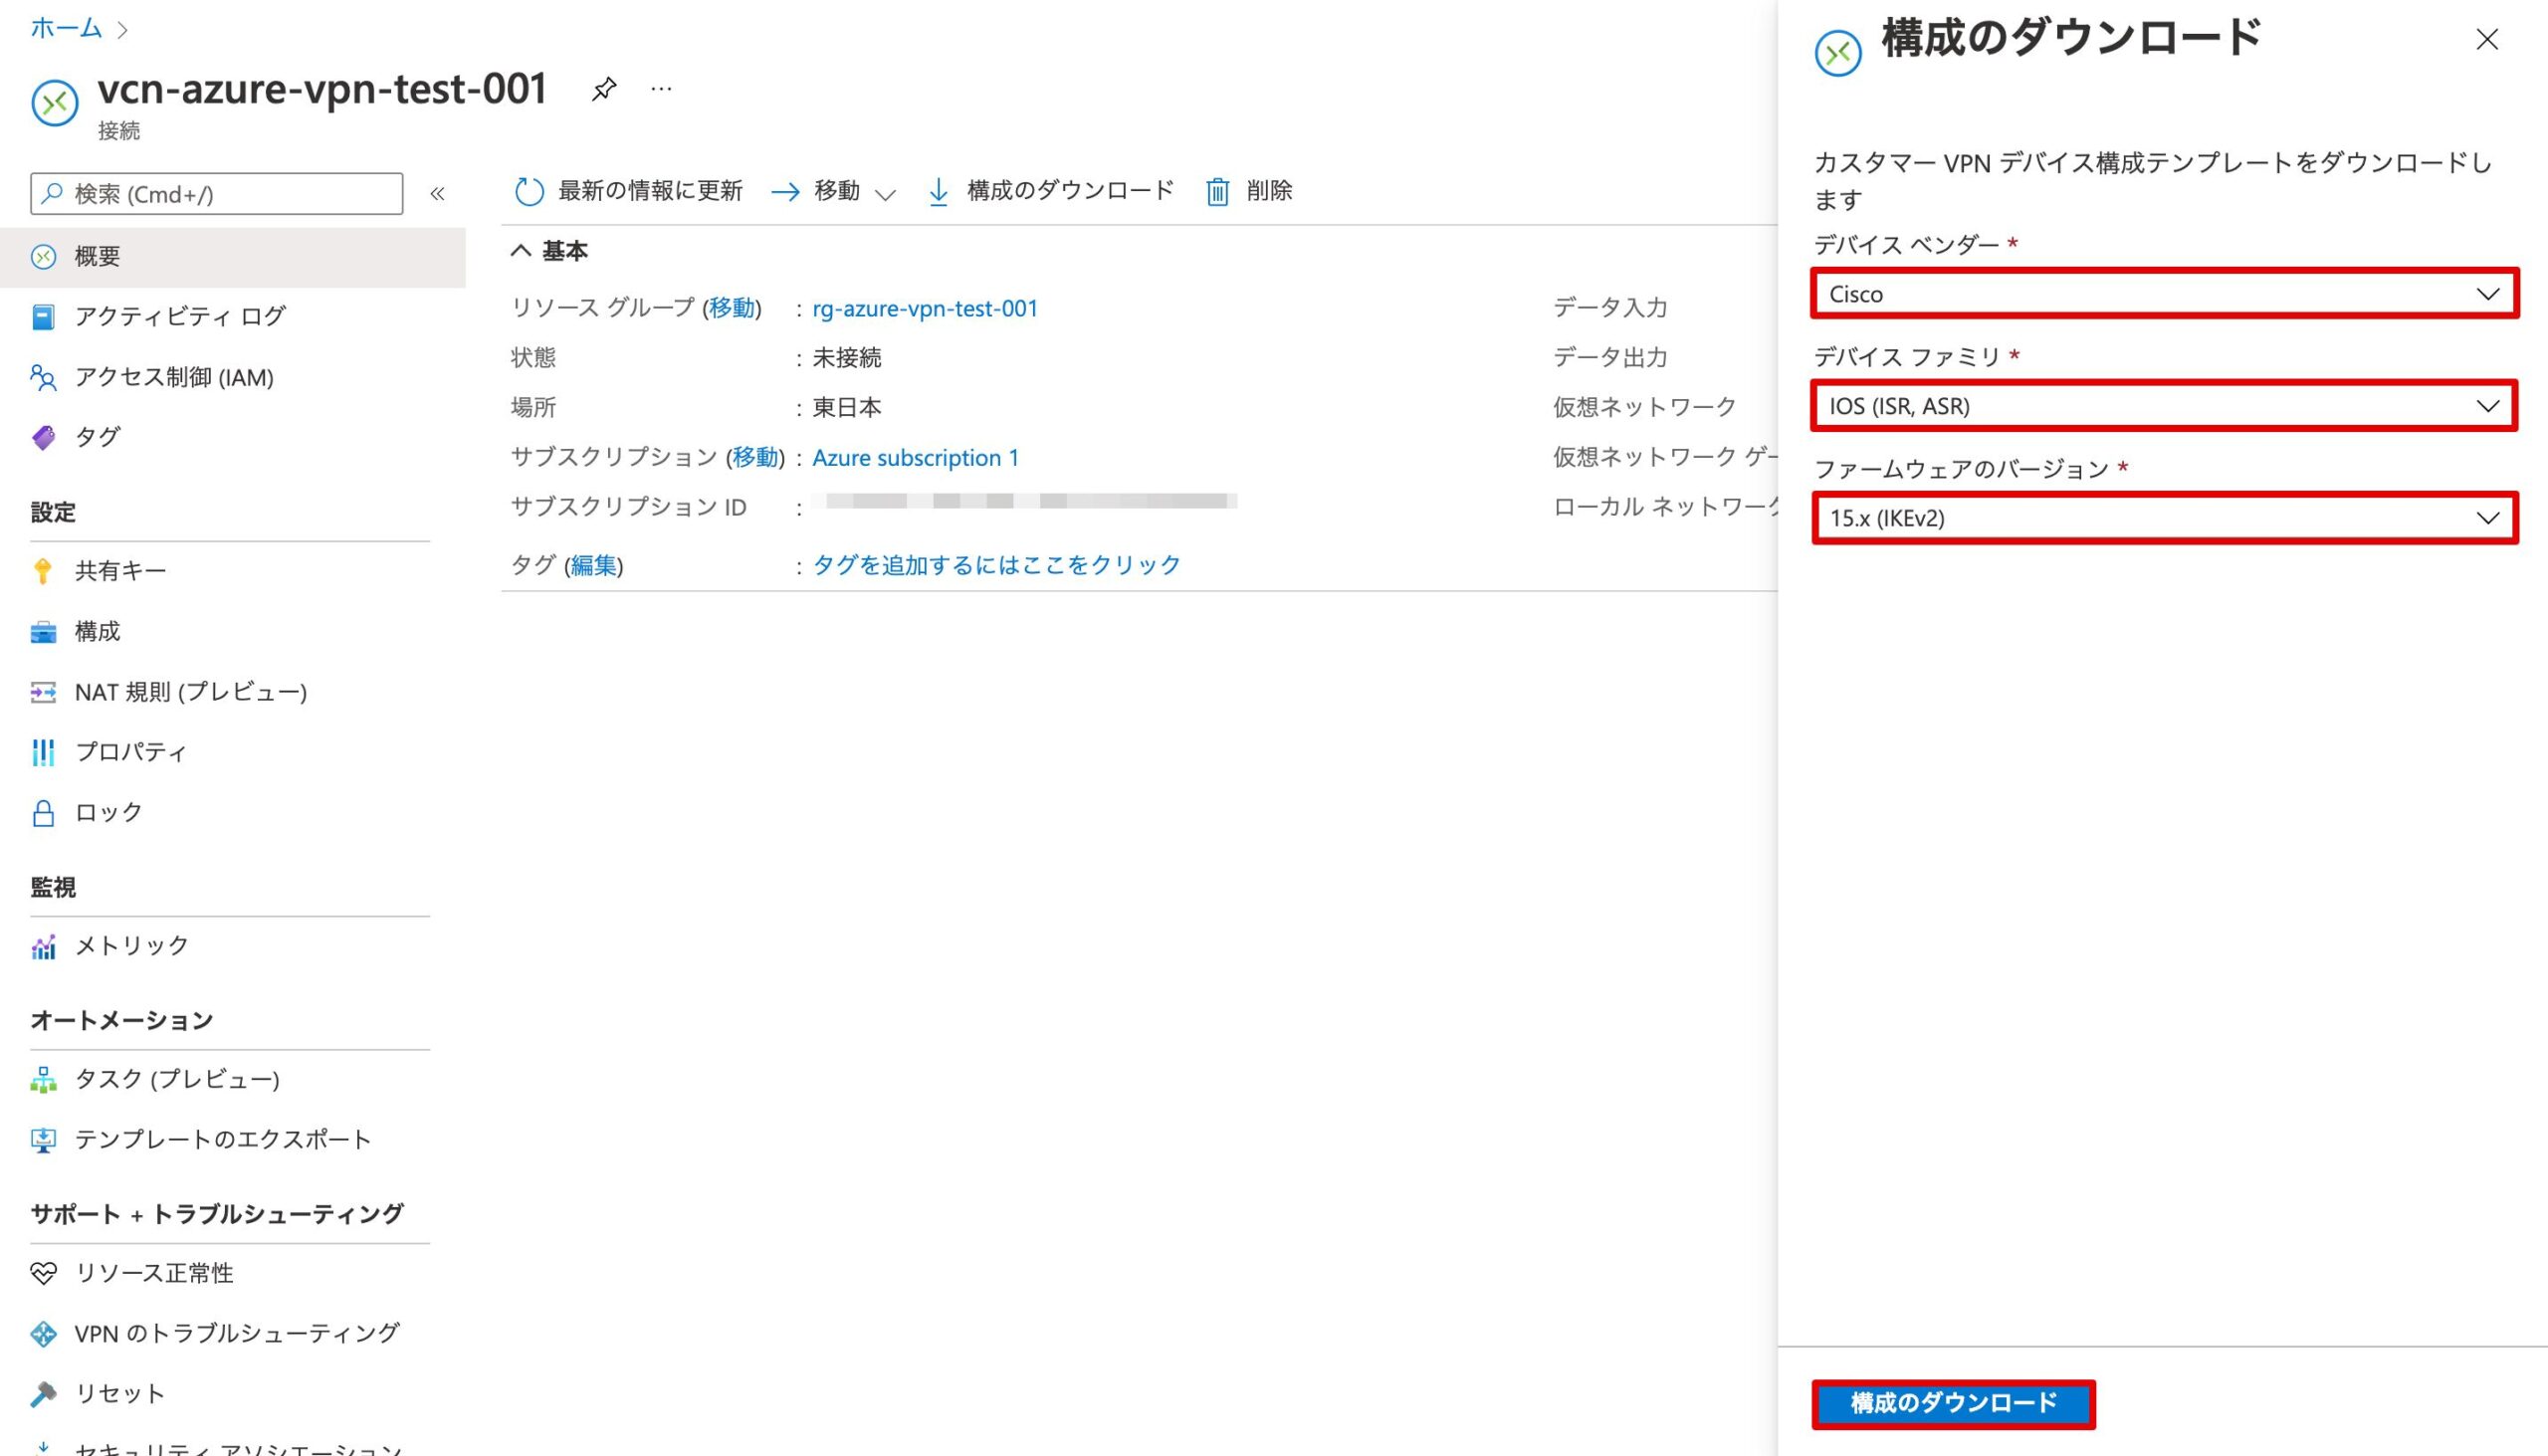
Azureの「接続」から設定のサンプルをダウンロードできます。「構成のダウンロード」をクリックします。
下記の通り選択し、「構成のダウンロード」をクリックします。
デバイスベンダー:Cisco
デバイスファミリ:IOS (ISR、 ASR)
ファームウェアのバージョン:15.x (IKEv2)
ダウンロードした設定サンプルから、今回は必要最低限の下記を設定します。****の部分はダウンロードしたテンプレート通りです。
crypto ikev2 proposal vcn-azure-vpn-test-001-proposal
encryption aes-cbc-256
integrity sha1
group 2
exit
crypto ikev2 policy vcn-azure-vpn-test-001-policy
proposal vcn-azure-vpn-test-001-proposal
match address local 192.168.1.100 ※ここはCML上のルーターのGi0/0のアドレスを指定
exit
crypto ikev2 keyring vcn-azure-vpn-test-001-keyring
peer ***.***.***.***
address ***.***.***.***
pre-shared-key ********************
exit
exit
crypto ikev2 profile vcn-azure-vpn-test-001-profile
match address local 192.168.1.100 ※ここはCML上のルーターのGi0/0のアドレスを指定
match identity remote address ***.***.***.*** 255.255.255.255
authentication remote pre-share
authentication local pre-share
lifetime 3600
dpd 10 5 on-demand
keyring local vcn-azure-vpn-test-001-keyring
exit
crypto ipsec transform-set vcn-azure-vpn-test-001-TransformSet esp-gcm 256
mode tunnel
exit
crypto ipsec profile azure-vpn-test-001-IPsecProfile
set transform-set vcn-azure-vpn-test-001-TransformSet
set ikev2-profile vcn-azure-vpn-test-001-profile
set security-association lifetime seconds 3600
exit
int tunnel 11
ip address 169.254.0.1 255.255.255.255
tunnel mode ipsec ipv4
ip tcp adjust-mss 1350
tunnel source 192.168.1.100 ※ここはCML上のルーターのGi0/0のアドレスを指定
tunnel destination ***.***.***.***
tunnel protection ipsec profile azure-vpn-test-001-IPsecProfile
exit
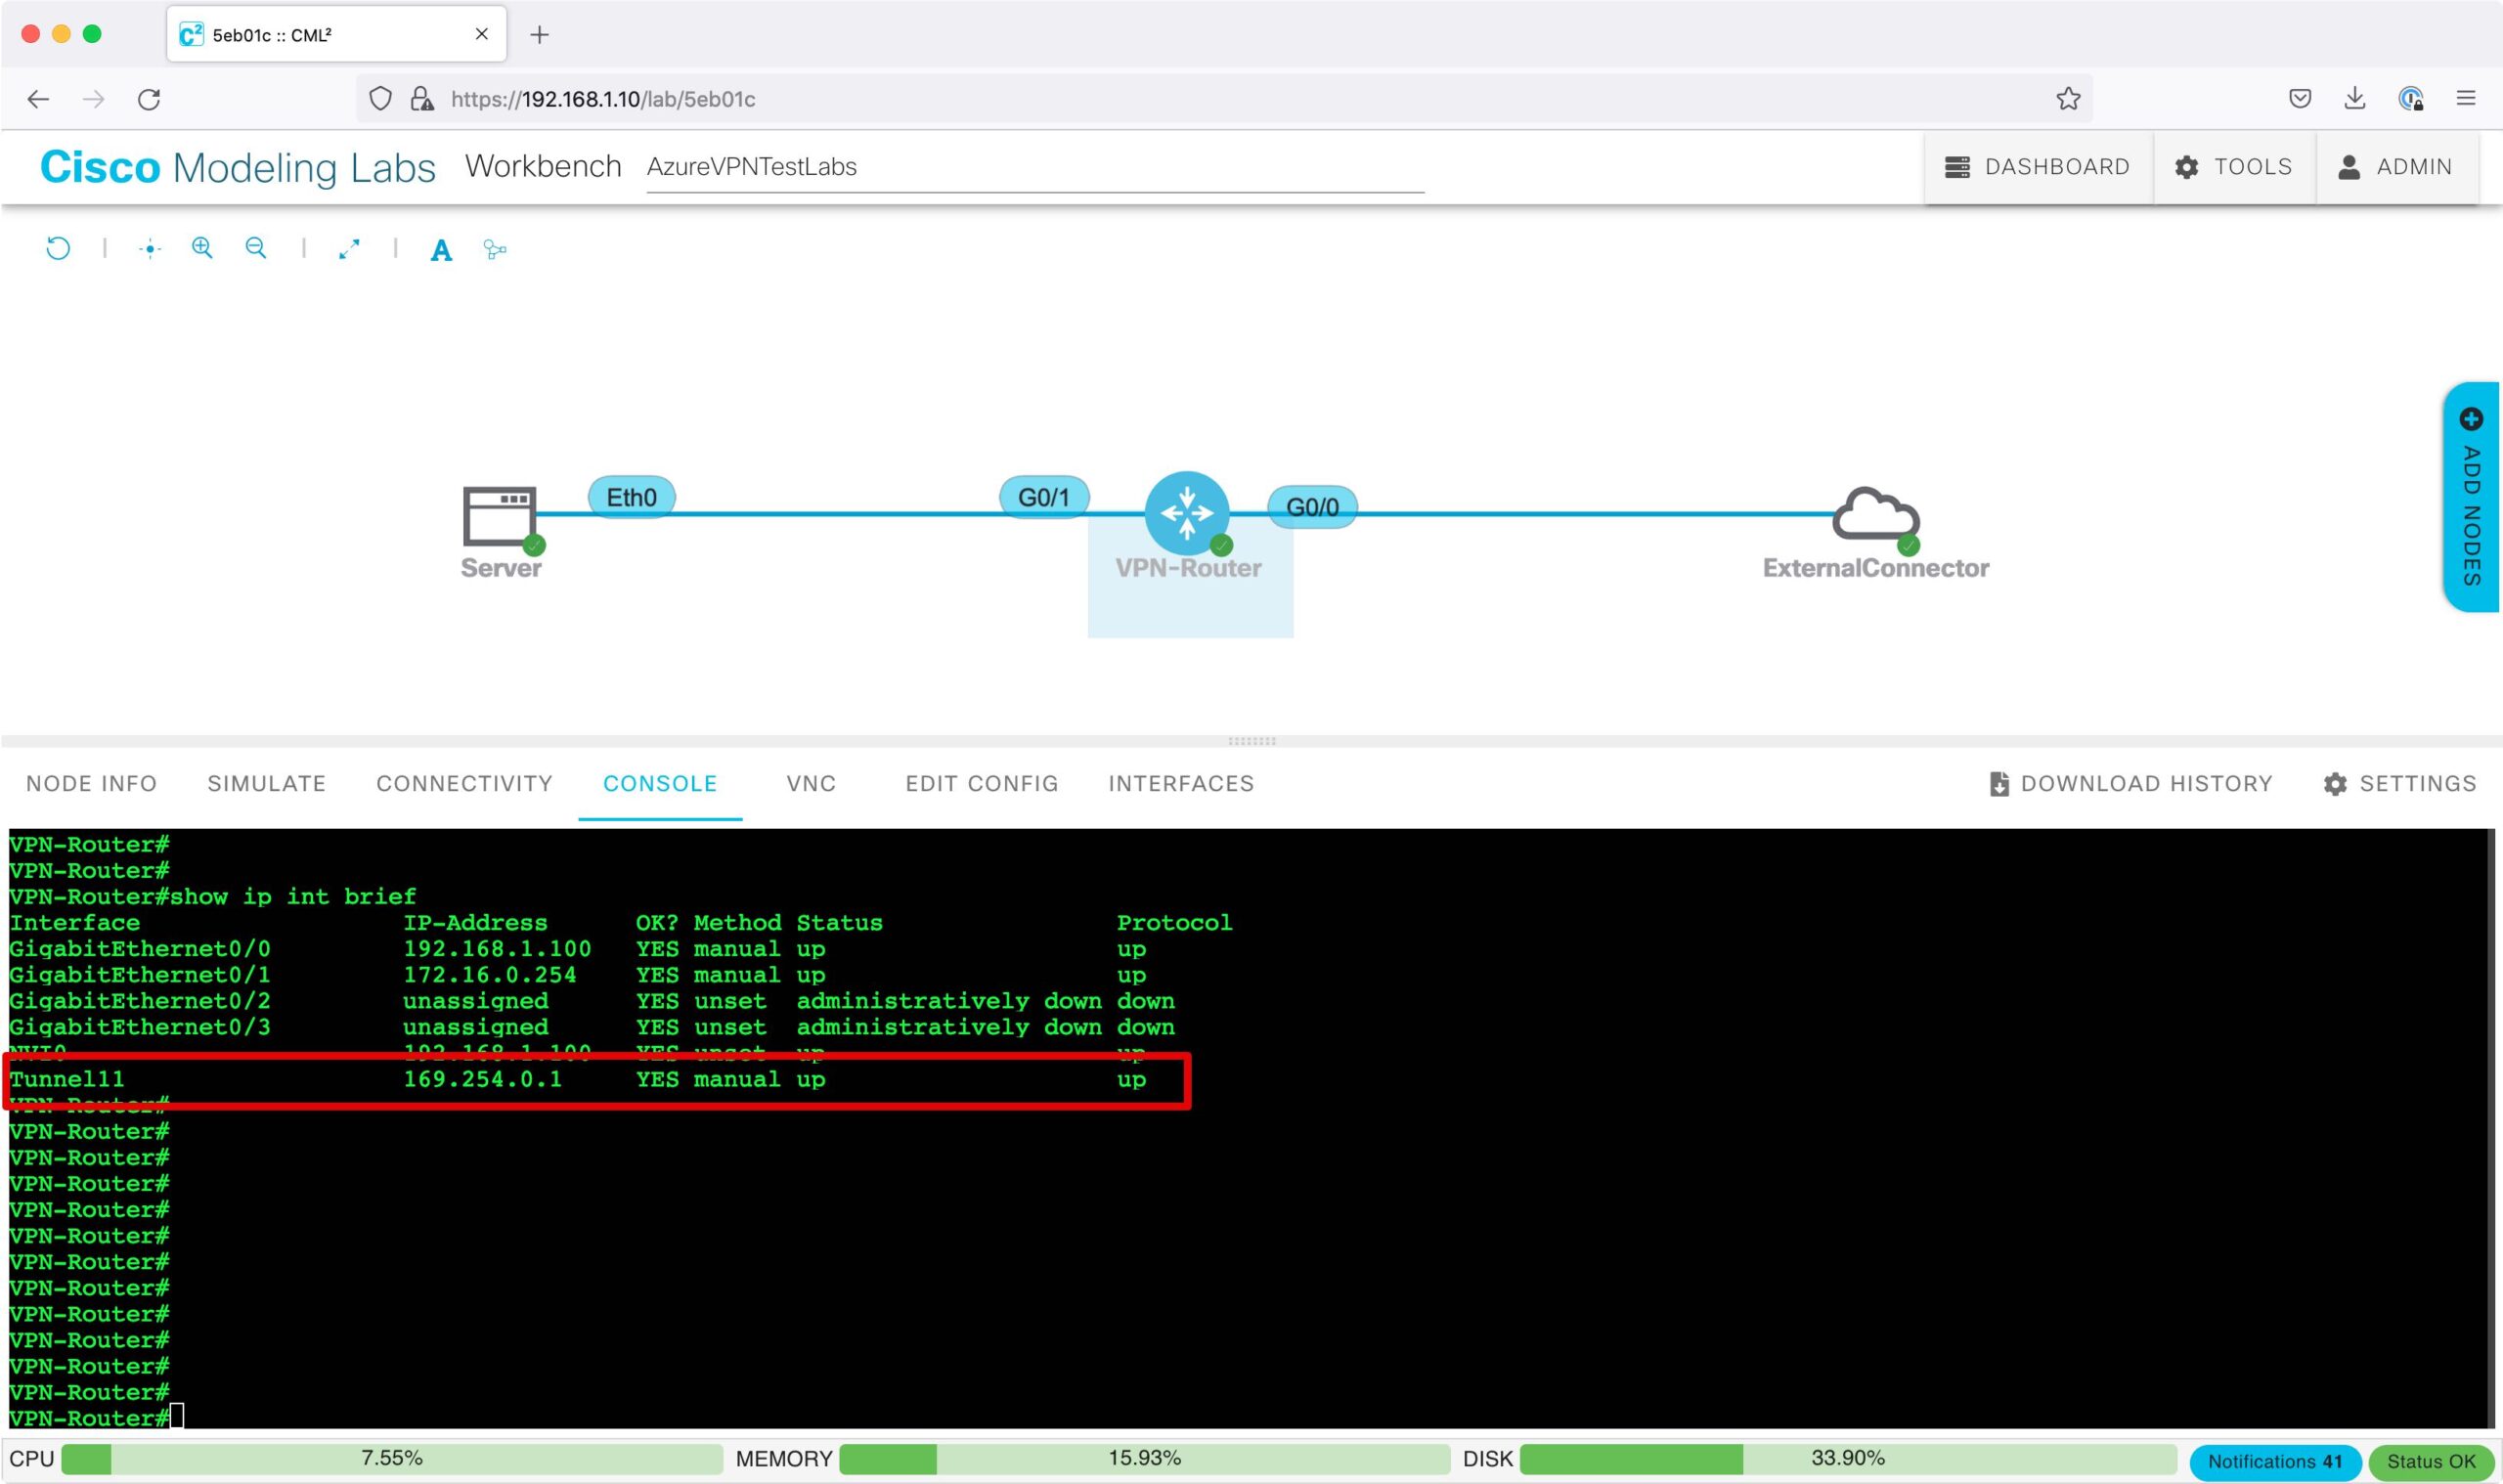
ip route 10.0.0.0 255.255.0.0 Tunnel 11Tunnel11が作成され、リンクアップしていることを確認します。
Azureの仮想ネットワーク(10.0.0.0/16)向けのルーティングが追加されていることを確認します。
show ip route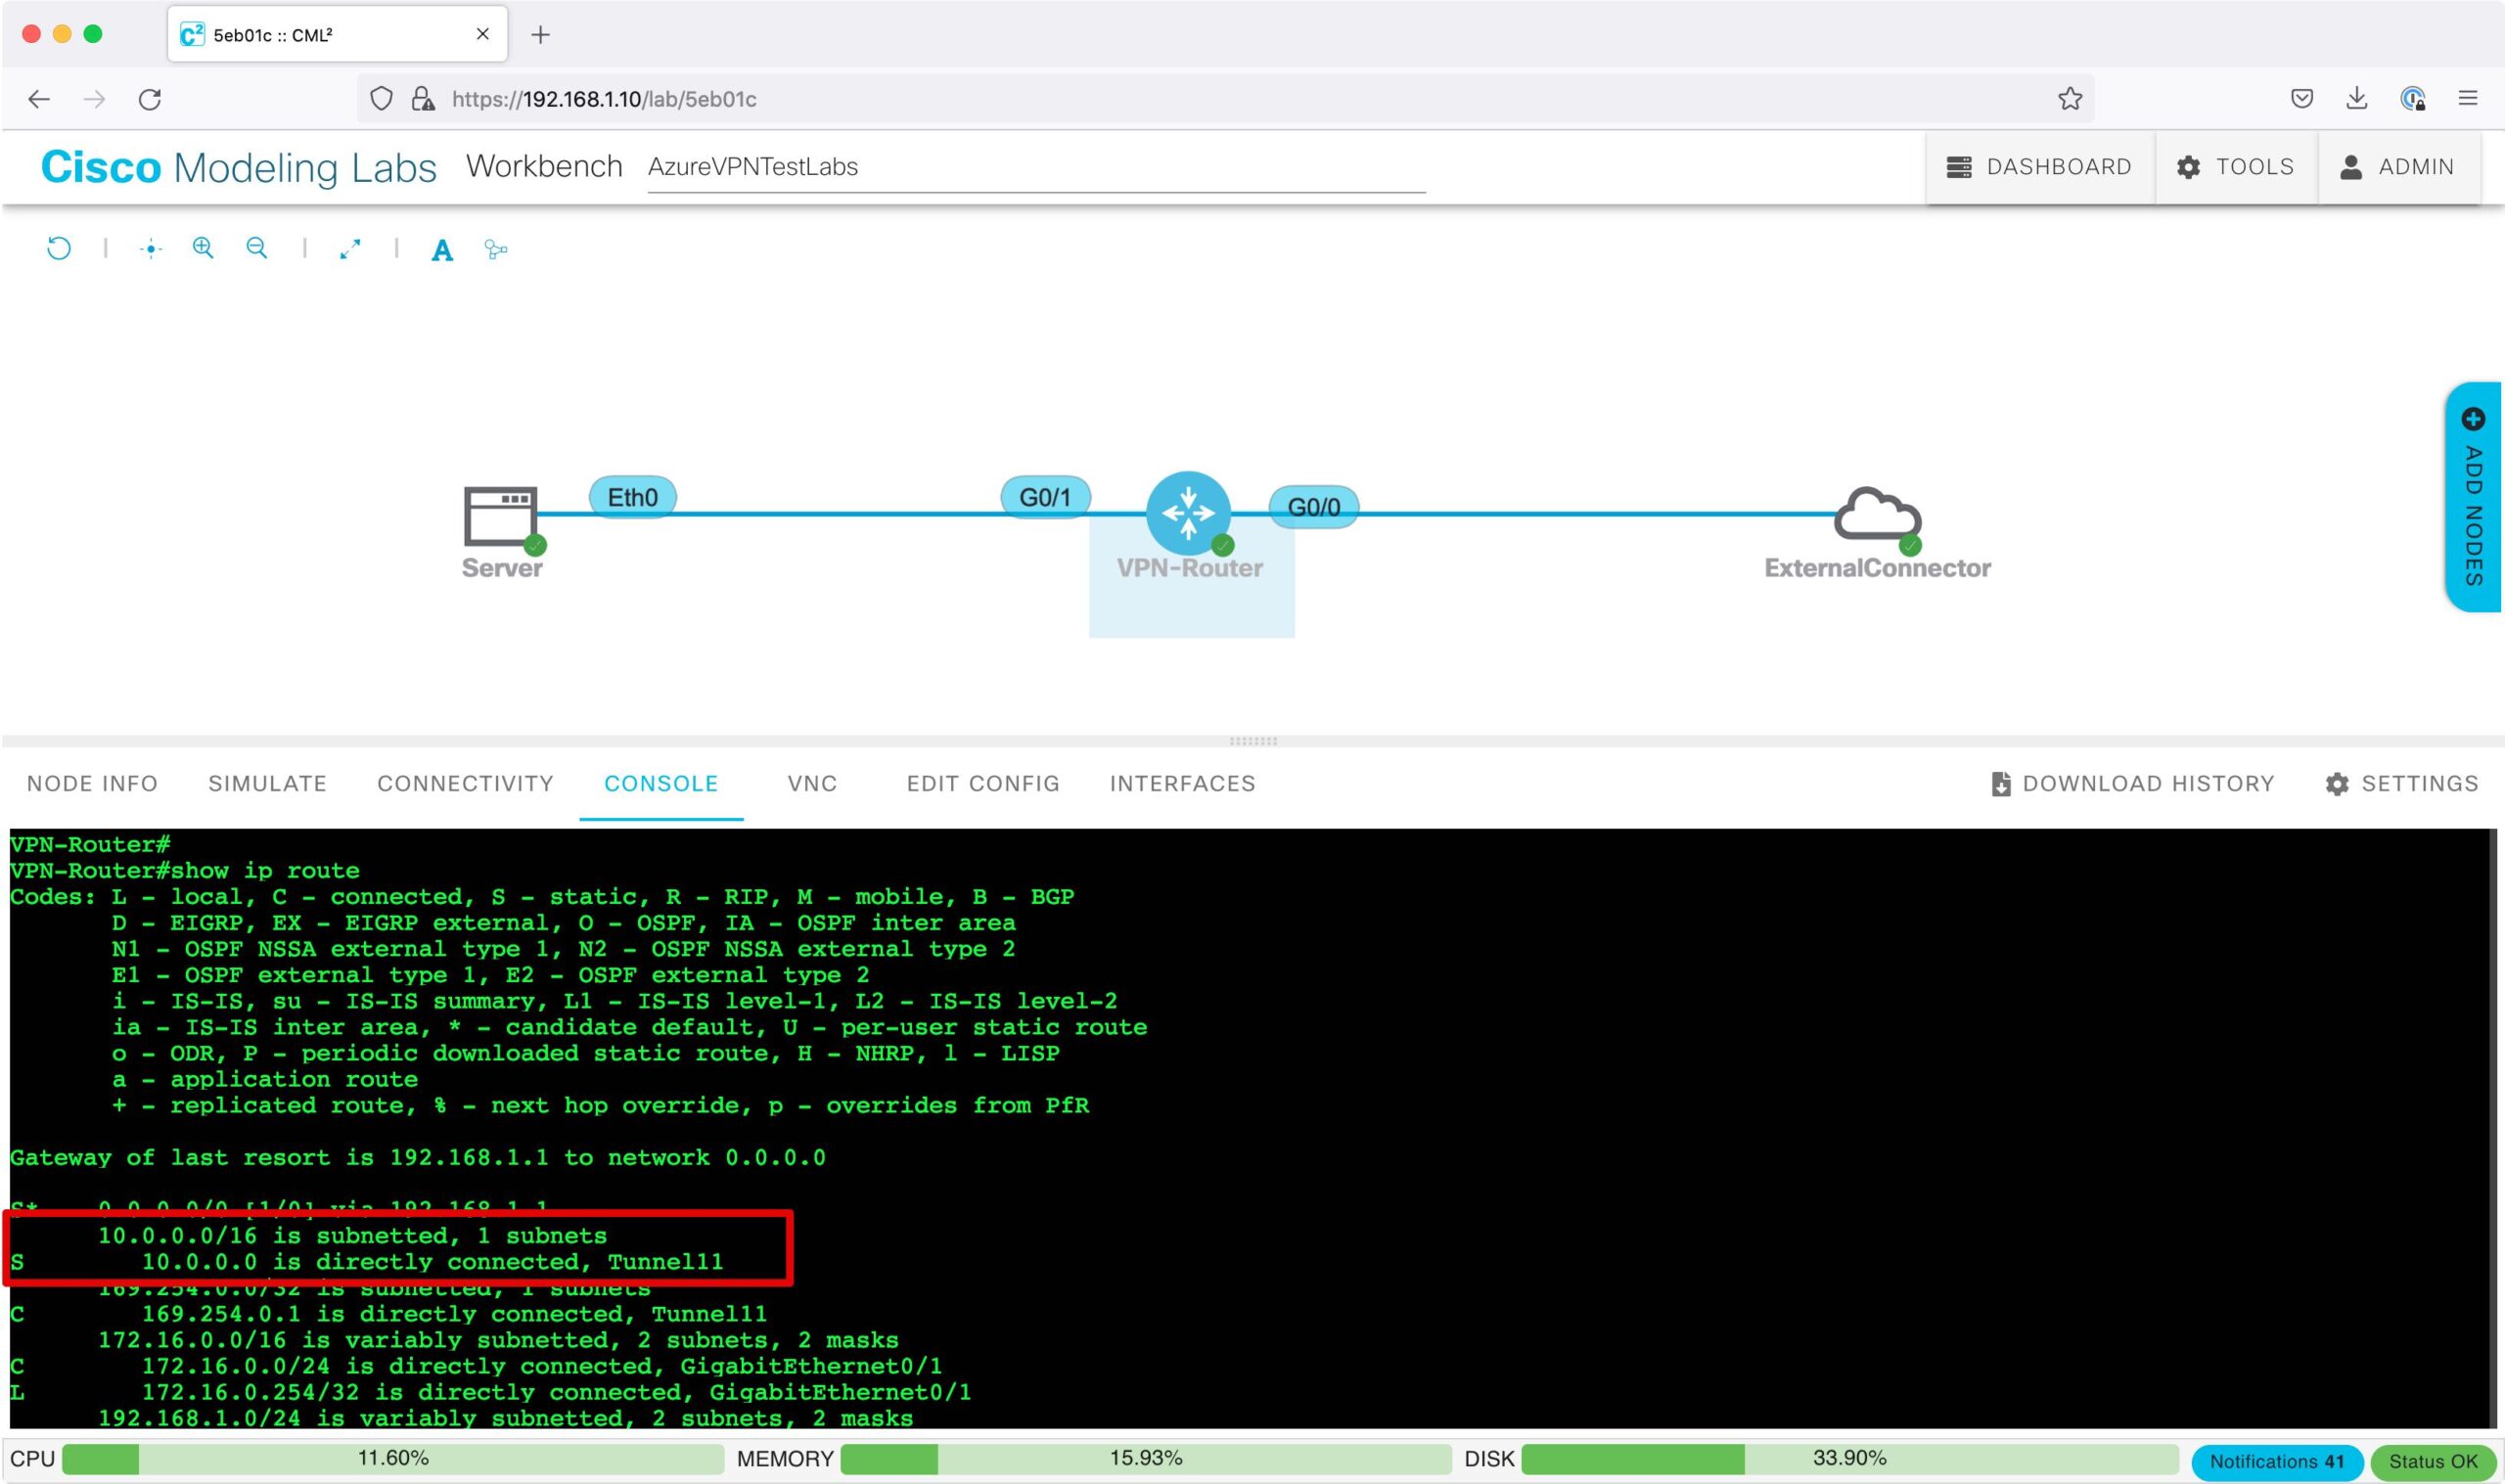
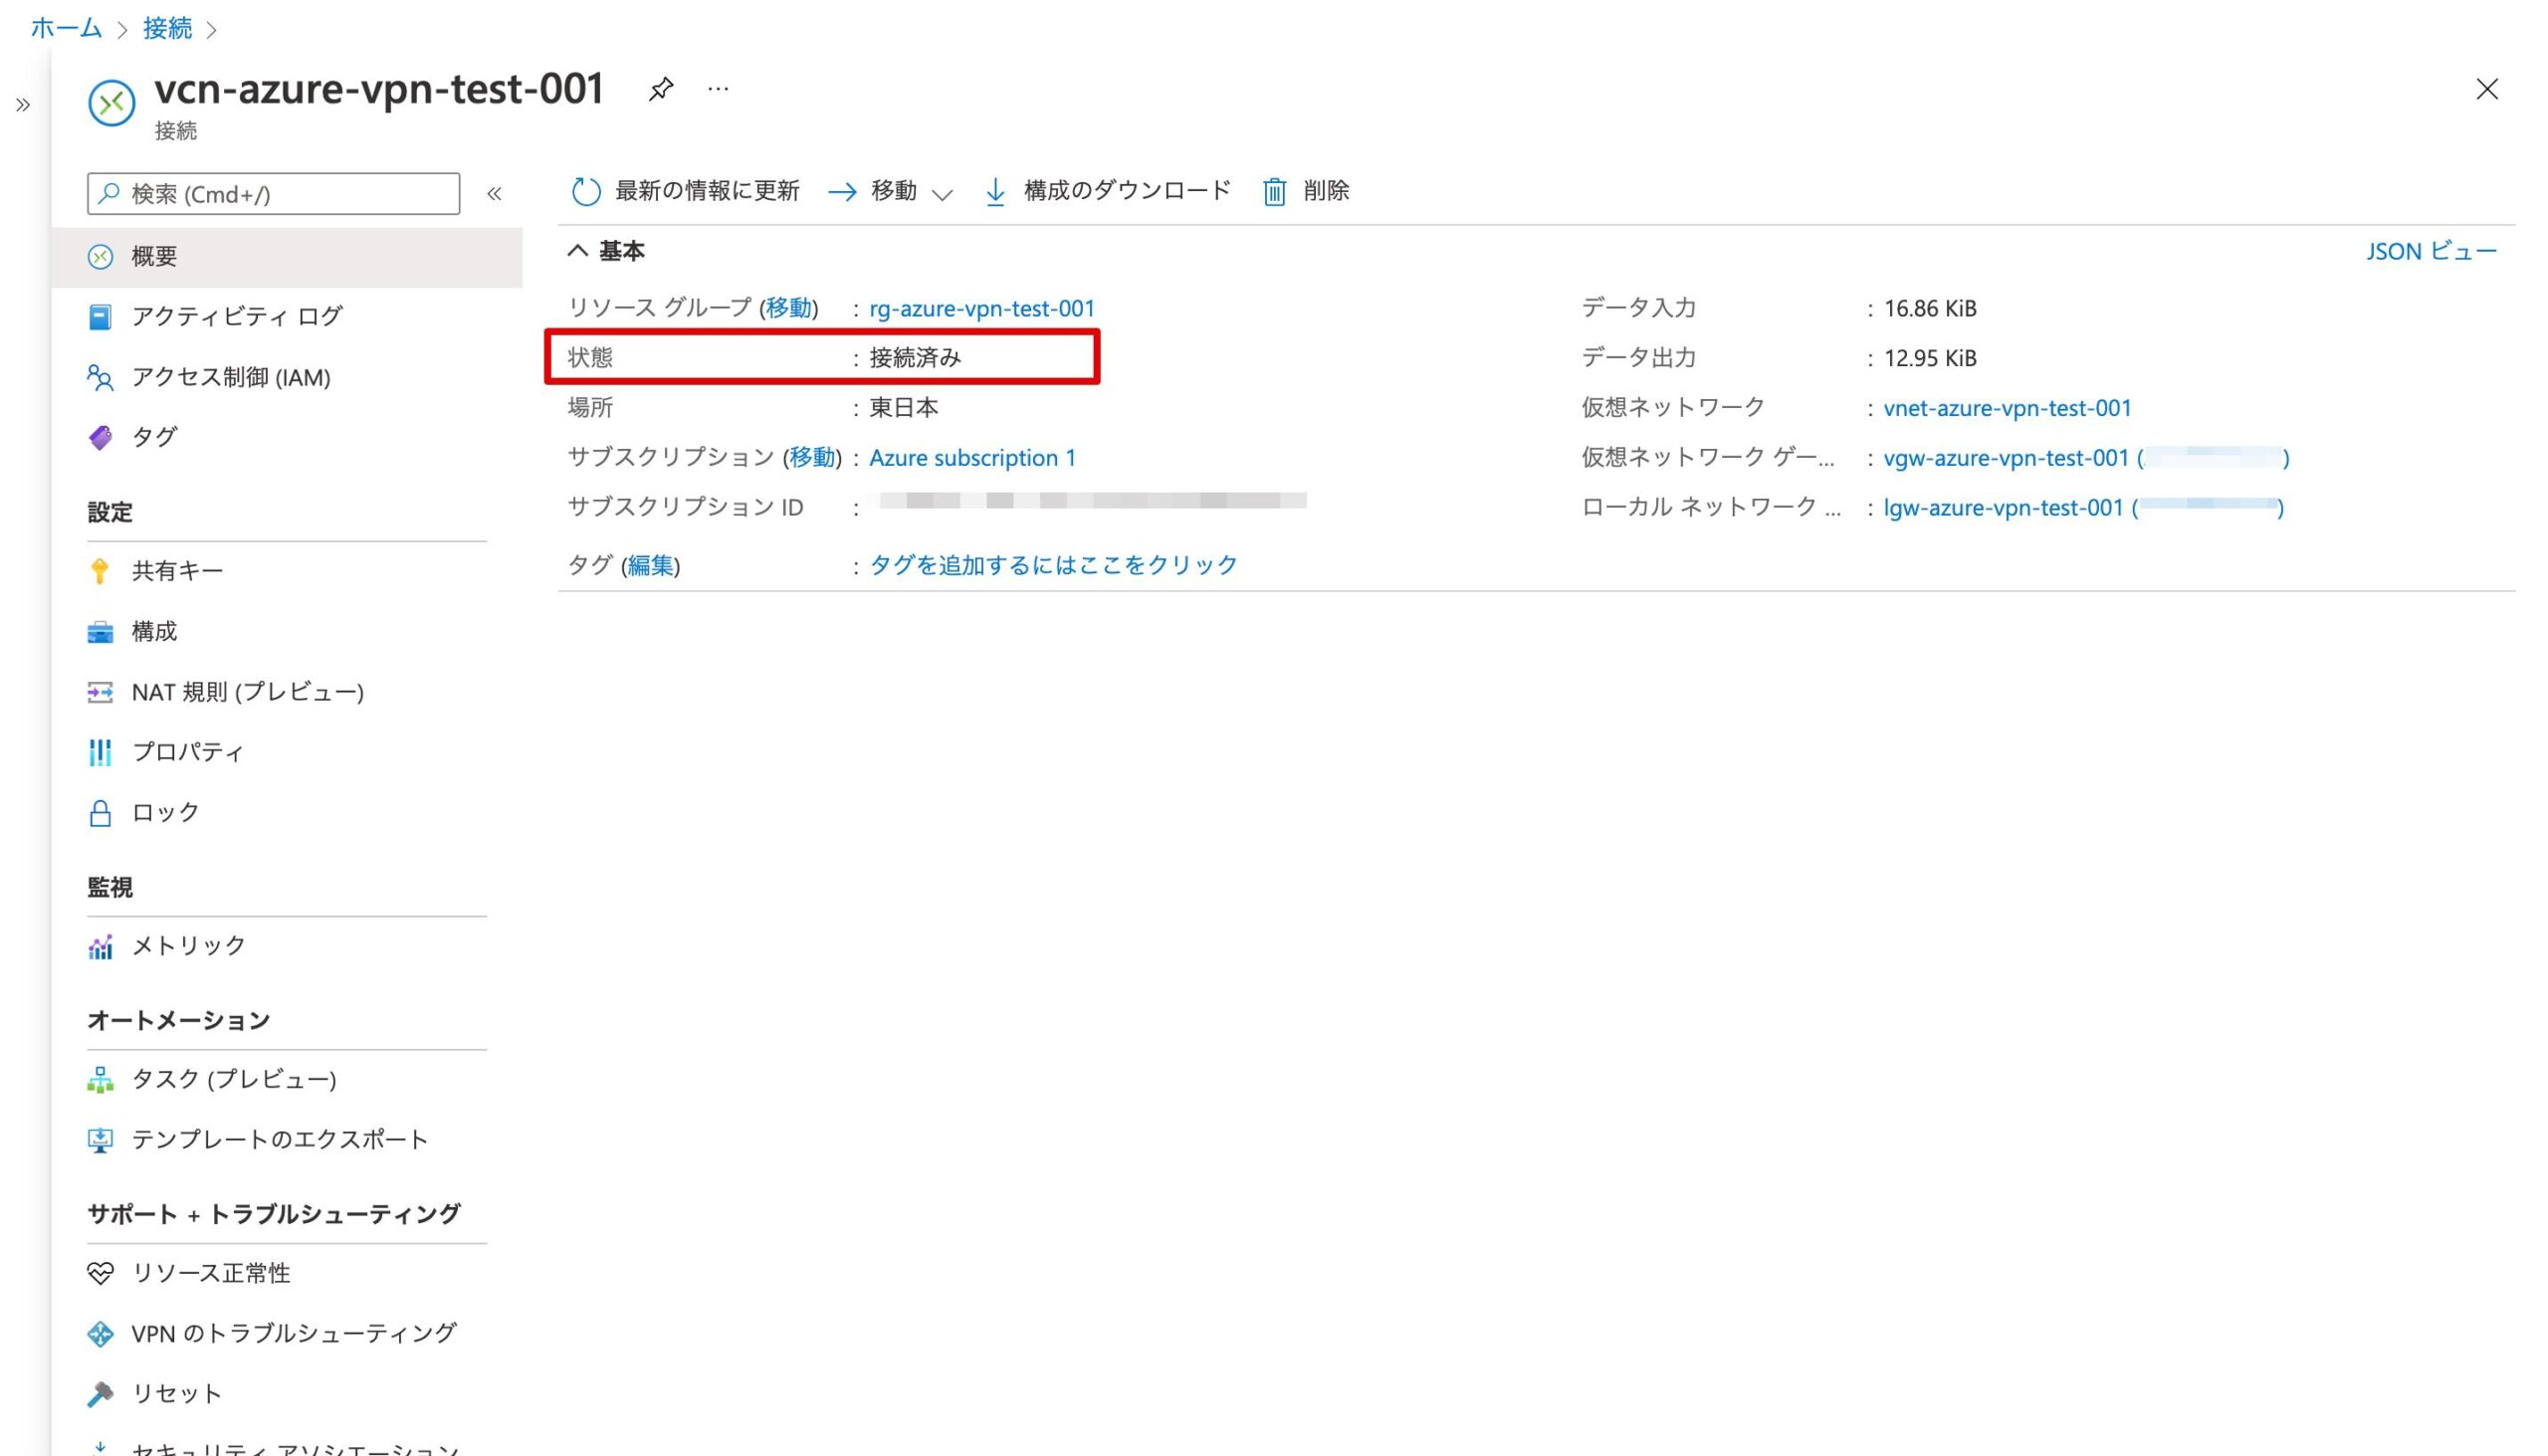
Azureの接続を確認すると、状態が「接続済み」になり、VPN接続が確立されています。
疎通確認
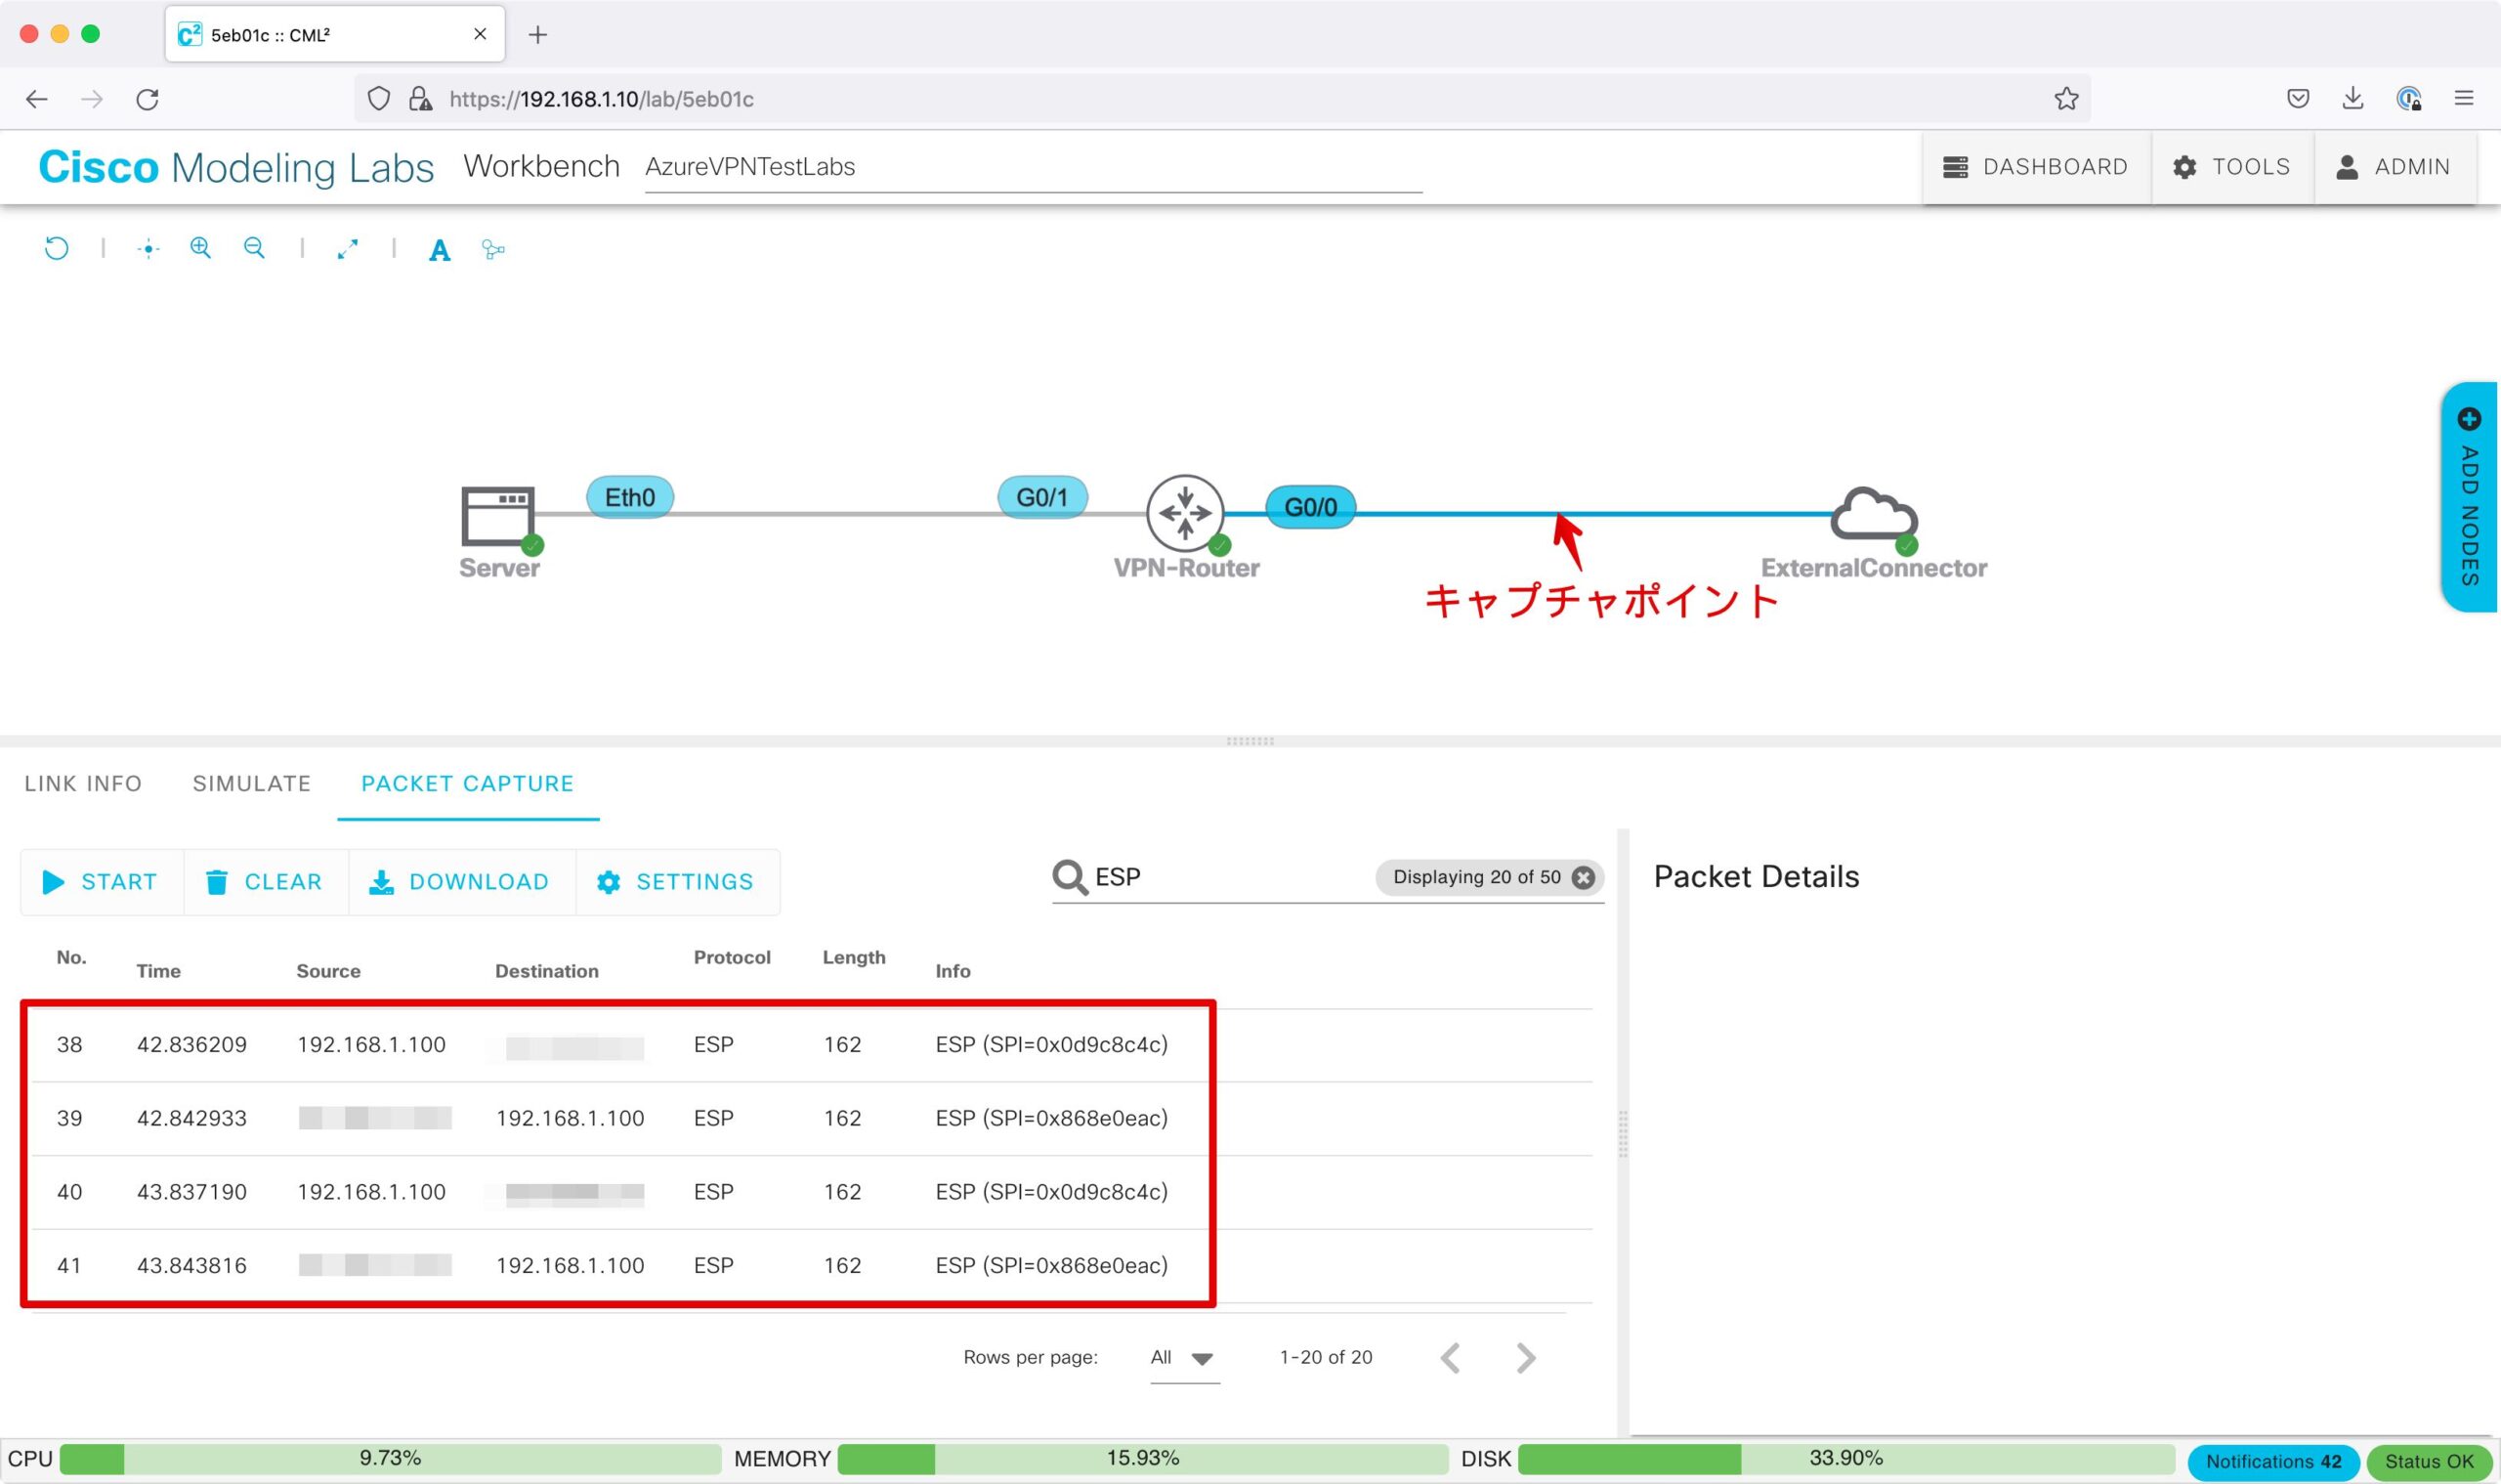
ServerからVirtualMachinesに向けてPingを実施し、疎通可能であることを確認します。
ping 10.0.0.4
CML上のVPN-RouterのGi0/0側でキャプチャすると、暗号化されて送信されていることが分かります。
ルーターのステータス確認
フェーズ1(IKEv2)のステータスを確認するには下記のコマンドを実行します。
Statusが”READY”となっていれば、IKEv2は確立されています。
show crypto ikev2 sa
フェーズ2(IPSec)のステータスを確認するには下記のコマンドを実行します。
“pkts encrypt: “と”pkts decrypt: “の数値がカウントされていれば、暗号化通信が行われていることを示しています。
show crypto ipsec sa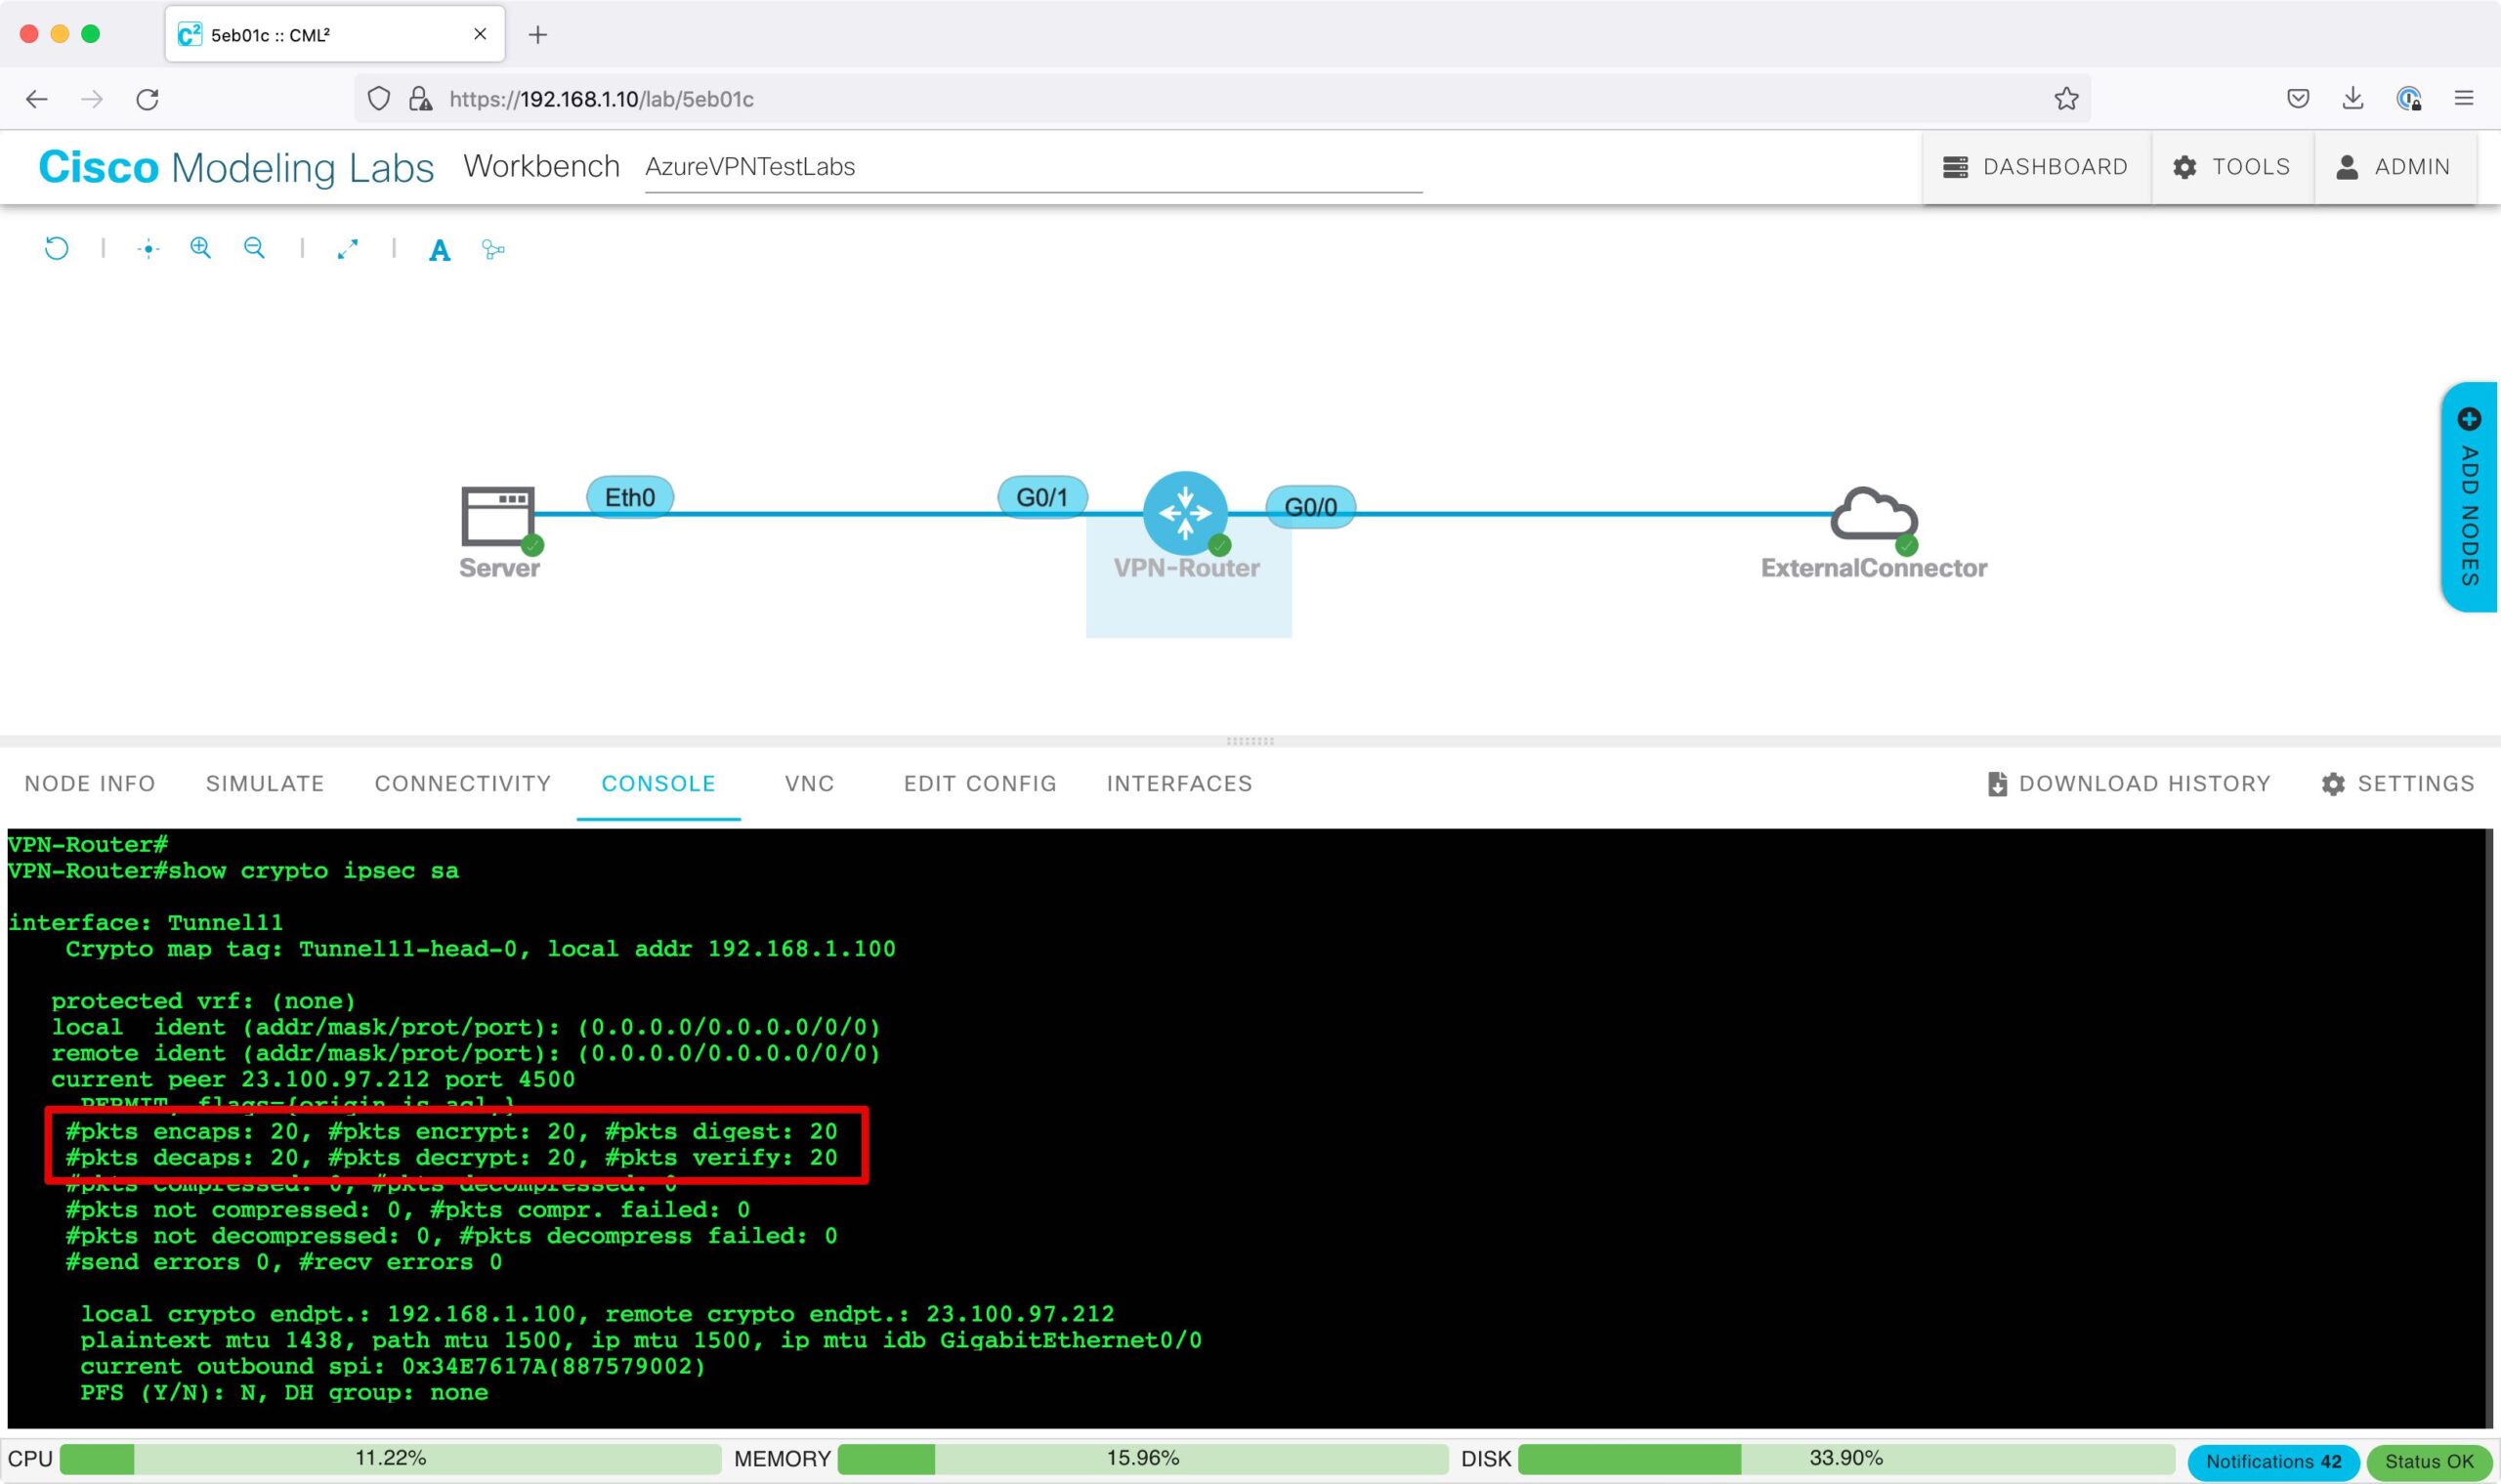
以上で、Azureサイト間VPNの構築(4.CMLの構築)の説明は完了です!
【前回】Azureサイト間VPNの構築(3.AzureのVPN構築)
【次回】Azureサイト間VPNの構築(5.Azure CLI によるVPN接続の作成)