【前回】5.CMLのライセンス登録
【次回】7.ラボのエクスポートとインポート
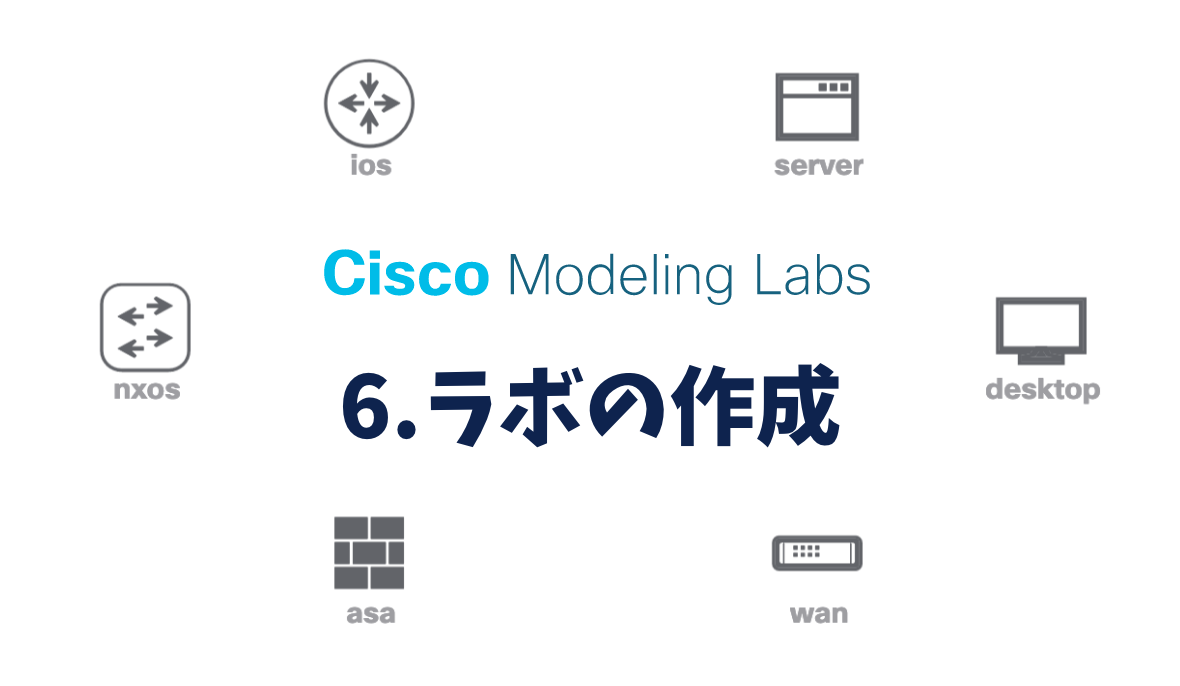
CMLを利用する準備ができたので、以下のような簡単なラボを作成して検証していきます。
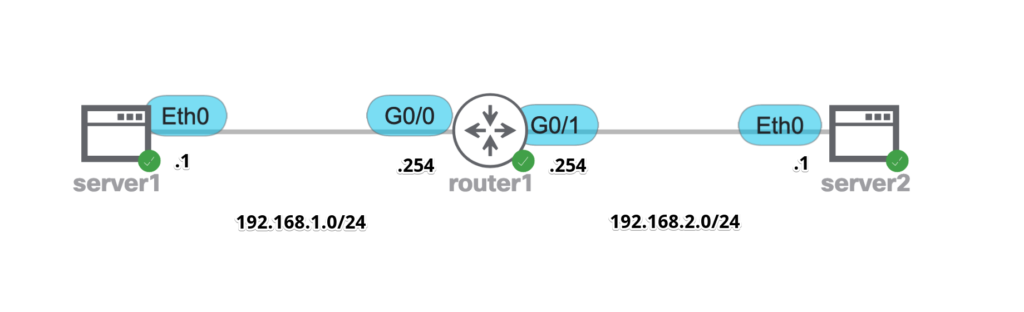
※2021年6月時点(Ver2.2.2)では、テキストボックス等の挿入ができないため、上記画像のIPアドレス情報は画像編集ソフトで挿入しています。今後のアップデートに期待しましょう。
※2023年3月にリリースされたVer2.5では、テキストボックスの挿入ができるようになりました。詳細は下記ページで説明しています。
環境構築
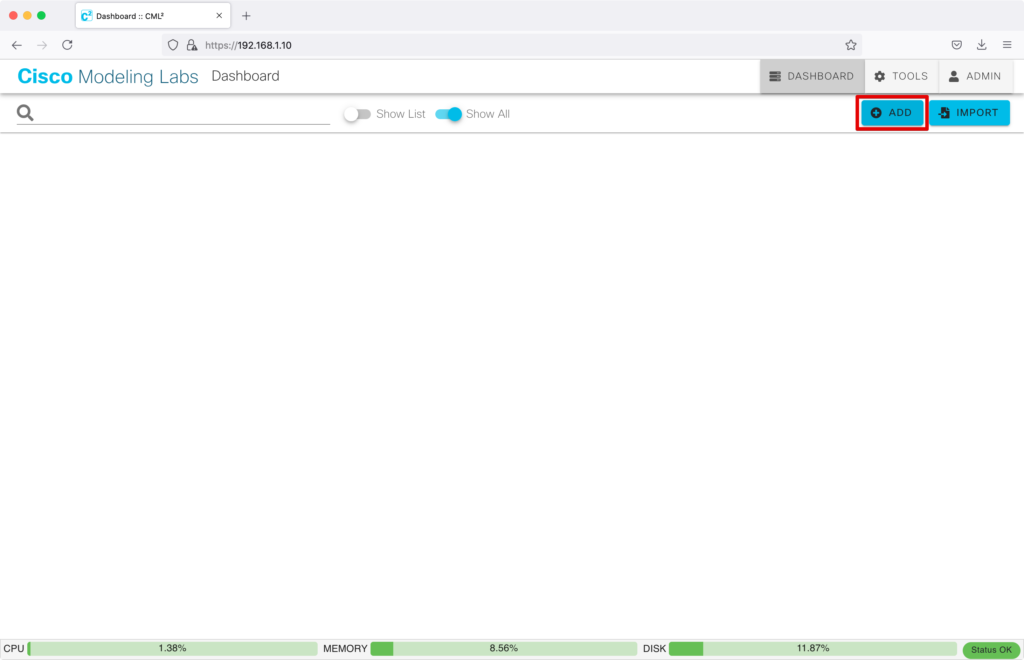
DASHBOARD画面で、右上の「ADD」をクリックします。
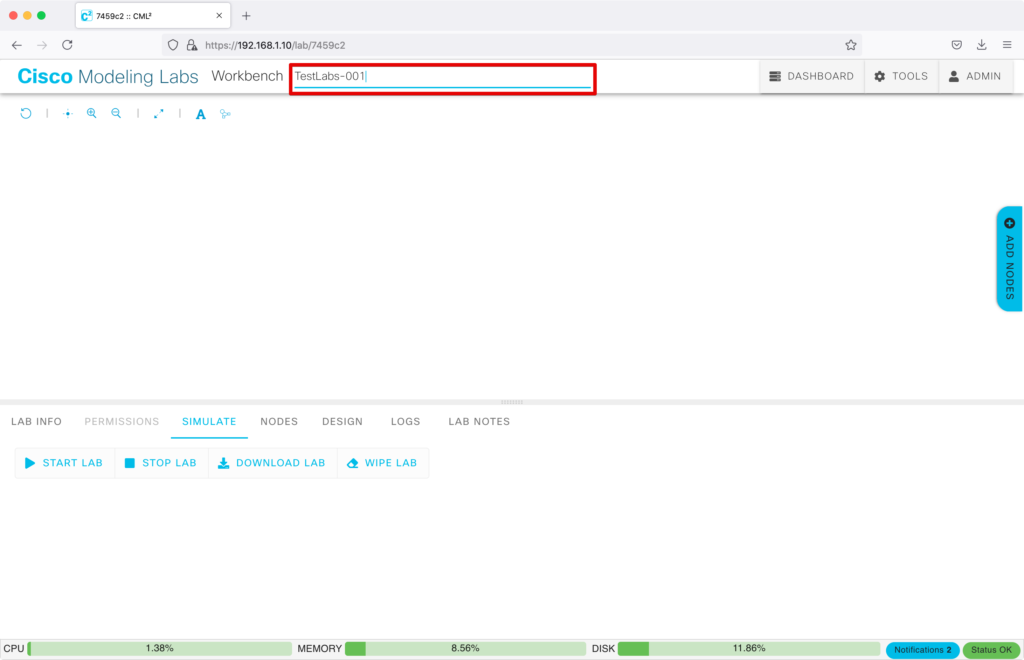
まずは、ラボの名前を変更します。
デフォルトだと”Lab at 曜日 時刻”となっているので、わかりやすい名前に変更しておきましょう。
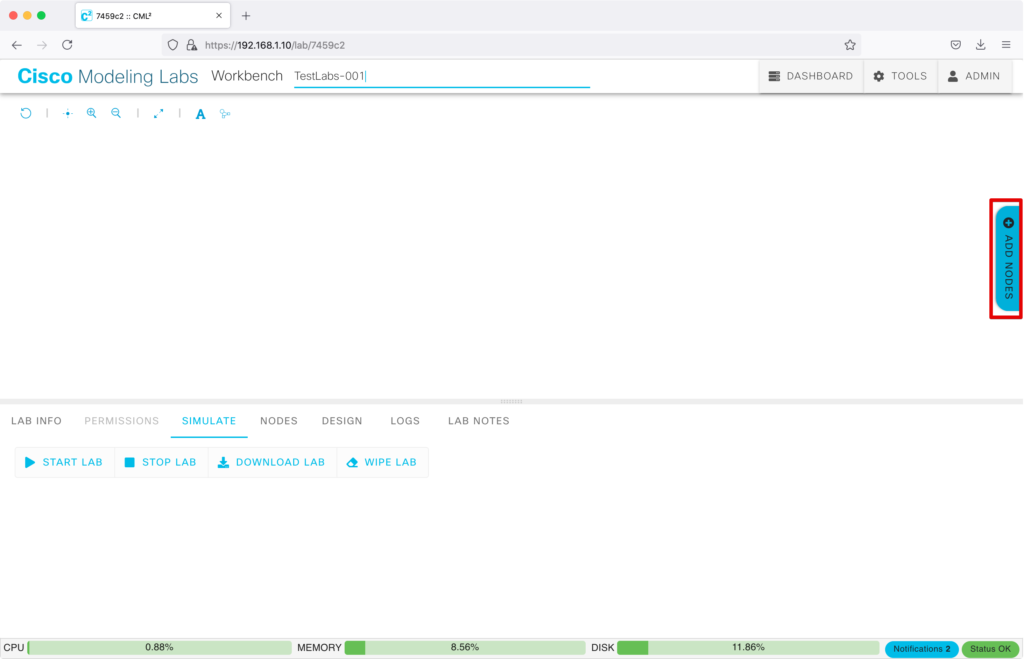
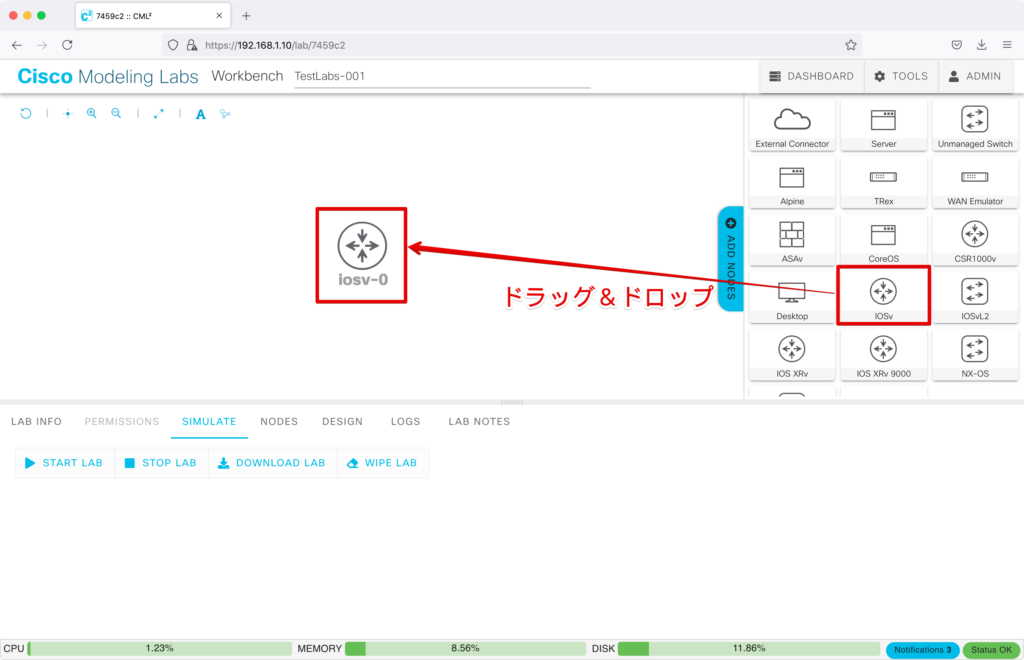
右側の「ADD NODES」をクリックします。
「iOSv」をドラッグ&ドロップして設置します。
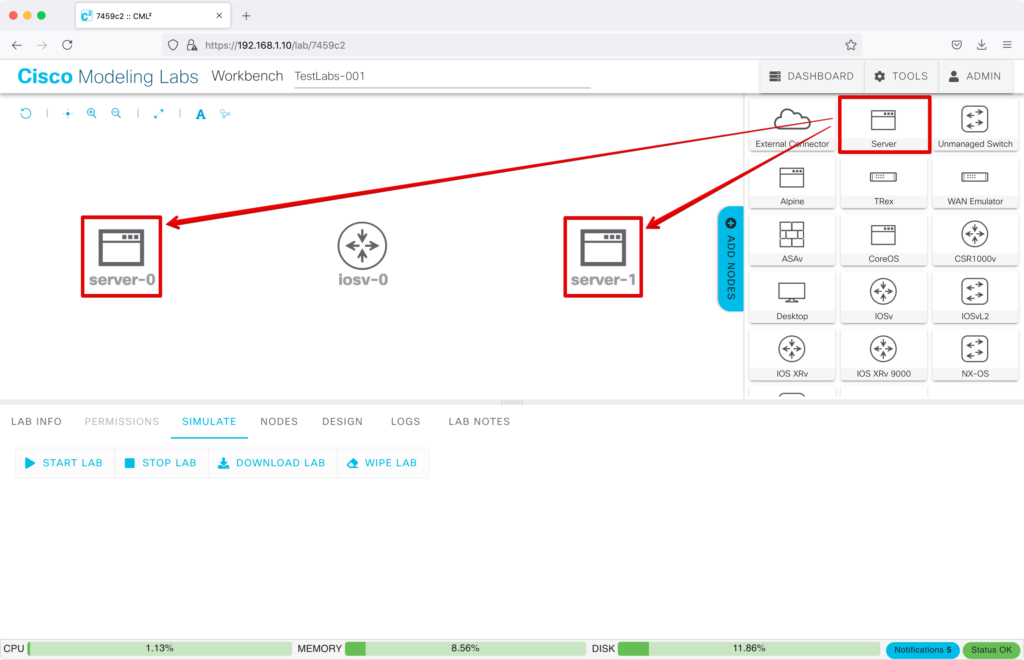
同様に「Server」をドラッグ&ドロップして設置します。
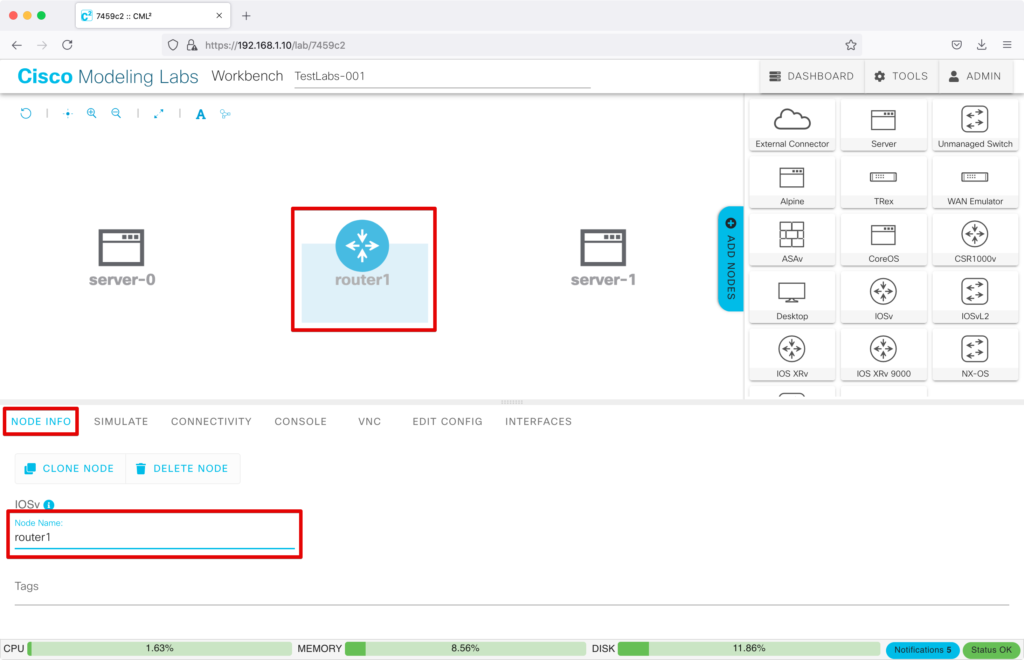
設置したままですと、デフォルトの名称は”NODES名-通番”となりますが、「NODE INFO」をクリックし、「Node Name」から変更できます。ここでは、”router1″としています。
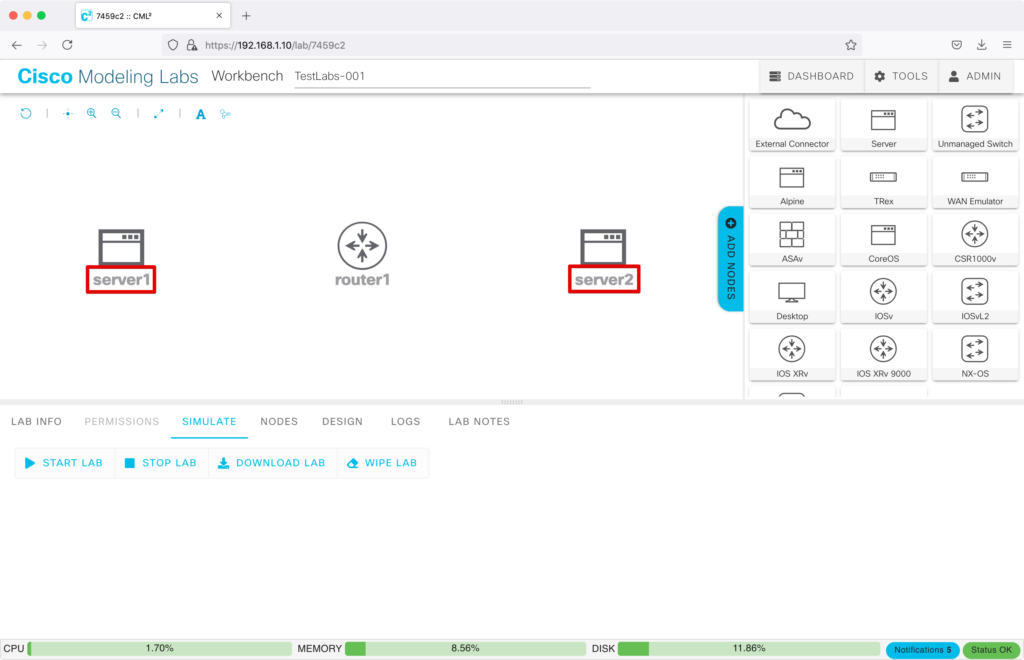
同様に、サーバーの名称も変更します。”server1″と”server2″しています。
次にリンクを作成します。(LANケーブルを接続するイメージです。)
router1を選択し、上のリンクマークをserver1にドラッグします。
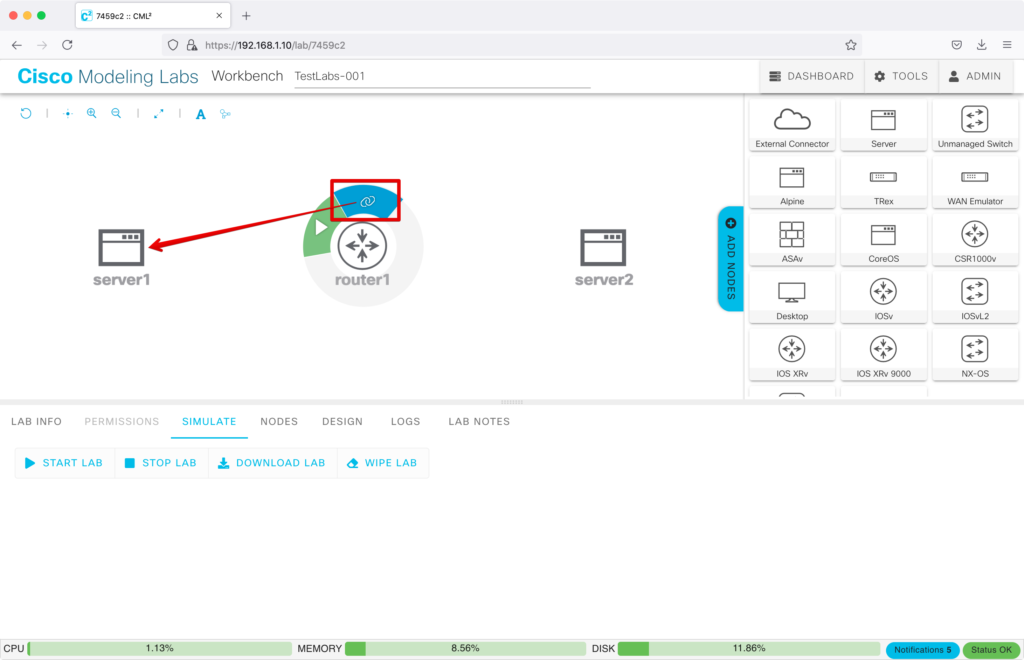
ポップアップ画面が表示されので、接続したいインターフェースを選択し、「CREATE LINK」をクリックします。

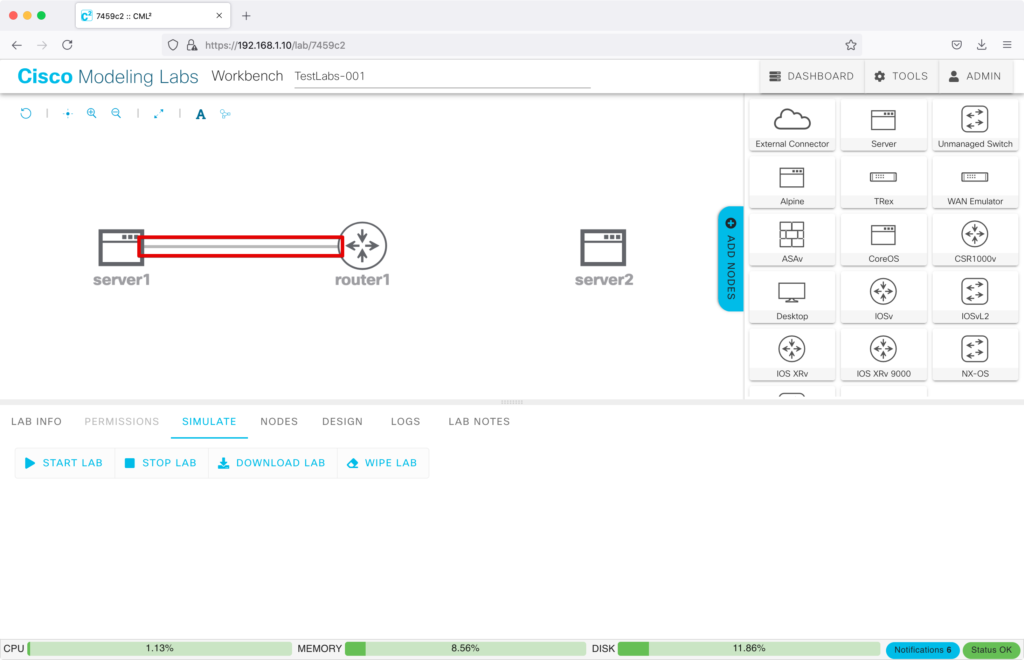
これで、router1とserver1が接続されました。
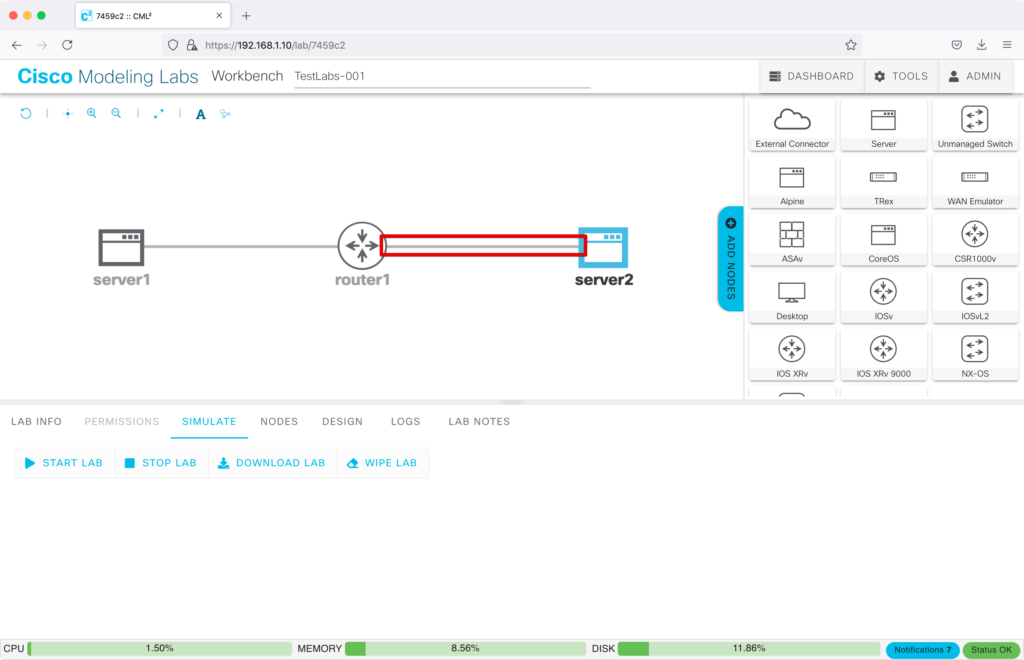
同様に、server2も接続します。
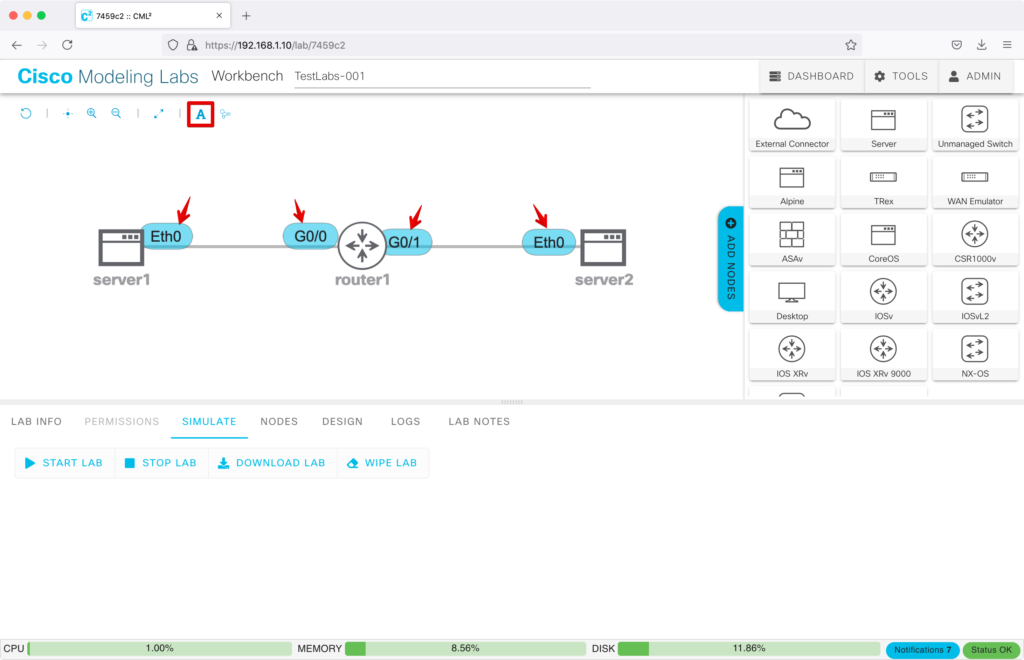
左上の「A」をクリックすると、インターフェース名が表示されるようになります。
サーバーの初期設定
サーバーの初期設定を行います。
server1を選択し、「EDIT CONFIG」をクリックします。
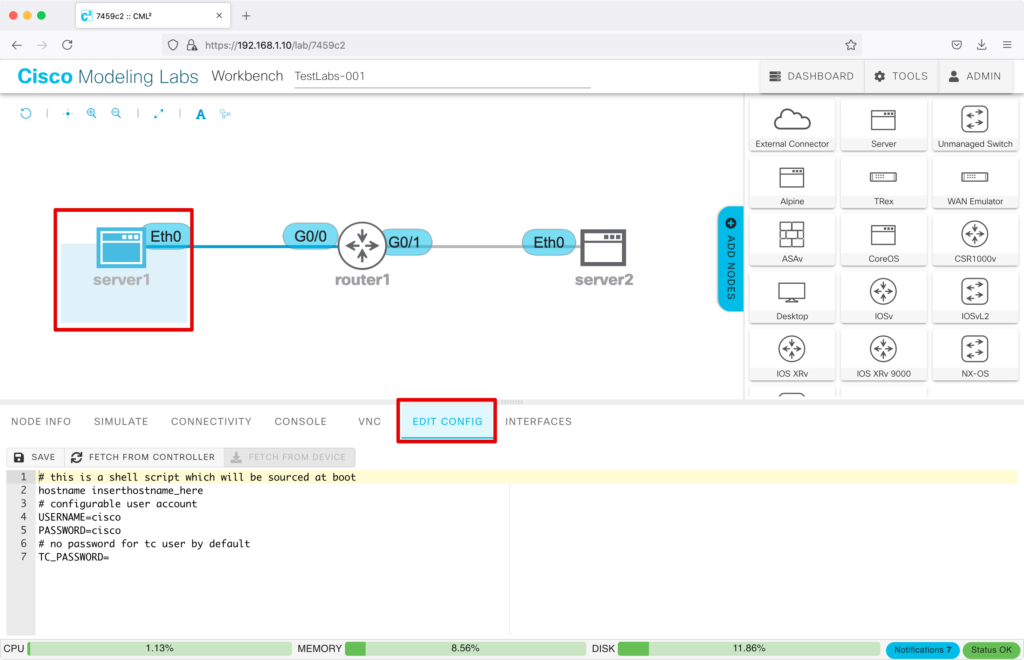
ホスト名とIPアドレス、ルーティングの設定を行います。
下記のコンフィグをコピー&ペーストし「SAVE」をクリックします。
hostname server1
ifconfig eth0 192.168.1.1 netmask 255.255.255.0 up
route add -net 0.0.0.0/0 dev eth0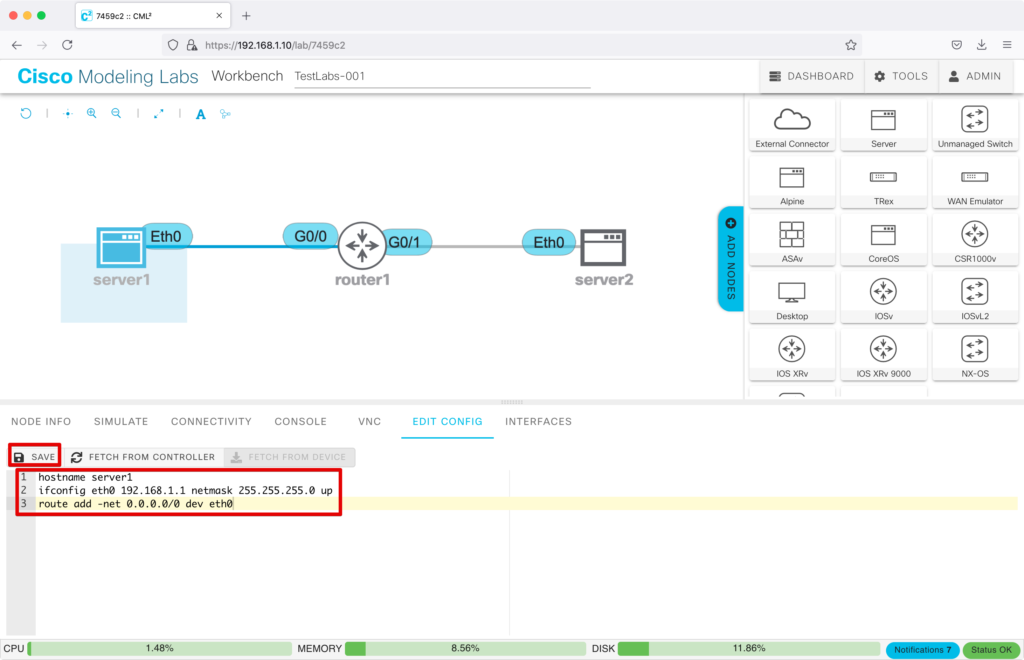
同様にserver2の設定も行います。
hostname server2
ifconfig eth0 192.168.2.1 netmask 255.255.255.0 up
route add -net 0.0.0.0/0 dev eth0
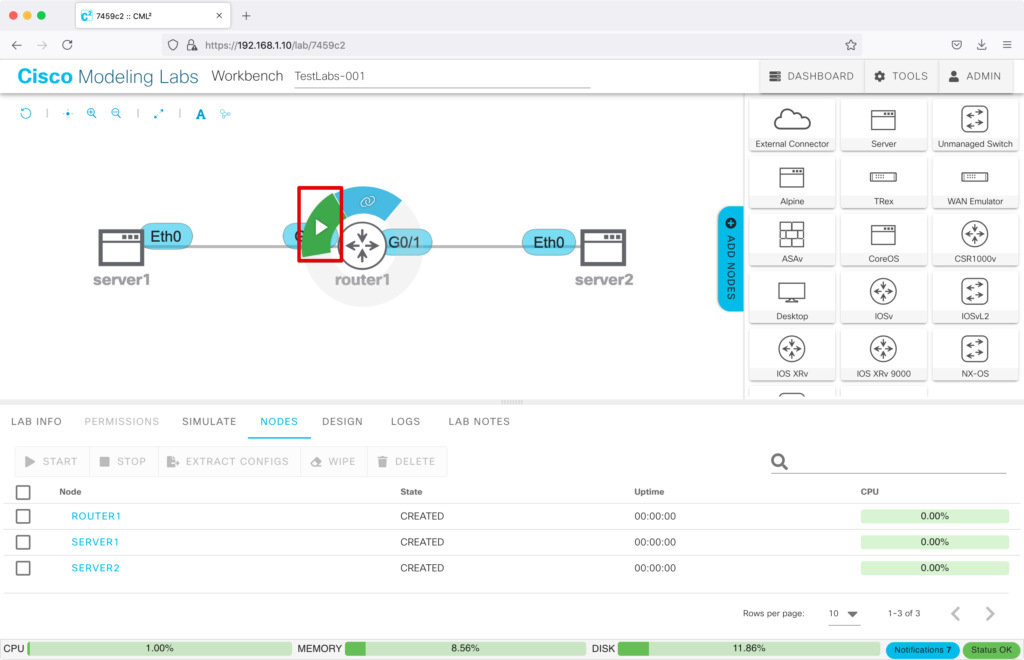
ルーター起動・設定変更
ルーターを起動し、設定変更を行なっていきます。
router1を選択し、左上の「再生マーク(▷)」をクリックします。
起動が完了すると、router1の右下に緑色のチェックマークが表示され、下のStateが「BOOTED」となります。
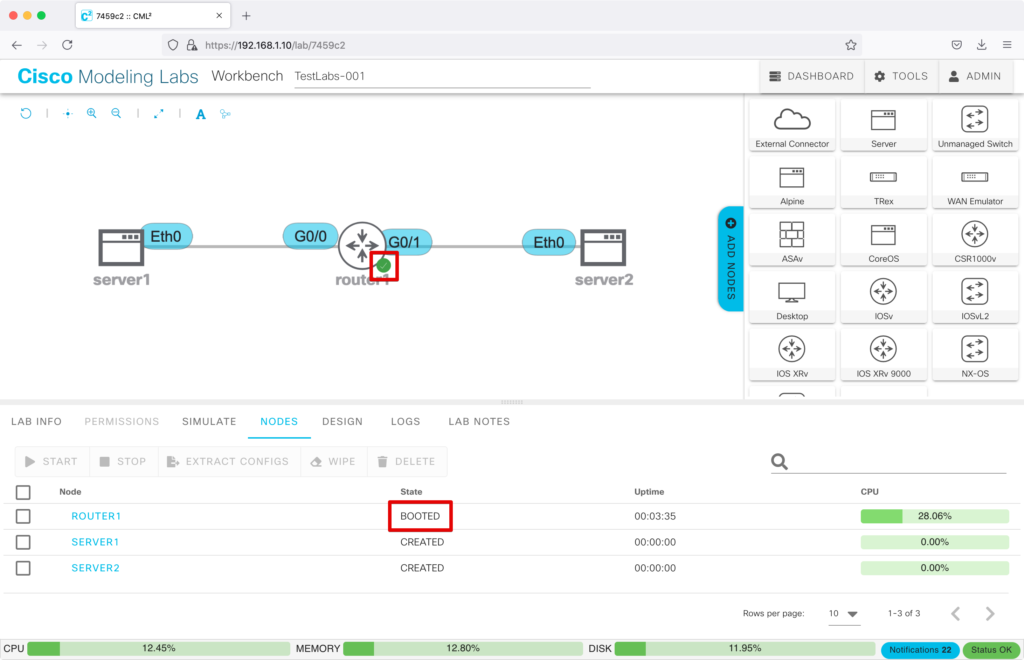
router1の設定を行なっていきます。
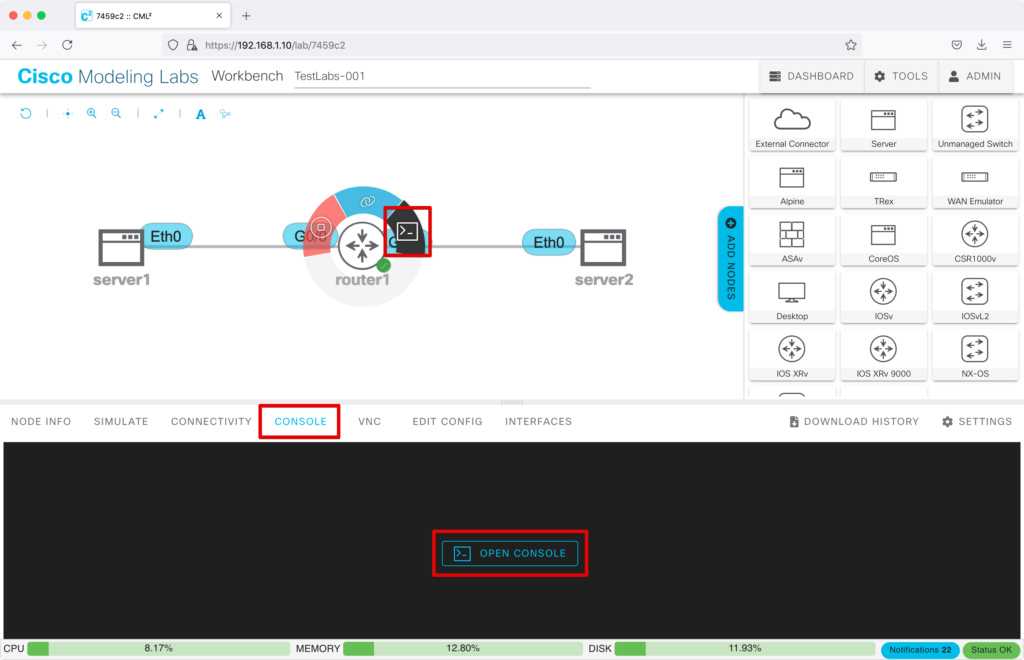
router1を選択し、右上の「コンソールマーク(>_)」をクリックします。
下にコンソールウィンドウが表示されるので、「OPEN CONSOLE」をクリックします。
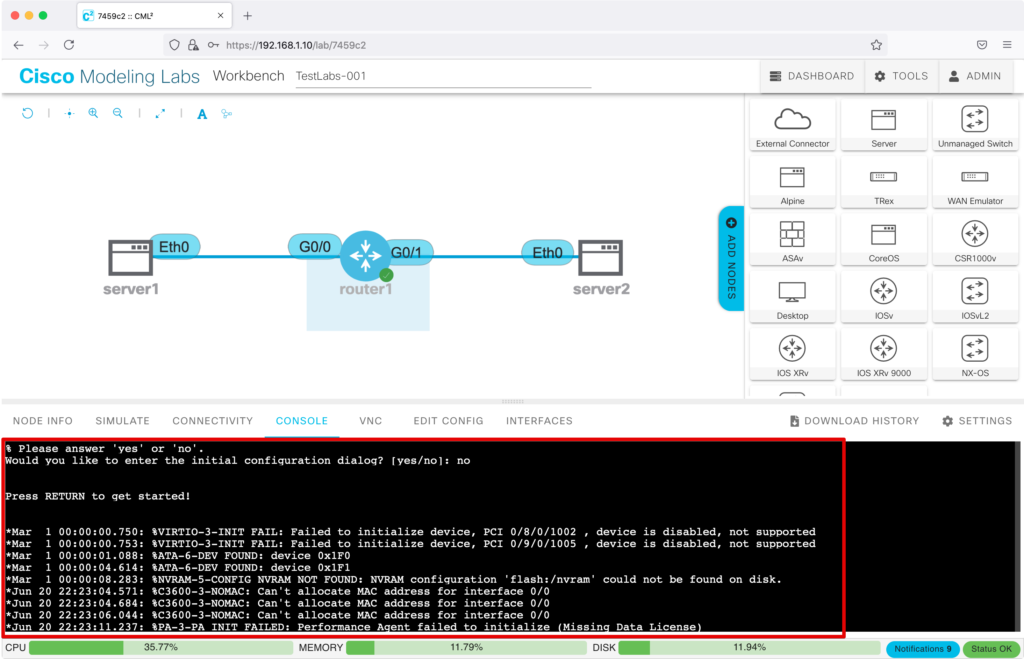
ルーターのコンソールが表示されます。
「Would you like to enter the initial configuration dialog? [yes/no] : 」
と聞かれるので、’no’を入力し、Enterを押します。
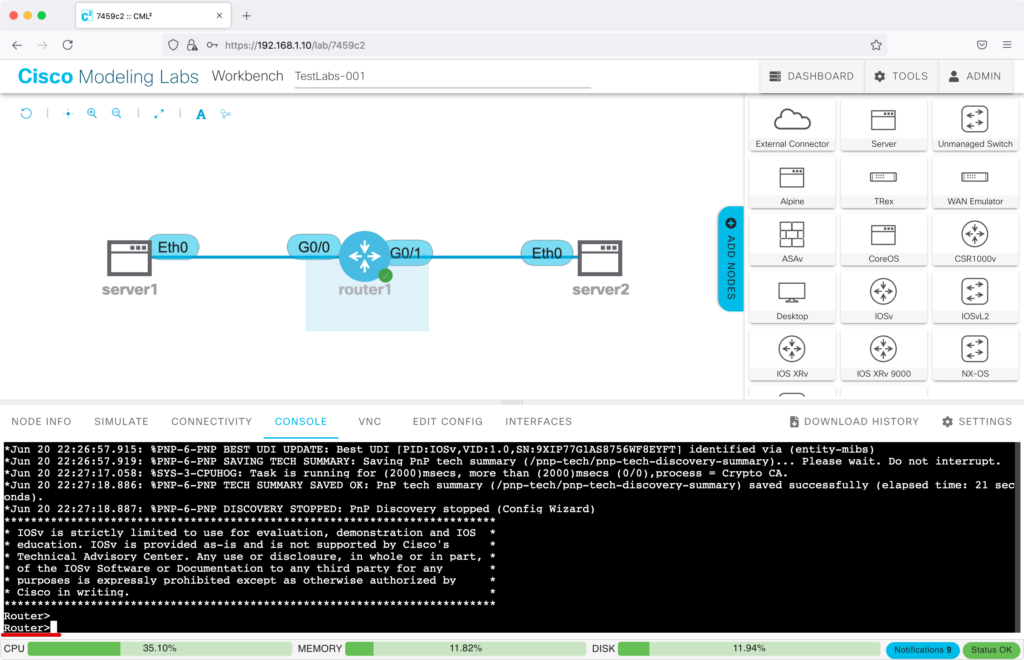
“Router>”と表示されるので、ルーターの設定を行なっていきます。
最低限必要なインターフェースのIPアドレス設定を行います。
en

conf t

int Gi0/0
ip address 192.168.1.254 255.255.255.0
no shut

int Gi0/1
ip address 192.168.2.254 255.255.255.0
no shut

end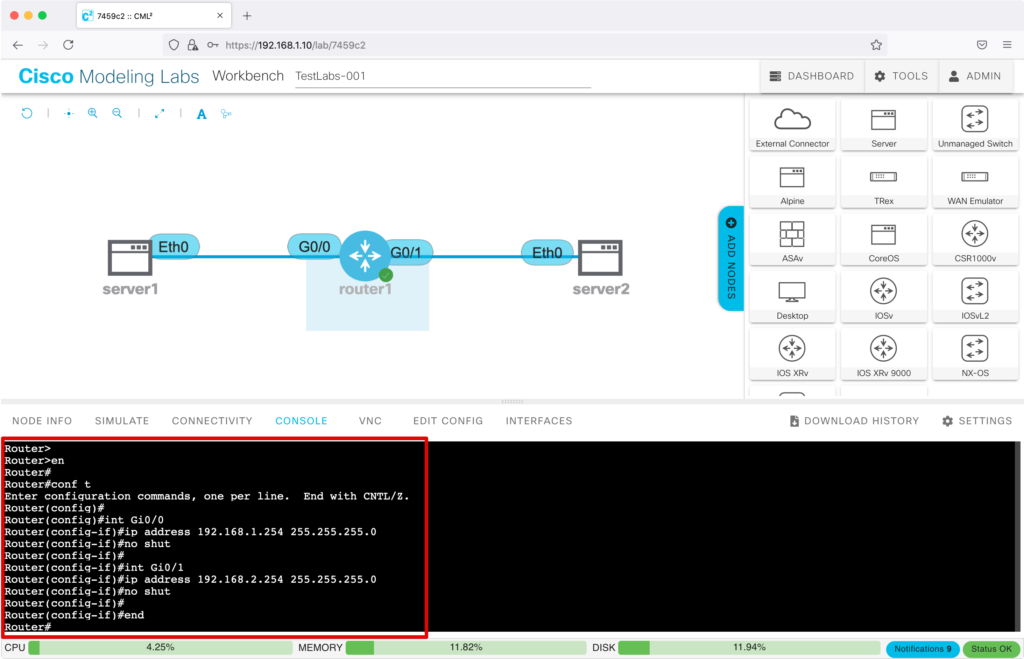
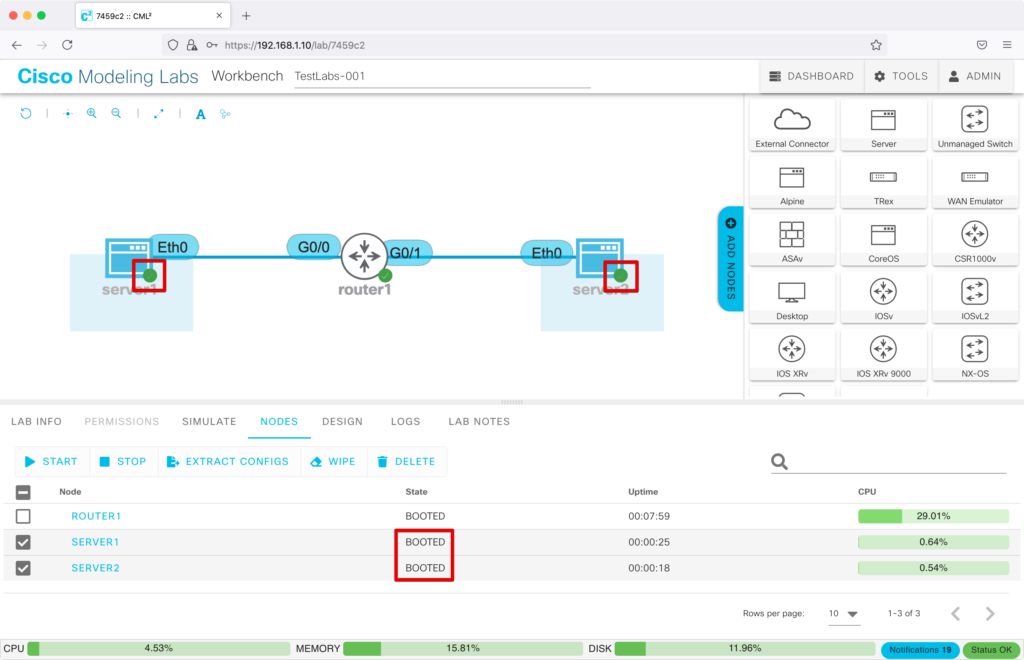
サーバー起動・疎通確認
サーバーを起動し、疎通確認を行います。
複数のNODEを同時に起動するには、NODEを選択していない状態で、下の「NODES」をクリックし、対象機器にチェックを入れた状態で「▶︎START」をクリックします。

起動すると、server1とserver2の右下に緑色のチェックマークが表示され、下のStateが「BOOTED」となります。
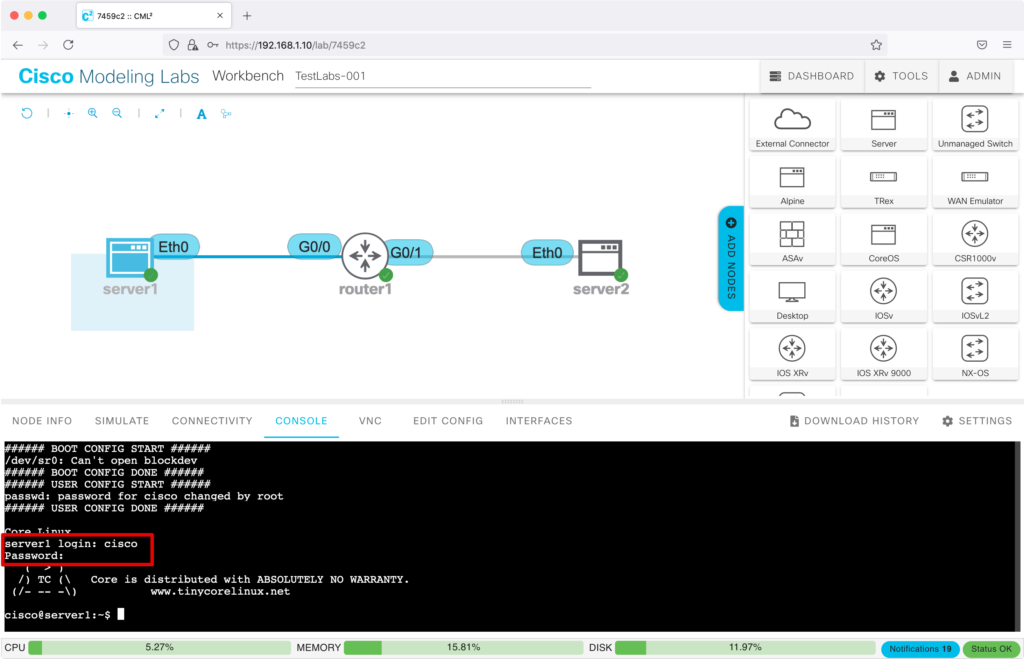
server1を選択し、右上の「コンソールマーク(>_)」をクリックし、サーバーのコンソールに入ります。
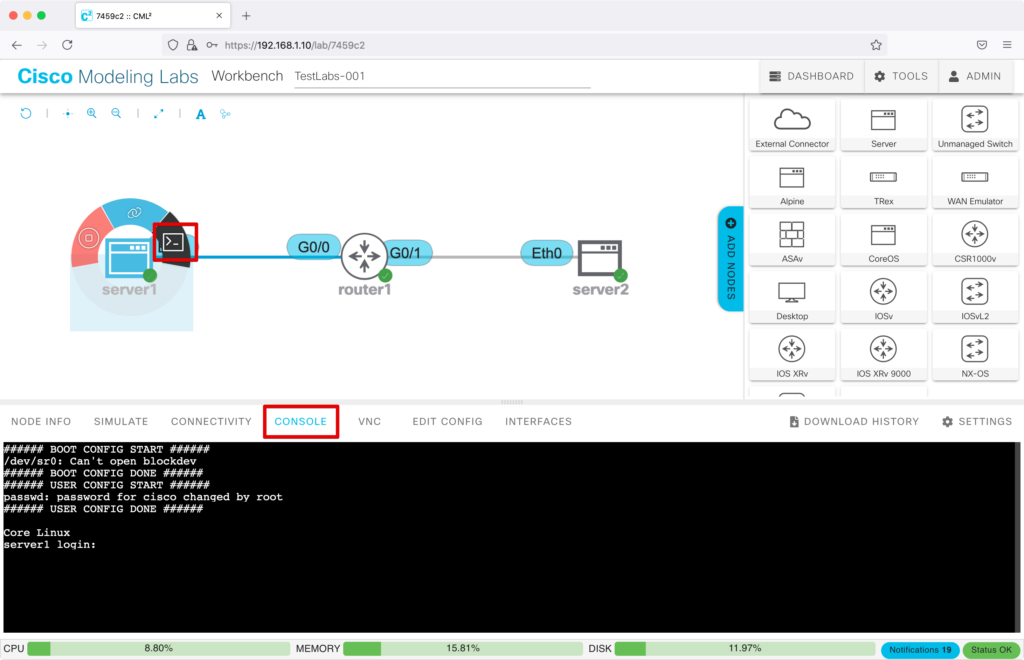
デフォルトのログインIDとパスワードは、”cisco/cisco”です。
router1に設定したゲートウェイとなるIPアドレスに、Pingを打ちます。
router1から応答があることがわかります。
ping 192.168.1.254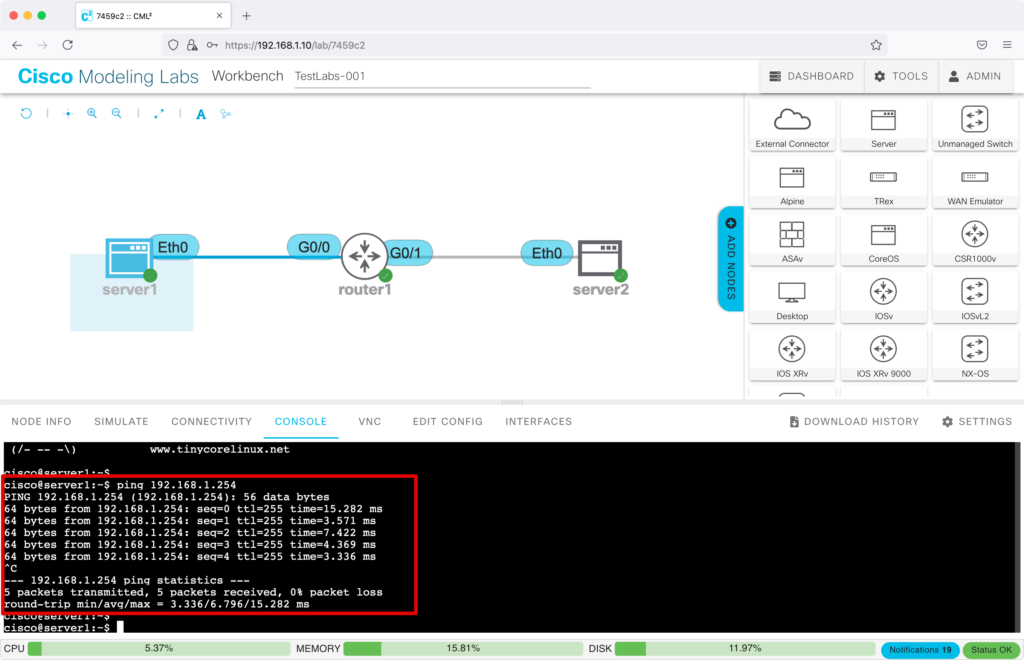
server2に設定したIPアドレスに、Pingを打ちます。
server2から応答があり、疎通可能なことが確認できます。
ping 192.168.2.1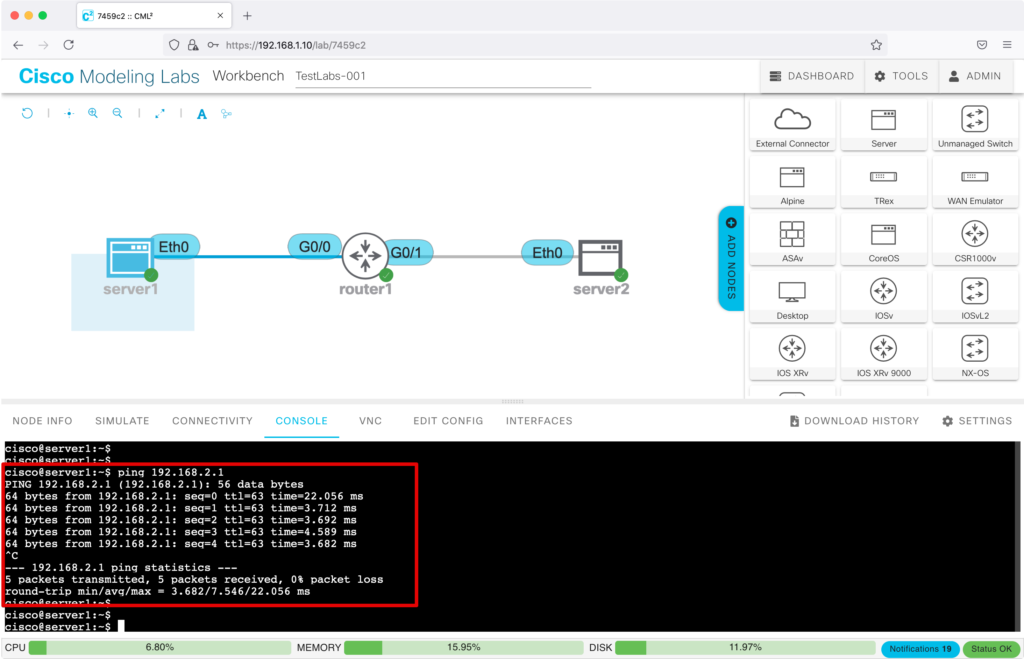
以上で、簡単なラボ作成と検証が完了です!