【前回】AWSサイト間VPNの構築(3.AWSのVPN構築)
【次回】AWSサイト間VPNの構築(5.暗号化・ハッシュアルゴリズム変更)
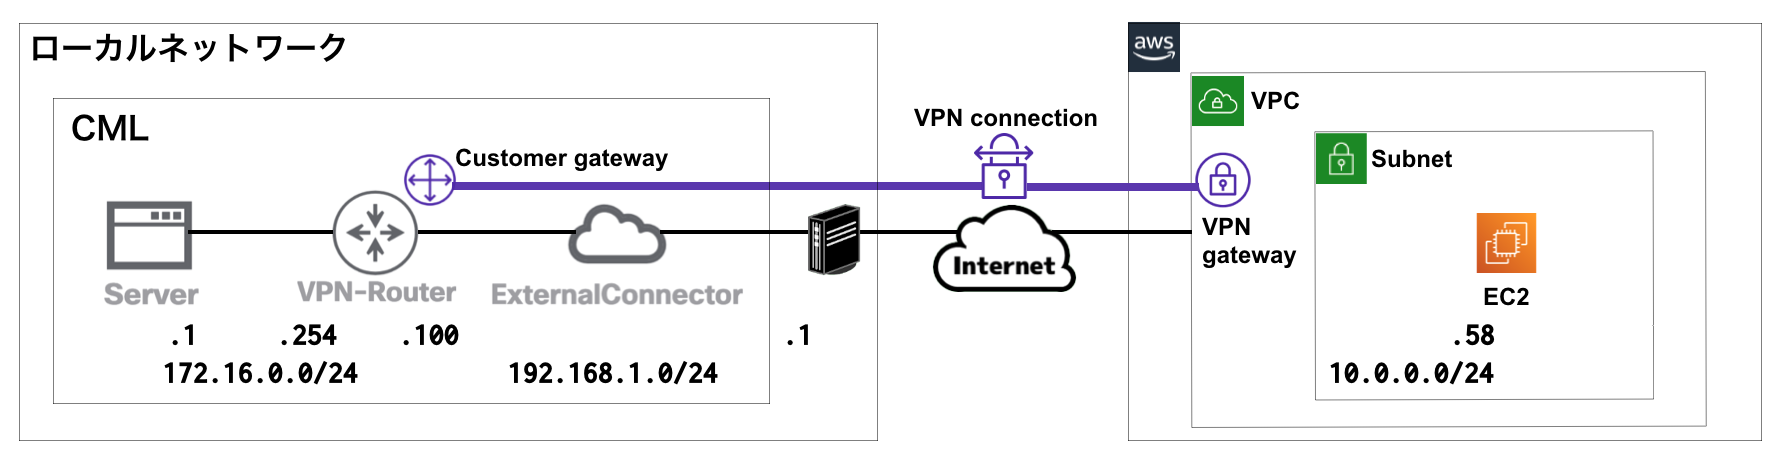
ネットワーク構成
下記のネットワーク構成で、CML上のLAN(172.16.0.0/24)とAWSのサブネット(10.0.0.0/24)が直接通信できるようにします。
※Server(172.16.0.1)からEC2(10.0.0.58)にPingによる疎通確認ができるようにしていきます。
CMLの構築
AWSのサイト間VPN接続の検証のためにCMLを構築します。
CMLの基本設定
Server、IOSv(VPN-Router)、ExternalConnectorを配置します。
RouterのGi0/0をExternalConnectorに、Gi0/1をServerに接続します。
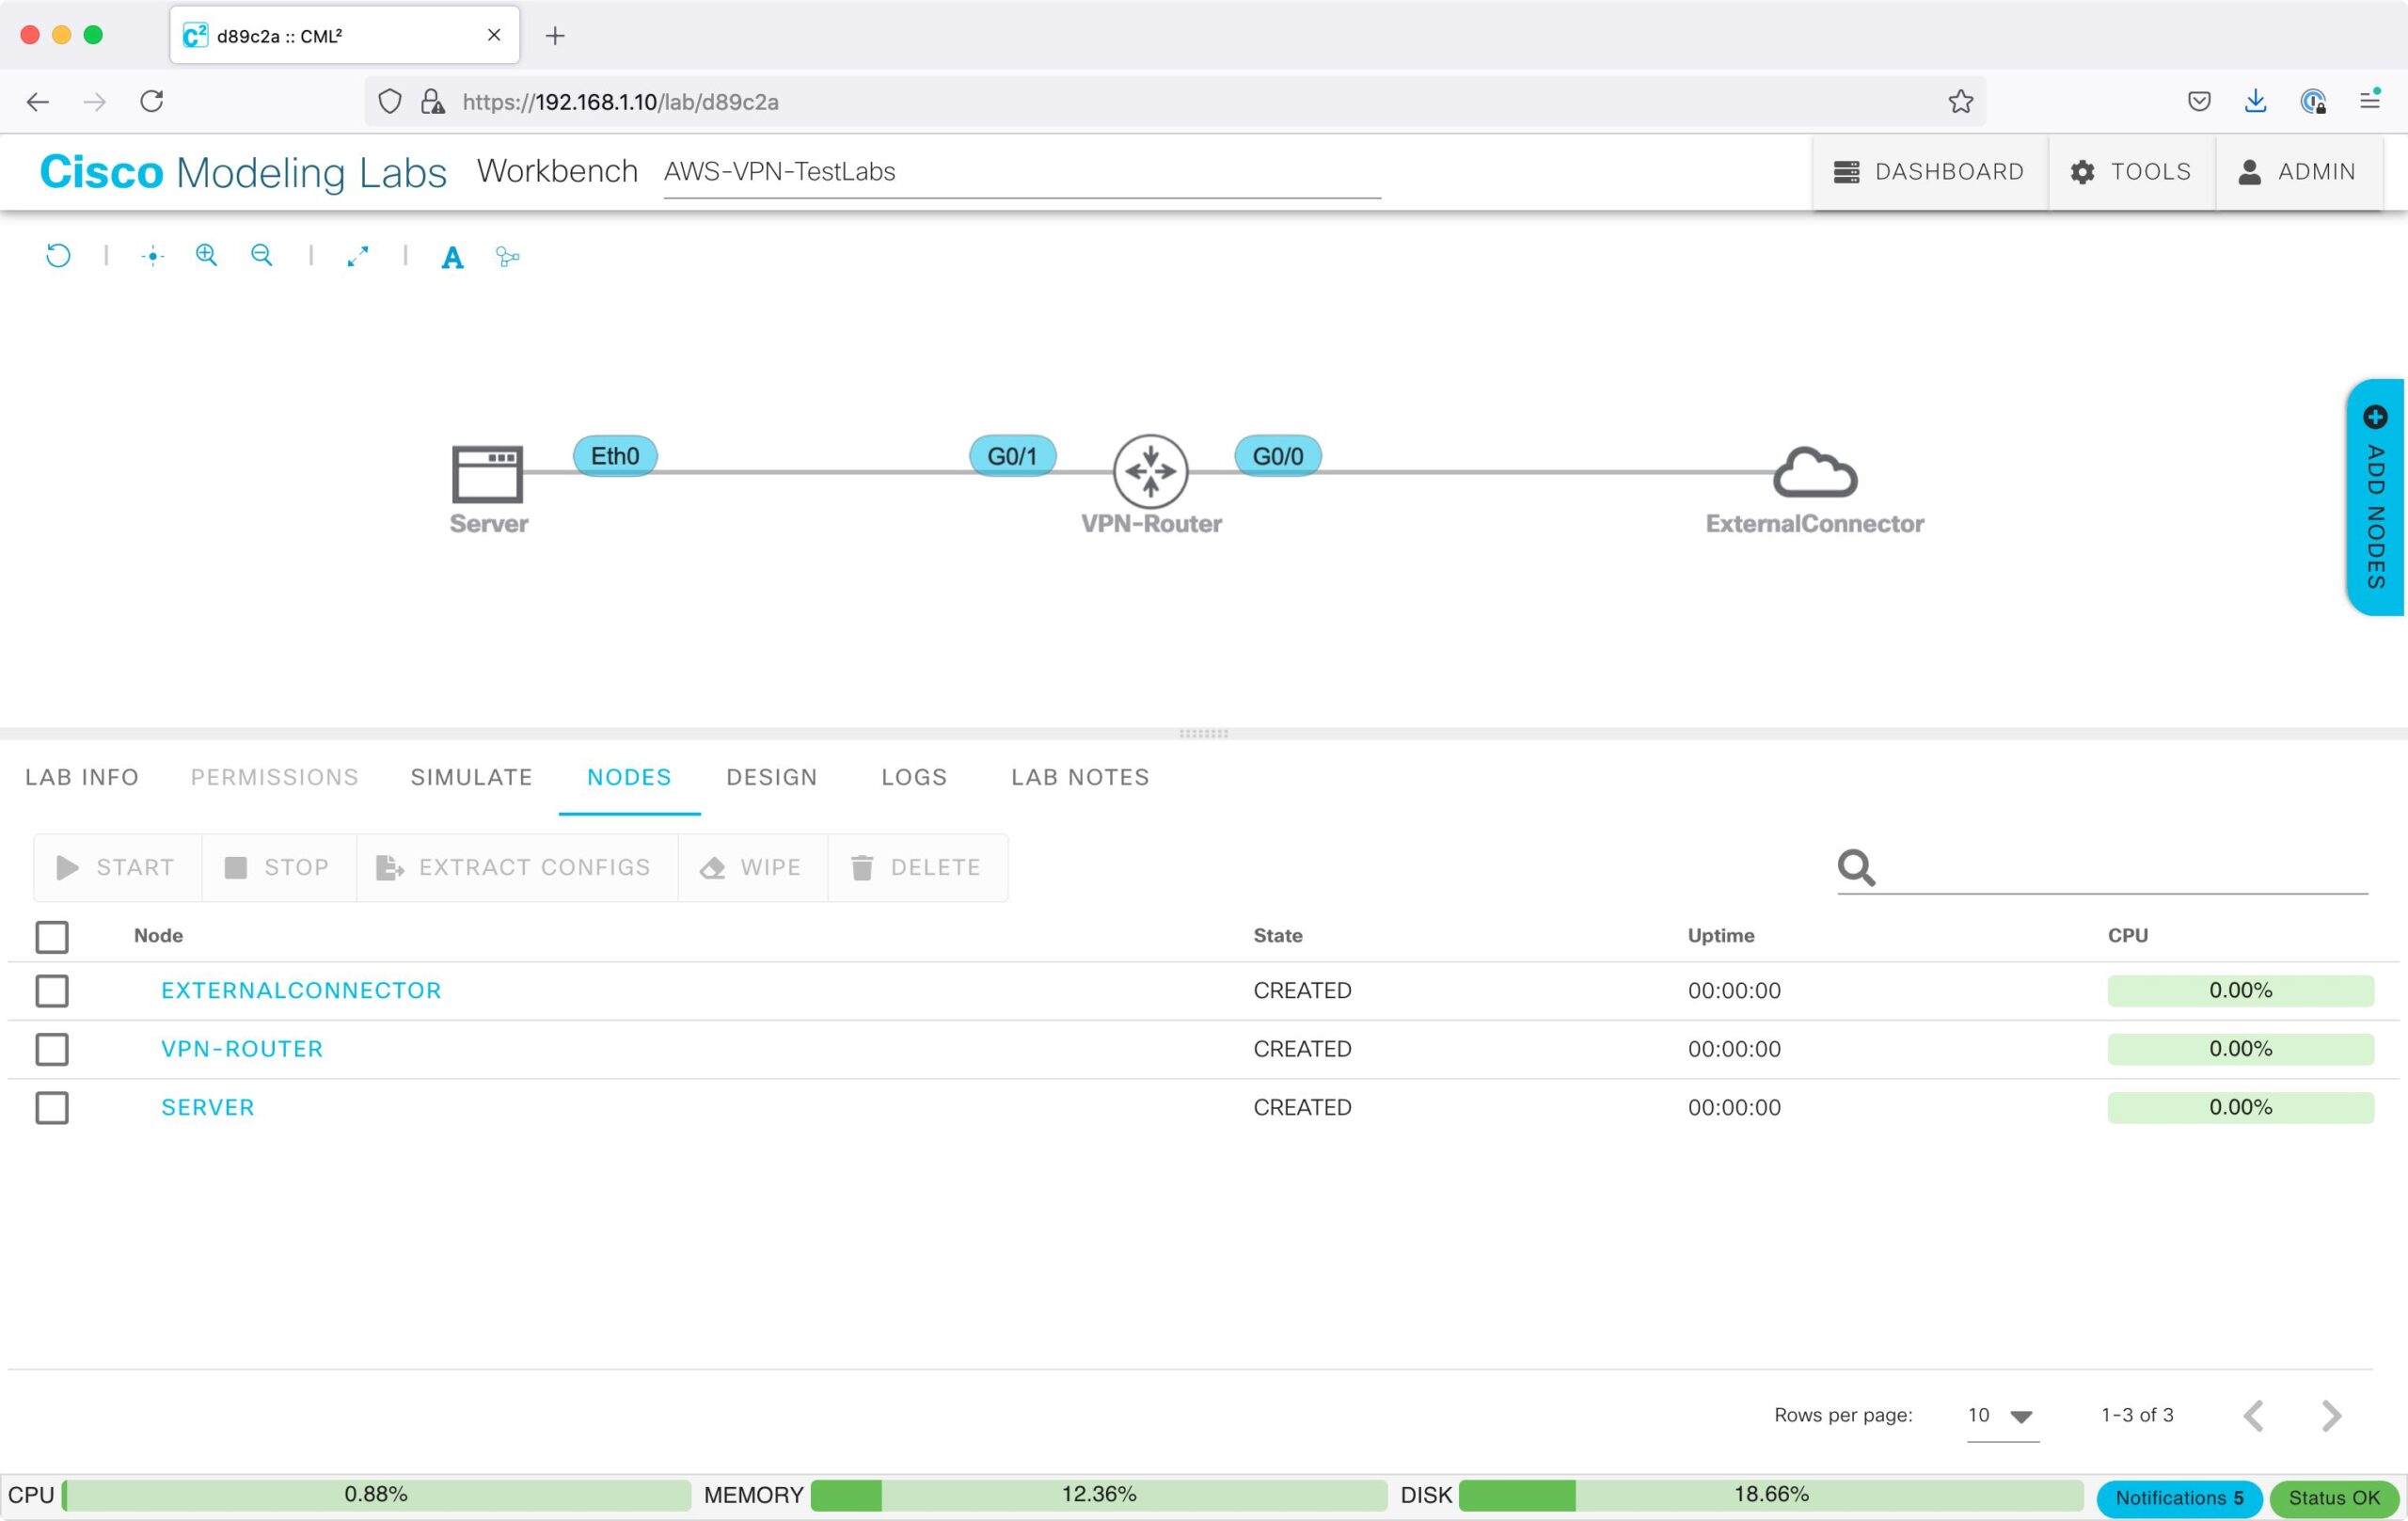
Serverは、「EDIT CONFIG」で下記の設定を行い起動します。
hostname Server
ifconfig eth0 172.16.0.1 netmask 255.255.255.0 up
route add -net 0.0.0.0/0 dev eth0
ExternalConnectorは、「EDIT CONFIG」で「BRIDGE」を選択します。
※CMLの外部ネットワーク接続の詳細はこちらで説明しています。

Routerのインターフェースを設定します。
int Gi0/0
ip address 192.168.1.100 255.255.255.0
no shut

int Gi0/1
ip address 172.16.0.254 255.255.255.0
no shut
RouterのインターフェースにIPアドレスが設定され、リンクアップしたことを確認します。
show ip int brief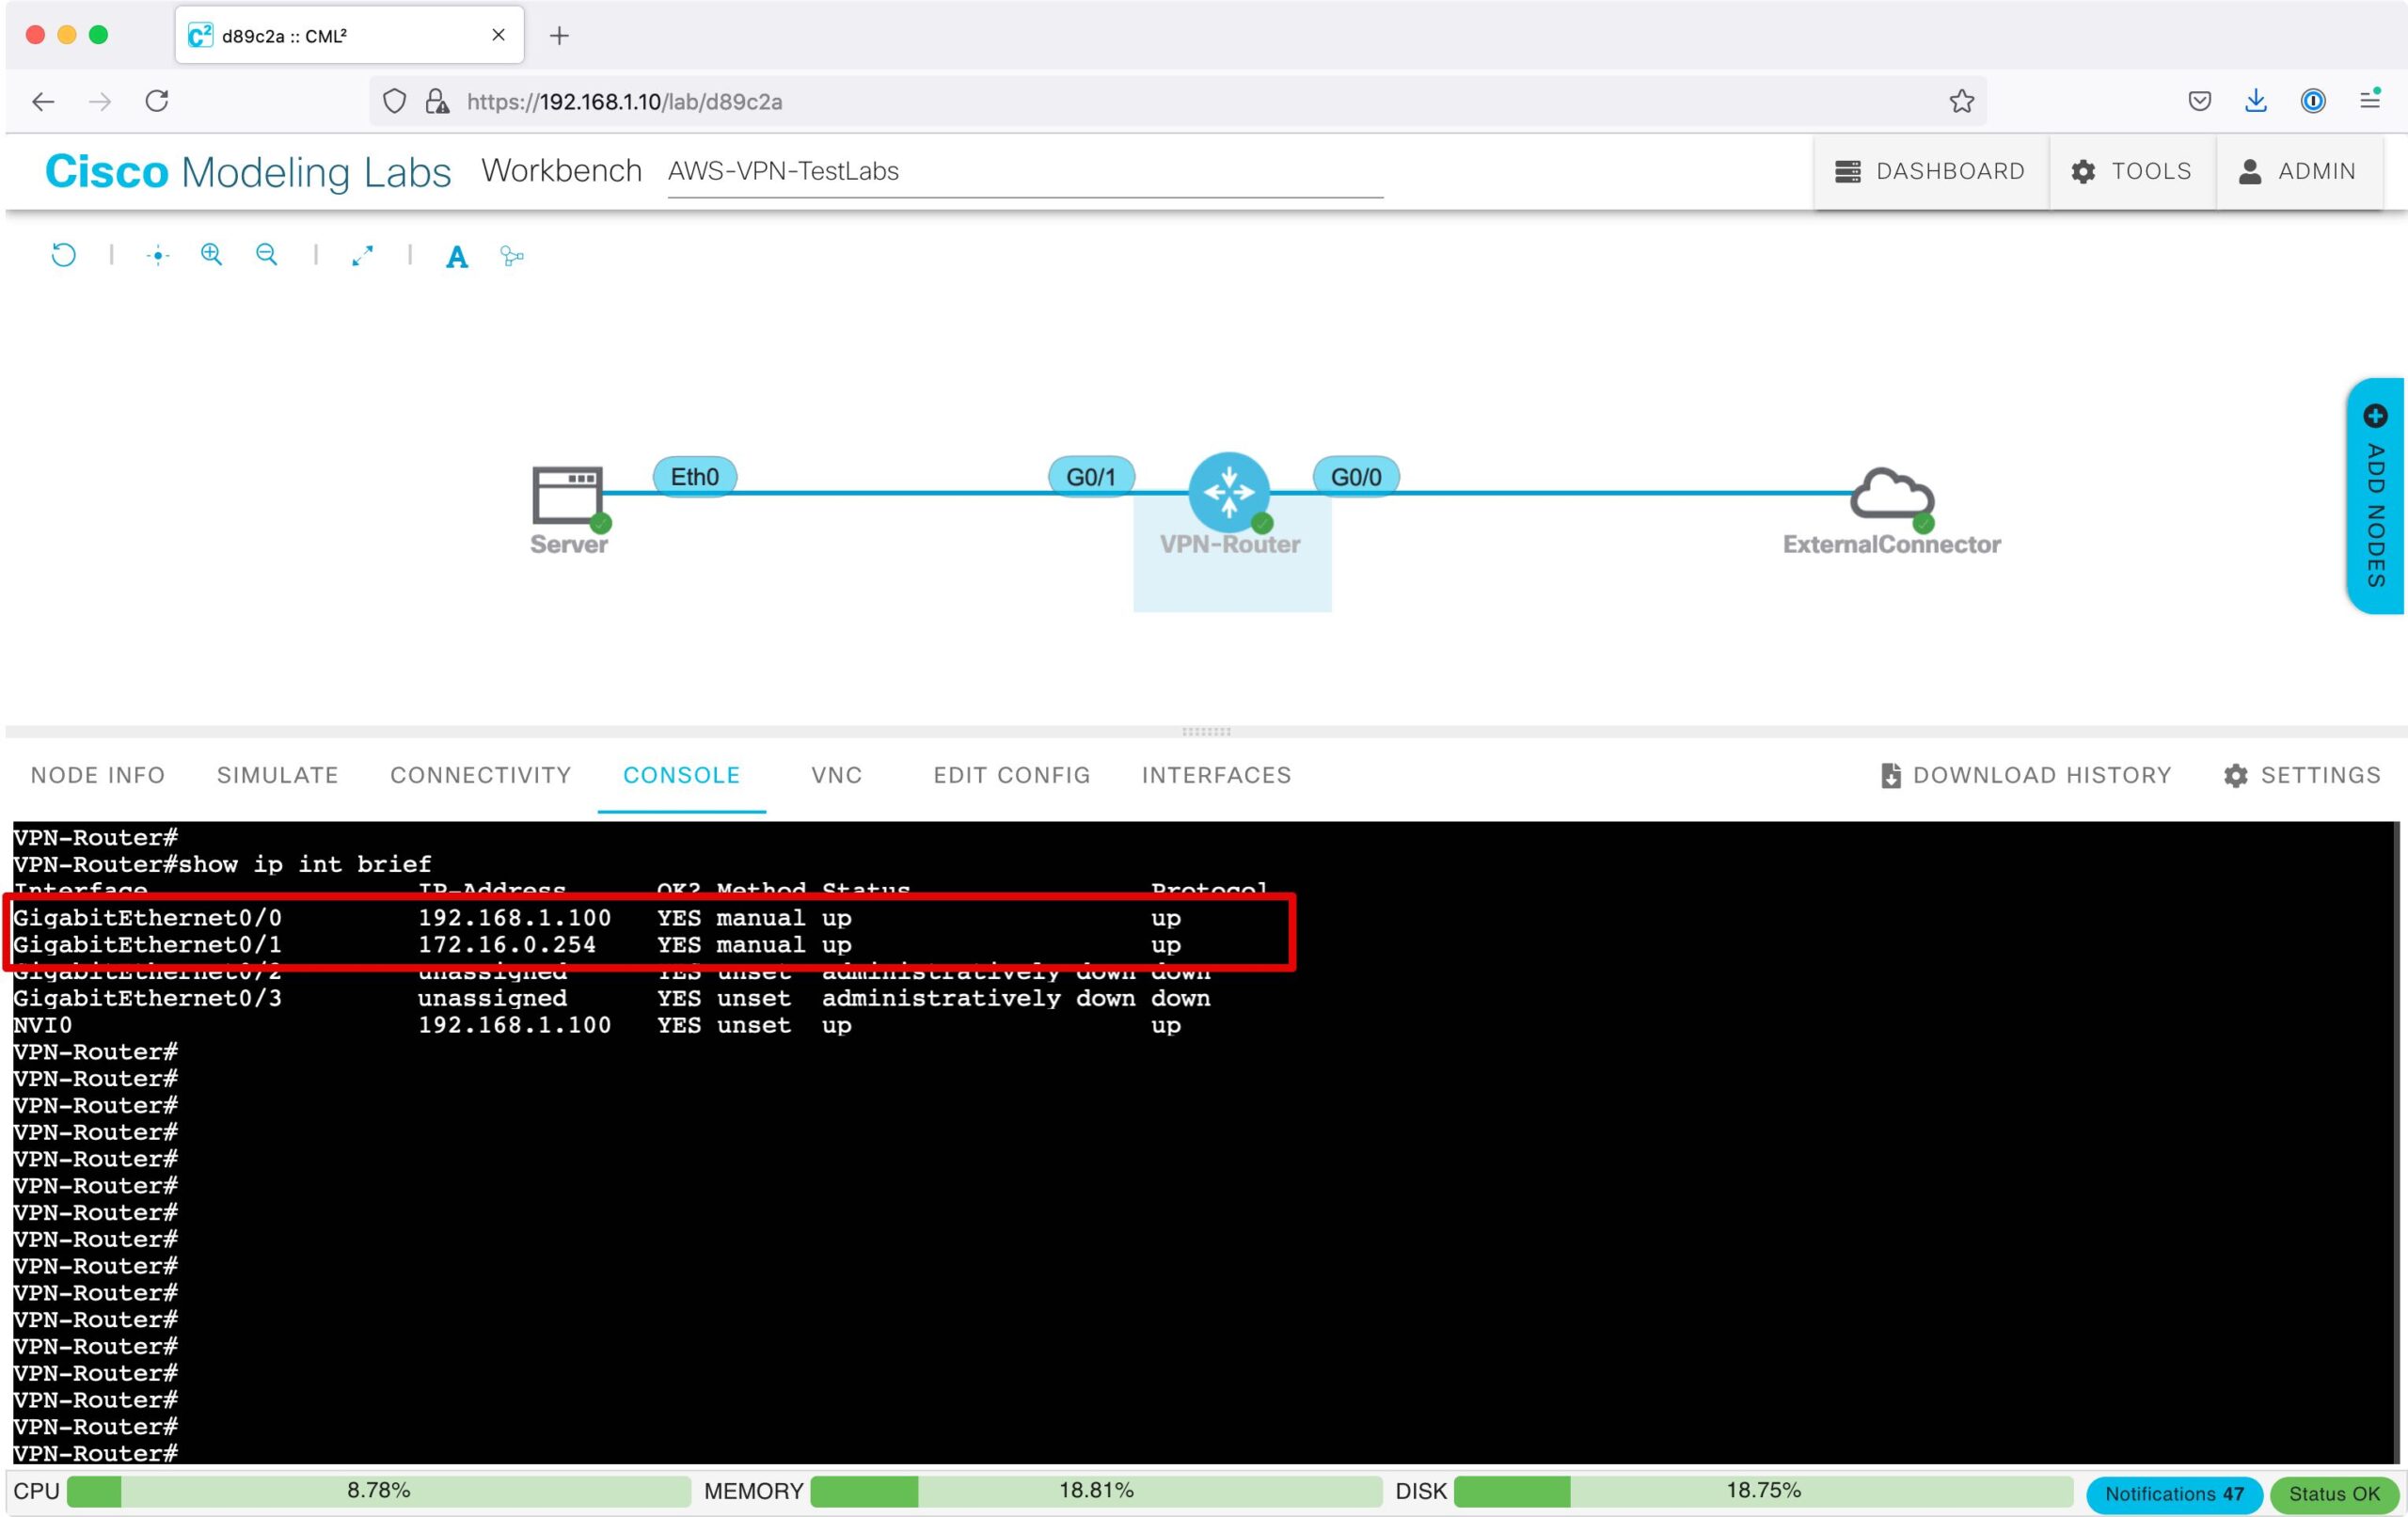
Routerのデフォルトルートを設定します。
ip route 0.0.0.0 0.0.0.0 192.168.1.1※デフォルトルートのネクストホップは、自身のローカル環境のルータのIPアドレスを設定します。下記のコマンドで確認できます。
[Windowsのコマンドプロンプト]
route print -4
-----------------------------------------------------------------------
0.0.0.0           0.0.0.0        192.168.1.1
-----------------------------------------------------------------------

[Macのターミナル]
netstat -rn -f inet | grep default
-----------------------------------------------------------------------
default            192.168.1.1
-----------------------------------------------------------------------
Routerのデフォルトルートが設定されたことを確認します。
show ip route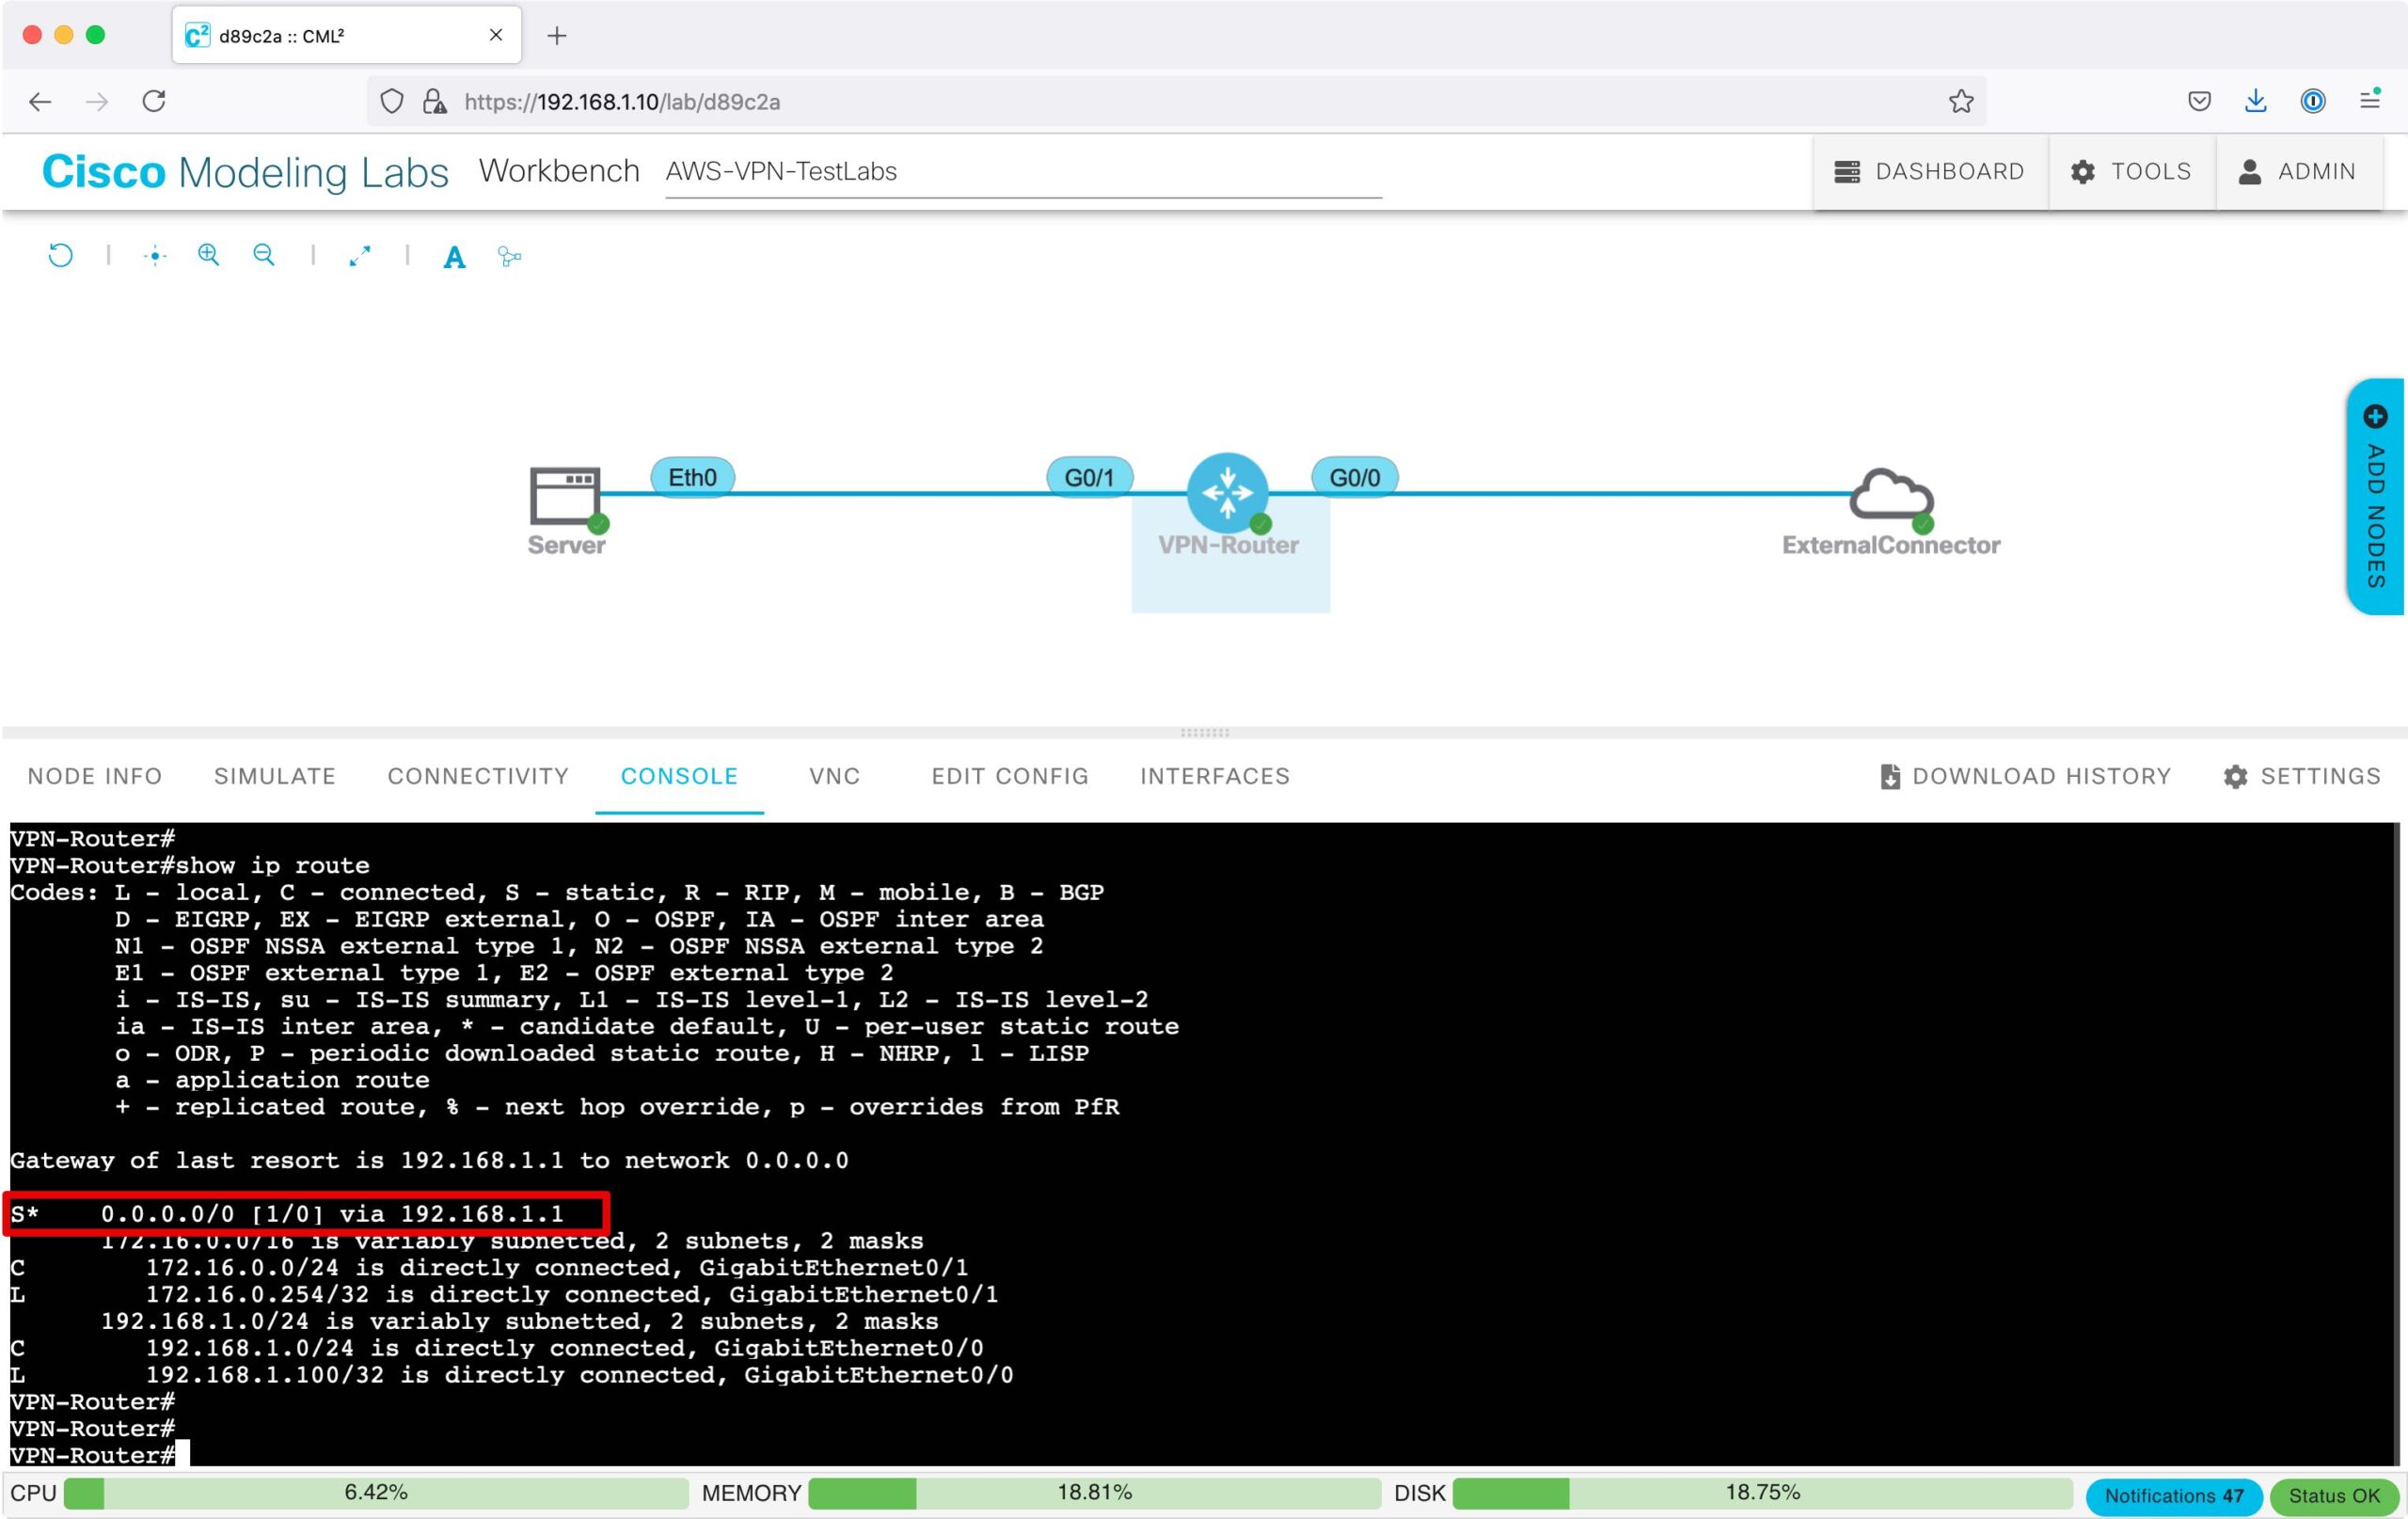
隣接機器にPingを実施し、疎通可能であることを確認します。
ping 192.168.1.1
ping 172.16.0.1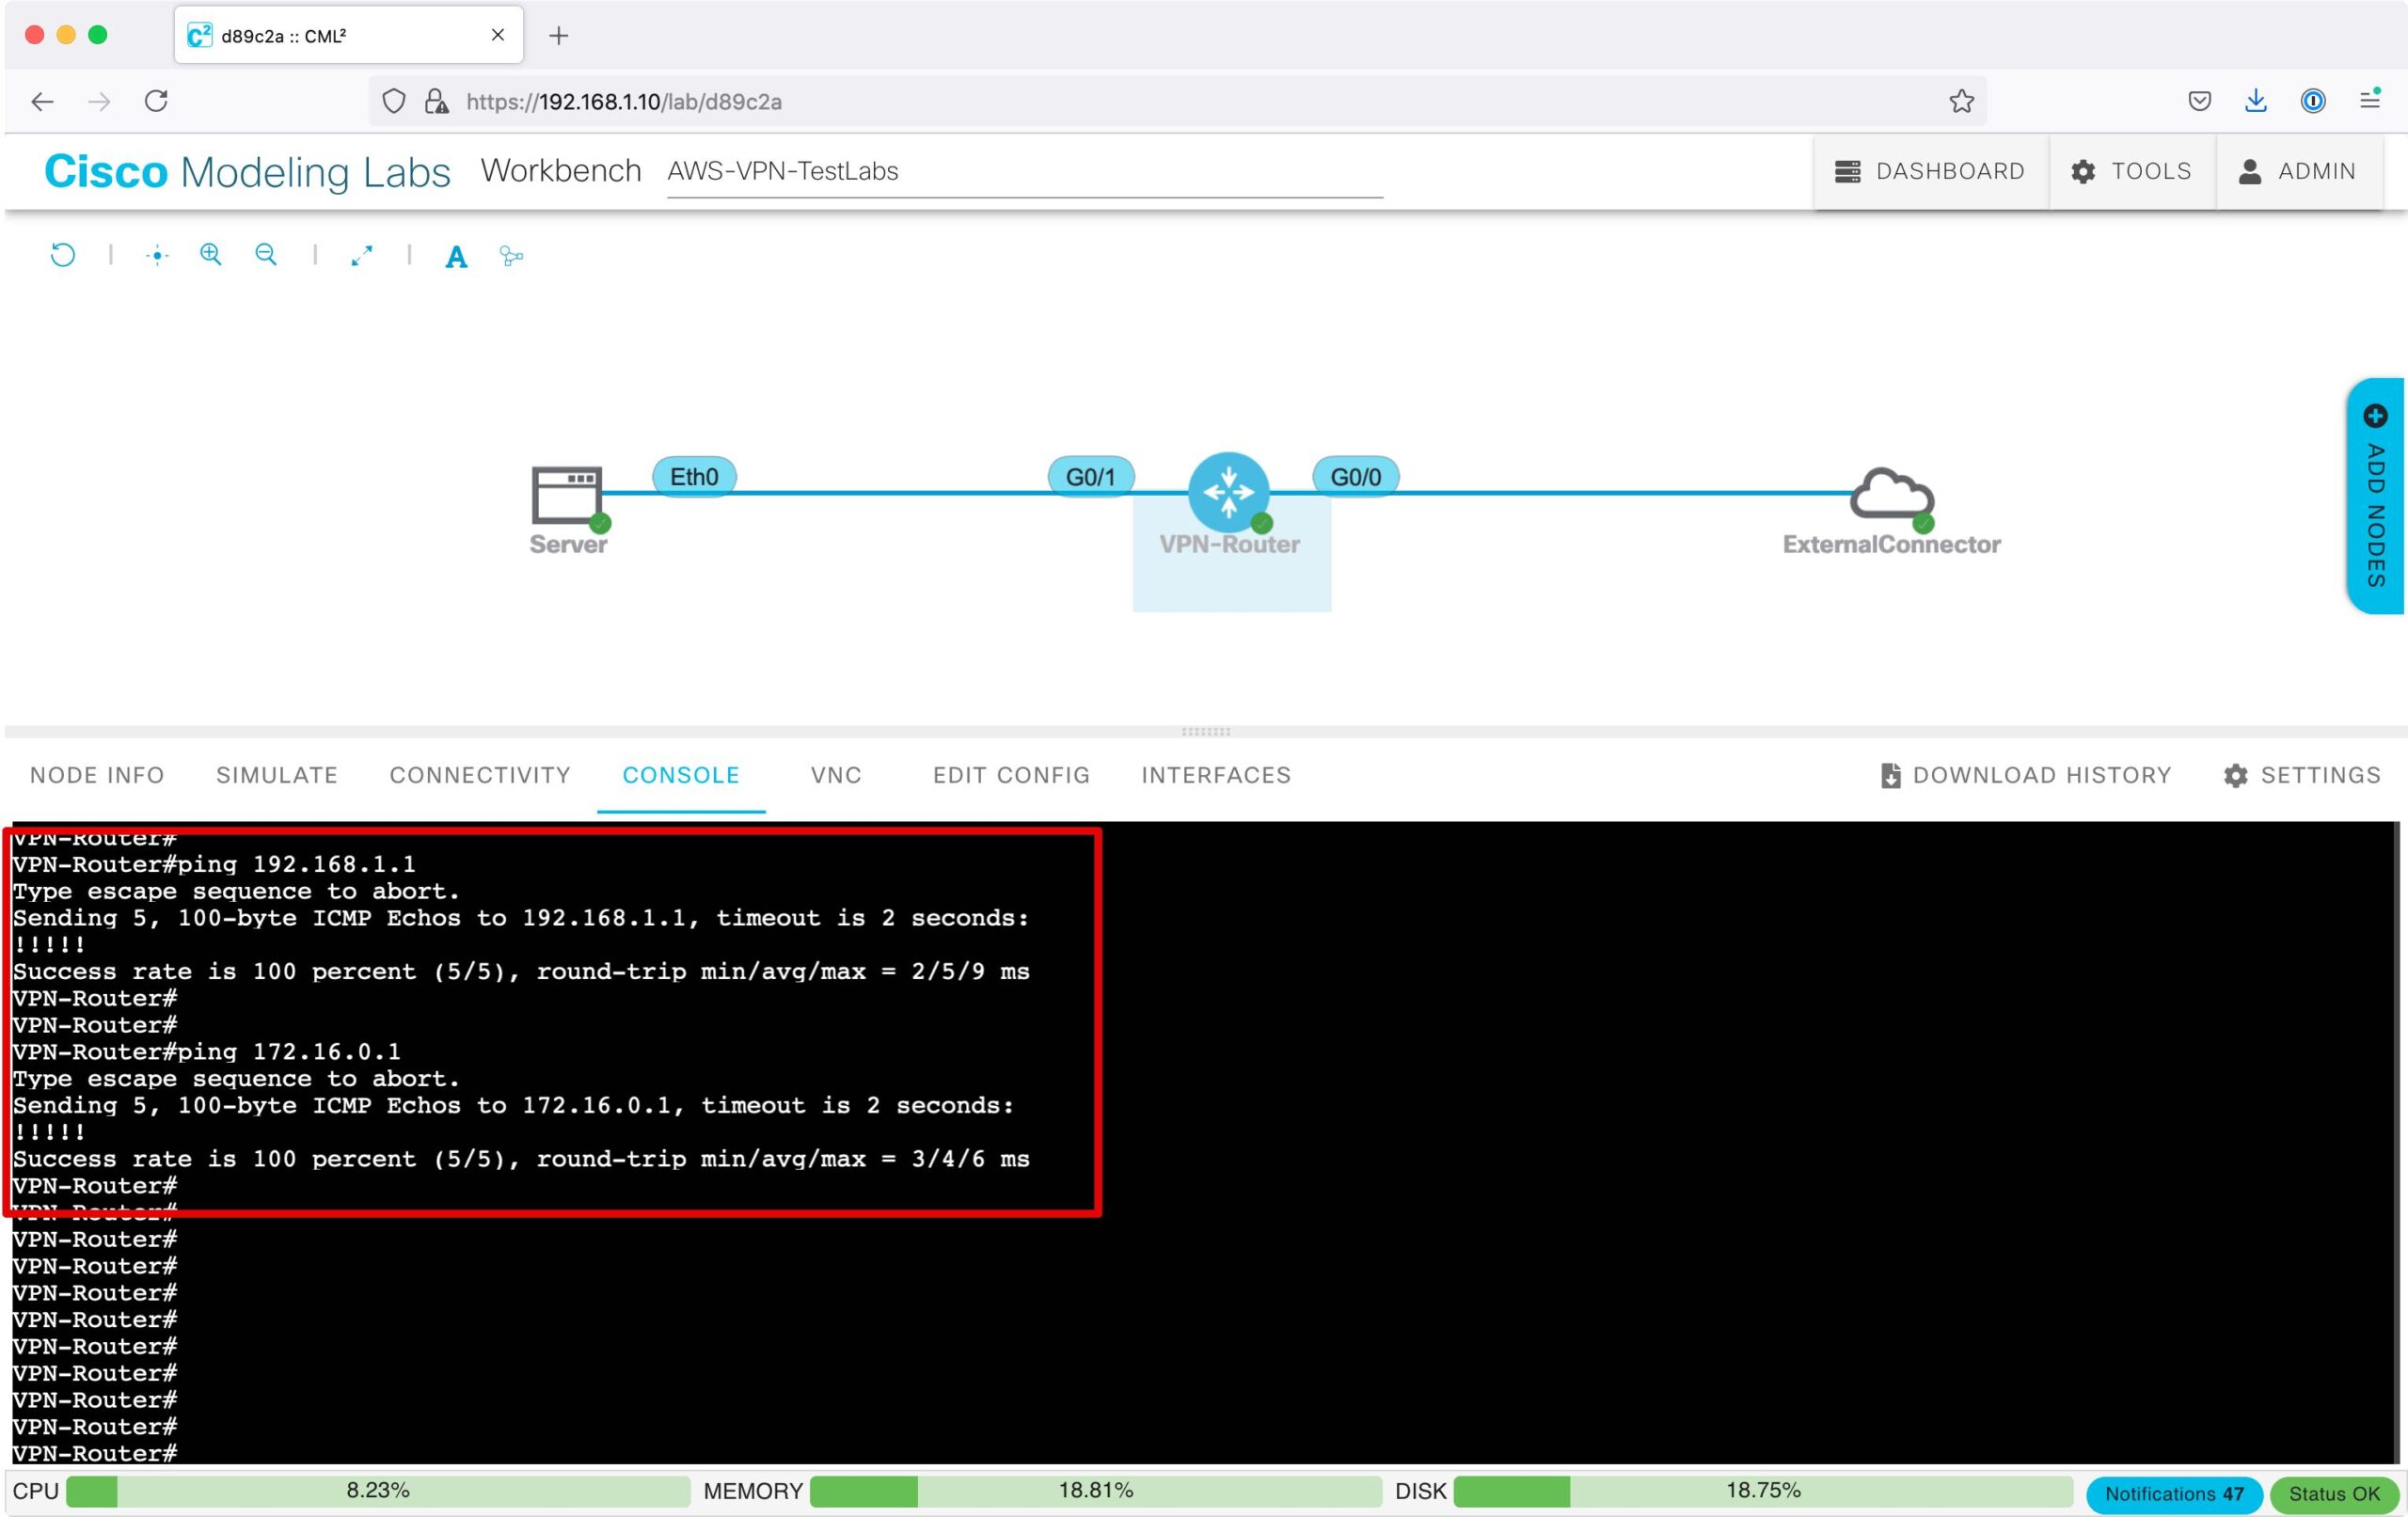
インターネット内とAWSのトンネルインターフェースの外部IPアドレスにPingを実施し、疎通可能であることを確認します。
ping 8.8.8.8 ※Googleが提供している「Google Public DNS」のIPアドレス
ping X.X.X.X ※AWSのトンネルインターフェースの外部IPアドレス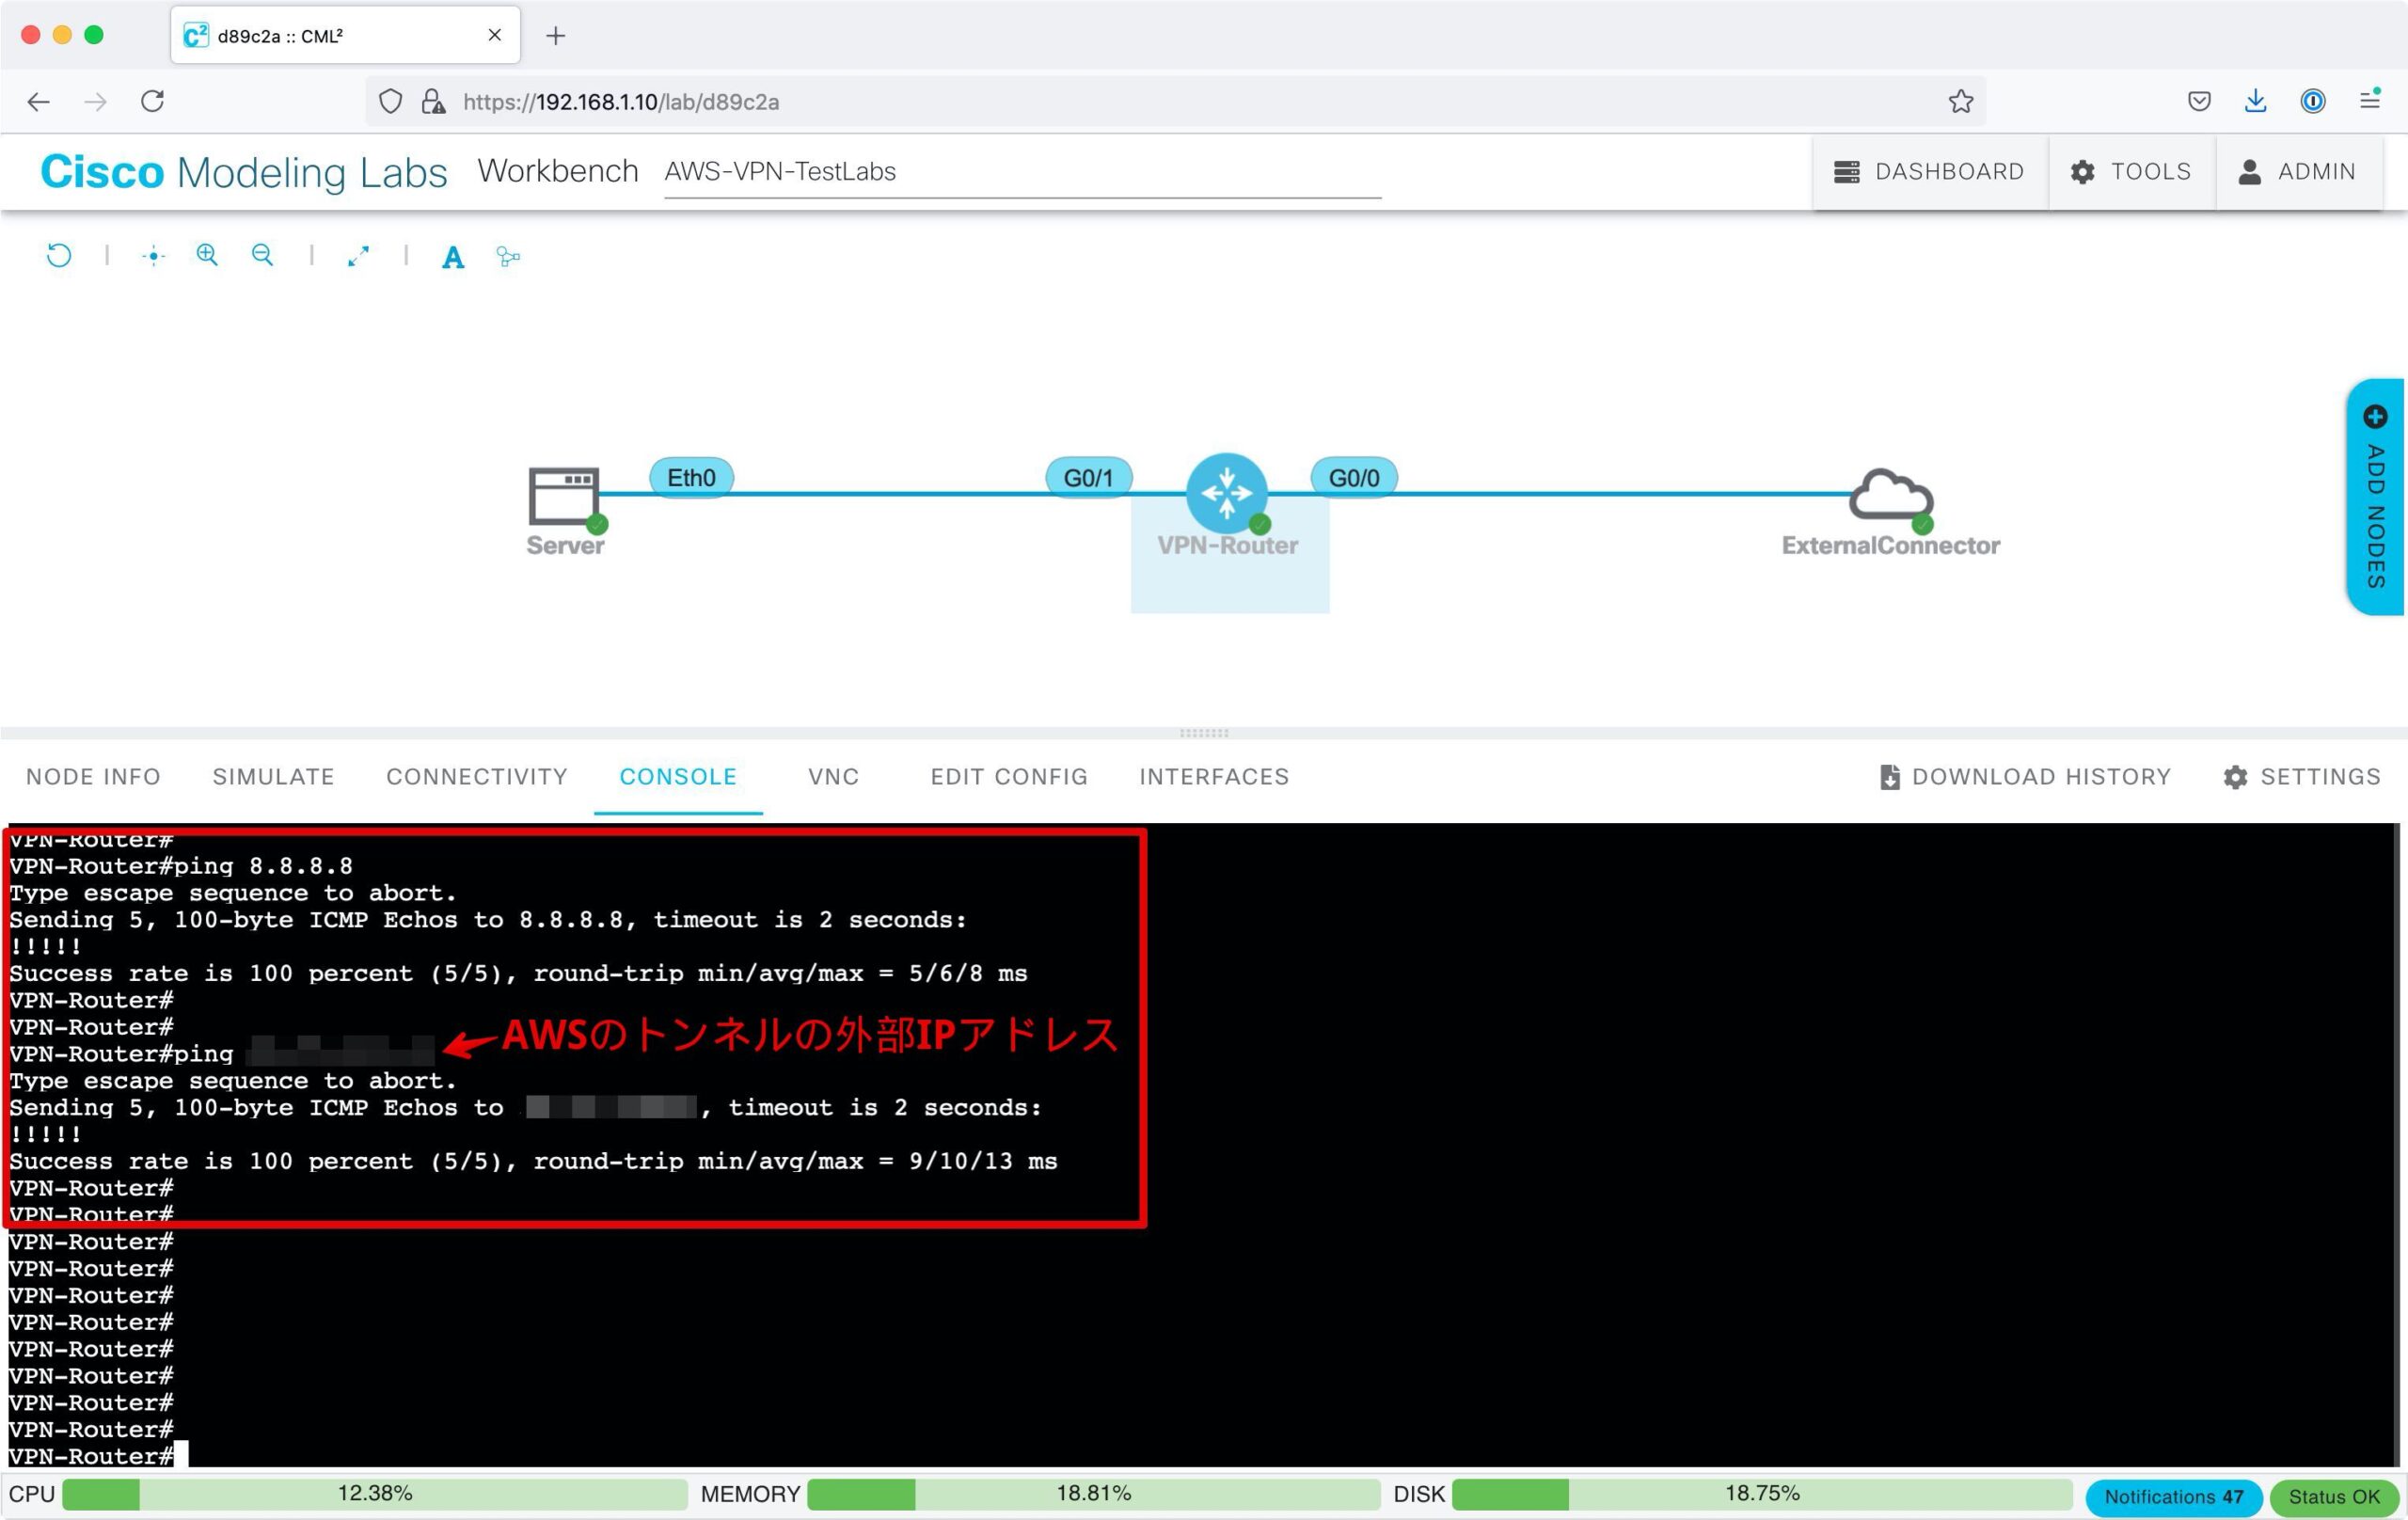
CMLのVPN設定
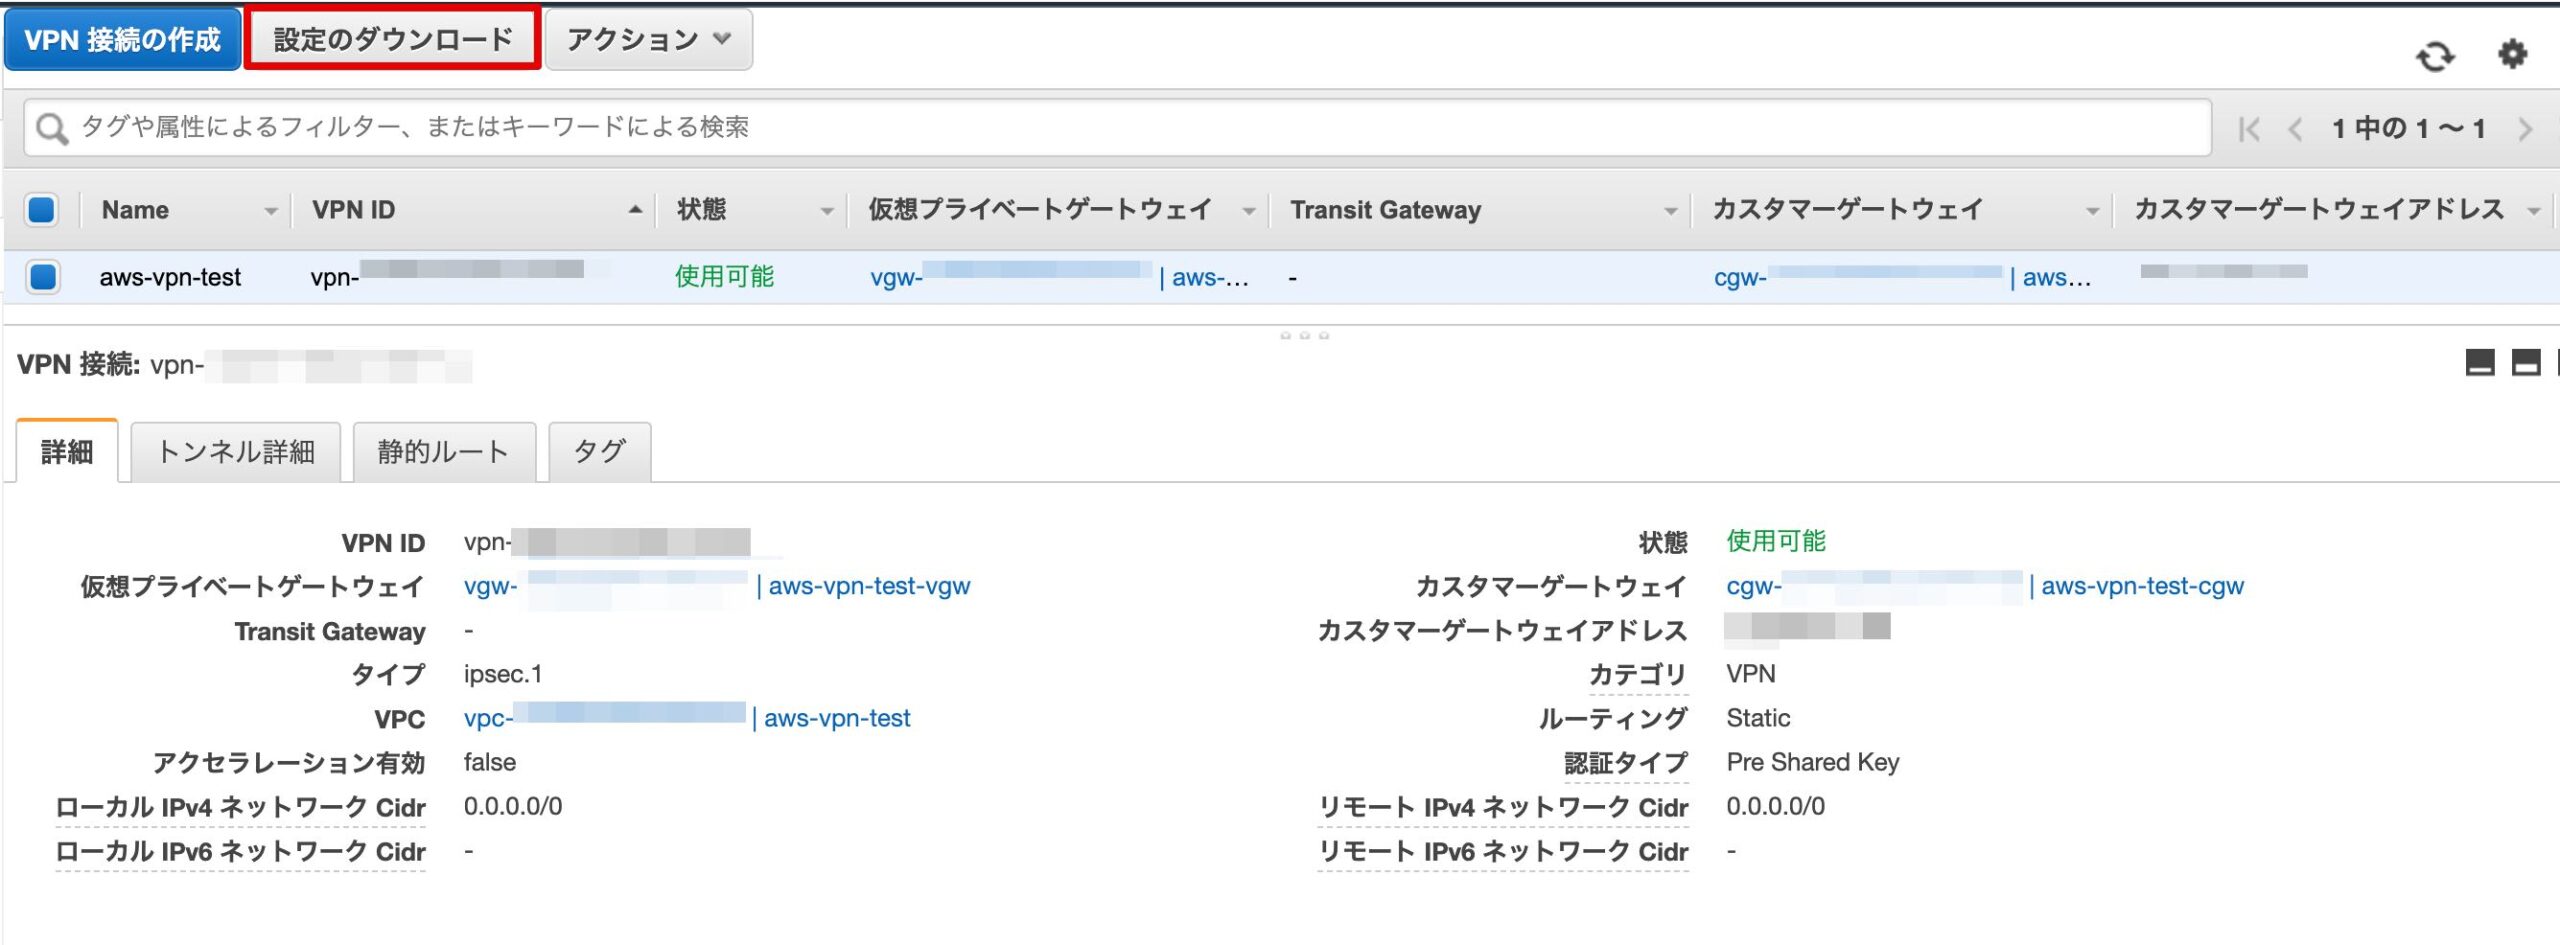
AWSの「サイト間のVPN接続」から設定のサンプルをダウンロードできます。
「設定のダウンロード」をクリックします。
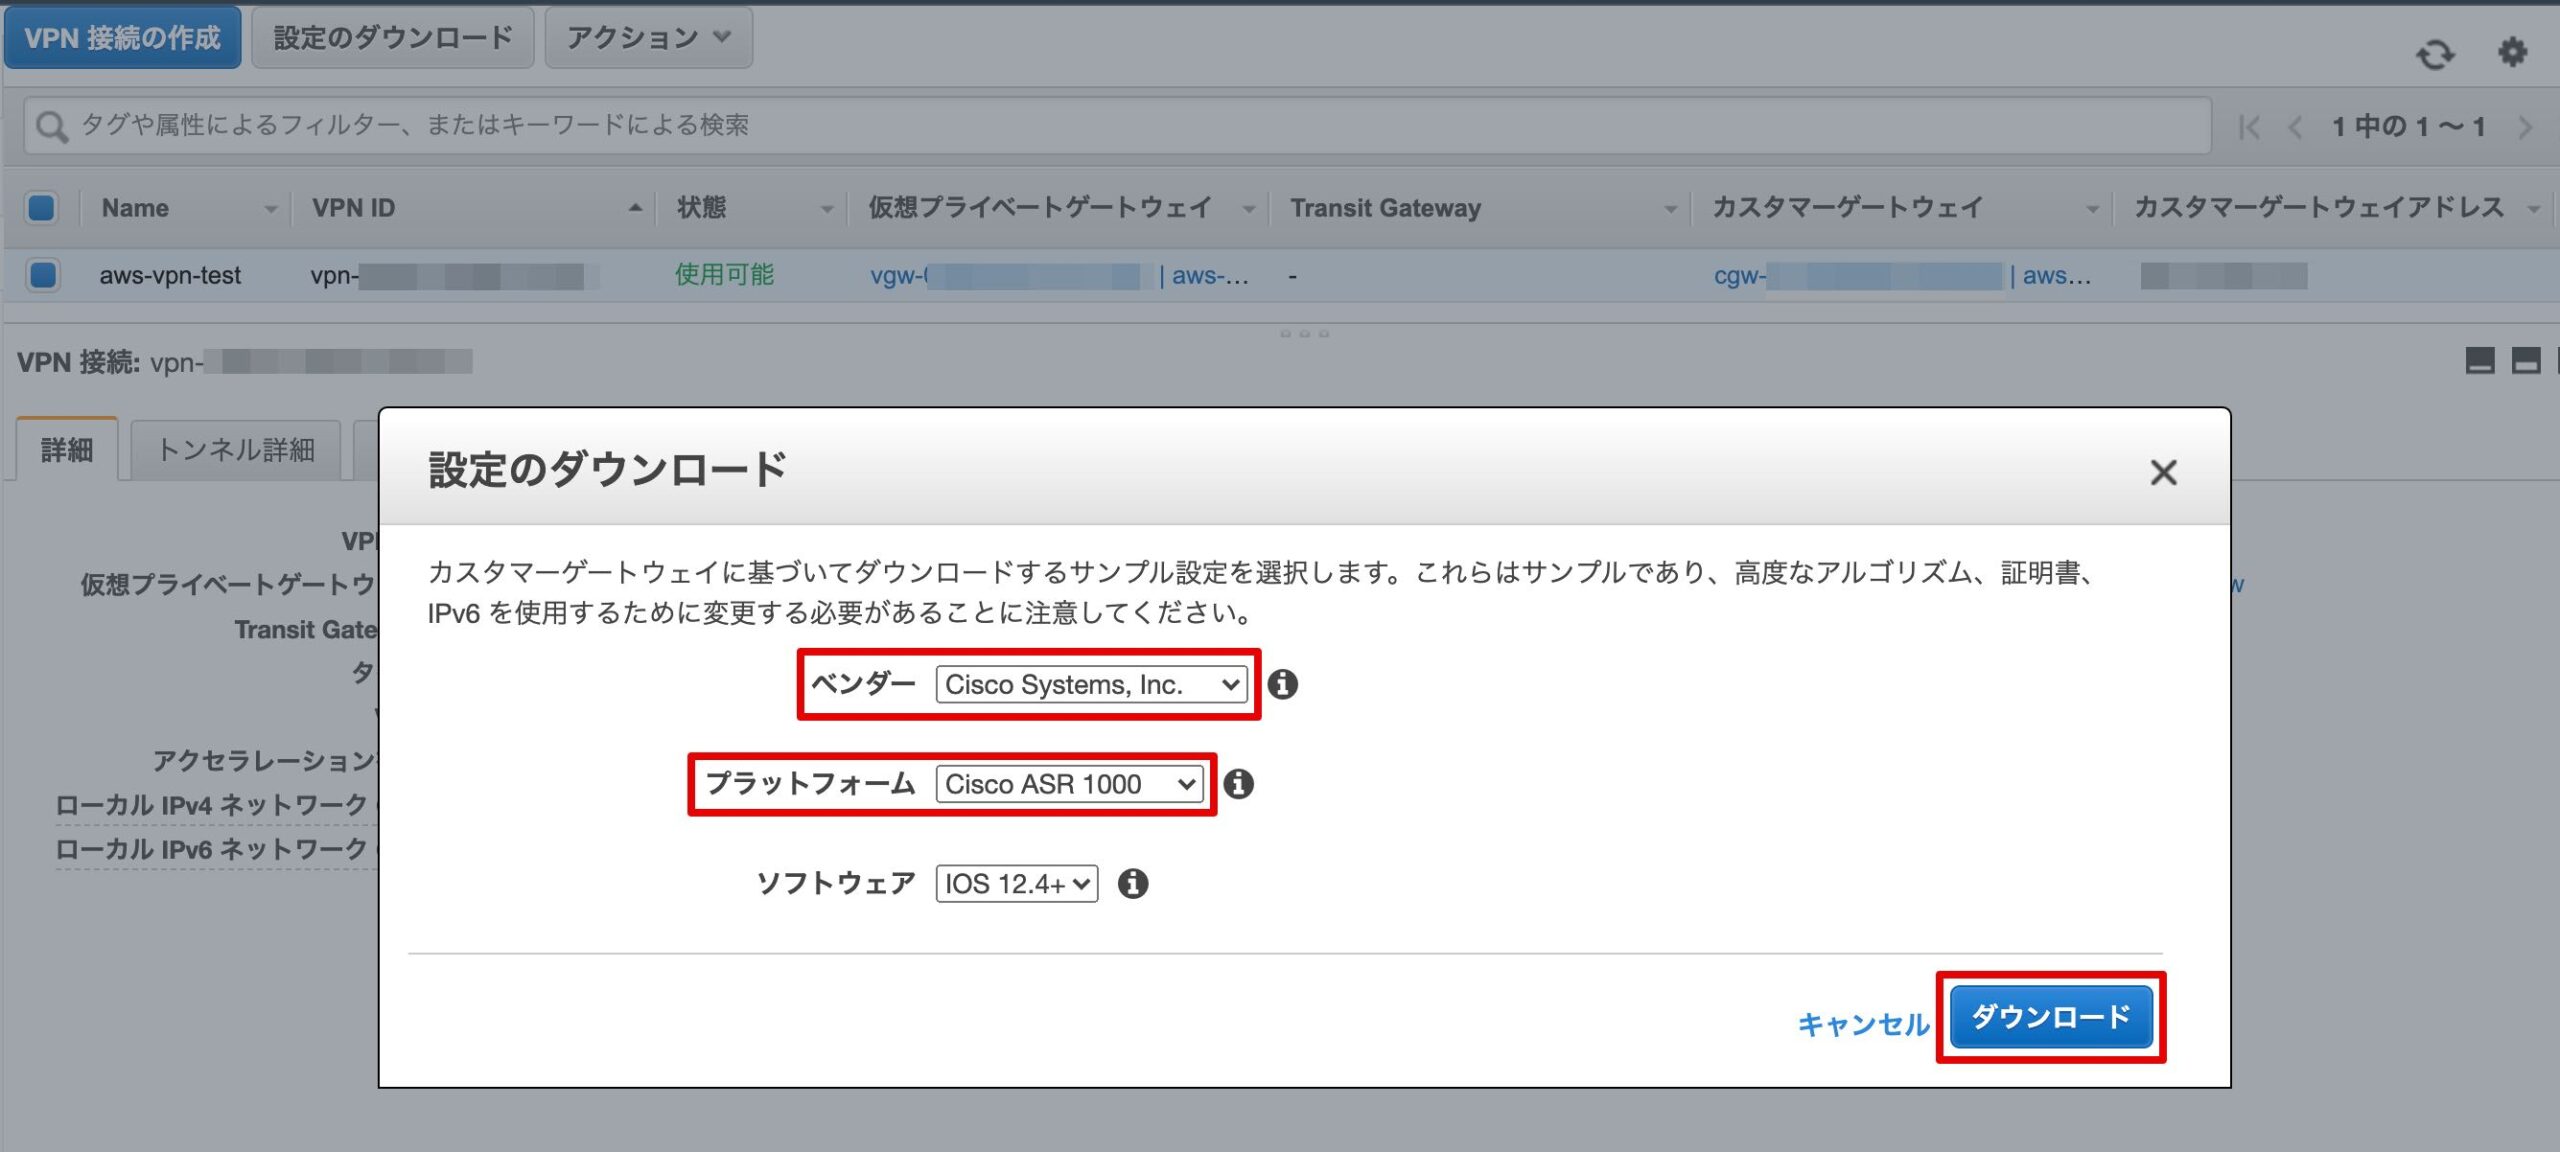
ベンダーは「Cisco Systems, Inc.」、プラットフォームは「Cisco ASR 1000」を選択し、ダウンロードをクリックします。
ダウンロードした設定サンプルから、今回は必要最低限の下記を設定します。AWSのVPN接続は、デフォルトでトンネルインターフェースが2つ作成されますが、片方のみ接続します。
*の部分はダウンロードしたテンプレート通りです。

crypto isakmp policy 200
  encryption aes 128
  authentication pre-share
  group 2
  lifetime 28800
  hash sha
exit

crypto keyring keyring-vpn-*******************
  local-address 192.168.1.100 ※ここはCML上のルーターのGi0/0のアドレスを指定
  pre-shared-key address ***.***.***.*** key *******************************
exit

crypto isakmp profile isakmp-vpn-*******************
  keyring keyring-vpn-*******************
  match identity address ***.***.***.*** 255.255.255.255
  local-address XXX.XXX.XXX.XXX ※ここは自身のグローバルアドレスを指定
exit

crypto ipsec transform-set ipsec-prop-vpn-******************* esp-aes 128 esp-sha-hmac
  mode tunnel
exit

crypto ipsec profile ipsec-vpn-*******************
  set pfs group2
  set security-association lifetime seconds 3600
  set transform-set ipsec-prop-vpn-*******************
exit

interface Tunnel1
  ip address 169.254.27.178 255.255.255.252
  ip virtual-reassembly
  tunnel source 192.168.1.100 ※ここはCML上のルーターのGi0/0のアドレスを指定
  tunnel destination ***.***.***.***
  tunnel mode ipsec ipv4
  tunnel protection ipsec profile ipsec-vpn-*******************
  ip tcp adjust-mss 1379
  no shutdown
exit

ip route 10.0.0.0 255.255.255.0 Tunnel1
Tunnel1が作成され、リンクアップしていることを確認します。
show ip int brief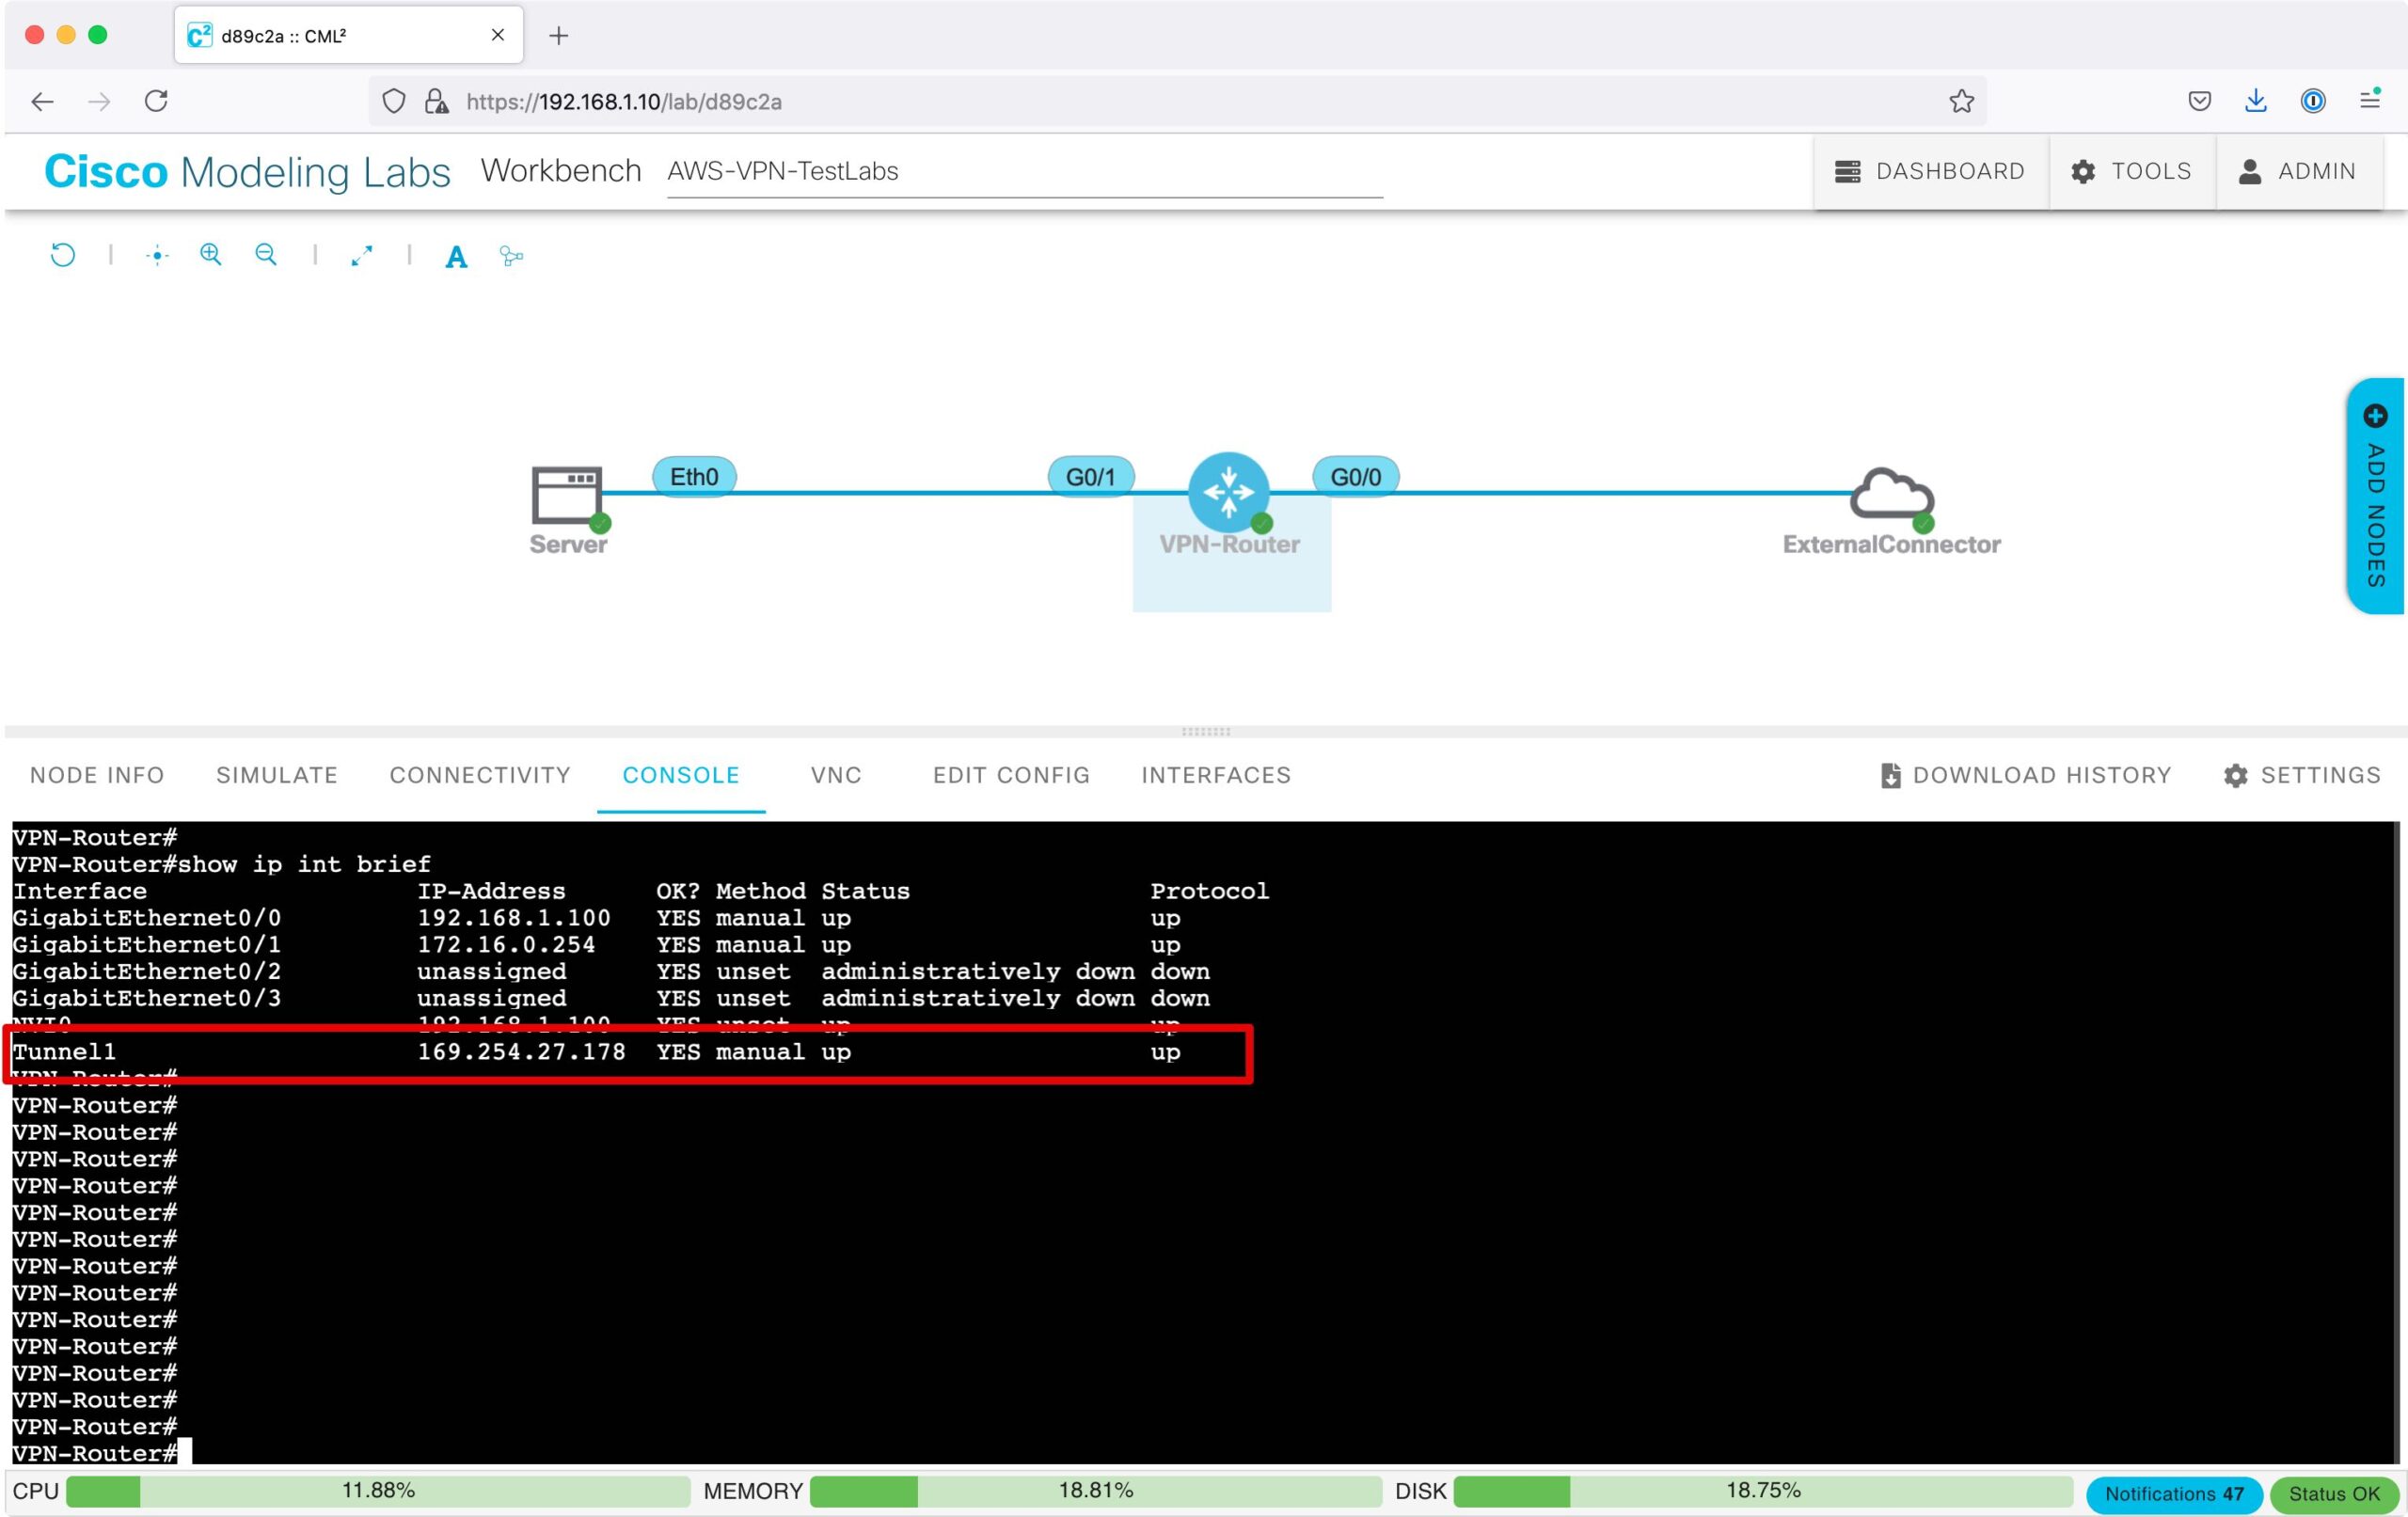
AWSのEC2を配置したサブネット(10.0.0.0/24)向けのルーティングが追加されていることを確認します。
show ip route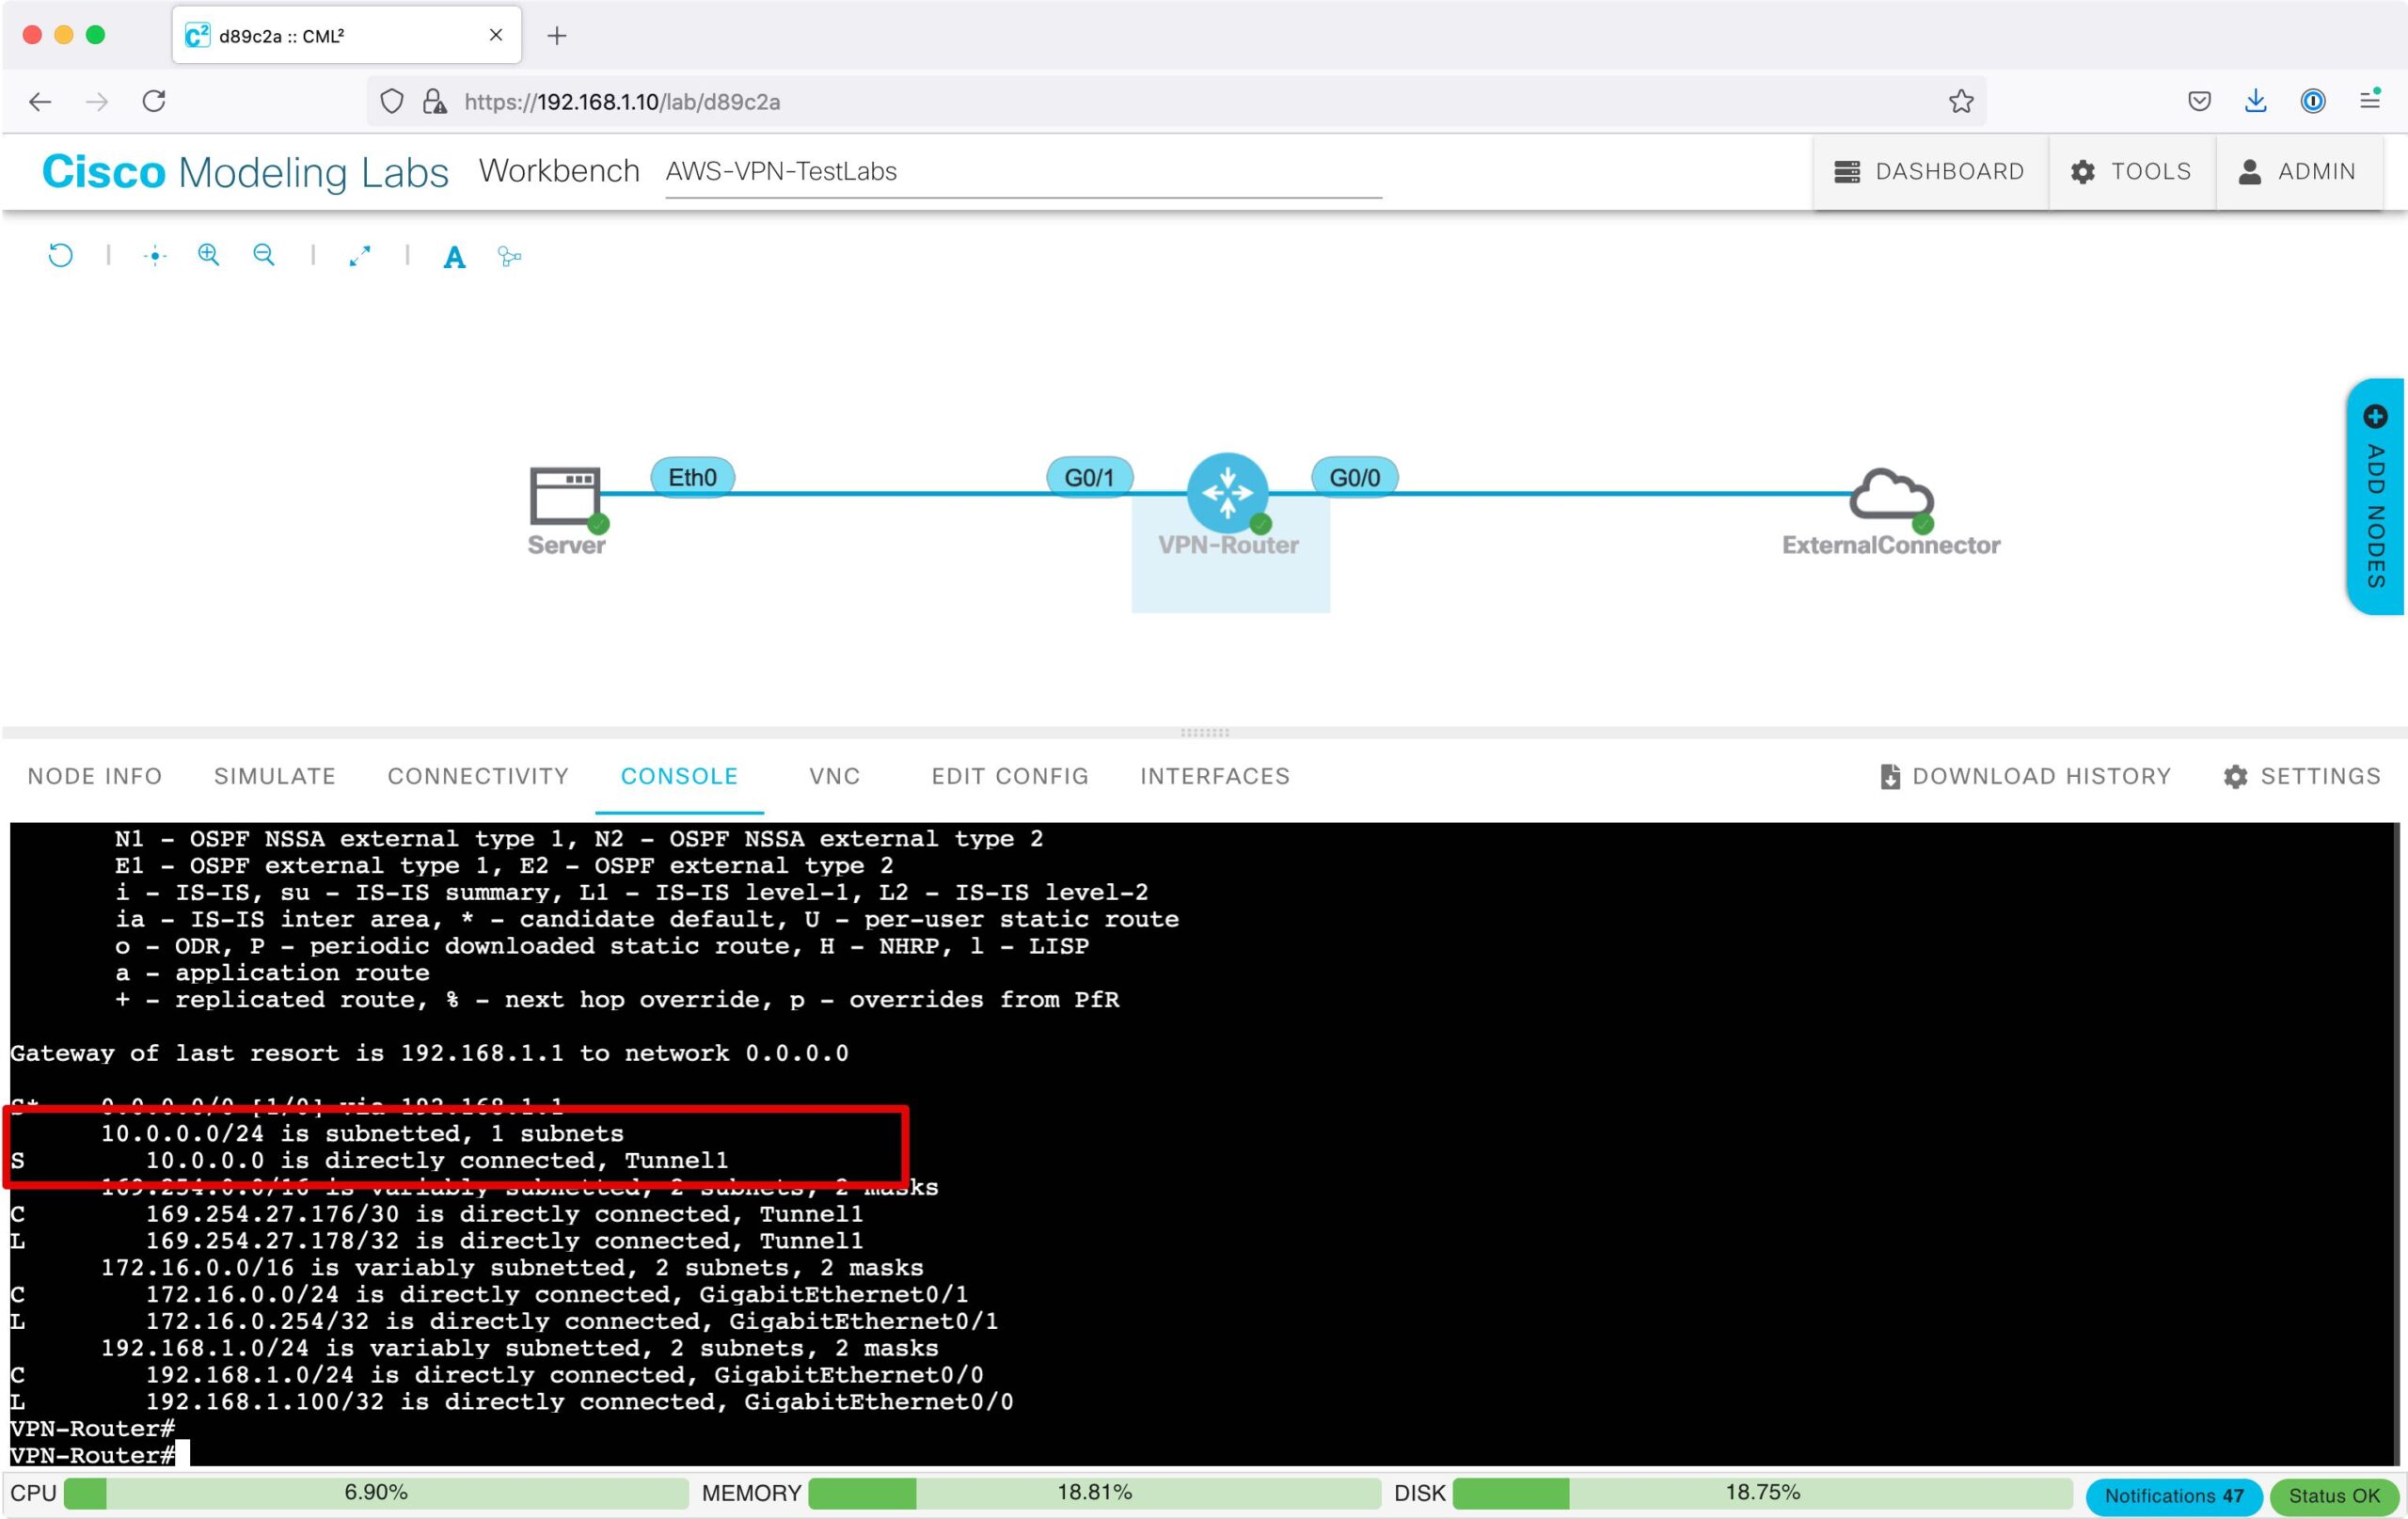
AWSのVPN接続のトンネルインターフェースにPingを実施し、疎通可能であることを確認します。
トンネルインターフェースのセグメント「169.254.27.176/30」は下記のようにアドレスがアサインされます。
169.254.27.176 ネットワークアドレス
169.254.27.177 AWS側のトンネルインターフェース
169.254.27.178 カスタマー側のトンネルインターフェース
169.254.27.179 ブロードキャストアドレス
ping 169.254.27.177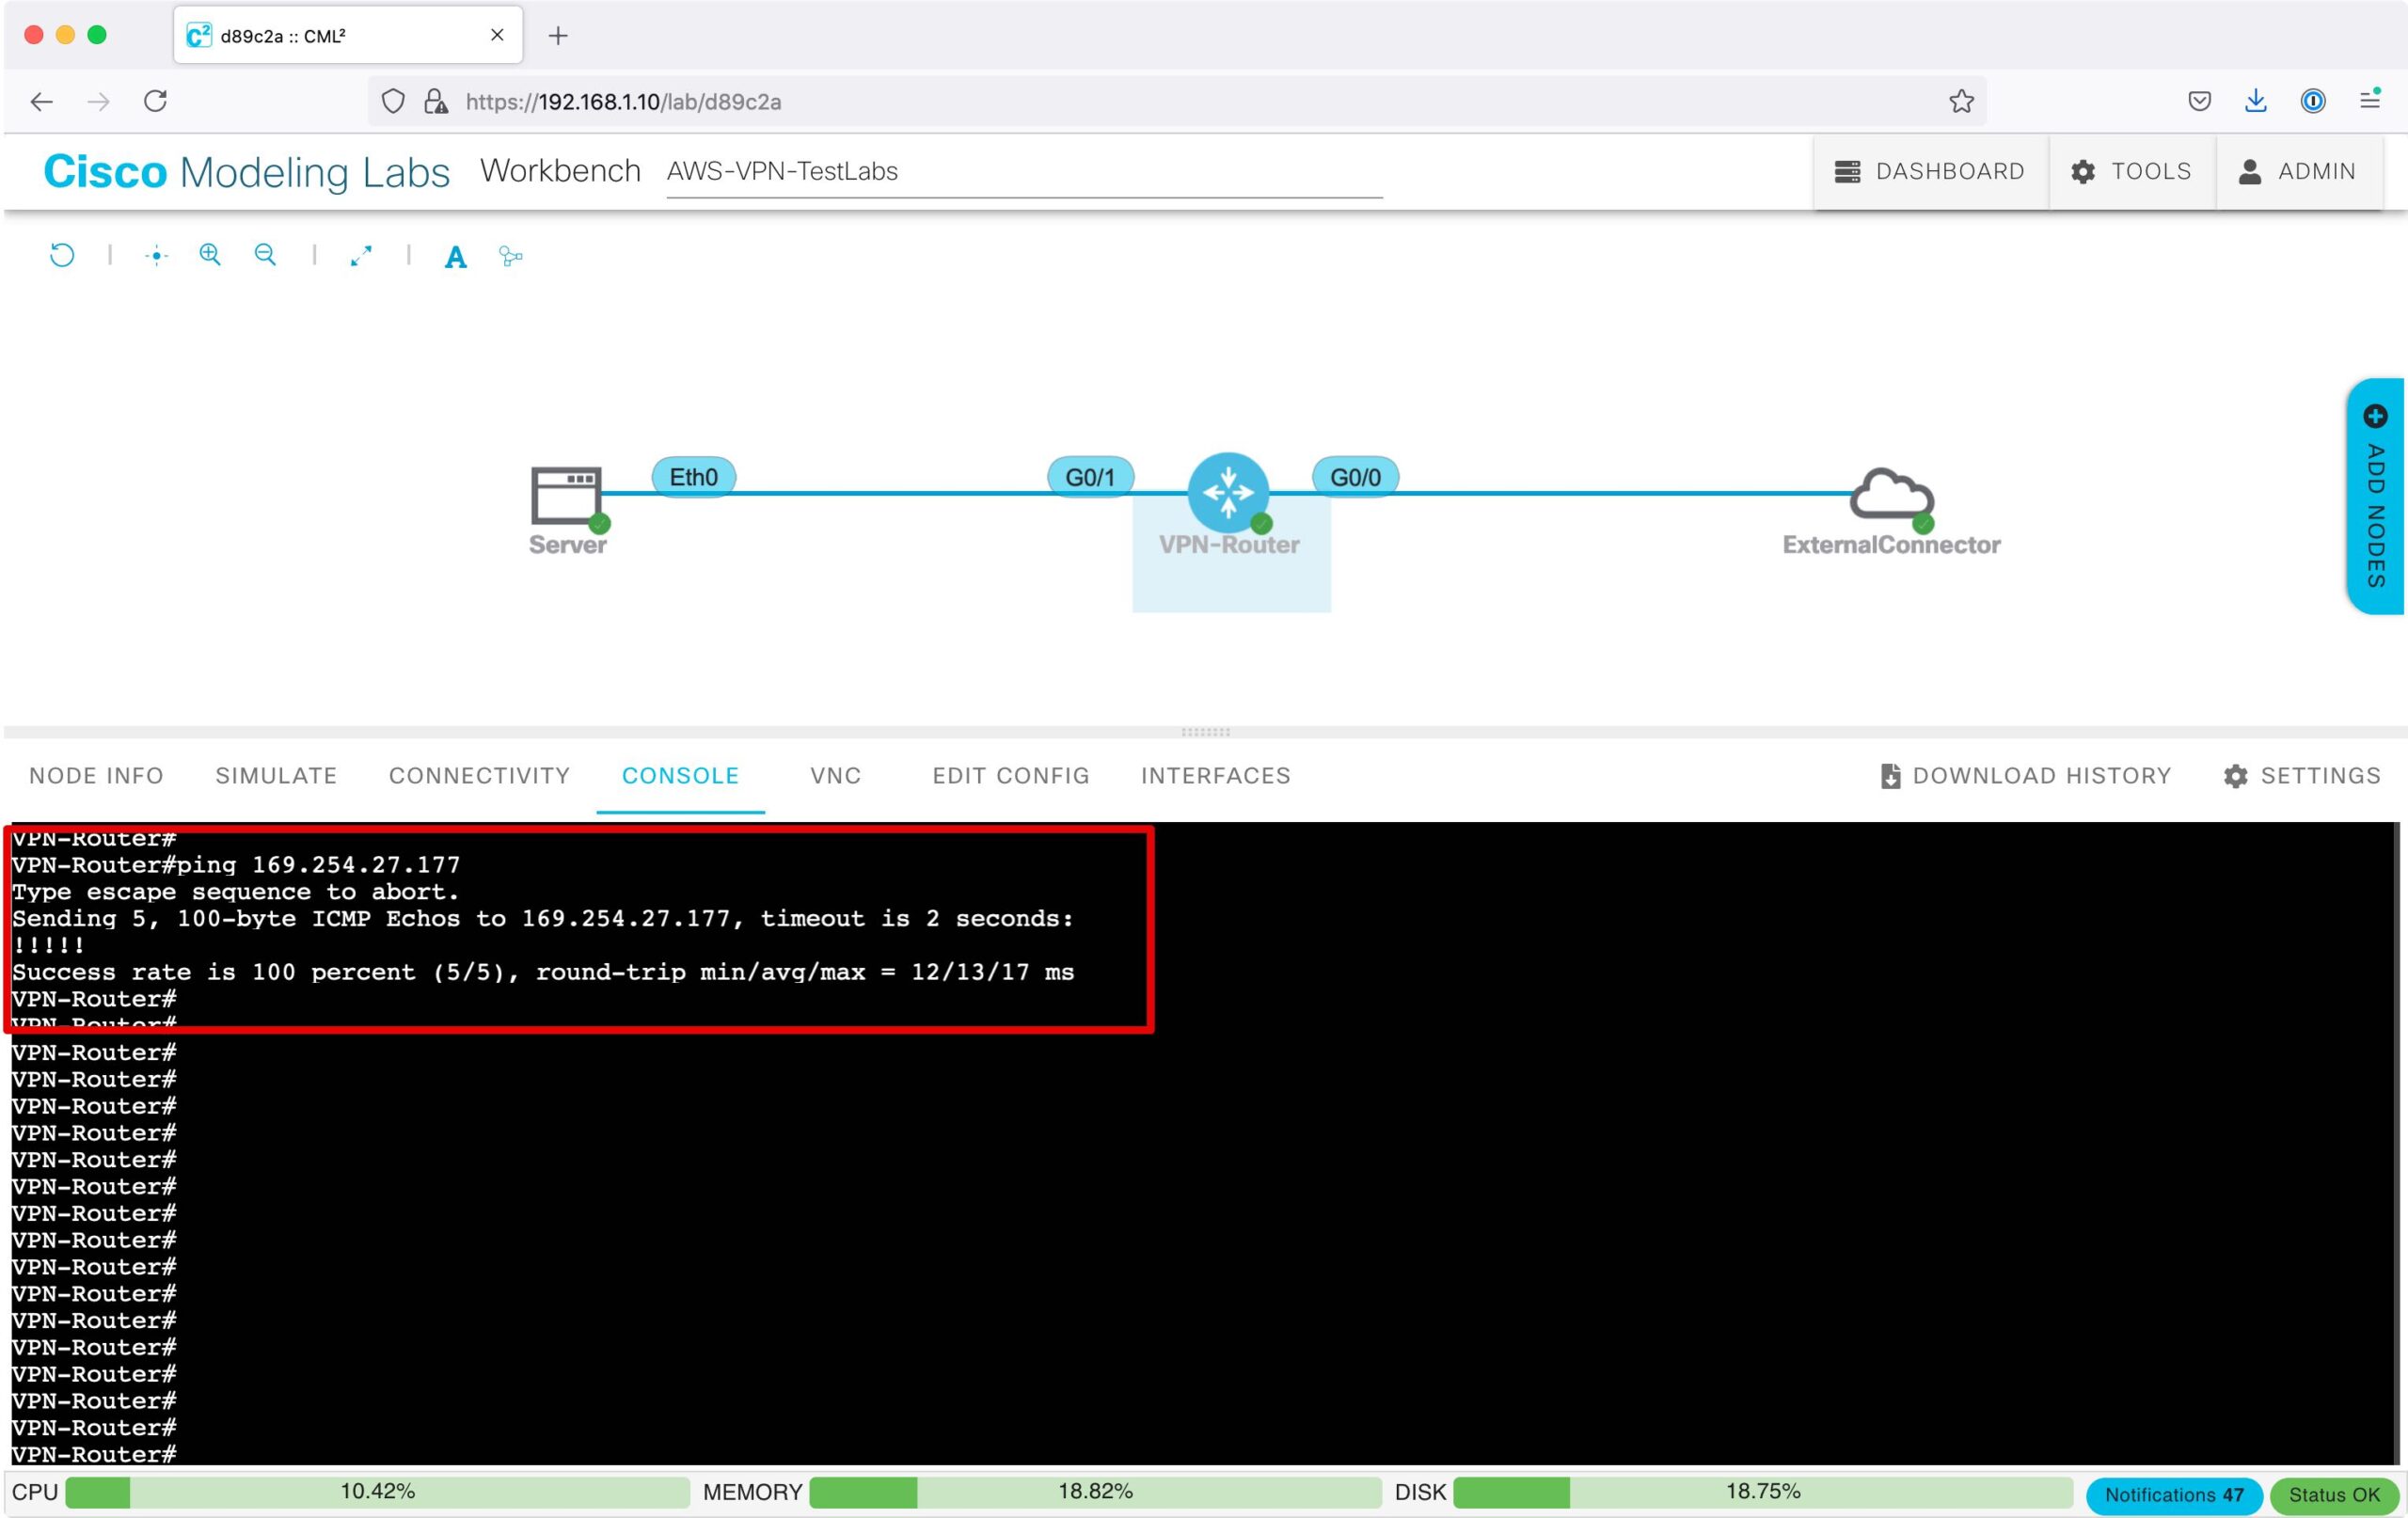
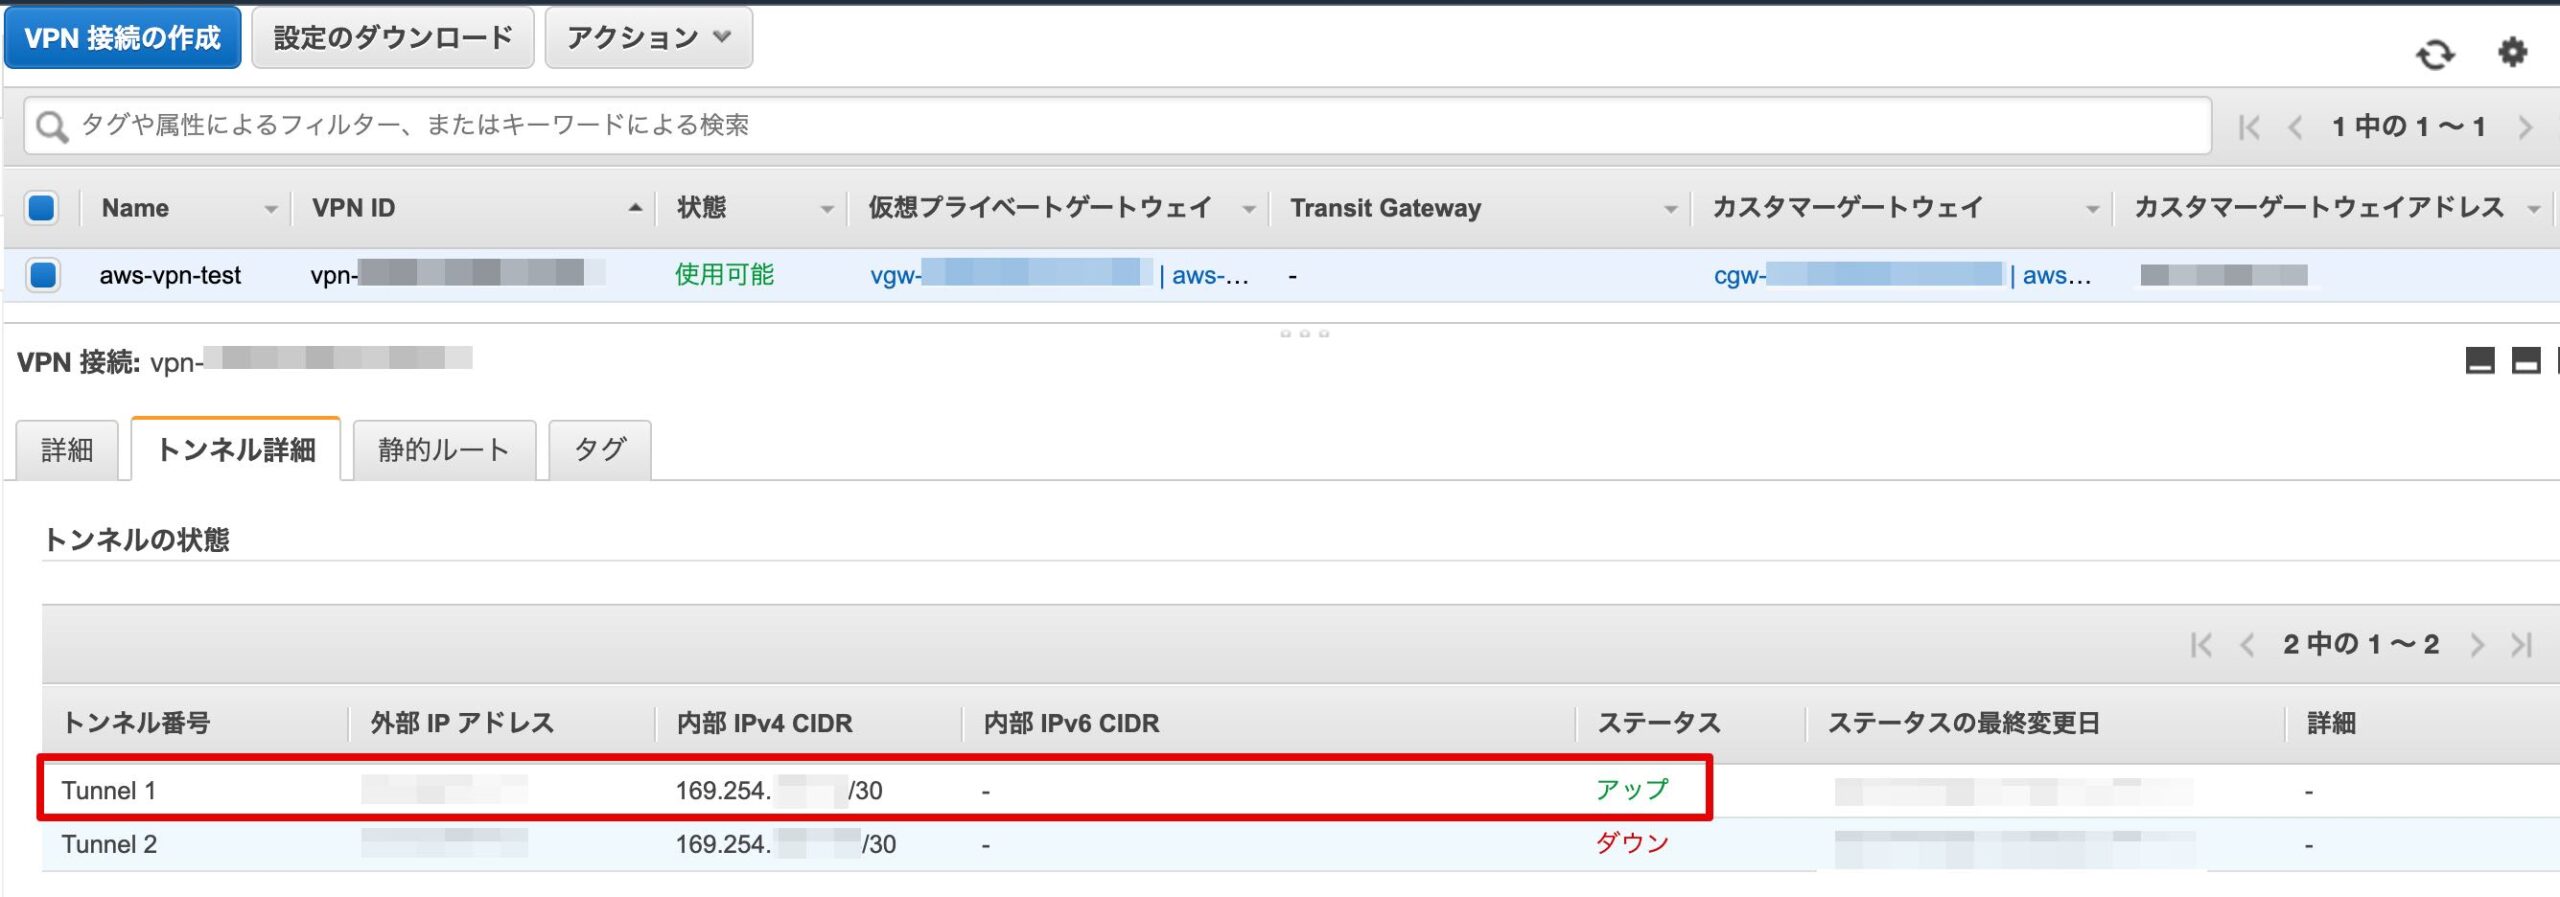
AWSのVPN接続の「トンネル詳細」を確認すると、Tunnel1のステータスが「アップ」になり、VPN接続が確立されています。
疎通確認
ServerからEC2に向けてPingを実施し、疎通可能であることを確認します。
ping 10.0.0.58
CML上のVPN-RouterのGi0/0側でキャプチャすると、暗号化されて送信されていることが分かります。

ルーターのステータス確認
フェーズ1(ISAKMP)のステータスを確認するには下記のコマンドを実行します。
stateが”QM IDLE”となっていれば、フェーズ1は成功しています。
show crypto isakmp sa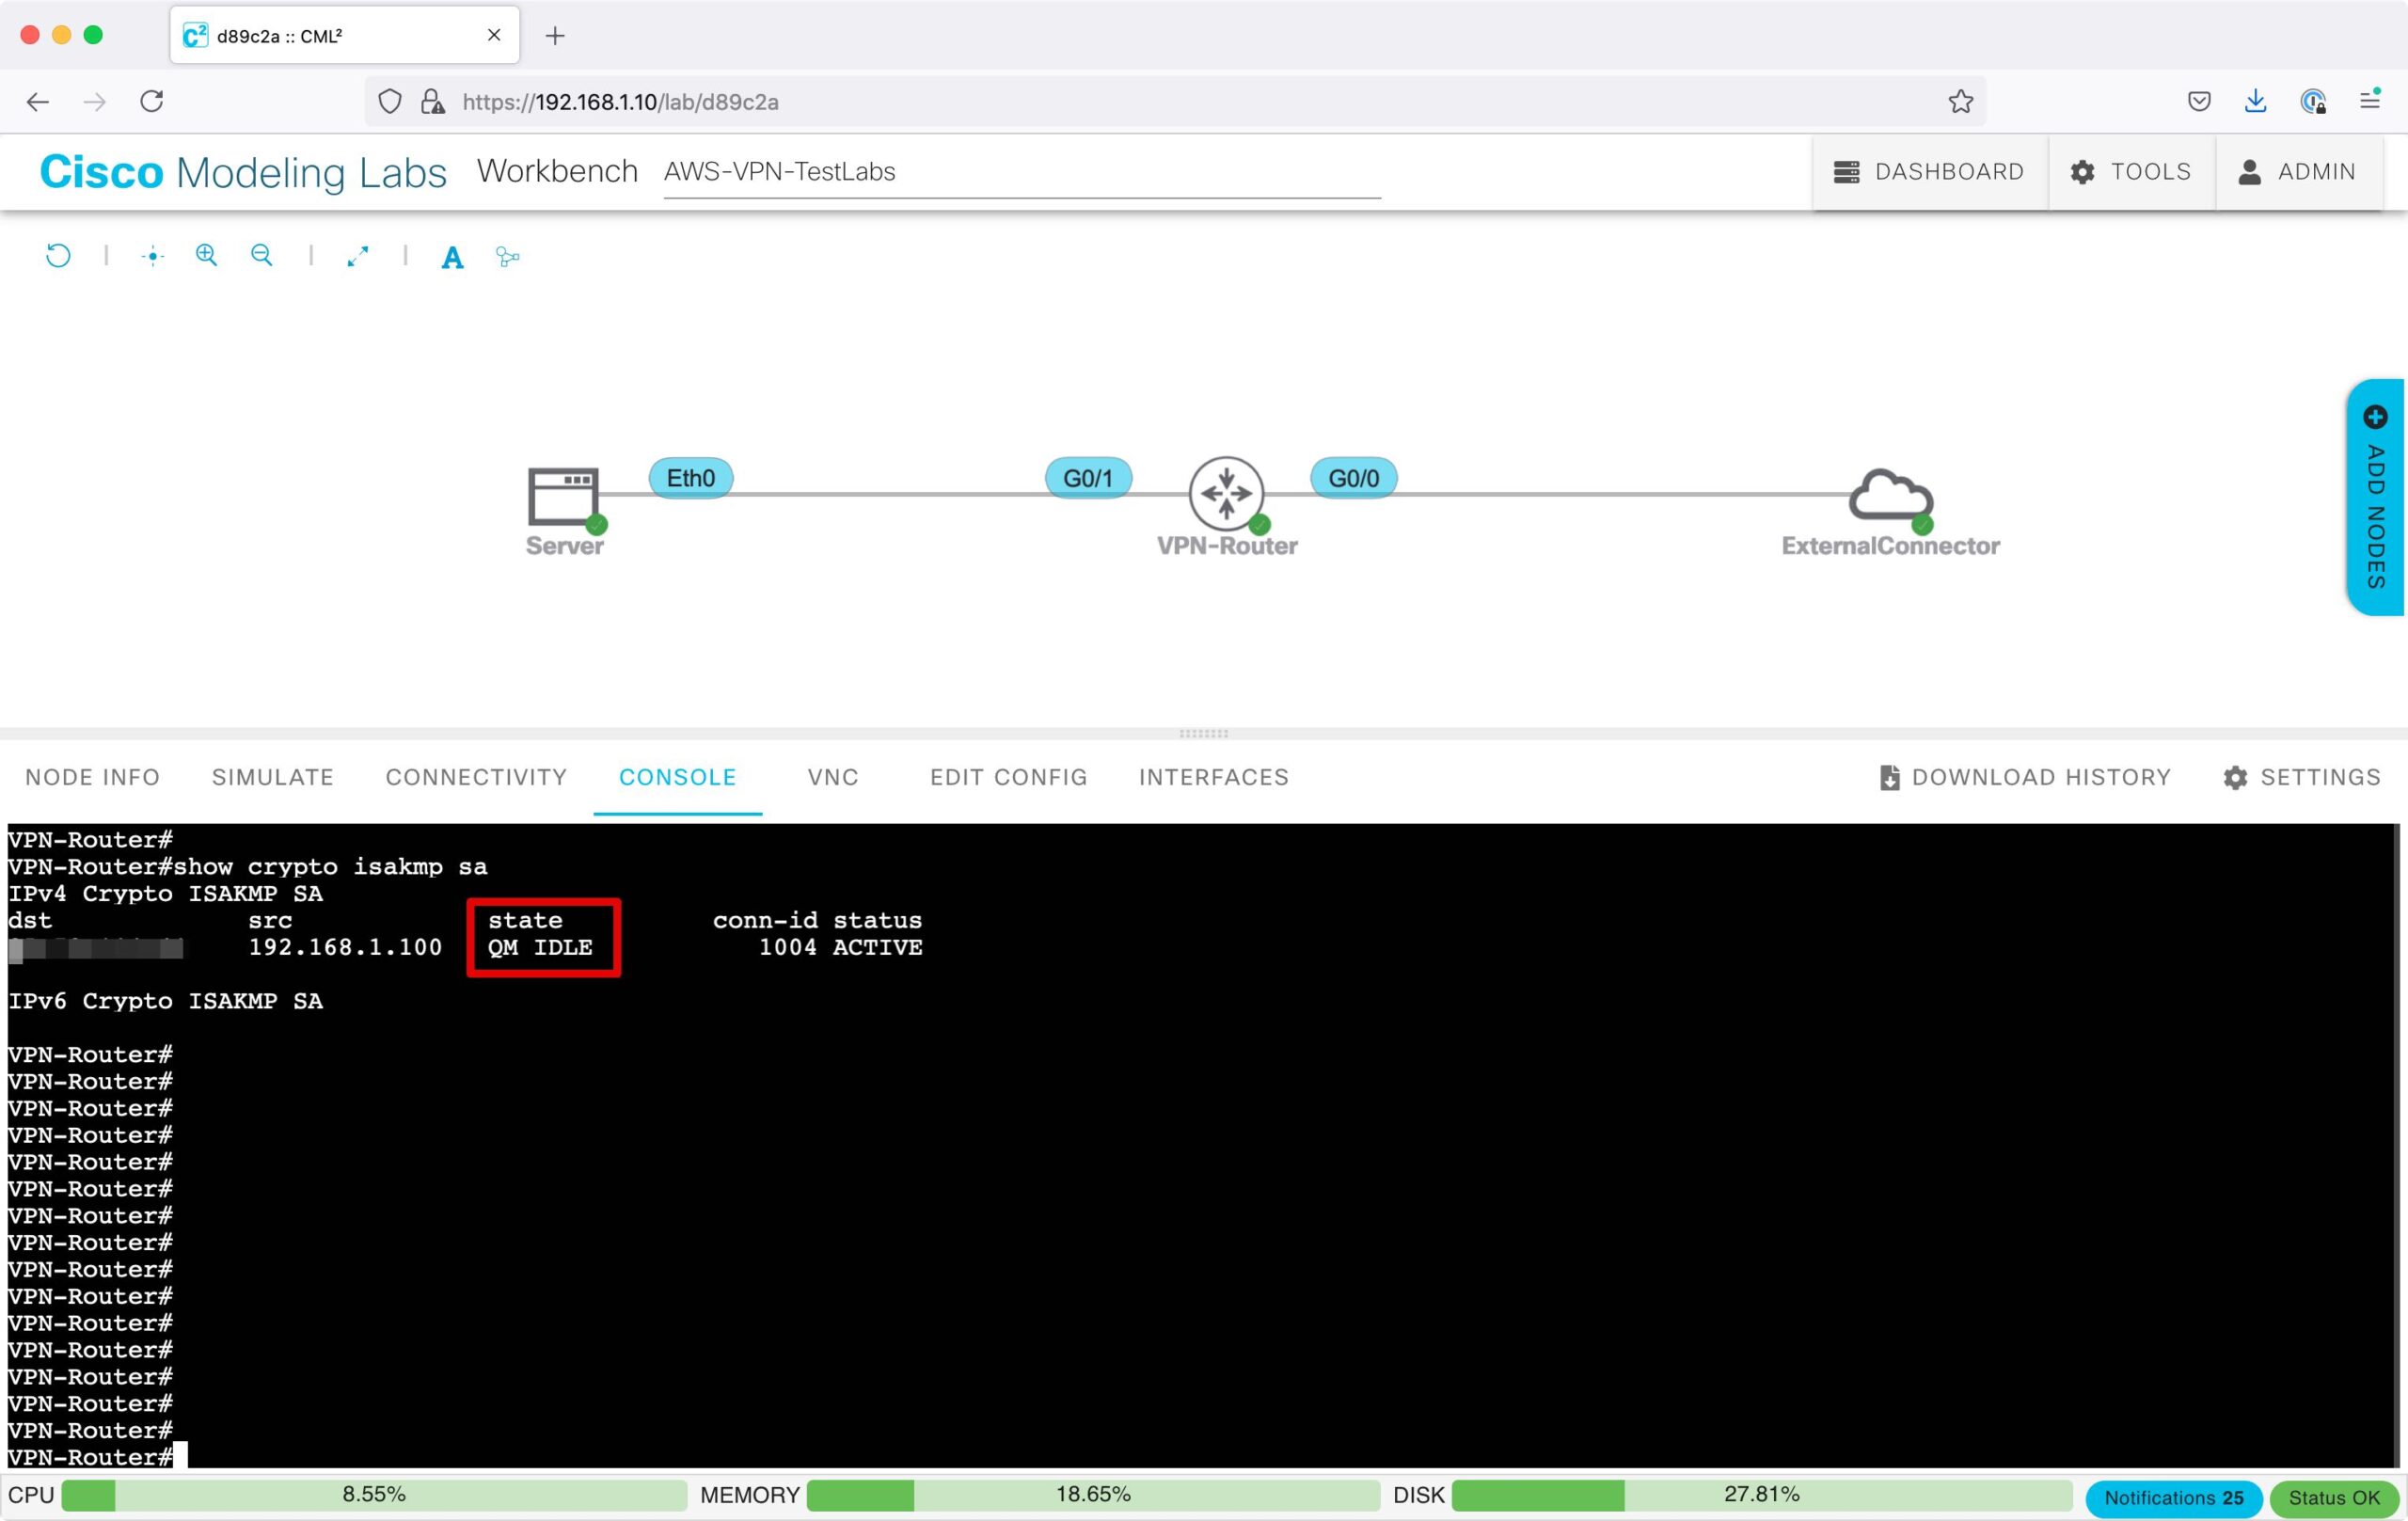
フェーズ2(IPSec)のステータスを確認するには下記のコマンドを実行します。
“pkts encrypt: “と”pkts decrypt: “の数値がカウントされていれば、暗号化通信が行われていることを示しています。
show crypto ipsec sa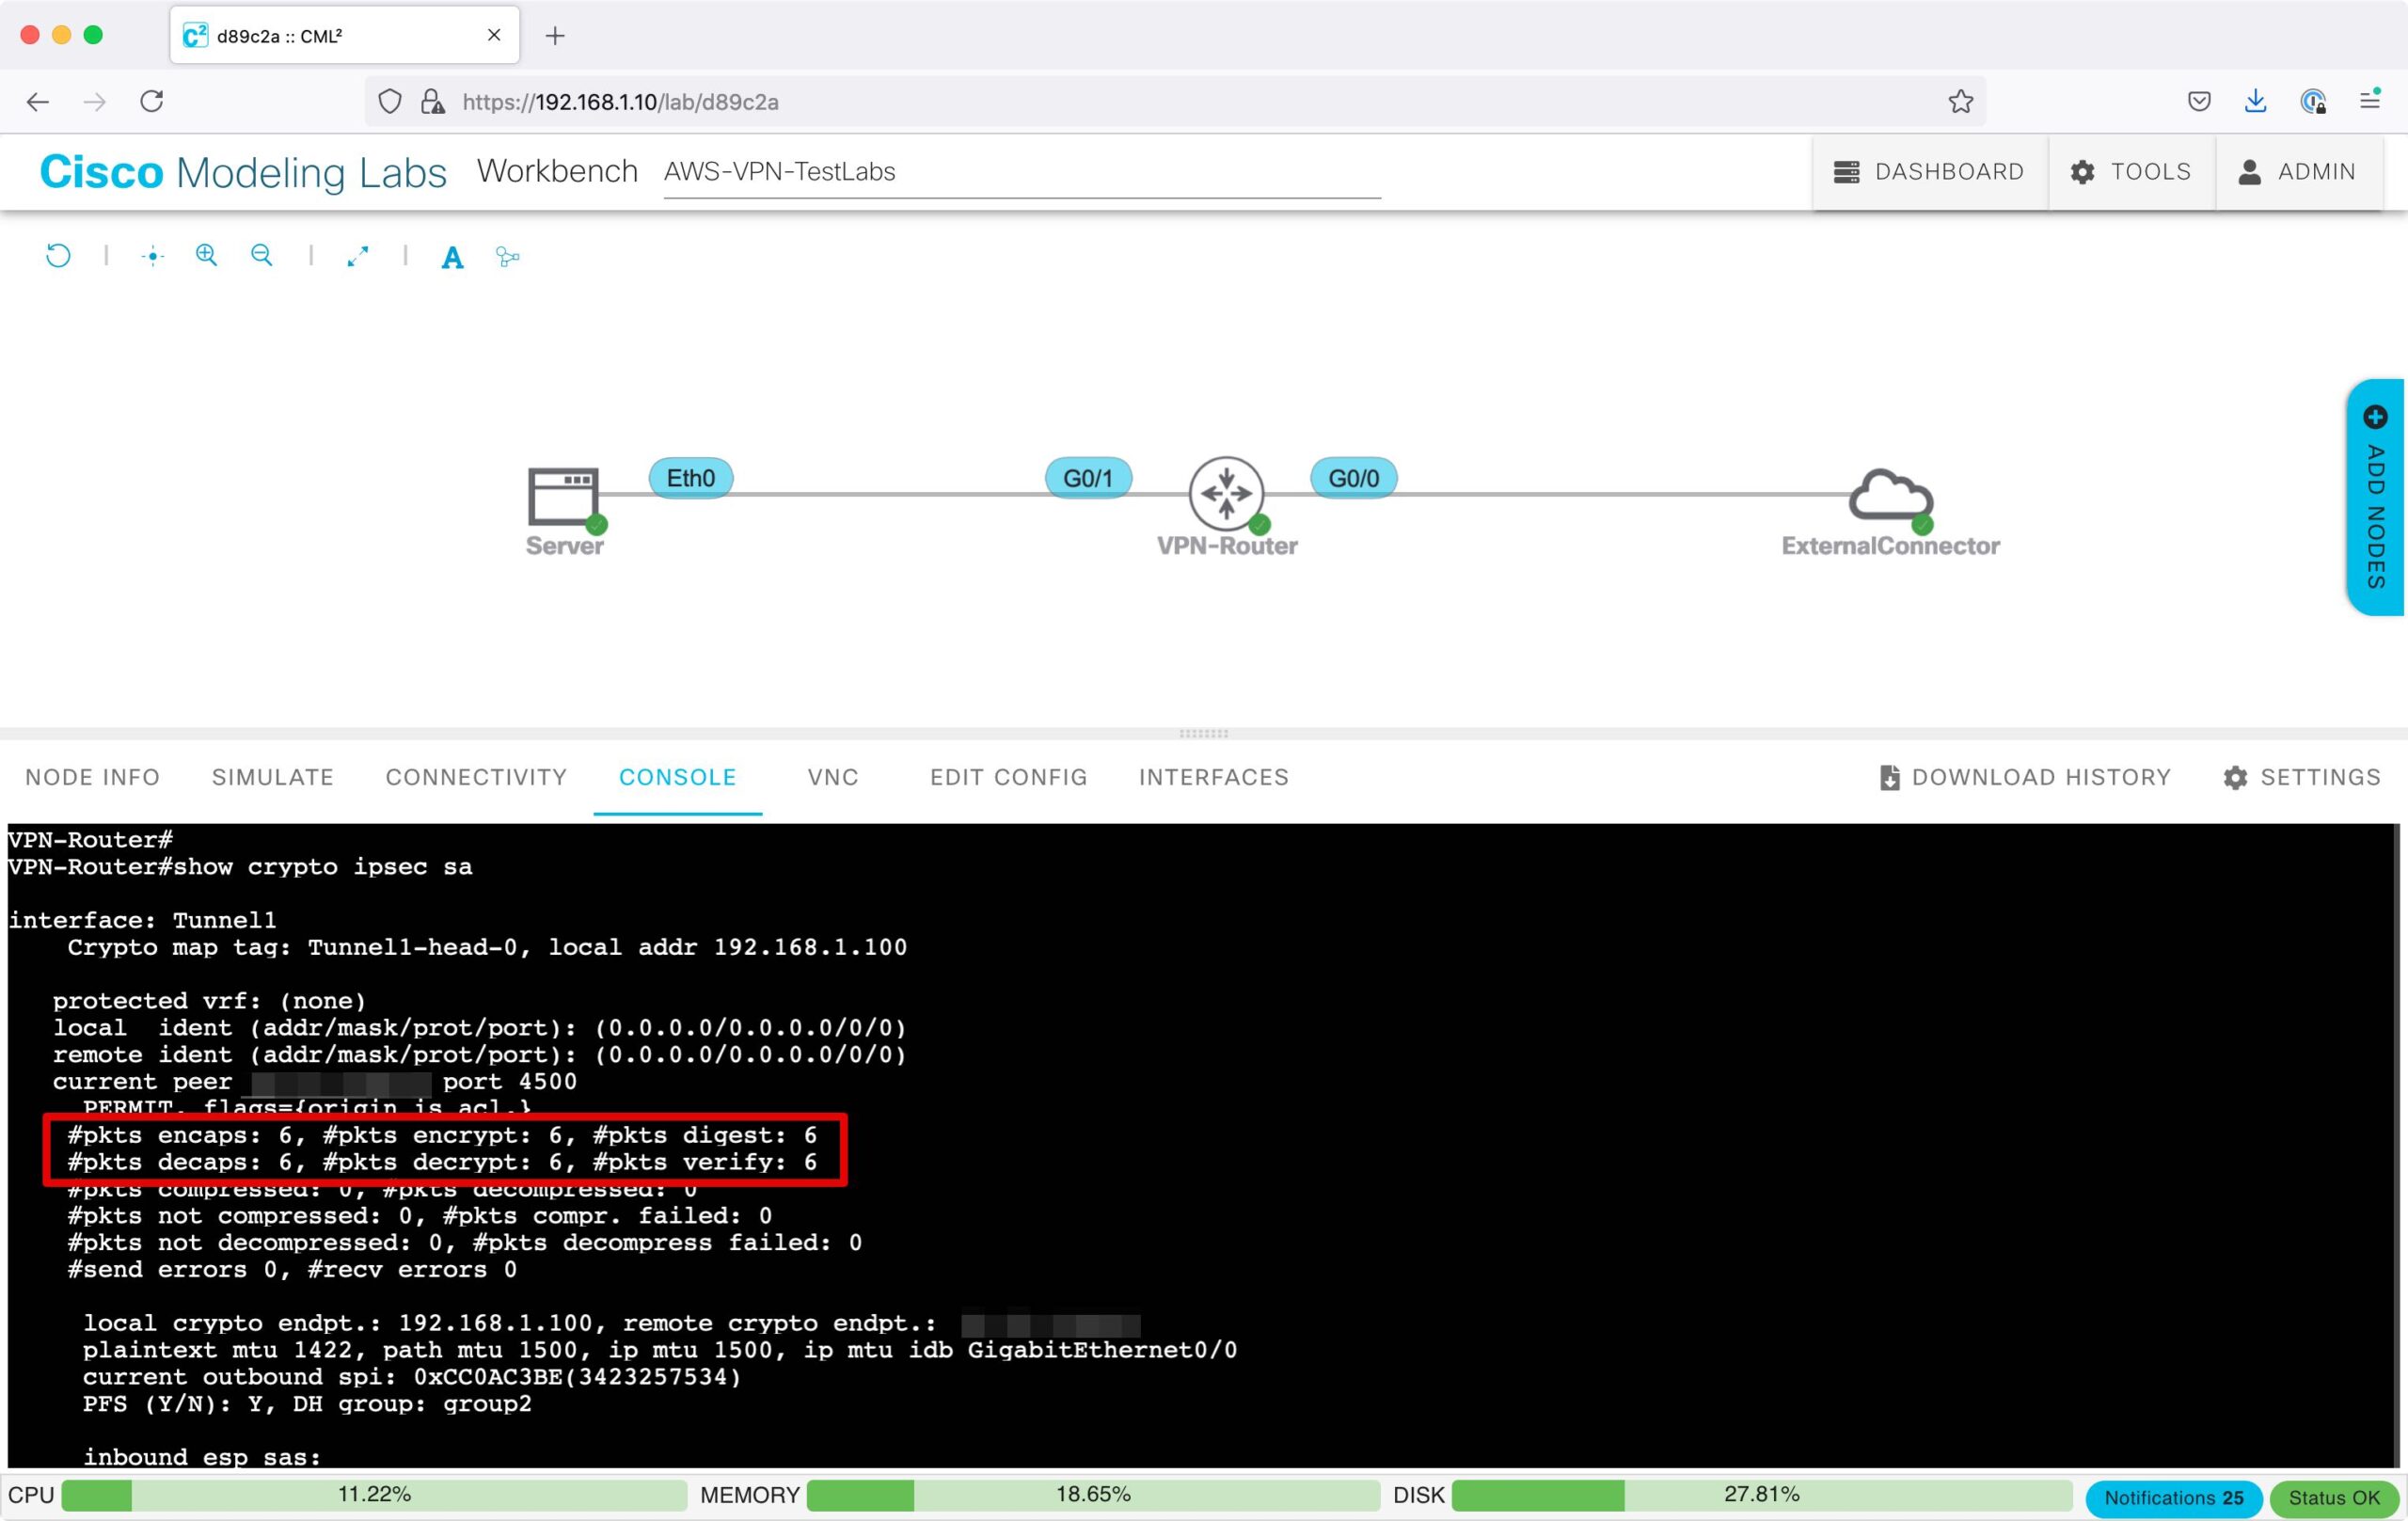
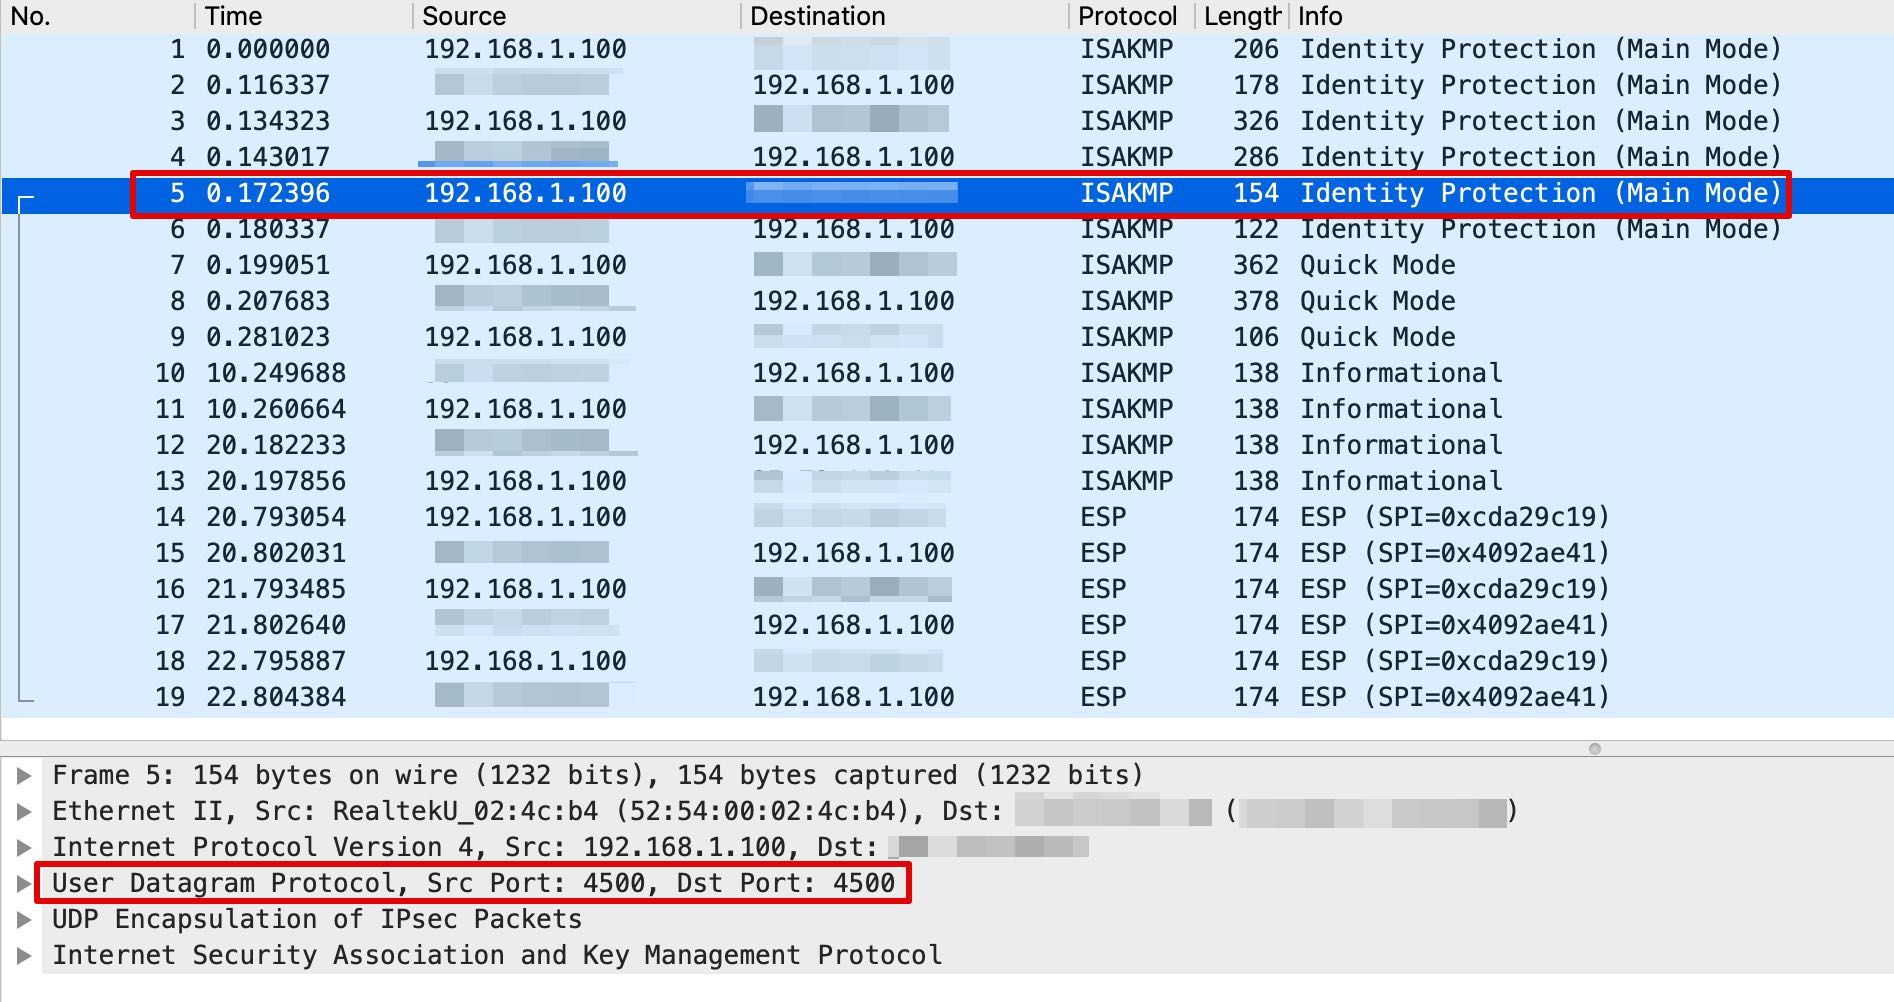
ISAKMPのポート番号
通常、ISAKMPは、UDPの500番ポートが利用されますが、途中にNAT機器を挟んだ場合は、NATトラバーサル用の4500番ポートに変更されます。ルーターのWAN側インターフェースでアクセスリストによる制御を行う場合は、UDPの500番ポートと4500番ポートを許可するようにしましょう。

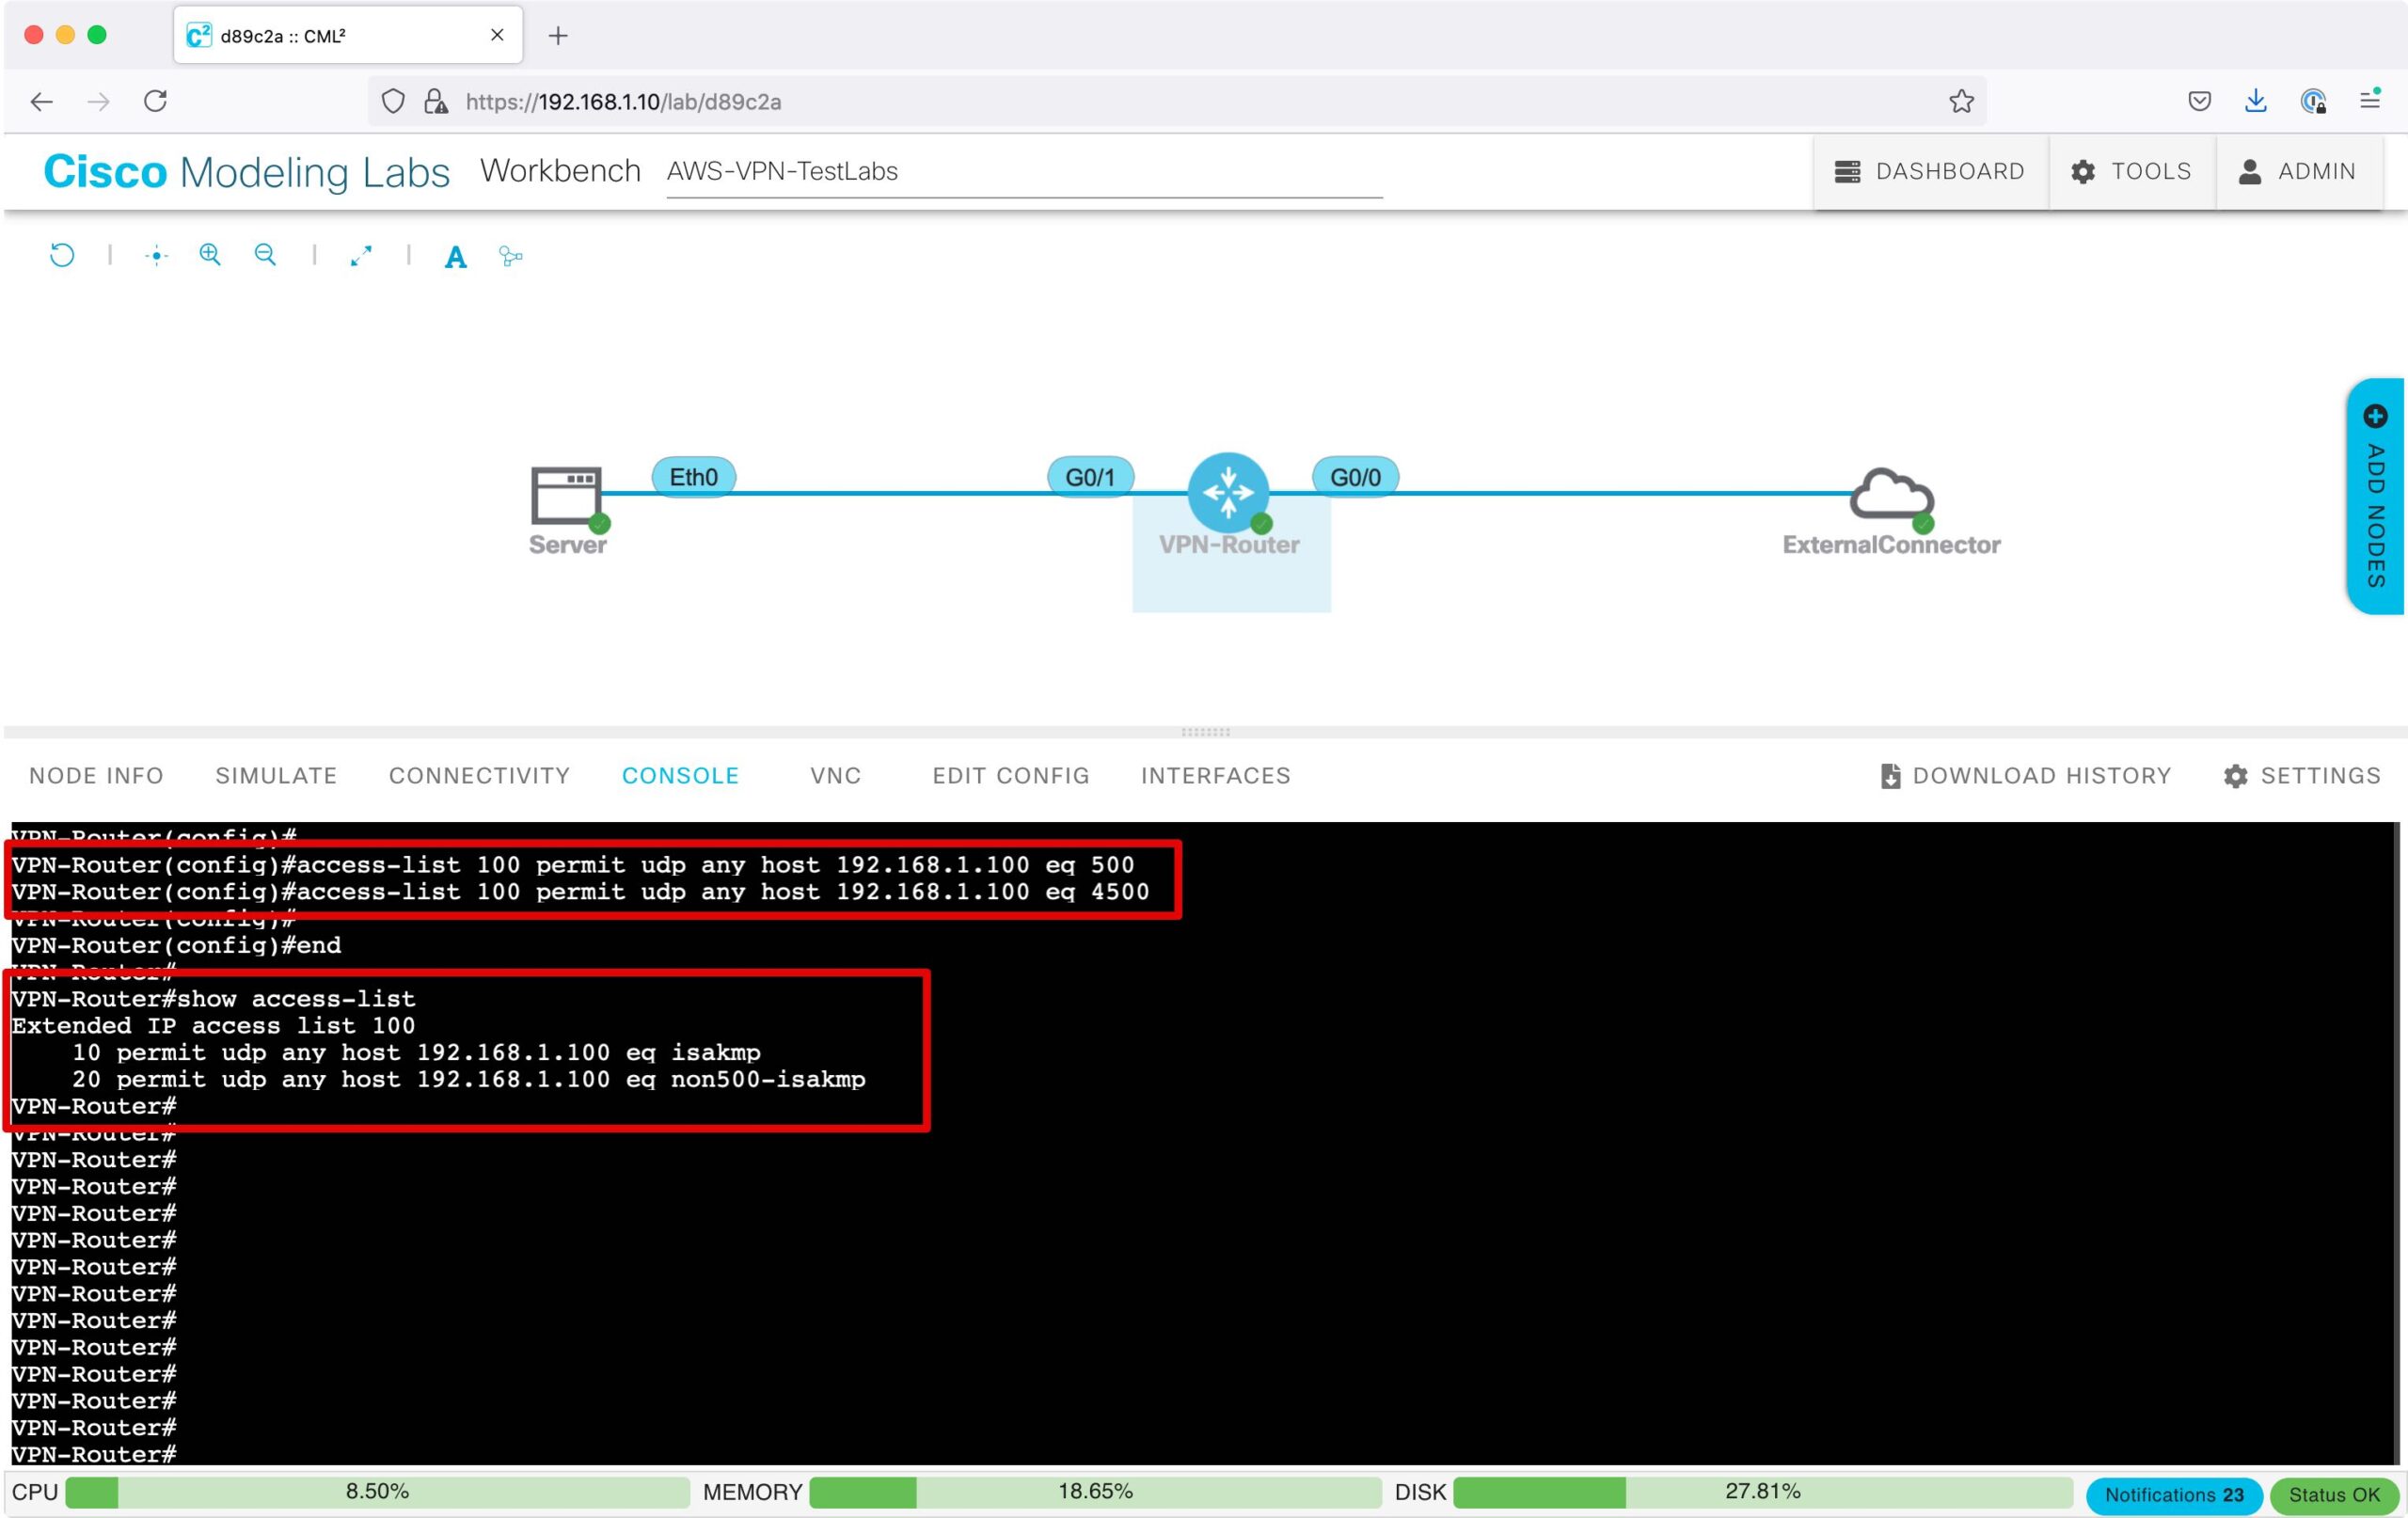
アクセスリスト上は、UDP/500は”isakmp”、UDP/4500は”non500-isakmp”として表示されます。(以下は例として送信元を”ANY”としていますが、実際には対向のグローバルIPアドレスを指定します。)
これで、AWSサイト間VPN接続のためのCML構築は完了です!
【前回】AWSサイト間VPNの構築(3.AWSのVPN構築)
【次回】AWSサイト間VPNの構築(5.暗号化・ハッシュアルゴリズム変更)